
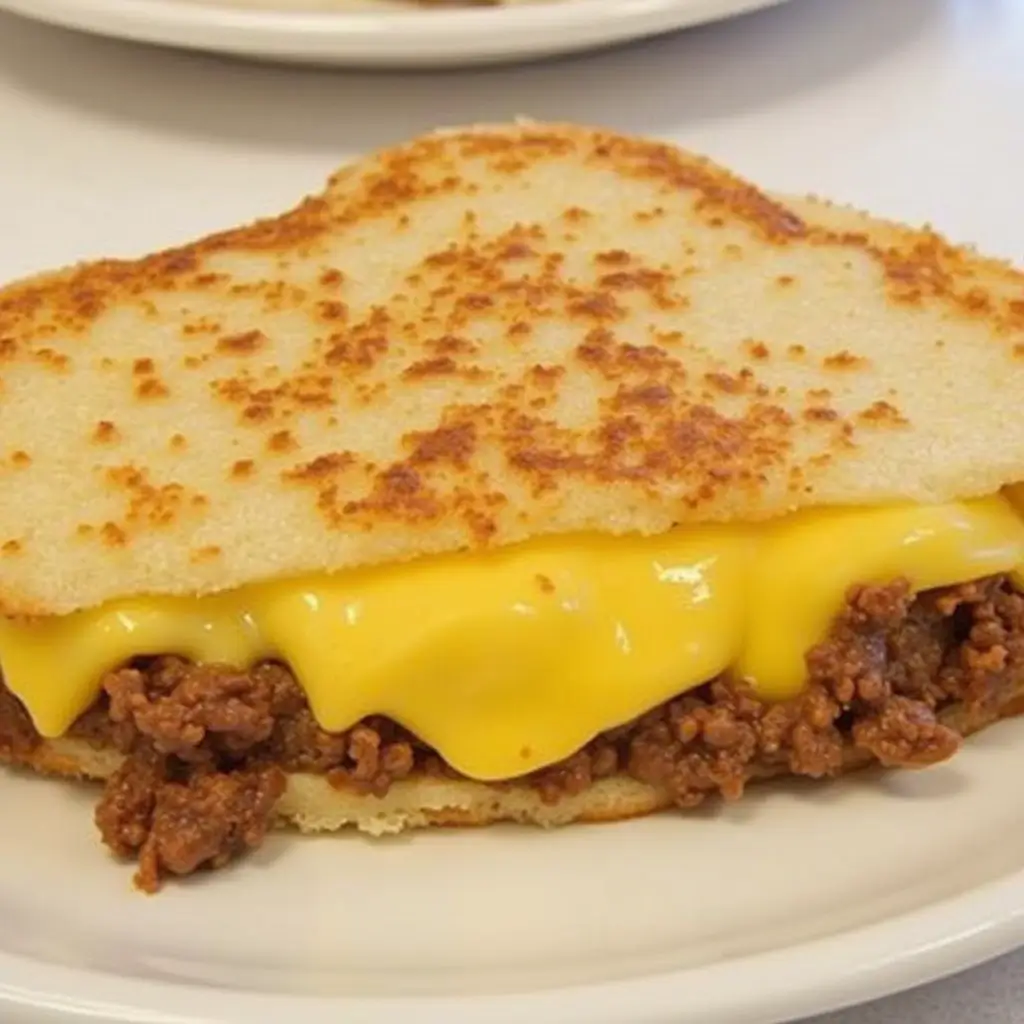
If you’re a fan of Taco Bell’s Grilled Cheese Burrito, you know it’s one of the cheesiest, most satisfying menu items they’ve ever created. But what if you could recreate that crispy, gooey, beefy goodness at home—without the drive-thru wait? That’s where this game-changing burrito hack comes in!
In this post, we’ll show you how to make a copycat Taco Bell Grilled Cheese Burrito using simple ingredients and a clever technique to achieve that signature crispy cheese crust. Whether you want to save money, customize the flavors, or just impress your friends with a homemade fast-food masterpiece, this recipe is a must-try.
Get ready to unlock the ultimate burrito hack that will take your homemade Taco Bell cravings to the next level! 🔥🌯🧀
What Is the Taco Bell Grilled Cheese Burrito?
A Breakdown of What’s Inside the Taco Bell Grilled Cheese Burrito
Taco Bell’s Grilled Cheese Burrito is a flavor-packed creation that combines bold spices, gooey cheese, and a satisfying crunch. Each bite delivers a perfect balance of textures and flavors, making it one of the most popular items on the menu. Let’s break down what makes this burrito so irresistible:
1. Seasoned Ground Beef
At the heart of this burrito is Taco Bell’s iconic seasoned beef, which is cooked with a blend of bold spices like chili powder, garlic, onion, paprika, and cumin. The beef is tender, juicy, and packed with savory umami flavors that give the burrito its signature taste.
2. Nacho Cheese Sauce
One of the biggest highlights of the Grilled Cheese Burrito is the rich and creamy nacho cheese sauce. This melted cheese blend adds a smooth, velvety texture and a mild, cheesy kick that perfectly complements the seasoned beef. The sauce is what makes the burrito extra indulgent and delicious.
3. Seasoned Rice
Unlike a basic burrito, the Grilled Cheese Burrito includes a layer of fluffy seasoned rice, which adds both texture and heartiness to the wrap. The rice is lightly seasoned to enhance the overall flavor without overpowering the cheesy goodness.
4. Crunchy Red Strips
To add a surprising crunch factor, Taco Bell includes crispy red tortilla strips inside the burrito. These thin, crunchy pieces give a contrast to the soft and cheesy filling, making every bite even more satisfying.
5. Chipotle Sauce
The creamy chipotle sauce is what brings the heat and a smoky depth to the burrito. This sauce has a slight tanginess and spice, making it the perfect complement to the nacho cheese and seasoned beef. If you love a little kick of heat, this sauce is a key player in the flavor profile.
6. Sour Cream
For a cool and creamy balance, sour cream is added to the burrito. It helps mellow out the spices from the chipotle sauce and seasoned beef while adding a rich, tangy contrast to the warm, cheesy filling.
7. Soft Flour Tortilla
All of these flavorful ingredients are wrapped in a large, soft flour tortilla, which holds everything together. The tortilla is warm and pliable, making it easy to grill and achieve that signature crispy cheese crust on the outside.
8. The Crispy Grilled Cheese Outer Layer
What truly sets this burrito apart from others is the grilled cheese crust. After wrapping all the fillings inside, Taco Bell takes a layer of melted three-cheese blend and crisps it onto the outer shell. This golden-brown, cheesy crust is what gives the burrito its crunchy, toasty texture and extra cheesy goodness.
Why These Ingredients Work Together
The combination of savory beef, melty cheese, crunchy red strips, and creamy sauces creates a burrito that is not only delicious but also packed with layers of texture and flavor. Each bite offers a contrast of crunchy, creamy, cheesy, and spicy elements, making it an instant fan-favorite.
Would you like me to expand on any specific ingredient or include potential substitutions for a homemade version? 😊
Why It’s a Fan-Favorite Among Taco Bell Menu Items
The Taco Bell Grilled Cheese Burrito has quickly become one of the most popular items on the menu, and for good reason. It takes everything people love about Taco Bell—bold flavors, cheesy goodness, and satisfying textures—and elevates it with an irresistible grilled cheese twist. Let’s dive into why this burrito stands out from the rest and has earned a cult following.
1. The Ultimate Cheese Lover’s Dream
Taco Bell is known for its love of cheese, but the Grilled Cheese Burrito takes it to the next level. Unlike regular burritos, which have cheese inside, this one features melted cheese grilled onto the outside of the tortilla. This creates a crispy, golden-brown cheese crust that adds an extra layer of texture and flavor. It’s like getting a quesadilla and a burrito in one bite, making it the ultimate comfort food for cheese lovers.
2. The Perfect Combination of Flavors and Textures
One of the reasons why the Grilled Cheese Burrito stands out is the way it balances different textures and flavors:
- The cheesy, crispy exterior provides a delicious crunch.
- The soft flour tortilla keeps everything warm and compact.
- The savory, seasoned beef adds a bold, umami-packed taste.
- The creamy nacho cheese and chipotle sauce create a smooth, indulgent finish.
- The crunchy red tortilla strips give it a surprise crispiness inside.
This contrast between creamy, crunchy, soft, and crispy elements makes every bite exciting and satisfying.
3. A Hearty and Filling Meal Option
Taco Bell has plenty of lighter menu items, but the Grilled Cheese Burrito is designed to be a hearty, indulgent meal. With its generous portion of seasoned beef, rice, cheese, and sauces, it’s larger and more filling than a standard burrito. For fans looking for something satisfying that will actually keep them full, this burrito delivers.
4. A Limited-Edition Item That Fans Keep Demanding Back
One of the biggest reasons this burrito is so popular is because Taco Bell doesn’t always keep it on the menu year-round. It was originally released as a limited-time item in 2020, but due to high demand, it keeps making comebacks. Every time it returns, fans rush to get their hands on it before it disappears again. The “get it before it’s gone” effect makes it even more desirable.
5. A Fast-Food Innovation That Feels Homemade
Taco Bell is known for coming up with creative, over-the-top fast-food creations, and the Grilled Cheese Burrito feels like something you’d make in your own kitchen if you were experimenting with a cheesy, indulgent comfort food recipe. The idea of grilling cheese onto a burrito shell is a simple yet genius hack that feels both gourmet and homemade at the same time. It’s familiar yet unique, which is why fans keep coming back for more.
Final Thoughts: Why Fans Can’t Get Enough
The Grilled Cheese Burrito isn’t just another fast-food item—it’s a cheese-filled, flavor-packed experience. It combines everything Taco Bell fans love—bold spices, creamy sauces, crunchy textures, and grilled cheese goodness—into one incredible bite. Its limited availability makes it even more exciting, creating hype every time it returns to the menu.
This is why so many fans crave it, rave about it, and try to recreate it at home—which is exactly what this blog post is here to help you do!
Would you like me to add anything, like customer reactions or comparisons to other Taco Bell favorites? 😊
Why Try This Grilled Cheese Burrito Hack?
The Limited-Time Hype and Whether It’s Available Year-Round
One of the biggest reasons the Taco Bell Grilled Cheese Burrito has gained a cult-like following is its limited-time availability. Unlike some of Taco Bell’s staple menu items, this cheesy, flavor-packed burrito doesn’t always stay on the menu year-round, creating a sense of urgency and excitement every time it returns.
Let’s dive into why Taco Bell chooses to release it for a limited time, how this marketing strategy fuels demand, and whether fans can expect it to become a permanent fixture on the menu.
1. The Power of Limited-Time Releases
Taco Bell has mastered the art of creating limited-time hype with menu items that come and go. By making the Grilled Cheese Burrito available only for short periods, they tap into what marketers call “scarcity marketing.” This strategy makes the item feel more exclusive and desirable, prompting customers to rush to their nearest Taco Bell before it disappears again.
This tactic isn’t new—many fast-food chains use it to boost excitement and sales. Some of Taco Bell’s most popular limited-time items include:
- The Nacho Fries (which return every few months)
- The Mexican Pizza (which was gone for years before making a comeback)
- The Volcano Menu (which has an intense fan base)
Every time Taco Bell brings back the Grilled Cheese Burrito, fans flood social media with excitement, creating free publicity and driving more people to try it before it’s gone again.
2. When Was the Grilled Cheese Burrito First Released?
The Grilled Cheese Burrito made its debut in 2020 as a limited-time menu item, and it was an instant hit. Fans loved the combination of a classic Taco Bell burrito with the crispy grilled cheese exterior, something that had never been done before.
Due to its overwhelming popularity, Taco Bell has re-released it multiple times, usually bringing it back for a few months before removing it again. The item has returned in:
- Summer 2020 (Initial release)
- Late 2021 (Brought back due to high demand)
- 2022 & 2023 (Reappeared with minor variations, including a spicy version)
Since it keeps coming back, it’s clear that Taco Bell recognizes how much fans love this burrito—but they also seem committed to keeping it as a special treat rather than a permanent menu item.
3. Will It Ever Become a Permanent Menu Item?
Taco Bell hasn’t officially confirmed whether the Grilled Cheese Burrito will ever become a permanent item, but there are a few things to consider:
- The demand is huge. Every time it returns, it sells out quickly and gets a ton of online buzz.
- Taco Bell has made some limited-time items permanent before. The Doritos Locos Tacos were originally a test item before becoming a fan favorite and earning a permanent spot.
- Menu rotations keep things fresh. Taco Bell constantly introduces new and exciting menu items, so they may prefer to keep the Grilled Cheese Burrito as an occasional treat rather than an everyday option.
However, if enough fans continue to request it, there’s always a chance that Taco Bell could make it a regular menu item—or at least bring it back more frequently.
4. How to Know When It’s Coming Back
Because the Grilled Cheese Burrito isn’t always on the menu, it’s important to keep an eye out for Taco Bell’s announcements. Here’s how you can stay updated:
- Follow Taco Bell on social media – They usually announce limited-time menu items on platforms like Instagram, Twitter, and TikTok.
- Check the Taco Bell app – The app sometimes offers early access to returning menu items.
- Sign up for Taco Bell Rewards – Members often get exclusive deals and news about upcoming releases.
- Look for fan buzz online – When rumors start circulating about a comeback, you’ll see food bloggers and Taco Bell enthusiasts posting about it.
Final Thoughts: Get It While You Can!
The Taco Bell Grilled Cheese Burrito is a perfect example of how a limited-time menu item can turn into a fan obsession. Its cheesy, crispy, flavor-packed goodness keeps customers coming back every time it returns.
While it’s not available year-round, the hype surrounding its comeback makes it even more exciting. Whether it eventually becomes a permanent menu item or continues to be a limited-time special, one thing is certain—when it’s available, it’s worth grabbing before it’s gone again!
Would you like me to add any details, like a history of other Taco Bell items that made a comeback due to fan demand? 😊
Save Money by Making It at Home Instead of Buying It
While the Taco Bell Grilled Cheese Burrito is undeniably delicious, making it a regular part of your takeout routine can add up quickly. With prices fluctuating depending on location and promotions, you could end up spending $5 to $6 per burrito—and if you’re feeding a family, the cost can skyrocket.
Luckily, you can recreate this cheesy, flavor-packed burrito at home for a fraction of the price! Not only will you save money, but you can also customize it to your taste and even make a healthier version if you choose. Let’s break down how DIY-ing this Taco Bell favorite can be a budget-friendly and satisfying alternative.
1. Cost Comparison: Buying vs. Making It at Home
Buying from Taco Bell
- Price per burrito: $5–$6 (depending on location)
- Meal combo (with drink and chips): $8–$10
- Multiple orders: If you’re feeding a family of four, expect to spend $25–$30 or more
Making It at Home
- Ground beef (1 lb): ~$5 (makes 4 burritos)
- Flour tortillas (pack of 10): ~$3
- Shredded cheese (2 cups): ~$4
- Nacho cheese sauce: ~$3
- Chipotle sauce: ~$3
- Rice: ~$2
- Tortilla strips: ~$3
- Sour cream (optional): ~$2
➡ Total cost for 4–5 burritos: Around $20, or just $4 per burrito—and you’ll likely have leftovers to make more later!
By making it at home, you cut the cost nearly in half while still getting the same cheesy, indulgent flavors.
2. Control Your Ingredients & Portions
One of the best things about recreating the Grilled Cheese Burrito at home is that you control what goes in it.
Healthier Substitutions:
- Use lean ground turkey or shredded chicken instead of beef for a lower-fat option.
- Swap white rice for brown rice or cauliflower rice for extra fiber or a low-carb version.
- Use reduced-fat cheese or dairy-free alternatives if you’re watching calories or avoiding dairy.
- Make your own chipotle sauce using Greek yogurt instead of mayonnaise for a healthier twist.
Customize the Flavors:
- Want it spicier? Add jalapeños or extra hot sauce.
- Love extra crunch? Throw in crushed tortilla chips instead of store-bought tortilla strips.
- Prefer more cheese? Load it up with a blend of cheddar, Monterey Jack, or pepper jack.
At Taco Bell, you’re stuck with their standard recipe (unless you pay extra for customizations), but at home, you can make it exactly how you like it.
3. Make It in Batches & Meal Prep for the Week
If you love the Grilled Cheese Burrito, why not meal prep a batch and have them ready to go? Instead of making one burrito at a time, you can:
- Cook a large batch of beef, rice, and cheese filling in advance.
- Assemble multiple burritos, wrap them in foil, and store them in the fridge for 3–4 days.
- Freeze extras so you can enjoy them anytime—just heat them up in the oven or air fryer for a crispy, cheesy finish!
This means you’ll always have a tasty burrito ready without having to wait in drive-thru lines or pay for fast food.
4. No More Surprise Fees or Upsells
Taco Bell is known for offering great deals, but sometimes, small extras quickly add up. If you customize your order with extra cheese, sauce, or meat, you might end up paying way more than expected.
Common Extra Charges at Taco Bell:
- Extra cheese: + $0.50–$1.00
- Extra beef: + $1.50
- Extra nacho cheese: + $0.75
- Custom sauces: + $0.50
By making your burrito at home, you skip all these extra charges and can be as generous as you want with the fillings.
5. The Joy of Cooking It Yourself!
There’s something incredibly satisfying about recreating your favorite fast-food meals at home. Not only do you save money, but you also get to enjoy the process of making it yourself, experimenting with flavors, and impressing friends and family with your cooking skills.
If you’re a Taco Bell fan, learning to make their menu items at home means you never have to wait for a limited-time release again. Whether it’s the Grilled Cheese Burrito, Crunchwrap Supreme, or Mexican Pizza, you can enjoy these iconic flavors anytime you want!
Final Thoughts: Is It Worth Making at Home?
Absolutely! The Taco Bell Grilled Cheese Burrito is a fan favorite for a reason, but if you love it enough to keep ordering it, making it at home is the cheaper, healthier, and more customizable option.
💰 Cost Savings: You can make 4–5 burritos for the price of 2 from Taco Bell
🔥 Customization: Add more cheese, spice it up, or make it healthier
⏳ Convenience: Meal prep and store for later—no more drive-thru lines!
So next time you’re craving one, why not try making it at home? You might never go back to buying it again! 😉
Would you like me to include a simple step-by-step homemade recipe for it as well? 😊
Customize It with Extra Cheese, Spicy Sauce, or Different Proteins
One of the best parts of making the Taco Bell Grilled Cheese Burrito at home is that you have complete control over the ingredients—and that means you can customize the burrito to match your exact tastes. Whether you’re a cheese lover, a spice fanatic, or someone who likes to switch up proteins, there are so many ways to make this dish your own. Let’s explore the endless possibilities for adding extra flavors, textures, and ingredients to your burrito.
1. Extra Cheese: Go as Cheesy as You Want
The Grilled Cheese Burrito is already a cheesy dream, but if you’re someone who can never get enough melted cheese, adding more is a no-brainer. Here’s how you can up the cheese factor in your homemade version:
Cheese for the Burrito Filling
- Cheddar: This classic cheese offers a sharp, tangy flavor that complements the richness of the ground beef.
- Monterey Jack: If you want a smoother, milder melt, Monterey Jack is the way to go.
- Pepper Jack: For a spicy kick, pepper jack cheese is an excellent choice, adding heat and flavor to your burrito.
- Mexican Blend: If you want a mix of several cheeses, opt for a Mexican blend of cheeses, which typically includes cheddar, Monterey Jack, and other varieties for a well-rounded taste.
Grilled Cheese on the Outside
The grilled cheese crust on the outside of the burrito is a signature feature, but you can always take it a step further by adding extra cheese. After wrapping your burrito and before grilling it in the pan, sprinkle shredded cheese on the outside of the tortilla. Once grilled, it will melt into a crispy, cheesy shell that adds another layer of indulgence to the burrito.
2. Spicy Sauce: Heat Things Up
If you’re someone who loves a bit of spice with your cheesy comfort food, then spicy sauces are a fantastic way to elevate the flavor profile of your Grilled Cheese Burrito. Taco Bell’s chipotle sauce is already a delicious addition, but at home, you can experiment with different hot sauces and spice levels to suit your personal taste.
Hot Sauce Options
- Sriracha: A sweet and tangy hot sauce that provides just the right amount of heat without overwhelming the other flavors.
- Taco Bell’s Fire Sauce: If you want to recreate that Taco Bell flavor at home, try adding Fire Sauce for a bold, fiery heat.
- Chipotle Mayo: Make your own spicy chipotle sauce by combining mayo, chipotle peppers in adobo sauce, garlic, and lime juice. This will give your burrito a creamy, smoky heat.
- Buffalo Sauce: For a tangy, buttery spice, drizzle on some buffalo sauce—it pairs perfectly with the cheesy filling and crispy shell.
- Cayenne Pepper: For those who like to kick things up a notch, add a sprinkle of cayenne pepper to your cheese and ground beef mixture.
You can also try combining sauces to create a unique, customized heat level. For example, mix hot sauce with ranch dressing for a creamy, spicy sauce that takes the burrito to the next level.
3. Different Proteins: Swap Beef for Chicken, Steak, or Even Vegetarian Options
While the original Grilled Cheese Burrito features seasoned ground beef, there’s no rule that says you can’t switch it up! The beauty of making this dish at home is that you can choose the protein that best fits your taste preferences or dietary needs. Here are some options:
Chicken
- Shredded Chicken: Swap the beef for shredded chicken (grilled or slow-cooked). You can make it spicy by adding taco seasoning or use rotisserie chicken for a faster option.
- Grilled Chicken: For a leaner protein, grilled chicken breast is a great alternative. Simply season with your favorite spices, grill it up, and slice it thin for a healthier yet equally satisfying burrito.
- Buffalo Chicken: For something extra spicy, Buffalo chicken is a great option. Toss shredded chicken in Buffalo sauce before adding it to your burrito for a tangy, spicy kick.
Steak
For steak lovers, using flank steak or sirloin can take your burrito to the next level. Marinate the steak in a mix of lime juice, garlic, and chili powder, then grill it to your preferred doneness. Slice it thin and add it to your burrito for a hearty, flavorful twist. Steak and cheese is a combination that always works.
Vegetarian
If you’re going vegetarian or just want to switch things up, there are plenty of protein-packed options that are just as satisfying:
- Black Beans: Use black beans as a base for a protein-rich filling that adds fiber and texture. You can also add some corn or rice for extra bulk.
- Grilled Veggies: For a fresh, smoky flavor, add grilled bell peppers, onions, and zucchini for a veggie-packed alternative.
- Tofu or Tempeh: If you’re vegan, tofu or tempeh marinated in taco seasoning or your favorite spices can be a great stand-in for meat.
4. Adding Crunch and Texture
Want to add some crunch to balance out the creamy cheese and flavorful sauce? Taco Bell’s Grilled Cheese Burrito comes with tortilla strips for extra texture, but at home, you can get creative with different crunchy ingredients:
- Tortilla Chips: Crush up tortilla chips and sprinkle them inside the burrito for an extra crunchy bite.
- Lettuce: Add a handful of shredded lettuce for a fresh crunch and extra bite.
- Crispy Onions: Add crispy fried onions for a sweet, savory crunch that pairs perfectly with the grilled cheese exterior.
5. Other Flavor Enhancements
Beyond just cheese and spice, there are a few extra ingredients that can further elevate the flavor of your Grilled Cheese Burrito. Consider adding:
- Guacamole: For a creamy and rich addition, spread some fresh guacamole inside the burrito.
- Sour Cream: A classic topping that adds tang and creaminess, balancing out the heat of spicy sauces.
- Fresh Cilantro: For a refreshing, herbaceous note, sprinkle some chopped cilantro inside the burrito.
Final Thoughts: Customization Is Key
The Taco Bell Grilled Cheese Burrito is already a winner, but when you make it at home, you have unlimited options to customize it to your tastes. Whether it’s adding extra cheese for a meltier experience, turning up the heat with spicy sauces, or experimenting with different proteins, the possibilities are endless.
Why settle for the standard burrito when you can craft one that’s uniquely yours? By adjusting ingredients, flavors, and textures, you can create a Grilled Cheese Burrito that’s perfectly suited to your cravings.
Would you like a quick recipe guide to get started with your customized version? 😊
Healthier Alternative by Controlling Ingredients and Portions
One of the major advantages of making your own Taco Bell Grilled Cheese Burrito at home is the ability to control both the ingredients and portions, which allows you to create a healthier version of the iconic fast-food dish. While the Taco Bell version can be loaded with fat, sodium, and calories, making it yourself gives you the power to opt for healthier alternatives without sacrificing taste. Let’s dive into how you can modify the burrito to make it a better fit for your dietary preferences without losing out on the indulgent flavors you love.
1. Choose Leaner Proteins
The classic Taco Bell Grilled Cheese Burrito uses ground beef as its main protein source, but ground beef can be high in saturated fat. By swapping out beef for leaner options, you can reduce the calorie and fat content of your burrito. Here are some healthier protein choices:
Ground Turkey
- Why it’s better: Ground turkey is a lean protein that is lower in fat than beef, making it a healthier alternative. You can season it with your favorite taco spices to match the original flavor.
- How to use: Substitute ground beef with ground turkey or turkey breast, and cook it just like you would ground beef for a lighter filling.
Chicken
- Why it’s better: Chicken, especially grilled or rotisserie chicken, is a low-fat, high-protein option that will still give you that hearty texture.
- How to use: Shred grilled chicken or use chicken breast instead of ground beef for a leaner protein. You can also add extra flavor with some taco seasoning or lime zest.
Plant-Based Proteins
For vegetarians or anyone wanting a lighter, plant-based option, you can use black beans, tofu, or tempeh as your protein source.
- Black Beans: Rich in fiber and protein, black beans are a filling and nutritious substitute for meat. They provide a hearty texture and can be seasoned with taco spices.
- Tofu or Tempeh: Both tofu and tempeh can be flavored with taco seasoning or marinated for a tasty plant-based protein option. They’re both high in protein and low in fat, making them an excellent choice for those seeking a healthier alternative.
2. Go for Whole Grains or Lower-Carb Options
While flour tortillas are commonly used for the Grilled Cheese Burrito, they are usually made from refined flour, which can spike your blood sugar. Instead, consider healthier tortilla alternatives that provide more fiber and nutrients:
Whole Wheat Tortillas
- Why they’re better: Whole wheat tortillas are made with whole grains, which are higher in fiber and have more nutrients than refined flour tortillas. Fiber helps with digestion and keeps you feeling full for longer.
- How to use: Replace the standard flour tortilla with whole wheat tortillas for added fiber and nutritional benefits. They also have a slightly nuttier flavor that can enhance your burrito experience.
Low-Carb or Cauliflower Tortillas
- Why they’re better: If you’re looking to cut back on carbs, low-carb tortillas or cauliflower tortillas are excellent options. These alternatives have significantly fewer calories and carbohydrates than regular flour tortillas while still providing that essential wrap for your burrito.
- How to use: Swap out regular tortillas for low-carb wraps or cauliflower tortillas, both of which are available in most grocery stores. These options help you enjoy the burrito without the carb overload.
3. Load Up on Veggies
Another simple way to make the Grilled Cheese Burrito healthier is to add more vegetables. Vegetables provide extra nutrients and fiber, helping you stay full and satisfied while reducing the overall calorie count of your burrito. Here are some veggie-packed additions to try:
Lettuce and Tomatoes
- Why they’re better: Fresh, crunchy vegetables like lettuce and tomatoes are low in calories and high in vitamins. Adding them boosts the nutritional profile of your burrito while also improving its texture.
- How to use: Shredded lettuce and sliced tomatoes are classic burrito additions. They provide a crisp contrast to the creamy cheese and help balance out the richness of the other ingredients.
Grilled Peppers and Onions
- Why they’re better: Grilled bell peppers and onions are not only flavorful but also packed with antioxidants, vitamins, and minerals. These veggies can add a smoky, savory element to your burrito, along with extra nutrients.
- How to use: Grill or sauté bell peppers and onions with a bit of olive oil and taco seasoning for an extra burst of flavor. They can be a great replacement for higher-calorie fillings like sour cream or extra cheese.
Avocado or Guacamole
- Why it’s better: Avocado is rich in healthy fats and provides a creamy texture that complements the burrito. While it’s higher in calories than other veggies, it’s also high in monounsaturated fats that are good for your heart.
- How to use: Instead of using full-fat sour cream, top your burrito with sliced avocado or a spoonful of homemade guacamole. This adds healthy fats and flavor without all the empty calories.
4. Use Lighter Sauces and Dairy-Free Options
While Taco Bell’s version of the Grilled Cheese Burrito often uses nacho cheese sauce and creamy sauces, you can make your version healthier by swapping those for lighter or homemade alternatives. Here are some ideas:
Light Sour Cream or Greek Yogurt
- Why they’re better: Greek yogurt or light sour cream is a healthier alternative to regular sour cream. Greek yogurt has probiotic benefits and is higher in protein, making it a great creamy addition to your burrito without adding as many calories or fat.
- How to use: Swap out regular sour cream for light sour cream or use Greek yogurt mixed with a little lime juice and cilantro to create a tangy and creamy topping.
Homemade Salsa or Pico de Gallo
- Why it’s better: Store-bought sauces can be high in sugar, sodium, and preservatives. By making your own salsa or pico de gallo, you can control the ingredients and keep it fresh and low in calories.
- How to use: Make a simple salsa by combining tomatoes, onions, cilantro, lime juice, and a pinch of salt. This will give your burrito a zesty, flavorful kick without extra calories.
Lower-Fat Cheese or Dairy-Free Alternatives
- Why they’re better: Full-fat cheeses can add unnecessary calories and fat to your burrito. By using lower-fat cheese or even dairy-free cheese alternatives, you can enjoy the cheesy goodness without the guilt.
- How to use: Try using reduced-fat cheese or dairy-free cheese made from coconut or almonds for a lighter version. These cheeses melt well and still provide that creamy, cheesy texture.
5. Mind Your Portion Sizes
When you control your own ingredients and portions, you can also keep your serving sizes in check, making sure you’re not overeating. It’s easy to go overboard when ordering fast food, but when cooking at home, you can serve yourself a portion that fits your dietary needs.
Use Smaller Tortillas
If you want to reduce calories but still enjoy the same flavor, you can opt for smaller tortillas. By using a 6-inch tortilla instead of a large one, you can reduce the overall size of the burrito while still packing in all the delicious ingredients.
Measure Ingredients
Rather than guessing the amount of cheese, meat, or sauce, measure out your ingredients. Use a kitchen scale or measuring cups to portion out your fillings, so you can avoid overloading your burrito with excess cheese or meat.
Final Thoughts: Healthier, Tastier, and Customized
By controlling the ingredients and portions, you can easily transform the Taco Bell Grilled Cheese Burrito into a healthier version that still satisfies your cravings. You can swap in lean proteins, whole grains, and fresh vegetables while using lighter sauces and toppings to make it a nourishing meal.
So, whether you’re looking to eat healthier or simply want to make a tastier, guilt-free burrito, making your own Grilled Cheese Burrito allows you to create a dish that fits your needs without compromising on flavor. Would you like a healthier recipe guide to help you get started? 😊
Step-by-Step Guide to Making a Copycat Grilled Cheese Burrito
Ingredients You’ll Need (Flour Tortilla, Seasoned Beef, Nacho Cheese, etc.)
To make the Taco Bell Grilled Cheese Burrito Hack at home, you’ll need a few essential ingredients that come together to recreate the bold flavors and satisfying texture of this fan-favorite dish. Let’s break down each key component and discuss why it’s important for creating the perfect homemade burrito.
1. Flour Tortillas
The foundation of any burrito is the flour tortilla, which provides the structure to wrap all the delicious ingredients inside. You’ll want to use large flour tortillas to hold all the fillings, and their soft yet sturdy texture makes them easy to roll. While Taco Bell uses regular flour tortillas, you can get creative with alternatives depending on your preferences. Consider using whole wheat tortillas for added fiber or low-carb tortillas if you’re trying to cut down on calories.
Why it’s important:
The flour tortilla is the base that holds everything together, and its neutral flavor allows the other fillings to shine. You can also use smaller tortillas to make burrito “flights” if you’re looking to try different fillings without going overboard.
2. Seasoned Ground Beef
The classic Taco Bell Grilled Cheese Burrito uses seasoned ground beef as its main protein. Ground beef is flavorful and hearty, and when it’s seasoned properly, it packs a delicious punch. You’ll want to use ground beef with a higher fat content (such as 80/20 or 85/15) to ensure that the beef stays juicy and flavorful when cooked. The seasoning mix is critical—Taco Bell uses a combination of spices to create that signature taco flavor. You can either buy pre-made taco seasoning or make your own blend of chili powder, cumin, garlic powder, onion powder, and paprika.
Why it’s important:
The seasoned ground beef is one of the key elements that defines the flavor of this burrito. It’s rich, savory, and provides the protein base that contrasts perfectly with the creamy cheese and spicy sauces.
3. Nacho Cheese Sauce
The nacho cheese sauce is the gooey, melty goodness that adds richness to the burrito. It’s what gives the Grilled Cheese Burrito its signature cheesy texture. Nacho cheese sauce can be found in most grocery stores, or you can make a homemade version by melting cheddar cheese with milk and a bit of butter. For a lighter version, you can use reduced-fat cheese or a homemade cheese sauce using Greek yogurt and shredded cheese.
Why it’s important:
The nacho cheese sauce is the indulgent element that adds flavor and moisture to the burrito. It creates a cheesy, creamy texture that brings the whole dish together. If you’re making the burrito at home, you can control how much cheese sauce to add, making it as cheesy as you like.
4. Chipotle Sauce or Creamy Hot Sauce
Chipotle sauce adds a smoky, spicy kick to the Grilled Cheese Burrito. This is one of the key ingredients that elevates the burrito from just cheesy to flavor-packed and spicy. Taco Bell’s chipotle sauce is creamy with a hint of heat, and it pairs perfectly with the seasoned beef and cheese. If you want to make it at home, you can make a similar sauce by combining chipotle peppers in adobo sauce, mayonnaise, sour cream, and a bit of lime juice for acidity.
Why it’s important:
The chipotle sauce provides an essential smoky flavor and a little heat to balance out the richness of the cheese. It’s the perfect contrast to the mild flavor of the beef and the creaminess of the cheese, making the burrito more dynamic.
5. Grilled Cheese on the Outside (Shredded Cheese)
The key to the Grilled Cheese Burrito is the layer of melted cheese on the outside. Taco Bell uses a mixture of shredded cheddar and mozzarella to form a crispy, cheesy crust that is toasted onto the outside of the burrito. This crispy outer layer adds texture and flavor to the burrito, making it feel indulgent and satisfying. For the best results, use shredded cheese for better melting, and be sure to grill the burrito until the cheese is golden and crispy.
Why it’s important:
The grilled cheese on the outside is the finishing touch that makes the Grilled Cheese Burrito a crispy, cheesy masterpiece. The golden, crunchy exterior creates an irresistible contrast to the soft, creamy interior of the burrito.
6. Optional Additions
While the ingredients listed above will create an excellent base for the Grilled Cheese Burrito, there are a few optional additions that can elevate the flavor even more. Here are some ideas:
- Lettuce and Tomatoes: Fresh veggies like shredded lettuce and sliced tomatoes add a refreshing crunch and a burst of flavor that balances out the richness of the cheese and beef.
- Guacamole or Avocado: For added creaminess and healthy fats, guacamole or sliced avocado is an excellent addition. It gives the burrito a creamy texture that complements the heat from the chipotle sauce.
- Jalapeños or Hot Sauce: If you like things spicy, consider adding some sliced jalapeños or your favorite hot sauce for an extra kick of heat.
- Sour Cream or Greek Yogurt: A dollop of sour cream or Greek yogurt can add a tangy flavor and smooth texture that cuts through the richness of the cheese.
Why it’s important to assemble the right ingredients:
Using the right ingredients ensures that your homemade Grilled Cheese Burrito is as close to the Taco Bell original as possible. By selecting the right tortilla, protein, cheese, and sauces, you can recreate the iconic burrito with your own personal touch. Furthermore, making it at home allows you to experiment with customizations to make it healthier or suit your tastes. Plus, you can control the quality of ingredients, ensuring you have fresher, higher-quality items than you might find in fast food.
With these key ingredients, you’ll be able to make a delicious, crave-worthy burrito that satisfies all of your Taco Bell cravings without having to leave your kitchen!
How to Cook the Beef & Prepare the Fillings
Now that you have all your ingredients ready, it’s time to cook the beef and prepare the fillings for your Taco Bell Grilled Cheese Burrito Hack. This step is crucial for ensuring the perfect flavor and texture in your homemade burrito. Let’s go through the process of cooking the beef and preparing the other fillings to assemble your burrito.
1. Cooking the Ground Beef
The seasoned ground beef is the heart of your burrito, so it’s important to cook it properly to ensure it’s flavorful and juicy. Here’s how to do it:
Step-by-Step Guide for Cooking Ground Beef:
- Choose the Right Ground Beef:
Begin by selecting your ground beef. For a juicy, flavorful filling, use 80/20 ground beef (80% lean, 20% fat) or 85/15 for a balance of tenderness and flavor. If you want a leaner option, ground turkey or chicken can also be used in place of beef. - Brown the Beef:
Heat a large skillet over medium-high heat. Add a tablespoon of olive oil or vegetable oil to the skillet. Once the oil is hot, add the ground beef to the pan. Break it up with a spoon or spatula into small pieces. Stir occasionally to ensure the meat cooks evenly. - Season the Beef:
As the beef begins to brown, it’s time to add your seasoning. Use a packet of taco seasoning or create your own by combining chili powder, cumin, paprika, onion powder, garlic powder, oregano, and a pinch of salt and pepper. For extra flavor, you can also add a dash of hot sauce or chipotle powder for a smoky kick. Mix the seasoning into the beef, ensuring that it is evenly distributed. - Simmer and Add Liquids:
After the seasoning is added, pour in a small amount of water (about ¼ cup) and let it simmer. This will help the seasoning to meld into the beef, creating a rich, flavorful filling. Let the beef simmer for about 5-10 minutes, until the flavors have blended and the liquid has cooked down. Stir occasionally. - Taste and Adjust:
Once the beef is fully cooked, taste it and adjust the seasoning as necessary. You may want to add a bit more salt, pepper, or even some lime juice for acidity. Keep the beef warm while you prepare the other fillings.
Why it’s important:
Properly cooking the beef ensures that it is flavorful, tender, and not dry. The seasoning is what brings the whole burrito together, giving it that signature Taco Bell flavor. The key is to let the beef simmer in the seasoned liquid, which helps keep the filling moist and juicy.
2. Preparing the Nacho Cheese Sauce
While the beef is cooking, you’ll want to prepare your nacho cheese sauce (or heat it if using store-bought). Nacho cheese is the creamy, melty filling that adds richness and flavor to the burrito.
How to Prepare Nacho Cheese Sauce:
- Store-Bought Nacho Cheese:
If you’re using a store-bought nacho cheese sauce, simply heat it up in a small saucepan over low heat, stirring occasionally to avoid burning. You can also microwave it in 30-second intervals until it’s fully heated. - Homemade Nacho Cheese:
If you prefer to make your own cheese sauce, follow these steps:- In a saucepan, melt 2 tablespoons of butter over medium heat.
- Whisk in 2 tablespoons of all-purpose flour to create a roux, and cook for about 1 minute to get rid of the raw flour taste.
- Gradually add 1 cup of milk, whisking constantly to prevent lumps. Once the milk has heated, reduce the heat to low.
- Stir in 1 ½ cups of shredded cheddar cheese and continue to stir until the cheese melts completely and the sauce is smooth. If you like a little extra spice, add a teaspoon of jalapeño juice or hot sauce to the mix.
- Keep it Warm:
Once your cheese sauce is ready, keep it warm over low heat until you’re ready to assemble your burritos. Stir it occasionally to maintain a smooth, creamy texture.
Why it’s important:
The nacho cheese sauce is the star of the burrito’s creamy texture. It’s what makes the burrito indulgent and cheesy. Whether you use store-bought or homemade, it should be perfectly melted and smooth to coat the other fillings and add richness to every bite.
3. Preparing the Chipotle Sauce
The chipotle sauce adds an essential smoky and spicy element to the burrito. It’s easy to make at home, and doing so allows you to control the heat and flavor profile.
How to Make Chipotle Sauce:
- Base Ingredients:
In a small bowl, combine ½ cup of mayonnaise (or use Greek yogurt for a lighter version) with 1 tablespoon of chipotle peppers in adobo sauce. Mash or finely chop the chipotle peppers and stir them into the mayonnaise. - Add Extra Flavor:
To make the sauce even more flavorful, add a teaspoon of lime juice, a pinch of garlic powder, and a dash of hot sauce (if you like it spicier). Stir everything together until it’s smooth and creamy. - Adjust to Taste:
Taste your chipotle sauce and adjust it to your liking. If you want more spice, add another chipotle pepper or a few dashes of cayenne pepper. For a milder version, use fewer peppers and more sour cream. - Refrigerate:
For the best flavor, refrigerate the chipotle sauce for 10-15 minutes before using it, allowing the flavors to meld.
Why it’s important:
The chipotle sauce is the element that ties everything together. It brings a smoky, spicy kick that balances out the richness of the cheese and beef, adding depth to the overall flavor of the burrito. It’s essential for creating that Taco Bell-inspired taste at home.
4. Optional Fillings and Garnishes
While the beef and cheese are the main stars of your burrito, you can add a few optional fillings to enhance the flavor and texture of your burrito.
Optional Fillings:
- Shredded Lettuce: For crunch and freshness, add some shredded lettuce inside the burrito.
- Tomatoes: Fresh diced tomatoes provide a juicy, slightly tangy contrast to the savory beef.
- Sour Cream or Greek Yogurt: A spoonful of sour cream or Greek yogurt adds creaminess and helps cool down any heat from the chipotle sauce.
- Guacamole: For a rich, creamy addition, add some guacamole or sliced avocado.
Why it’s important:
These optional fillings add variety and balance to your burrito. The coolness of the sour cream or yogurt helps tone down the spice, while the vegetables add freshness and texture to offset the richness of the beef and cheese.
Final Thoughts on Preparing the Fillings
Cooking the beef and preparing the fillings properly is key to creating a Taco Bell Grilled Cheese Burrito Hack that rivals the fast-food version. Properly seasoned beef, melted nacho cheese, smoky chipotle sauce, and any additional fillings will bring all the elements together, ensuring that your homemade burrito is as flavorful, satisfying, and indulgent as the one you love from Taco Bell. By following these steps, you’ll be able to assemble a delicious, customizable burrito that is sure to become a new favorite!
The Secret Hack for the Perfect Crispy, Cheesy Finish
One of the most beloved features of the Taco Bell Grilled Cheese Burrito is the crispy, cheesy crust on the outside. This adds a satisfying texture contrast to the soft, warm interior, making every bite even more indulgent. The secret to achieving that perfect crispy, cheesy finish is all about grilling techniques, cheese placement, and heat control. Here’s how to unlock this crispy, cheesy hack at home:
1. The Right Type of Cheese for the Crispy Crust
To create the perfect cheesy exterior, you need to use the right shredded cheese that melts well and crisps up nicely. Taco Bell uses a combination of cheddar cheese and mozzarella cheese for its signature texture. Cheddar provides a sharp, flavorful bite, while mozzarella helps create that gooey stretchiness. Together, they form a cheese blend that not only melts beautifully but also crisps up when grilled.
Which Cheese to Use:
- Cheddar: Use shredded sharp cheddar cheese for its bold flavor. This will give your burrito that signature rich, cheesy taste.
- Mozzarella: Combine with shredded mozzarella cheese to add a stretchiness and smooth melt to the outer crust.
- Optional: You can also add a small amount of Parmesan cheese for extra crispiness and a slightly nutty flavor.
Why it’s important:
The right combination of cheese ensures that the outer layer of the burrito will melt and crisp up evenly. Cheddar adds flavor, while mozzarella gives the perfect stretchy texture, creating a golden, crispy finish.
2. Applying Cheese to the Outside of the Burrito
To achieve that mouthwatering grilled cheese crust, it’s important to apply the cheese to the outside of the burrito before grilling it. Here’s how to do it:
How to Apply the Cheese:
- Assemble the Burrito:
Once you’ve added all your fillings (seasoned beef, nacho cheese, chipotle sauce, etc.) into the flour tortilla, roll it up tightly to form a burrito. Be sure to tuck in the edges to prevent the fillings from spilling out. - Coat the Outside with Butter:
Lightly brush the outside of the burrito with butter or mayo. This helps the cheese stick and ensures that it crisps up nicely during grilling. You can also use olive oil if you want a slightly different flavor. - Apply the Shredded Cheese:
After buttering the outside of the burrito, coat the burrito with a generous layer of shredded cheese. Focus on spreading the cheese on the sides of the burrito where you want the crisp, grilled cheese effect to form. Don’t be afraid to use a lot of cheese—this is the key to getting that crunchy, cheesy exterior. - Press the Burrito:
Once the cheese is applied, you can press the burrito slightly with your hands to ensure the cheese sticks to the outside. The more evenly distributed the cheese is, the better the crispy effect.
Why it’s important:
The cheese coating on the outside of the burrito is what creates that crispy, golden-brown finish that’s so irresistible. By buttering the burrito and pressing the cheese onto it, you ensure that the cheese melts uniformly and crisps up in the right places.
3. The Perfect Grilling Technique
Grilling your burrito is the final step in achieving that perfect crispy, cheesy finish. The goal is to get the outer layer of cheese browned and crunchy while ensuring the filling inside stays warm and gooey. Here’s the hack to make it happen:
Step-by-Step Grilling Technique:
- Preheat the Skillet:
Start by heating a non-stick skillet or a cast-iron pan over medium heat. A hot pan is essential for achieving a crispy crust without burning the cheese. If you have a griddle, that works even better for an even, golden finish. - Grill the Burrito:
Place the burrito in the skillet, seam side down, to prevent the filling from spilling out. Press the burrito gently with a spatula or use a heavy pan to weigh it down and create an even, crispy surface. Allow the burrito to cook for about 3-4 minutes on one side, or until the cheese begins to melt and the exterior turns golden brown. - Flip and Continue Grilling:
Carefully flip the burrito to the other side and grill it for another 3-4 minutes. Be sure to watch carefully to prevent burning. You want the cheese to melt and crisp, but not burn. If the cheese starts to brown too quickly, reduce the heat slightly to give the cheese time to melt through. - Check for Perfection:
Once both sides are golden and crispy, remove the burrito from the skillet and let it rest for a minute. This allows the cheese to set slightly, making the burrito easier to cut and eat.
Why it’s important:
Grilling the burrito with the cheese on the outside is the secret to achieving that crispy, cheesy crust. The right heat and pressure ensure that the cheese doesn’t burn but instead becomes beautifully crisp and golden, adding texture and flavor to the outside of the burrito.
4. Extra Hacks for the Crispy Finish
For those looking to take their crispy, cheesy finish to the next level, here are some additional hacks to ensure perfection:
Use a Press for Even Crispy Cheese:
- If you want a uniform crispy crust, use a grill press or panini press to apply even pressure to the burrito while it grills. This ensures that the cheese melts evenly across the entire surface, creating a perfect golden crust.
Bake for Extra Crispiness:
- If you want to make your burrito even crispier, consider baking it after grilling. Place the burrito in a preheated oven (around 375°F) for 5-7 minutes. This will further crisp the cheese on the outside while keeping the inside nice and warm.
Add Extra Cheese During Grilling:
- If you’re a cheese lover, sprinkle a bit more shredded cheese on top of the burrito just before flipping it. This will give you an even thicker layer of crispy cheese that’s extra gooey and satisfying.
Why This Hack Makes All the Difference
The crispy, cheesy finish is what elevates the Taco Bell Grilled Cheese Burrito from a regular burrito to a memorable, crave-worthy treat. By focusing on the right cheese combination, applying the cheese to the outside, and using the correct grilling technique, you can recreate this delicious texture at home. The crispy layer adds a satisfying crunch, while the melted cheese provides that indulgent, cheesy experience that makes every bite irresistible.
This crispy, cheesy finish is the game-changer that will make your homemade Grilled Cheese Burrito stand out and taste just like Taco Bell’s version, if not better!
Pro Tips for the Best Grilled Cheese Burrito at Home
Choosing the Right Cheese for the Perfect Melt
The cheese you choose is crucial to achieving the signature melt and flavor profile that makes a Grilled Cheese Burrito so irresistible. Whether you’re aiming for a gooey, stretchy interior or a crispy, golden exterior, the type of cheese you use can make or break the burrito. Here’s a deeper look into the best cheeses to use and why each one contributes to the perfect melt.
1. The Importance of Cheese in a Grilled Cheese Burrito
Cheese plays a central role in the Grilled Cheese Burrito. Not only does it contribute to the flavor, but it also determines the texture of the burrito. The perfect cheese should melt smoothly, stretch beautifully, and hold together without being too greasy or clumpy. The right combination of cheeses will help you achieve the balance of creamy, stretchy melt and crispy, cheesy exterior that’s so sought after.
- Melting properties: Some cheeses melt effortlessly and provide a smooth, creamy texture, while others have the ability to crisp up on the outside when grilled.
- Flavor: The cheese should complement the other flavors in the burrito without overpowering them. A good balance of flavor and meltability is key.
2. Best Cheese for the Inside of the Burrito
When you’re choosing cheese for the filling of your burrito, you want a cheese that melts beautifully and adds that satisfying creaminess. Here are the top contenders:
Cheddar Cheese
- Why it’s great: Cheddar is the go-to cheese for a classic cheese pull. Its sharp, tangy flavor enhances the burrito without being too heavy. It also melts well, creating a smooth, luscious texture.
- Best use: Choose mild to medium cheddar for a smoother melt, or sharp cheddar if you want a tangier, more pronounced cheese flavor.
Monterey Jack
- Why it’s great: Known for its mild flavor and excellent melting properties, Monterey Jack is a great addition for the filling. It creates that gooey, stretchy texture that makes each bite satisfying.
- Best use: Monterey Jack works well as the primary cheese in the filling because of its versatility and meltability. It pairs well with sharper cheeses like cheddar.
Mozzarella
- Why it’s great: Mozzarella is famous for its stretchy, gooey melt, making it a perfect choice for that indulgent, cheesy experience. It brings a smooth texture that contrasts well with the other ingredients in the burrito.
- Best use: If you love stretchy cheese, mozzarella should be a key player in the filling. Combine it with cheddar or Monterey Jack for a richer, more complex flavor profile.
3. The Cheese for the Crispy, Cheesy Crust
The outer, crispy cheese layer is what gives the Grilled Cheese Burrito its signature texture. You want a cheese that can melt and then crisp up when grilled to golden perfection. Some cheeses are better suited for this purpose than others:
Cheddar Cheese
- Why it’s great: Shredded cheddar not only melts easily but also crisps up beautifully when grilled. This gives you that golden, crunchy crust that enhances the burrito’s flavor and texture.
- Best use: Apply cheddar on the outside of the burrito after it’s been wrapped with the filling. It will create a crispy exterior that enhances the flavor and provides a satisfying crunch.
Parmesan Cheese
- Why it’s great: Parmesan is excellent for adding an extra level of crispiness to the outer layer of the burrito. Its hard texture allows it to crisp up perfectly in the skillet or griddle, adding a nice nutty flavor to the cheese layer.
- Best use: Add a sprinkle of grated Parmesan to the outside of the burrito just before grilling. It will create a crispy, golden shell that elevates the texture of your burrito.
Mexican Cheese Blend
- Why it’s great: A Mexican cheese blend typically contains a mixture of cheddar, Monterey Jack, and sometimes queso blanco. This blend is known for its excellent melting properties and its ability to create a smooth, creamy interior, while also crisping up well on the outside.
- Best use: You can use a Mexican cheese blend both in the filling and on the outside for a cheesy, golden crunch. The blend of different cheeses ensures the perfect balance of melt and texture.
4. Key Tips for Achieving the Perfect Melt
To ensure your cheese melts perfectly in both the filling and the crispy outer layer, follow these tips:
Shred Your Cheese
- Pre-shredding your cheese helps it melt more quickly and evenly compared to using whole slices or blocks. Shredded cheese also crisps up more evenly on the outside of the burrito, ensuring a perfect grilled finish.
Use Room Temperature Cheese
- Allow your cheese to come to room temperature before assembling your burrito. Cold cheese takes longer to melt and may result in a clumpy texture inside the burrito. Room temperature cheese will melt more evenly and quickly, creating a smoother, creamier filling.
Avoid Overheating the Cheese
- While you want the cheese to melt, avoid overheating it, especially inside the burrito. If you cook it for too long, the cheese can become greasy and separate. Keep your heat on medium to low while grilling to allow the cheese to melt slowly without burning.
Use a Combination of Cheeses
- Combining cheddar, mozzarella, and Monterey Jack offers a balance of flavors and meltability. Cheddar adds richness, mozzarella offers stretchiness, and Monterey Jack provides a smooth, creamy texture. A combination ensures you get the best of both worlds—melt and flavor.
5. Cheese Pairing for Extra Flavor
For those who want to get a bit creative with their cheese, here are some other cheeses that can elevate the flavor of your Grilled Cheese Burrito:
Pepper Jack
- Why it’s great: Pepper Jack adds a spicy kick to your burrito, enhancing the flavor profile with its jalapeño and herb-infused flavor. It’s a great addition if you enjoy a bit of heat.
- Best use: Mix it with mozzarella or cheddar for a spicy, melty combo inside the burrito.
Queso Blanco
- Why it’s great: Queso blanco is a creamy, smooth cheese that melts beautifully and brings a mild, milky flavor to the burrito. It pairs wonderfully with bold, spicy fillings.
- Best use: Use it as an addition to the filling for a smooth, creamy texture, or combine it with cheddar for a richer melt.
Gouda
- Why it’s great: Gouda adds a smoky, rich flavor that can enhance your burrito’s overall taste. It also melts well, creating a creamy interior.
- Best use: Use in small amounts to add an extra layer of flavor to your burrito without overpowering the other ingredients.
Conclusion
Choosing the right cheese is key to making a perfect Grilled Cheese Burrito. By selecting cheeses that melt smoothly, stretch beautifully, and crisp up on the outside, you can recreate Taco Bell’s cheesy masterpiece at home. Whether you prefer the classic sharp cheddar, a mild mozzarella, or an exciting spicy pepper jack, the cheese is what gives your burrito that rich, gooey indulgence. The combination of textures—melted inside and crispy outside—makes for a truly satisfying meal that can be customized to your taste.
How to Get the Burrito Extra Crispy Like Taco Bell’s Version
Achieving the extra crispy texture that makes Taco Bell’s Grilled Cheese Burrito so irresistible is one of the most coveted parts of making this dish at home. The crispy, golden outer layer adds the perfect contrast to the warm, gooey cheese and savory fillings inside. Here’s a breakdown of how to recreate that delicious, crispy finish just like Taco Bell does.
1. Preheat Your Pan or Griddle Properly
To achieve the ideal crispy exterior, proper preheating of your cooking surface is key. You want the heat to be high enough to sear the tortilla but not so high that it burns the cheese or fillings before everything melts.
- What to do: Preheat your non-stick skillet or cast-iron griddle on medium to medium-high heat for a few minutes before placing the burrito in it. This ensures that the tortilla starts to crisp up immediately upon contact, giving it that golden, crunchy texture Taco Bell is known for.
- Tip: A cast-iron skillet is ideal for creating the crispy texture since it retains heat well and distributes it evenly. However, a non-stick skillet will also work if you’re concerned about sticking.
2. Use Butter or Oil for the Best Crisp
Taco Bell’s burritos have that extra crispy, buttery finish that makes them so satisfying. The secret is in the cooking fat you use. Instead of just placing the burrito directly in the pan without anything, butter or oil will give you the perfect crisp.
- Butter: Using butter adds a rich, flavorful crisp that complements the cheese. It also creates a golden, crunchy crust on the tortilla, making it more indulgent.
- Oil: Vegetable oil or canola oil is a great choice if you prefer a more neutral flavor. It creates a crisp, non-greasy finish, which some people prefer if they want a more balanced crunch.
- What to do: Add a thin layer of butter or oil to the heated pan before placing the burrito in it. Swirl the pan around to coat the surface evenly. Once the burrito is in place, press it down gently with a spatula to ensure the entire surface gets that crispy, golden texture.
3. Press Down for an Even Crisp
One of the techniques that Taco Bell uses to achieve that extra-crispy layer is to press down on the burrito slightly as it grills. This ensures that the tortilla stays in direct contact with the hot surface of the pan, making it more likely to get that golden, crispy finish.
- What to do: After placing the burrito in the pan, use a spatula or a heavy object, like a second skillet, to gently press down on the burrito. This will help create a uniform, crispy surface across the entire tortilla. Make sure to press down for only 1-2 minutes on each side to avoid over-crisping.
4. Toast Both Sides
For the signature Taco Bell Grilled Cheese Burrito texture, you’ll want to make sure that both sides of the burrito get a crispy finish. The outer tortilla should be golden and crunchy, with the cheese melted perfectly inside. This requires flipping the burrito halfway through cooking.
- What to do: Cook the burrito for about 2-3 minutes on the first side, until it’s golden brown and crispy. Once you see the crisp forming, carefully flip the burrito to the other side using a spatula. Cook for another 2-3 minutes until both sides are evenly crispy.
- Tip: Don’t rush the flip! If you flip too early, you risk tearing the tortilla or losing that beautiful crispy finish. Be patient and wait until the first side is well-browned.
5. Add Cheese to the Outside of the Burrito
To recreate the signature extra cheesy, crispy exterior that Taco Bell’s Grilled Cheese Burrito is known for, cheese is a crucial ingredient on the outside. Sprinkling cheese on the outer layer before grilling creates an additional crunchy cheese crust that elevates the texture and flavor of the burrito.
- What to do: Before you place the burrito in the pan, sprinkle a generous amount of shredded cheddar or a Mexican cheese blend directly on the outside of the tortilla. When it cooks, this cheese will melt and crisp up, creating that extra crispy, cheesy finish.
- Tip: For an extra touch of flavor and texture, you can also sprinkle a bit of parmesan on the outside of the burrito along with your shredded cheese. Parmesan crisps up beautifully and adds a nutty, savory finish to the outer layer.
6. Monitor Heat and Cooking Time
To ensure the perfect crisp, you need to find the right balance between heat and cooking time. Too much heat can cause the burrito to burn before it crisps up properly, while too little heat will prevent the crisp from forming at all.
- What to do: Maintain a medium to medium-high heat throughout the cooking process. This allows enough time for the cheese to melt inside while achieving that perfect crispy texture on the outside. If necessary, lower the heat slightly toward the end to ensure the cheese inside melts completely without the outside burning.
- Tip: Be mindful of the timing. If your burrito is getting too dark on the outside but isn’t crisp enough, reduce the heat and allow it to cook a little longer. Alternatively, if it’s taking too long to brown, increase the heat slightly to get the desired crisp.
7. Rest the Burrito Before Cutting
Once your burrito is beautifully crispy on the outside, allow it to rest for a minute or two before cutting. This allows the cheese inside to set and solidify slightly, making it less likely to ooze out when you slice it. It also helps maintain that crispy outer layer.
- What to do: After removing the burrito from the pan, place it on a plate and let it rest for 1-2 minutes before slicing it. This also gives the cheese a moment to cool and firm up, so it stays intact.
Conclusion
Achieving that perfect, extra crispy exterior like Taco Bell’s Grilled Cheese Burrito requires a bit of technique, but with the right approach, you can make your burrito just as crunchy and golden as the original. By properly preheating your cooking surface, using butter or oil, pressing down on the burrito, and adding cheese to the outside, you can recreate that delicious, crispy texture at home. The result is a mouthwatering, cheesy, crispy burrito that rivals Taco Bell’s version every time!
Best Sauces & Toppings to Elevate the Flavor of Your Grilled Cheese Burrito
While the core of a Grilled Cheese Burrito lies in its filling and crispy tortilla, the right sauces and toppings can truly elevate the flavor and create a more indulgent, customized experience. Taco Bell is known for layering on bold flavors, and you can do the same at home by adding a few signature sauces and fresh toppings. Here’s a guide to the best options that will take your homemade Grilled Cheese Burrito to the next level.
1. Classic Taco Bell Sauces
Taco Bell’s sauces are beloved for their flavorful punch and wide variety, offering the perfect balance of heat, sweetness, and tanginess to complement the burrito’s cheese and beef. You can replicate these flavors easily at home or try making your own versions for an added touch of creativity.
Creamy Chipotle Sauce
- Why it’s great: The creamy chipotle sauce is a perfect addition to your Grilled Cheese Burrito. It combines smoky, spicy, and creamy flavors, adding depth to the burrito’s overall taste without overwhelming it.
- Best use: Drizzle it generously inside the burrito before rolling it up, or serve it as a dip on the side for an extra hit of flavor.
Spicy Ranch Sauce
- Why it’s great: Spicy ranch sauce offers a creamy, tangy flavor with a spicy kick, which perfectly balances out the richness of the cheese and beef. Its coolness also provides a nice contrast to the warmth of the burrito.
- Best use: Add a generous drizzle inside your burrito, or serve it on the side to dip. It’s especially great if you like a bit of coolness paired with heat.
Hot or Mild Taco Sauce
- Why it’s great: Taco Bell’s hot and mild taco sauces are a staple for any Taco Bell fan. They bring a straightforward, tangy flavor with just the right amount of heat. This sauce works wonders if you want a more traditional flavor without too much complexity.
- Best use: Add it on top of the burrito after grilling or inside the filling to add zest and flavor without overwhelming the cheese.
2. Homemade Sauces for Extra Flavor
If you want to take things to the next level and try something new, consider making your own sauces at home. Homemade sauces allow you to control the ingredients and tailor the flavor exactly to your liking.
Garlic Butter Sauce
- Why it’s great: A garlic butter sauce brings a rich, savory element to your burrito, perfectly complementing the crispy, cheesy texture. The garlic adds a wonderful depth, and the butter creates a silky smooth texture that’s ideal for a decadent bite.
- Best use: Drizzle a little garlic butter on the outside of the burrito before grilling for a garlicky crispy finish, or dip the burrito into the sauce after cutting for extra richness.
Buffalo Sauce
- Why it’s great: For those who love spicy, tangy flavors, a Buffalo sauce is a fantastic addition. The tanginess from vinegar, combined with the heat of hot sauce, pairs wonderfully with the beef and cheese, adding a bold contrast to the rich flavors.
- Best use: Mix Buffalo sauce with some ranch dressing for a creamy, spicy combination that can be drizzled over the inside of the burrito or served on the side as a dip.
Sriracha Mayo
- Why it’s great: If you like a balance of heat and creaminess, Sriracha mayo is the perfect choice. The creamy mayo helps tame the heat of Sriracha, while the chili flavor still packs a punch. It’s a great alternative to Taco Bell’s Spicy Ranch for those who prefer more spice.
- Best use: Spread a thin layer inside the burrito, or serve it on the side for dipping. It also works great as a topping after grilling for an added spicy kick.
3. Fresh Toppings for Texture and Flavor
Toppings are another way to add extra flavor, texture, and freshness to your Grilled Cheese Burrito. While Taco Bell’s version is delicious as-is, adding fresh ingredients will not only elevate the flavor but also provide a more personalized touch to the meal.
Shredded Lettuce
- Why it’s great: Shredded lettuce adds a crunchy texture that balances out the soft, melty interior of the burrito. It also provides a refreshing, light contrast to the richness of the cheese and beef.
- Best use: Add shredded lettuce on top of the filling or inside the burrito before rolling it up. You can also serve it on the side as a garnish.
Diced Tomatoes
- Why it’s great: Diced tomatoes bring a juicy burst of freshness and a subtle tang, cutting through the richness of the cheese and meat. This topping can lighten the overall flavor and add color to the burrito.
- Best use: Top the burrito with diced tomatoes after grilling, or mix them into the filling for added moisture and brightness.
Sliced Jalapeños
- Why it’s great: For those who enjoy a bit of spice, sliced jalapeños are the perfect topping. They add heat, flavor, and a bit of crunch that complements the smooth, cheesy texture of the burrito.
- Best use: Add fresh sliced jalapeños inside the burrito before rolling it up, or use them as a topping after grilling for an extra kick of heat.
4. Cheeses and Other Add-ins to Experiment With
If you’re looking to enhance the cheesiness or experiment with different textures, don’t be afraid to play around with extra cheeses and add-ins to make the burrito truly your own.
Queso Dip
- Why it’s great: For an extra indulgent touch, queso dip is a must. It adds a rich, smooth texture and extra cheese flavor to your burrito, taking the gooey factor to the next level.
- Best use: Drizzle queso dip inside the burrito before rolling it up, or use it as a dipping sauce to serve on the side.
Avocado or Guacamole
- Why it’s great: Avocado or guacamole adds a creamy, fresh element that balances out the rich flavors of the beef and cheese. The mild flavor of avocado also brings a lovely contrast to the spices and sauces you use.
- Best use: Mash some avocado and spread it inside the burrito for creaminess, or top the burrito with guacamole for added texture and flavor after grilling.
Cilantro and Sour Cream
- Why it’s great: Fresh cilantro and a dollop of sour cream can brighten up the burrito with a fresh, herby flavor and a cool, creamy touch. The sour cream helps mellow out the spiciness from the sauces, while cilantro adds a burst of freshness.
- Best use: Sprinkle fresh cilantro inside the burrito, or use it as a garnish. Add a spoonful of sour cream on top for an extra creamy finish.
5. Other Fun Toppings and Combinations
- Crushed Tortilla Chips: If you’re a fan of extra crunch, adding crushed tortilla chips inside the burrito can add a textural element that pairs beautifully with the gooey cheese and seasoned beef.
- Lime Wedges: A squeeze of fresh lime over the burrito can add a zesty, tangy flavor that enhances all the other ingredients. It’s a simple way to brighten up the dish.
- Pickled Red Onions: For a slightly sweet and tangy topping, pickled red onions are a great option. They add a burst of flavor and color that balances the richness of the cheese.
Conclusion
The right sauces and toppings can transform your Grilled Cheese Burrito into something truly special. Whether you stick to Taco Bell’s classic sauces like Creamy Chipotle or Spicy Ranch, or experiment with homemade options like Garlic Butter Sauce or Buffalo Sauce, the flavor possibilities are endless. Toppings such as fresh lettuce, tomatoes, jalapeños, and even sour cream will add texture, freshness, and extra flavor. With the right balance of creamy, spicy, tangy, and crunchy ingredients, your burrito will be elevated to new heights, creating a satisfying and flavor-packed meal every time!
Choosing the Right Potatoes for Hash Browns
Why Russet Potatoes Are the Best: High Starch Content for Crispy Texture
When it comes to making crispy hash browns, the choice of potato is crucial. Among the various types of potatoes, Russet potatoes are widely regarded as the best option, particularly for achieving the perfect crispy texture that everyone loves. Their unique properties make them stand out when it comes to frying or baking, giving you that golden, crispy exterior while maintaining a soft interior. Let’s dive deeper into why Russet potatoes are the go-to choice for achieving the perfect crispy hash browns.
1. High Starch Content for Ultimate Crispiness
The primary reason Russet potatoes are favored for making crispy hash browns is their high starch content. Starch is a key factor in creating the right texture when cooking potatoes, and Russets have a significantly higher amount of starch compared to other potato varieties.
- What does starch do?
Starch in potatoes works by absorbing moisture when cooked, helping to create a crisp, dry outer layer while maintaining a tender, fluffy interior. This is particularly important for hash browns, where the balance between crispy and soft is what makes them so delicious. - Effect of high starch content:
The high starch content in Russet potatoes contributes to the crispiness that forms when frying or baking. The starch helps form a crunchy outer shell, allowing you to get the perfect golden-brown exterior while ensuring that the inside remains light and soft. This is what gives restaurant-quality hash browns their texture.
2. Low Moisture Content for Better Frying
In addition to their high starch content, Russet potatoes have a relatively low moisture content compared to other potatoes like Yukon Golds or Red potatoes. Lower moisture helps achieve that coveted crispy texture because less water is released during cooking.
- Why does moisture matter?
Potatoes with higher moisture content, when cooked, can result in soggy or soft hash browns rather than crispy ones. The excess moisture needs to evaporate for that crunchy texture to form, and if the potatoes have too much water, the cooking process will steam the potatoes instead of crisping them up. - Result of lower moisture:
Russet potatoes’ low moisture content helps the starch take the spotlight in forming a crispy crust when fried. This allows the potatoes to fry up beautifully without becoming mushy or greasy, which is essential for hash browns.
3. Ideal for Grating or Shredding
Russet potatoes are also particularly well-suited for grating or shredding into small pieces, which is a common preparation method for hash browns. When grated, the texture of Russets allows for an ideal surface area that promotes even cooking and crisping.
- Easy to grate:
The firm flesh of Russet potatoes makes them easy to grate, resulting in perfectly shredded strands that cook evenly. These shreds help the surface area of the potatoes become crispier when fried, creating that signature golden-brown texture. - Even cooking:
Russets’ firmness and high starch content also allow for uniform browning, so every bite of your hash browns has that same satisfying crunch. This makes them the perfect choice for achieving that crispy, golden texture you want from hash browns.
4. How Russets Compare to Other Potatoes
While Yukon Gold or Red potatoes are great for mashed potatoes, soups, or other dishes, their waxy texture and higher moisture content are not ideal for creating crispy hash browns. Here’s a comparison:
- Yukon Golds:
Yukon Gold potatoes have a more creamy texture and a slightly waxy skin, which makes them better suited for dishes where you want the potatoes to hold their shape, like mashed potatoes or casseroles. Their lower starch content and higher moisture make them less ideal for achieving crispiness in hash browns. - Red Potatoes:
Red potatoes also have a waxy texture, which causes them to break down more easily when cooked, resulting in less crispy hash browns. These potatoes are better suited for salads or dishes where you want them to remain intact. - Russet Potatoes:
Russets are considered the gold standard for crispy hash browns because they hit the perfect balance of high starch, low moisture, and firmness. This combination ensures that when you fry or bake them, you get that perfect crispy, crunchy exterior while maintaining a light and fluffy interior.
5. How to Maximize Crispy Texture with Russet Potatoes
To make the most of Russet potatoes’ crispy potential, it’s important to prepare them correctly. Here are a few tips to ensure that you get the best crispy hash browns every time:
- Rinse off excess starch: After grating the Russet potatoes, rinse them thoroughly under cold water to remove excess starch. This prevents the potatoes from clumping together during frying and helps them crisp up better.
- Pat dry: After rinsing, be sure to pat the grated potatoes dry with a paper towel to remove any excess moisture. This step ensures that the potatoes fry up crispy rather than soggy.
- Use the right cooking method: Frying in hot oil or using a cast-iron skillet will allow the Russet potatoes to form that perfect golden-brown crust. You can also bake them at a high temperature for a healthier version of crispy hash browns.
Conclusion
Russet potatoes are undeniably the best choice when it comes to making crispy hash browns. Their high starch content and low moisture provide the perfect foundation for that crispy, golden exterior and soft interior that everyone craves. Whether you’re frying, baking, or pan-frying, Russet potatoes ensure that your hash browns are perfectly crispy every time. For the ultimate crispy texture, make sure to follow the proper preparation steps and enjoy the satisfying crunch that comes with using these versatile potatoes!
How to Prepare the Potatoes: Washing and Peeling Tips
Preparing potatoes properly is key to making the perfect crispy hash browns, and it all starts with the right techniques for washing and peeling the potatoes. Whether you’re using Russet potatoes or another variety, these steps are essential for achieving the best texture and flavor in your dish.
1. Start with Washing the Potatoes Thoroughly
Before you do anything with your potatoes, it’s important to wash them thoroughly to remove any dirt, debris, or pesticides that may be on the skin. Here’s how you should wash your potatoes:
- Use Cold Water: Rinse the potatoes under cold, running water. This will help remove any dirt or dust that has accumulated on the surface.
- Scrub Gently: If you’re using Russet potatoes, the skin can sometimes hold onto more dirt due to its rough texture. Use a potato brush or a scrub sponge to gently scrub the skin of the potatoes. Be sure to scrub all sides and ensure the potatoes are clean.
- Avoid Using Soap: Never use soap when washing your potatoes, as it can leave behind harmful residues. Simply scrubbing with cold water is enough.
- Dry the Potatoes: Once the potatoes are clean, pat them dry with a clean towel or paper towels. Removing the moisture from the surface will make it easier to peel them and will prevent any excess water from affecting the crispiness of your hash browns later on.
2. Deciding Whether to Peel or Leave the Skin On
When it comes to peeling potatoes, you have two options: peel the potatoes or leave the skin on. Both methods have their merits, depending on your desired result.
Peeling the Potatoes
- Why Peel?
Peeling the potatoes gives your hash browns a smoother texture, allowing the grated potato to cook more evenly and crisp up without the interference of the skin. It’s especially beneficial if you’re making hash browns with very thick or rough-skinned potatoes like Russets. - How to Peel:
Use a vegetable peeler or a paring knife to carefully remove the skin. It’s easiest to start from one end of the potato and work your way around in a circular motion, ensuring you remove all of the rough skin. Make sure to leave as much of the potato flesh as possible for a smoother, more consistent hash brown texture.
Leaving the Skin On
- Why Leave the Skin On?
Leaving the skin on the potatoes can add extra texture and flavor to your hash browns. The skin becomes crispy when fried, contributing to a slightly different texture that some people really enjoy. It also retains nutrients that would otherwise be lost if the skin were removed, making it a slightly healthier option. - What to Consider:
If you decide to leave the skin on, be sure to clean it well and scrub away any visible dirt. This is especially important for Russet potatoes, which tend to have thicker, rougher skin.
3. Cutting and Shredding the Potatoes
Once you’ve washed and peeled your potatoes (or chosen to leave the skin on), the next step is to prepare the potatoes for shredding or grating. Here’s how to do it:
- Cut the Potatoes for Easier Grating:
If you’re shredding by hand, cut the potatoes in half or into smaller chunks that are easier to handle. This gives you a stable base to work from when you start grating. If you’re using a food processor, you can skip this step. - Grating the Potatoes:
Use a box grater or food processor with the coarse shredding attachment to grate the potatoes. Grate the potatoes on the longest side of the grater to get long, thin shreds. The finer the shreds, the crisper your hash browns will be. - Shredding Consistency:
For the best texture, try to achieve a consistent size in your potato shreds. This ensures even cooking and even crispiness across your hash browns. Some prefer a more rustic, uneven texture, but for that perfect crisp, even shreds are the way to go.
4. Rinsing After Shredding
After shredding your potatoes, it’s important to rinse them again to remove excess starch. Starch is what can cause your hash browns to clump together or become mushy rather than crisp. Here’s how you do it:
- Rinse Under Cold Water:
Place the shredded potatoes in a fine mesh strainer or large bowl and rinse them under cold water. Use your hands or a spoon to gently agitate the potatoes to help release the excess starch. Keep rinsing until the water runs clear, which may take a minute or two. - Why Rinse?
Removing the starch is essential for achieving that crispy exterior. Too much starch can cause the potatoes to stick together and form clumps instead of separating into individual, crisp strands.
5. Drying the Potatoes
After rinsing, it’s important to dry the shredded potatoes as much as possible to prevent any excess moisture from affecting the crispiness of your hash browns. Here’s how to do it:
- Use a Clean Towel:
Place the rinsed potatoes onto a clean kitchen towel or paper towels and gently press down to remove the water. You want to get as much moisture out as possible without crushing the potatoes. - Option for Extra Drying:
If you’re looking for extra crispiness, you can also place the shredded potatoes between two layers of paper towels or cloth and press down firmly to squeeze out even more moisture. You can also let them sit in the towel for a few minutes to allow any remaining moisture to drain.
6. Ready for Cooking
Once the potatoes are washed, peeled (or not), shredded, rinsed, and dried, they’re ready to be turned into crispy hash browns. The preparation process ensures that your hash browns will cook evenly and crisp up perfectly, making for a golden-brown, deliciously crispy texture on the outside and soft on the inside.
Conclusion
Properly preparing your potatoes—whether you’re peeling them, shredding them, or rinsing away the excess starch—is the foundation for creating crispy hash browns. By washing the potatoes thoroughly, deciding whether to peel or leave the skin on, and properly preparing the shredded pieces, you set yourself up for success in achieving that perfect balance of crispiness and tenderness. With these tips, you’ll be well on your way to making hash browns that will rival any restaurant’s version.
Grating Methods: Use a Grater or Food Processor for Even Shreds
Grating your potatoes is one of the most important steps in making crispy hash browns. The texture and uniformity of the potato shreds directly impact the overall crispiness and consistency of your final dish. Whether you use a box grater or a food processor, achieving evenly grated potatoes will ensure that each shred cooks uniformly, contributing to that perfect crispy texture. Here’s a breakdown of the various grating methods and tips on how to achieve even shreds.
1. Using a Box Grater
A box grater is a classic and affordable tool for grating potatoes. It’s simple to use and gives you complete control over the texture of your shredded potatoes. However, the key to getting even shreds lies in how you handle the grater.
Steps to Grate Potatoes Using a Box Grater:
- Choose the Right Side of the Grater:
A box grater typically has several sides with different grating sizes, including fine, medium, and coarse. For hash browns, the coarse grating side is ideal because it creates long, thin shreds that will crisp up perfectly. This texture is perfect for hash browns since it provides a nice balance of crispy exterior and tender interior. - Grate Evenly:
Hold the potato firmly in one hand, with the cut side facing down, and slide it along the grater. Use a consistent motion and apply even pressure as you move the potato across the grater. Try to avoid pressing too hard, as this can create inconsistent shreds or cause the potato to break apart. - Use a Steady Hand:
As the potato begins to get smaller, make sure to maintain a steady grip to avoid cutting yourself. You can also use a holder or potato grip to safely hold the potato as you finish grating. - Pros:
The main advantage of using a box grater is that it gives you full control over the texture of the potato. You can adjust how coarse or fine the shreds are depending on your preference. Box graters also don’t require electricity, making them a great option for those who want a simple, hands-on approach. - Cons:
The biggest downside is that it can take more time and effort, especially if you’re making a large batch of hash browns. Additionally, using a box grater for multiple potatoes can be tiring on your hands and arms.
2. Using a Food Processor
A food processor is an excellent alternative to a box grater, especially if you’re looking to speed up the grating process and achieve consistent results with minimal effort. The food processor is particularly useful for making large batches of hash browns quickly, which is perfect if you’re hosting a big breakfast or brunch.
Steps to Grate Potatoes Using a Food Processor:
- Choose the Right Attachment:
Most food processors come with a shredding disk attachment designed specifically for grating vegetables. The shredding disk typically creates uniform, medium-sized shreds, which are perfect for hash browns. Make sure you’re using the correct attachment before starting. - Prepare the Potatoes:
Just like when using a box grater, you’ll want to rinse and peel (if preferred) your potatoes before grating them. Cut them into smaller chunks to fit the food processor’s feeding tube. - Feed the Potatoes Into the Food Processor:
Turn on the food processor, and feed the potatoes into the chute slowly, allowing the shredding disk to do the work. Be sure to feed the potatoes in a consistent manner to ensure that all the shreds are uniform. The machine will automatically shred the potatoes into evenly sized pieces. - Pulse for Control:
If your food processor has a pulse setting, use it to maintain control over the shredding process. Pulsing for short bursts will help prevent over-shredding and ensure that the potatoes are not turned into mush. It also allows you to check the consistency and stop when the shreds are just right. - Pros:
A food processor is much faster than a box grater and works well for large batches. The consistency of the shredded potatoes is often more uniform, ensuring even cooking and crispiness. It also saves your hands from the fatigue that comes with using a box grater. - Cons:
The downside of using a food processor is that it requires electricity and can be difficult to clean. Additionally, the size of the machine may be overkill if you’re only making a small batch of hash browns.
3. How to Achieve Even Shreds for Perfect Hash Browns
Regardless of the grating method you use, achieving even shreds is key to making perfect hash browns. Here are some extra tips to ensure your potatoes are grated to perfection:
Consistency Is Key:
- Whether using a box grater or a food processor, aim for consistent shred size. The more uniform the shreds, the better they’ll cook, ensuring each piece becomes equally crispy and golden brown.
Avoid Over-Grating:
- If you’re using a food processor or box grater, stop grating as soon as the potato is almost entirely shredded. Over-grating can cause the potatoes to become mushy or unevenly cooked. Leave the last small bit of potato intact to avoid grating too much.
Mix Shredded Potatoes for Uniform Cooking:
- After grating, mix the shredded potatoes together in a bowl to ensure they are evenly distributed before cooking. This will help maintain a consistent texture and ensure that every shred fries up to perfection.
4. Which Method Is Best for You?
Choosing between a box grater and a food processor comes down to personal preference and the quantity of potatoes you’re working with.
- Box Grater: Best if you’re looking for full control over the texture and don’t mind a bit of extra effort. Ideal for small batches or if you enjoy a more hands-on approach to cooking.
- Food Processor: Best if you’re making a larger quantity of hash browns or need to save time. It’s a more efficient option that consistently creates evenly grated potatoes with minimal effort.
Conclusion
Both grating methods—using a box grater or food processor—offer unique advantages. The box grater gives you the flexibility to adjust the texture of your potatoes, but the food processor is faster and provides more consistent results, especially for larger batches. Regardless of the method, the key to achieving the perfect crispy hash browns lies in creating even shreds of potatoes that will cook uniformly. Experiment with both methods to see which one works best for your needs, and enjoy your delicious, crispy hash browns!
Prepping Potatoes for Maximum Crispiness
Removing Excess Moisture: Squeezing Out Water with Paper Towels or a Clean Cloth
Removing excess moisture from grated potatoes is one of the most crucial steps in making perfectly crispy hash browns. Potatoes naturally contain a lot of water, and this moisture can interfere with the crisping process, leading to soggy or unevenly cooked hash browns. By properly removing the excess water, you can ensure that the hash browns cook up to a golden, crispy texture. Here’s a detailed look at why and how you should remove moisture from your shredded potatoes, along with tips on the best techniques for doing so.
1. Why Removing Moisture Is Important
Before we dive into the methods of removing moisture, let’s understand why this step is essential:
- Prevents Sogginess: Excess water can prevent the potatoes from crisping up properly in the pan or fryer. If there’s too much moisture in the mixture, it will create steam when cooking, making your hash browns soft and soggy instead of crispy.
- Promotes Even Crisping: When you remove moisture, the grated potatoes are more likely to fry evenly, creating a consistent crispy texture across all the pieces. This allows the potatoes to form a delicious, crunchy exterior while keeping the inside soft and tender.
- Prevents Clumping: Excess water can cause the shredded potatoes to clump together when they cook, which leads to uneven browning. Dry potatoes will separate better in the cooking process, giving you individual, crispy strands.
- Enhances Flavor: Removing moisture can also enhance the flavor. When potatoes have less water content, the heat from the pan or fryer is able to concentrate on the potato itself, allowing the natural flavors to shine without being diluted by excess water.
2. How to Remove Moisture from Shredded Potatoes
After grating the potatoes and rinsing them to remove excess starch, it’s time to focus on squeezing out the water. There are a couple of methods to do this effectively, each offering its benefits. Here’s how you can remove excess moisture for the best results:
Method 1: Using Paper Towels
One of the simplest and most effective methods for removing moisture from grated potatoes is using paper towels.
- Step 1: Spread Out the Shredded Potatoes
Place the freshly grated potatoes onto a clean surface, such as a cutting board or a large plate. Spread them out in an even layer so that the moisture can be absorbed more efficiently. - Step 2: Layer with Paper Towels
Take several paper towels and place them on top of the shredded potatoes. Press down lightly to help absorb the excess moisture. You can also fold the paper towels for extra absorbency. - Step 3: Press to Remove Water
Gently press down on the paper towels with your hands or a flat object, like a pan lid or spatula, to apply some pressure. This will help squeeze out the water from the grated potatoes without crushing them. - Step 4: Repeat if Necessary
If the paper towels become too wet, discard them and use fresh ones. Continue pressing until the shredded potatoes feel significantly drier. It may take a few rounds depending on how much moisture is in the potatoes. - Tip: Use thicker paper towels or several layers for better absorption.
Method 2: Using a Clean Cloth or Cheesecloth
Another excellent method for removing moisture is to use a clean cloth or cheesecloth. This technique is especially useful when you’re working with larger amounts of shredded potatoes.
- Step 1: Lay the Cloth Flat
Spread a clean dish towel, cheesecloth, or a thin cotton cloth onto a flat surface like a large cutting board or countertop. - Step 2: Add the Shredded Potatoes
Place the shredded potatoes in the center of the cloth, spreading them out evenly. Make sure to leave enough space around the edges so that you can fold the cloth over the potatoes. - Step 3: Fold and Twist the Cloth
Fold the edges of the cloth over the shredded potatoes, creating a pouch-like shape. Hold the edges of the cloth together, and gently twist the cloth to form a bundle, trapping the grated potatoes inside. - Step 4: Squeeze Out the Water
With the cloth tightly wrapped around the potatoes, squeeze and press it in a twisting motion. This will force the water out of the potatoes. Continue twisting and pressing until most of the moisture has been removed. - Tip: A cheesecloth is especially effective because it’s porous and can absorb a lot of moisture without tearing. If you don’t have cheesecloth, any thin cotton fabric will work.
3. Additional Tips for Effective Moisture Removal
Removing moisture is all about applying pressure while being gentle with the potatoes. Here are some additional tips to ensure you get the best results:
- Don’t Overdo It: While it’s important to remove excess moisture, you don’t want to completely dry out the potatoes. Some moisture is essential to keep the potatoes from becoming too dry during cooking, which can result in them burning before they crisp up.
- Let the Potatoes Sit: If you have time, after squeezing out the excess moisture, let the potatoes sit for a few minutes to release any residual water. This will ensure that the potatoes are as dry as possible before cooking.
- Use a Fine Mesh Sieve for Small Batches: If you’re working with a small amount of grated potatoes, you can also use a fine mesh sieve or strainer. Place the shredded potatoes in the sieve and press down with the back of a spoon to squeeze out the moisture.
- Avoid Using Too Much Pressure: While it’s important to remove the water, you don’t want to crush the potatoes into a paste. Gently press or twist the cloth/paper towel so that the potatoes retain their shape and texture.
- Use Potato Drying Tools: If you’re making hash browns often, you can invest in a potato ricer or salad spinner for easier moisture removal. A potato ricer will press out excess water while preserving the shape of the shredded potatoes, while a salad spinner can be a quick and efficient way to dry them.
4. The Benefits of Proper Moisture Removal
- Perfect Crispiness: By removing moisture, your hash browns will be able to crisp up properly, forming a golden-brown, crunchy exterior without sogginess.
- Even Cooking: With less moisture, the heat can better penetrate each potato shred, allowing them to cook evenly and achieve that ideal texture.
- Flavor Enhancement: Removing the water helps concentrate the natural flavor of the potatoes, leading to a richer taste without the dilution of excess water.
Conclusion
Removing excess moisture from your shredded potatoes is a simple but essential step for making crispy hash browns or any fried potato dish. Whether you use paper towels, a clean cloth, or a cheesecloth, the key is to apply gentle pressure to squeeze out as much water as possible without damaging the potatoes. The result is a dry, crispier texture that ensures each bite is golden and delicious. Follow these tips, and you’ll be well on your way to making the perfect crispy hash browns every time!
Seasoning Tips: Salt, Pepper, and Optional Add-ins Like Garlic Powder or Paprika
Seasoning plays a crucial role in elevating the flavor of your hash browns, ensuring they’re more than just crispy potatoes. While simple ingredients like salt and pepper provide the base flavor, adding optional seasonings like garlic powder, paprika, or onion powder can take your hash browns to the next level, giving them depth and complexity. Here’s a breakdown of the most common seasonings and how to use them for perfect hash browns.
1. The Essentials: Salt and Pepper
Salt:
- Why Salt Is Important: Salt is essential for enhancing the natural flavor of the potatoes. It draws out moisture from the potatoes (which aids in the crisping process) while also seasoning them evenly.
- How to Use It: When seasoning hash browns, sprinkle salt over the shredded potatoes after you’ve removed the excess moisture. You can either add the salt directly to the grated potatoes or sprinkle it during the cooking process. Start with a pinch or 1/2 teaspoon per medium potato, and adjust to taste as needed.
- Tip: For better seasoning penetration, allow the salt to sit on the potatoes for a minute or two before cooking, giving it time to draw out moisture and dissolve.
Pepper:
- Why Pepper Complements Salt: While salt brings out the inherent flavors, black pepper adds a bit of heat and sharpness. The combination of these two seasonings is classic because they balance each other perfectly.
- How to Use It: Freshly cracked black pepper works best to achieve a more aromatic flavor. Simply season the grated potatoes with ground black pepper before cooking, or sprinkle it on top once they’re crispy and ready to serve.
- Tip: If you want a spicier bite, consider using white pepper for a subtler pepper flavor, or cayenne pepper for extra heat.
2. Optional Add-ins for Extra Flavor
While salt and pepper are the foundation, additional spices can give your hash browns unique and bold flavors. Here are some popular options:
Garlic Powder:
- Why Garlic Powder Works: Garlic powder adds an earthy, savory depth that’s especially delicious when combined with crispy potatoes. It infuses the hash browns with a subtle, aromatic garlic flavor without the texture of fresh garlic, which might burn during cooking.
- How to Use It: Sprinkle 1/4 to 1/2 teaspoon of garlic powder per potato into the shredded mixture before cooking. If you love garlic, feel free to adjust to your taste.
- Tip: Garlic powder pairs wonderfully with other seasonings like onion powder or paprika, so don’t hesitate to mix them together for a more complex flavor profile.
Paprika:
- Why Paprika Is a Great Choice: Paprika adds a mild sweetness and smoky undertone, especially if you use smoked paprika. The vibrant color it imparts can make the hash browns even more visually appealing.
- How to Use It: Add 1/4 teaspoon of paprika for every potato, or adjust according to your preference. If you’re looking for a smoky flavor, opt for smoked paprika; for a sweeter taste, use sweet paprika.
- Tip: Paprika can also be used as a garnish once the hash browns are cooked, adding a pop of color and an additional layer of flavor.
Onion Powder:
- Why Onion Powder Works: Onion powder gives your hash browns a rich, savory base, similar to the flavor of caramelized onions, but without the hassle of chopping and frying fresh onions.
- How to Use It: Use about 1/4 teaspoon of onion powder for every medium potato. Add it along with the garlic powder for a flavorful combination, or mix it with paprika for a savory and slightly smoky effect.
- Tip: If you want an even more intense onion flavor, consider using onion flakes or dehydrated onion in combination with the powder.
Other Optional Add-ins:
- Chili Powder: Adds a smoky, mildly spicy kick to your hash browns. Perfect for those who like a bit of heat with their breakfast potatoes.
- Cayenne Pepper: If you enjoy spicy hash browns, a pinch of cayenne pepper will bring the heat, making them a perfect side dish for a savory, spicy meal.
- Fresh Herbs: Chopped parsley, chives, or thyme can be added to the grated potatoes for a fresh, aromatic flavor. These work well if you want your hash browns to have an herbaceous twist.
- Cheese Powder: For a cheesy flavor without the need for melted cheese, sprinkle some cheese powder (like from a packet of mac and cheese) into the grated potatoes before cooking. This adds an additional layer of richness and savory depth.
3. How to Season for Maximum Flavor
- Seasoning Before Cooking: Always season your grated potatoes before cooking to ensure the flavors penetrate every shred. This is particularly important if you’re making large batches, as it ensures an even distribution of spices.
- Don’t Overdo It: When it comes to seasoning, it’s important to keep a balance. While you want the hash browns to have flavor, you don’t want to overpower the natural taste of the potatoes. Start with small amounts of seasoning, taste, and adjust as necessary.
- Taste as You Go: Since seasonings can vary in strength, always taste a small portion of the grated potatoes before cooking. This allows you to adjust seasoning levels to your preference before it’s too late.
- Layer the Seasoning: If you’re frying or baking the hash browns in stages, consider adding some seasoning during the cooking process as well. For example, add a bit of extra salt and pepper just before serving or even a sprinkle of garlic powder to enhance the aroma when the potatoes are nearly done.
4. Common Mistakes to Avoid When Seasoning Hash Browns
- Not Removing Enough Moisture: If you don’t remove enough moisture before seasoning, the seasoning won’t stick properly to the potatoes. This can result in uneven flavor distribution. Be sure to squeeze out excess moisture from the shredded potatoes before seasoning.
- Seasoning Too Late: Waiting until the hash browns are almost cooked to season them can result in under-seasoned potatoes. Season the potatoes early in the process so that the flavors can meld together as they cook.
- Over-salting: Potatoes can absorb a lot of salt, so be cautious about adding too much at once. If in doubt, start with less salt and add more later during the cooking process.
Conclusion
Seasoning your hash browns properly is key to transforming them from simple fried potatoes into a flavorful, satisfying dish. Salt and pepper are the basics, but by adding optional ingredients like garlic powder, paprika, and onion powder, you can customize your hash browns to suit your taste. Whether you prefer a classic approach or want to get creative with extra spices and herbs, adjusting your seasonings is the perfect way to elevate the flavor profile of your crispy hash browns.
Why Moisture Control Matters: Preventing Sogginess and Achieving Golden Brown Perfection
Moisture control is one of the most critical factors in achieving perfectly crispy hash browns. Without proper moisture management, even the best seasoning and the finest potatoes will result in soggy, greasy hash browns that lack the desired crispness. Here’s a deeper dive into why moisture control matters and how to achieve that golden-brown perfection you crave.
1. The Science Behind Soggy vs. Crispy Hash Browns
When potatoes are grated and left with excess moisture, the water released during cooking can prevent them from crisping up. The moisture, trapped within the potato shreds, turns into steam when heated, which can cause the potatoes to become soft and soggy instead of crispy. To achieve that crispy, golden-brown texture, the moisture must be reduced to allow the exterior of each shred to crisp up properly.
The key to crispiness is to remove as much moisture as possible before cooking the potatoes, allowing the natural sugars and starches in the potatoes to caramelize and form a golden crust. If there’s too much moisture, the potatoes will steam instead of fry, resulting in a limp, soggy texture.
2. Techniques for Removing Excess Moisture
1. Using Paper Towels or a Clean Cloth:
One of the easiest and most effective ways to remove moisture from grated potatoes is by using paper towels or a clean cloth. After grating the potatoes, spread them out on a flat surface (such as a cutting board or a plate) and press down gently with a paper towel or cloth. The material will absorb the water, leaving the potatoes dry and ready for frying.
- Tip: Use multiple layers of paper towels or cloth to absorb as much moisture as possible. If necessary, repeat the process until the potatoes are visibly drier.
2. Salting the Grated Potatoes:
Another technique for moisture control is to sprinkle salt over the grated potatoes and allow them to sit for about 10-15 minutes. Salt draws moisture out of the potatoes, which can then be squeezed or blotted away. This not only reduces moisture but also enhances the flavor of the hash browns.
- Tip: Once you’ve salted the potatoes and let them rest, be sure to squeeze out the water. Afterward, rinse the potatoes briefly to remove excess salt, then pat dry before cooking.
3. Using a Squeeze Method:
To further control moisture, you can squeeze the grated potatoes by placing them in a clean kitchen towel or cheesecloth. Gather the cloth around the potatoes and twist it tightly, then apply pressure to extract excess water. This is a particularly efficient method when making large batches of hash browns, as it ensures an even moisture content across all the potatoes.
3. The Importance of Drying Before Cooking
Once you’ve removed excess moisture, it’s important to ensure that the potatoes are as dry as possible before you begin cooking. While a bit of moisture is fine for some dishes, crispy hash browns require dry potato shreds to fry evenly.
- Why Drying Matters: Any remaining moisture will steams the potatoes during frying, preventing them from developing that crisp, crunchy exterior. The drier the potatoes, the better they will fry up in the pan or on a griddle, forming that beautiful golden-brown crust we all love.
- Tip: After squeezing or blotting out the moisture, let the potatoes rest for a few minutes to air-dry any lingering dampness.
4. Cooking Strategies for Moisture Control
Even if you’ve done a great job at removing excess moisture from the potatoes, the way you cook them also plays a huge role in achieving crispy hash browns.
1. Use a Hot Pan:
The hotter your pan, the quicker the moisture in the potatoes will evaporate, resulting in a crispier texture. Make sure your pan or griddle is preheated before adding the potatoes. This will immediately begin the frying process, sealing in the crispy texture while releasing moisture.
- Tip: Avoid overcrowding the pan, as this traps moisture and leads to steaming rather than crisping. If necessary, cook the hash browns in batches.
2. Don’t Overcrowd the Potatoes:
Crowding the pan can trap steam and moisture around the potatoes, preventing them from crisping up properly. For the crispiest results, spread the grated potatoes in a thin, even layer across the pan, giving them plenty of room to fry and develop that golden-brown exterior.
- Tip: Leave some space between the hash browns in the pan so the moisture can escape freely, allowing the hash browns to cook evenly and crisply.
5. Frying Techniques to Maximize Crispiness
- Frying in Oil: Use enough oil to fully coat the pan, but avoid drowning the potatoes. Too much oil can make the hash browns greasy, while not enough can prevent them from becoming crisp.
- Flip Gently: When flipping the hash browns, be gentle to avoid breaking them apart. Flipping them too early or too aggressively can result in uneven cooking and sogginess.
6. The Benefits of Moisture Control for Crispy Hash Browns
By carefully removing moisture and controlling the cooking environment, you unlock the potential for perfectly crispy, golden hash browns. Not only will they have a satisfying crunch, but they’ll also cook evenly without burning. The flavor is enhanced, too, as moisture isn’t diluting the natural potato taste or the seasonings.
In summary, moisture control is an essential step in ensuring your hash browns turn out crispy, golden, and delicious. Through techniques like squeezing out excess water, salting, and cooking with the right methods, you can prevent sogginess and achieve that perfect crispy texture that’s both crunchy on the outside and tender on the inside.
The Perfect Cooking Technique
Oil or Butter? The Pros and Cons of Each for Crispy Edges
When it comes to achieving those perfect, crispy edges on your hash browns, one of the key decisions you’ll make is whether to use oil or butter. Both oils and butter offer different results, and the choice between the two can significantly impact the texture, flavor, and overall outcome of your hash browns. Let’s dive into the pros and cons of each so you can decide which is best for your crispy, golden-brown hash browns.
1. The Case for Oil: High Heat and Crispiness
Using oil for cooking hash browns is one of the most popular methods because of its ability to crisp up the potatoes quickly and evenly. Oils have higher smoking points than butter, making them better suited for frying at higher temperatures without burning.
Advantages of Using Oil:
- Higher Smoke Point: Many cooking oils (such as canola oil, vegetable oil, avocado oil, and peanut oil) have high smoke points, typically between 400°F and 450°F, which makes them ideal for frying hash browns at higher temperatures. This allows the potatoes to cook quickly, creating that crispy texture without the oil breaking down or smoking.
- Crispier Texture: Oil forms a thin, even layer around the potato shreds, helping to crisp them up more evenly. The fat in the oil fries the potatoes, creating a crunchy exterior while sealing in the moisture inside, resulting in a tender inside and crispy edges.
- Neutral Flavor: Most oils, especially vegetable oil or canola oil, have a neutral flavor, which means they won’t overpower the natural taste of the potatoes or the seasonings. This allows the focus to remain on the crispy texture and the flavor of the potatoes themselves.
- Consistent Cooking: Oil coats the pan more evenly, providing a more consistent surface for frying the hash browns. This helps prevent sticking and ensures that the hash browns cook uniformly, avoiding spots that are undercooked or soggy.
Disadvantages of Using Oil:
- Less Flavor: While oil is great for crispiness, it doesn’t add the same rich, buttery flavor that butter can provide. This might be a downside if you’re looking for a more indulgent or decadent flavor profile.
- Potential for Greasiness: If you use too much oil or don’t drain the hash browns properly, they can become greasy. The key is to use the right amount of oil and to drain the hash browns on paper towels afterward to absorb any excess.
- Oils with Strong Flavors: Some oils, like olive oil or coconut oil, can impart a strong flavor that may not be ideal for hash browns, depending on the other ingredients you’re using.
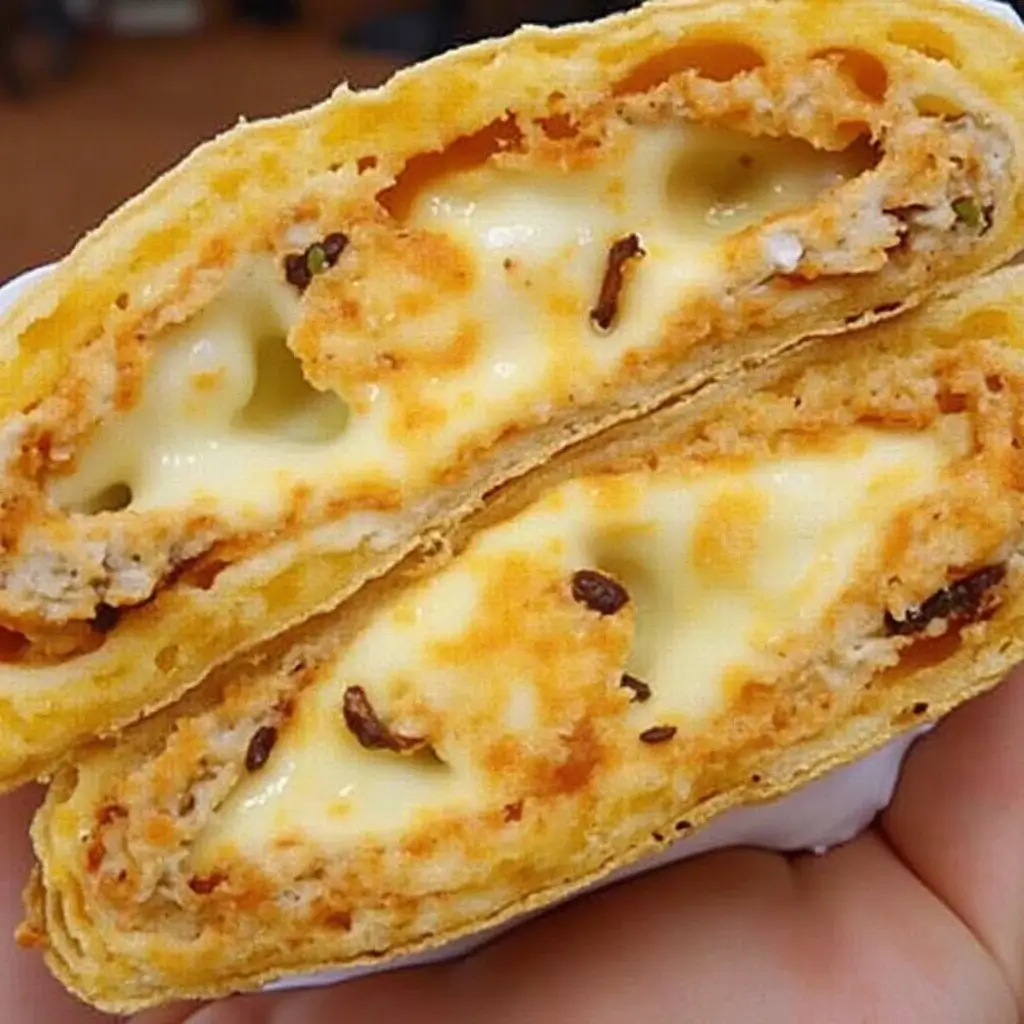
2. The Case for Butter: Rich Flavor and Golden Crispness
Butter is another option that’s often used to cook hash browns, and while it doesn’t have the high smoke point of oil, it brings its own set of advantages to the table, especially in terms of flavor. Cooking with butter is a great way to add a rich, savory note to your hash browns.
Advantages of Using Butter:
- Rich, Savory Flavor: Butter has a naturally rich, creamy flavor that enhances the taste of hash browns, giving them a slightly indulgent quality. It imparts a golden, nutty flavor that’s perfect for those who enjoy the richness of butter in their cooking.
- Golden Color: As butter melts, it browns and forms a golden color on the hash browns, creating a deliciously crispy, visually appealing crust. The natural milk solids in butter help achieve that beautiful golden-brown effect, which is a hallmark of perfect hash browns.
- Ideal for Finishing: Butter can also be used for the final stages of cooking, adding flavor and crispness just before serving. You can cook the hash browns primarily with oil, then add butter in the last few minutes to help achieve a crispy, golden exterior.
Disadvantages of Using Butter:
- Lower Smoke Point: Butter has a lower smoke point, around 350°F, which means it can burn easily if the heat is too high. This makes it less ideal for frying at higher temperatures. If butter burns, it can become bitter, ruining the taste of your hash browns.
- Less Crispiness: While butter adds a lovely flavor, it doesn’t have the same crisping power as oil. Hash browns made with butter can sometimes turn out a bit softer or greasier on the outside if the heat is not controlled properly.
- Burnt Butter Taste: If you cook with butter at too high a heat, it can burn quickly, creating a bitter flavor. This requires more careful attention and temperature control to avoid ruining the taste.
3. Combining Oil and Butter: The Best of Both Worlds
If you’re torn between oil and butter, don’t worry—there’s a solution that combines the best of both worlds! Many cooks use a combination of oil and butter to get the advantages of both: the crispy texture from the oil and the rich, buttery flavor from butter. This method allows you to:
- Boost Flavor: The butter adds depth of flavor without compromising too much on the crispiness of the hash browns.
- Achieve Optimal Crispiness: Oil’s higher smoke point helps fry the hash browns quickly and evenly, while the butter provides that rich finish for a perfect golden-brown crust.
How to Combine Oil and Butter:
- Start by heating oil (such as vegetable or canola oil) in the pan over medium-high heat.
- Once the oil is hot and shimmering, add a tablespoon or two of butter to the pan.
- Let the butter melt into the oil, and then add the grated potatoes.
- The oil helps keep the butter from burning, and the butter will add that signature golden color and flavor as the hash browns cook.
4. Final Thoughts: Which is Better for Crispy Edges?
The decision between oil and butter ultimately depends on what you’re looking for in your hash browns:
- Choose Oil if you want crispier, more evenly fried hash browns with a neutral flavor that won’t overpower the potatoes.
- Choose Butter if you want richer flavor and golden, crispy edges that come with a buttery taste.
- Combine Both if you’re aiming for maximum flavor and crispy edges without sacrificing texture.
By understanding the unique properties of both oil and butter, you can tailor your cooking to achieve the perfect balance of crispy edges and savory flavor, ensuring your hash browns turn out just right every time.
Cooking Process: Step-by-Step Guide to Pan-Frying Hash Browns Evenly
Cooking hash browns to crispy perfection requires the right technique, and pan-frying is one of the best methods to achieve that satisfying crunch on the outside while keeping the inside soft and tender. To ensure your hash browns turn out golden and evenly cooked, follow this step-by-step guide to mastering the art of pan-frying hash browns.
Step 1: Prepare Your Pan
Choosing the right pan is crucial for even cooking. A non-stick skillet or cast iron pan works best for frying hash browns, as both materials ensure that the potatoes don’t stick while also promoting an even distribution of heat. Here’s how to prepare the pan:
- Heat the Pan: Place your chosen skillet over medium to medium-high heat. Allow it to warm up for a couple of minutes.
- Add Oil or Butter: Once the pan is hot, add a couple of tablespoons of oil (such as vegetable oil, canola oil, or avocado oil) or a combination of oil and butter for extra flavor. Let the oil heat up until it starts shimmering but isn’t smoking. If you’re using butter, allow it to melt and bubble, but be careful not to burn it.
Step 2: Add the Grated Potatoes
Once your pan is prepped and the oil is heated, it’s time to add your shredded potatoes. Here’s what you need to do:
- Evenly Spread the Potatoes: Take your grated potatoes and gently spread them in an even layer in the hot pan. Do not overcrowd the pan—this will allow the hash browns to cook more evenly. If you’re making a larger batch, you may need to cook them in two or more batches to prevent overcrowding.
- Press Down Lightly: Once the potatoes are in the pan, press them down gently with a spatula to ensure even contact with the hot surface. This will help them cook uniformly and develop a crispy crust. However, avoid pressing too hard, as this could make the hash browns too thin or cause them to stick.
Step 3: Cook the First Side
Now that your potatoes are in the pan, the key is to give them time to crisp up on one side without moving them around too much.
- Let It Sizzle: Allow the potatoes to cook on the first side for about 4-5 minutes without disturbing them. The heat should be set to medium-high, and you should hear a gentle sizzle as the potatoes cook. During this time, the potatoes will begin to brown and become crispy.
- Check for Crispiness: After 4-5 minutes, check the edges of the hash browns. If they have a golden-brown color and you can easily lift them from the pan with your spatula, it’s time to flip them over. Be sure to lift them gently to avoid breaking them apart.
Step 4: Flip and Cook the Other Side
Flipping the hash browns can be tricky, especially if they’re large or delicate. Here’s how to do it with ease:
- Flip Carefully: Use a wide spatula to gently lift one side of the hash browns. You can also flip the entire hash brown by carefully sliding the spatula under it and flipping it in one smooth motion.
- Cook the Other Side: Once flipped, allow the hash browns to cook for another 4-5 minutes on the other side. At this point, you can lower the heat slightly if you notice that the hash browns are browning too quickly. You want them to cook evenly and not burn on one side while leaving the other undercooked.
- Check for Even Crispness: If you prefer extra crispy hash browns, press them lightly with the spatula after flipping to encourage crispiness. Make sure both sides are golden brown and crispy before removing them from the pan.
Step 5: Drain and Serve
Once both sides of the hash browns are perfectly crisp and golden, it’s time to remove them from the pan:
- Drain Excess Oil: Place the cooked hash browns on a plate lined with paper towels to absorb any excess oil. This step helps prevent the hash browns from becoming greasy while keeping their crispy texture intact.
- Serve Immediately: Serve the hash browns while they’re still hot and crispy! They’re perfect on their own, or you can pair them with eggs, bacon, or any other breakfast favorites.
Tips for Perfect Pan-Fried Hash Browns
- Avoid Overcrowding the Pan: Overcrowding the pan prevents the hash browns from crisping properly and can lead to uneven cooking. If needed, cook them in batches to maintain the ideal cooking environment.
- Use Medium-High Heat: Cooking on medium-high heat is key to achieving that perfect golden brown color. Lower the heat if you notice that the hash browns are cooking too quickly or burning before they are fully crisped.
- Use the Right Amount of Oil: The oil should be enough to coat the bottom of the pan without drowning the potatoes. You don’t need a deep fry situation, but you do need enough oil to fry the hash browns evenly on all sides.
- Don’t Stir Too Much: Stirring the hash browns while they cook will break them apart and disrupt the even cooking process. Instead, let them sit undisturbed for a few minutes on each side to achieve that crispy crust.
By following these steps and tips, you’ll be able to pan-fry hash browns that are crispy on the outside and tender on the inside, just like the ones you love at your favorite diner or breakfast spot.