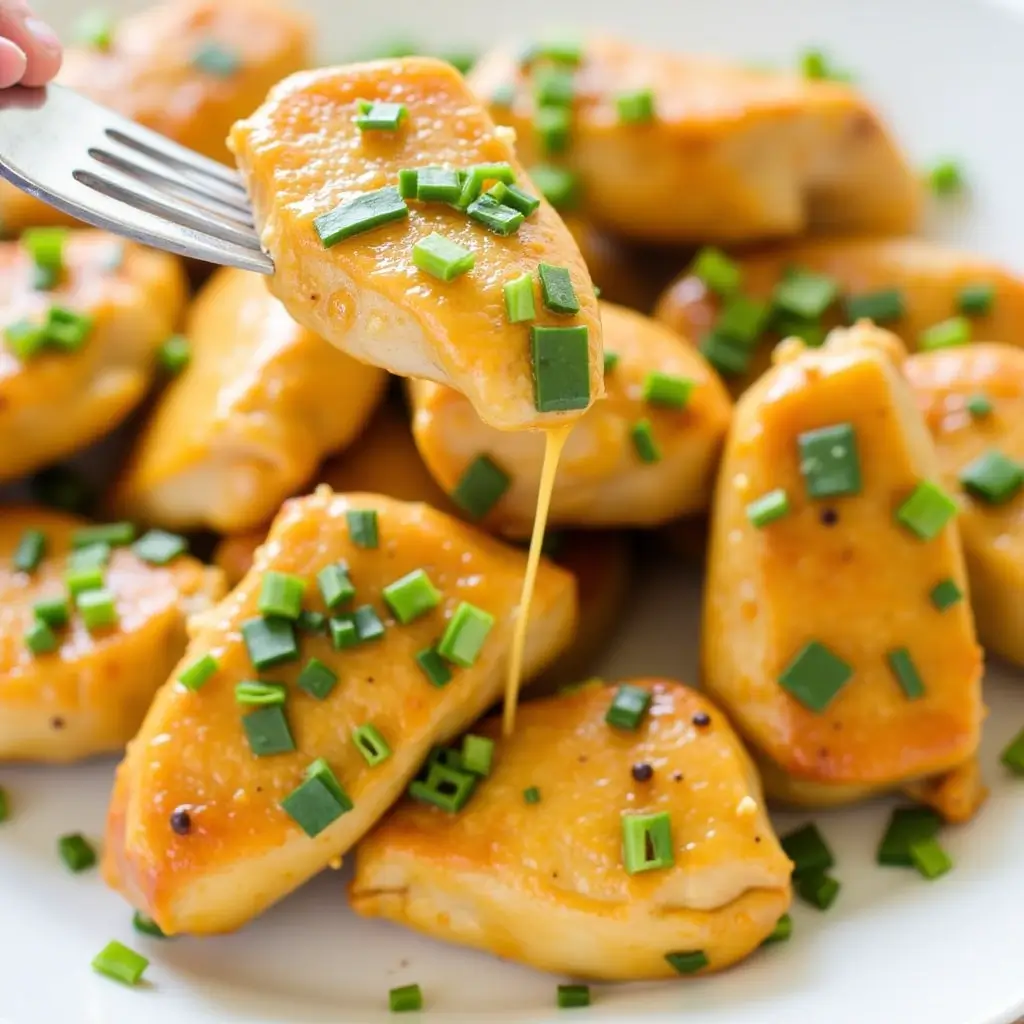
If you’re looking for a marinade that transforms ordinary chicken into a mouthwatering masterpiece, look no further than this honey mustard chicken marinade. With the perfect blend of sweet, tangy, and savory flavors, it’s guaranteed to become your go-to recipe for juicy and flavorful chicken. Whether you’re grilling, baking, or pan-frying, this marinade adds a delightful caramelized glaze and deep flavor that elevates every bite.
Not only is this recipe quick and easy to prepare, but it’s also versatile enough to complement a variety of cooking methods and side dishes. Made with simple ingredients like honey, Dijon mustard, and a touch of garlic, this marinade strikes the perfect balance between indulgent taste and wholesome ingredients. Prepare to impress your family and friends with a dish that’s as irresistible as it is effortless!
Why Choose a Honey Mustard Marinade?
Sweet and Tangy Flavor Profile
The magic of a honey mustard marinade lies in its perfectly balanced sweet and tangy flavor profile. This harmony of flavors is achieved by combining the natural sweetness of honey with the sharp, zesty notes of mustard, creating a marinade that enhances the taste of chicken without overpowering it.
The sweetness from honey not only adds depth to the flavor but also helps caramelize the chicken as it cooks, giving it a golden, slightly crisp exterior. This natural sweetener pairs beautifully with the tanginess of mustard, which cuts through the richness and adds a bright, bold contrast. Together, they create a dynamic taste that excites the palate with every bite.
For a more personalized touch, you can adjust the levels of sweetness and tanginess to suit your preferences. Prefer a sweeter marinade? Add an extra tablespoon of honey. Crave a stronger tang? Opt for a sharper mustard like Dijon or wholegrain mustard. The versatility of this flavor combination makes it ideal for pairing with a variety of side dishes, from creamy mashed potatoes to fresh green salads.
This balance of sweet and tangy also ensures that the chicken remains moist and flavorful throughout the cooking process, making it the perfect marinade for everything from casual weeknight meals to backyard barbecues. Once you experience the rich complexity of this flavor profile, you’ll never want to settle for plain chicken again!
The Perfect Balance of Honey and Mustard for Bold, Delicious Flavors
The secret to a truly unforgettable honey mustard marinade lies in achieving the perfect balance between its two star ingredients: honey and mustard. These complementary flavors work together to create a bold and delicious profile that enhances the natural taste of chicken, whether it’s grilled, baked, or pan-fried.
Honey: Sweetness with a Caramelized Touch
Honey is the key to adding sweetness and depth to this marinade. Its natural sugars not only infuse the chicken with a hint of sweetness but also help it develop a caramelized glaze during cooking. As the chicken bakes or grills, the honey reacts with heat to create a rich, golden crust that’s as visually appealing as it is delicious. The sweetness also serves to balance the sharpness of mustard, making the flavors smooth and well-rounded.
Mustard: Zesty Tang and Depth
Mustard, on the other hand, brings tanginess and a slight pungency to the marinade. Dijon mustard is a popular choice for its creamy texture and balanced sharpness, while wholegrain mustard adds texture and a robust, earthy flavor. Mustard’s acidity helps to tenderize the chicken, ensuring it remains moist and succulent while also adding a depth of flavor that complements the sweetness of honey.
Finding the Ideal Ratio
Striking the perfect balance between honey and mustard is key to achieving a marinade that’s both bold and harmonious. A good starting point is a 2:1 ratio of honey to mustard, allowing the sweetness to shine while mustard provides a tangy backbone. However, you can easily adjust the ratio based on your taste preferences. If you prefer a bolder, tangier flavor, add more mustard. For a sweeter, milder profile, increase the honey.
Enhancing the Balance with Supporting Ingredients
To further enhance the harmony between honey and mustard, supporting ingredients like apple cider vinegar, garlic, and olive oil can be added. The vinegar introduces an additional layer of acidity that brightens the flavors, while garlic adds a subtle savory undertone. Olive oil not only helps emulsify the marinade but also rounds out the flavors, ensuring the chicken is evenly coated and absorbs the marinade perfectly.
Versatility Across Dishes
This perfectly balanced honey mustard marinade isn’t just for chicken; it’s versatile enough to complement pork chops, salmon, or even roasted vegetables. Whether you’re preparing a family dinner or hosting a barbecue, this flavor combination will leave your guests asking for the recipe.
With its bold yet balanced flavor profile, this honey mustard marinade transforms ordinary chicken into an irresistible, restaurant-quality dish every time.
Works for Grilling, Baking, or Pan-Searing Chicken
One of the greatest advantages of this honey mustard marinade is its versatility—it works beautifully across multiple cooking methods, including grilling, baking, and pan-searing. Regardless of how you choose to prepare your chicken, this marinade guarantees bold flavors, tender meat, and a deliciously caramelized finish. Here’s how it enhances each cooking method:
Grilling: Smoky and Charred Perfection
Grilling chicken marinated in honey mustard is a game-changer. The natural sugars in honey caramelize beautifully over high heat, creating a slight char and a smoky flavor that elevates the dish. The mustard tang adds a zesty contrast to the sweetness, making every bite flavorful and satisfying.
Tips for Grilling:
- Preheat the grill to medium-high heat to avoid burning the honey.
- Brush extra marinade onto the chicken while grilling for added flavor and moisture.
- Cook the chicken for 6–7 minutes per side (for boneless cuts) or until the internal temperature reaches 165°F (74°C).
- Use indirect heat for thicker cuts like bone-in chicken to ensure even cooking without over-charring.
Baking: Even Cooking with a Tender Finish
Baking is a foolproof method for cooking honey mustard-marinated chicken, as it allows the flavors to penetrate deeply while the oven’s even heat ensures consistent cooking. The marinade forms a glossy, golden crust on the chicken, locking in moisture for a tender and juicy result.
Tips for Baking:
- Preheat the oven to 375°F (190°C).
- Line the baking dish with parchment paper or lightly oil it to prevent sticking.
- For boneless chicken breasts or thighs, bake for 20–25 minutes. For bone-in pieces, bake for 35–45 minutes.
- For extra flavor, reserve some marinade to drizzle over the chicken during the last 5 minutes of baking (be sure it hasn’t touched raw chicken).
Pan-Searing: Quick and Flavorful Results
Pan-searing is the ideal method for those looking for a quick, weeknight dinner option. It creates a beautifully caramelized crust on the chicken, thanks to the honey in the marinade, while keeping the interior moist and flavorful. The sizzling heat locks in the marinade’s sweet and tangy notes, making every bite a delight.
Tips for Pan-Searing:
- Use a heavy-bottomed skillet (like cast iron) for even heat distribution.
- Heat the skillet over medium-high heat and add a small amount of oil to prevent sticking.
- Sear the chicken for 4–5 minutes per side, depending on thickness. Reduce heat to low, cover, and cook for an additional 2–3 minutes to ensure doneness.
- Deglaze the pan with a splash of chicken stock or white wine for a quick pan sauce to serve with the chicken.
Choosing the Right Method for Your Meal
- Grilling is perfect for summer barbecues or when you want a smoky, charred flavor.
- Baking is ideal for hands-off cooking and when you need to prepare a larger batch of chicken.
- Pan-searing works best for quick, individual servings and when you’re craving a caramelized crust.
By tailoring your cooking method to your preferences or occasion, this honey mustard marinade can transform your chicken into a standout dish, no matter how it’s prepared!
Health Benefits of Honey and Mustard
Beyond their incredible flavor, honey and mustard bring a host of health benefits to the table. These two simple ingredients not only enhance the taste of your chicken but also offer nutritional value and promote overall well-being. Let’s explore the unique health properties of each:
Honey: A Natural Sweetener with Healing Properties
Honey has been used for centuries as both a sweetener and a natural remedy due to its impressive health benefits. When used in moderation, it can be a healthier alternative to refined sugar. Here’s what honey brings to the marinade:
- Rich in Antioxidants:
Honey contains natural antioxidants, such as flavonoids and phenolic acids, which help combat free radicals in the body. These antioxidants can reduce inflammation and protect cells from oxidative damage. - Natural Energy Booster:
The natural sugars in honey, like glucose and fructose, provide a quick and sustained energy boost, making it an excellent choice for those leading active lifestyles. - Soothes Digestion:
Honey is known to support digestive health. It can help soothe the stomach lining and promote healthy gut bacteria. - Antibacterial and Antimicrobial Properties:
Honey has natural antibacterial properties, which may help the body fight infections. Certain types, like Manuka honey, are especially effective in promoting healing.
Mustard: A Nutritional Powerhouse in a Tiny Seed
Mustard, made from mustard seeds, is a surprisingly nutrient-dense ingredient with numerous health benefits. Its tangy, sharp flavor also adds a punch to the marinade. Here’s why mustard is a great addition:
- Low in Calories and Fat:
Mustard is a naturally low-calorie condiment, making it a great choice for those looking to add flavor without extra calories or unhealthy fats. - Rich in Minerals:
Mustard seeds contain essential minerals like selenium, magnesium, and phosphorus, which support bone health, thyroid function, and overall metabolism. - Source of Phytochemicals:
Mustard seeds are rich in glucosinolates, natural compounds that may have cancer-fighting properties. These compounds are known to support the body’s detoxification process. - Digestive Health Support:
Mustard can stimulate digestive enzymes, aiding in digestion and improving nutrient absorption. - Anti-Inflammatory Benefits:
The selenium and magnesium in mustard seeds may help reduce inflammation in the body, supporting joint and cardiovascular health.
When Combined: A Powerful Duo
When honey and mustard come together in a marinade, they create more than just a delicious flavor—they form a combination that supports both taste and health. The honey’s natural sweetness balances mustard’s tangy sharpness, making it easier to enjoy the nutritional benefits of mustard without overpowering the palate.
Additionally, the nutrients and antioxidants from honey and mustard can complement the protein-rich chicken, creating a meal that’s satisfying and nourishing. This balance of flavor and health makes honey mustard chicken an excellent option for those seeking a wholesome yet indulgent dish.
By incorporating these ingredients into your diet, you’re not just treating yourself to delicious meals—you’re also reaping the many health benefits they offer. This makes the honey mustard marinade a win-win for your taste buds and your well-being!
Natural Sweetness and Healthful Mustard Properties
The combination of honey and mustard in a marinade not only delivers an irresistible flavor but also offers numerous nutritional benefits. This sweet-and-tangy pairing strikes the perfect balance between indulgence and health, making your honey mustard chicken a guilt-free choice. Here’s a closer look at how these two ingredients contribute to both taste and well-being:
Natural Sweetness from Honey: A Healthy Sugar Alternative
Honey serves as the natural sweetener in this marinade, offering a depth of flavor that refined sugars simply can’t match. Its richness enhances the marinade while delivering a range of health benefits:
- Better Than Refined Sugar:
Unlike processed sugars, honey contains trace amounts of vitamins, minerals, and antioxidants that make it a more wholesome choice. It provides a touch of sweetness without the empty calories. - Natural Energy Source:
Honey is packed with natural sugars like fructose and glucose, which are quickly absorbed by the body. This makes it an excellent energy booster, especially for active individuals or as part of a balanced meal. - Aids in Caramelization:
The natural sugars in honey caramelize beautifully during cooking, creating a golden, slightly crisp exterior on the chicken. This adds texture and enhances the overall flavor of your dish. - Supports Digestive Health:
Honey has prebiotic properties, promoting the growth of healthy gut bacteria. It can also help soothe digestive discomfort, making it a versatile and health-friendly addition to your marinade.
Healthful Properties of Mustard: A Nutritional Powerhouse
Mustard, derived from the tiny mustard seed, is much more than a zesty condiment. It’s packed with essential nutrients and health benefits that complement the natural sweetness of honey:
- Rich in Minerals:
Mustard seeds are a source of important minerals like magnesium, selenium, and phosphorus. These minerals support everything from bone health to thyroid function and overall metabolism. - Low-Calorie and Low-Fat:
Mustard is naturally low in calories and fat, making it an excellent ingredient for adding bold flavor without unwanted calories. It’s a perfect choice for health-conscious eaters. - Aids Digestion:
Mustard has been known to stimulate digestive enzymes, aiding in the breakdown of food and promoting nutrient absorption. Its slight pungency can also help stimulate appetite. - Anti-Inflammatory Benefits:
Mustard seeds contain selenium and magnesium, which have natural anti-inflammatory properties. This can be beneficial for overall health, particularly for those with inflammatory conditions. - Detoxifying and Cancer-Fighting Compounds:
Mustard seeds contain glucosinolates, natural compounds that may help detoxify the body and reduce the risk of certain cancers. These compounds also contribute to the distinct sharp flavor of mustard.
A Harmonious Blend of Sweetness and Health
When combined, honey and mustard create a harmonious blend of flavors and health benefits. The honey’s sweetness balances the tangy sharpness of mustard, ensuring the marinade is well-rounded and delicious. This balance also makes it easier to enjoy the nutritional benefits of mustard without overwhelming your palate.
For those who prefer a sweeter marinade, the honey can be adjusted to enhance the natural sugars, while mustard can be emphasized for those seeking a sharper tang and a bolder taste. This adaptability ensures the marinade can be tailored to your flavor preferences while still delivering its healthful properties.
By incorporating this natural sweetness and the nutrient-rich properties of mustard, the honey mustard chicken marinade is both indulgent and nourishing—a perfect addition to any meal plan.
Key Ingredients for the Perfect Honey Mustard Marinade
Honey: The Natural Sweetener
Honey is much more than just a sweetener in this honey mustard marinade—it’s a versatile, healthful ingredient that brings more to the table than you might think. Used for centuries for both culinary and medicinal purposes, honey’s natural sugars provide sweetness without the harmful effects of refined sugars. Let’s dive into the numerous benefits and features of honey as a natural sweetener.
Natural vs. Refined Sugar
Unlike refined sugar, which is processed and stripped of nutrients, honey is a whole, unrefined food. It contains trace amounts of essential vitamins and minerals, including B vitamins, vitamin C, and antioxidants, making it a healthier choice for sweetening dishes. The presence of these beneficial compounds means honey is not just about adding sweetness—it also nourishes the body in subtle but important ways.
Refined sugar, on the other hand, contributes to blood sugar spikes and offers little to no nutritional value. Honey, when used in moderation, provides a slow and steady source of energy, thanks to its natural sugar composition. This makes it a more balanced option for those looking to manage their blood sugar levels while still satisfying their sweet tooth.
Health Benefits of Honey
While honey’s natural sweetness enhances the flavor of the marinade, it also brings a host of health benefits, which make it stand out as a health-conscious alternative to processed sugar:
- Rich in Antioxidants:
Honey is loaded with antioxidants like flavonoids and phenolic acids, which help protect the body from oxidative stress caused by free radicals. These antioxidants contribute to overall health by reducing inflammation, supporting heart health, and promoting a healthy immune system. - Antibacterial and Antimicrobial Properties:
Honey, particularly varieties like Manuka honey, has natural antibacterial and antimicrobial properties. It has been shown to help fight infections, support wound healing, and boost the immune system. Adding honey to your meals can contribute to overall health and wellness, not just flavor. - Digestive Health:
Honey has been used as a natural remedy for digestive issues for centuries. It has prebiotic properties that help stimulate the growth of beneficial gut bacteria. A healthy gut microbiome is essential for optimal digestion, immune function, and overall health. Honey also helps soothe the digestive system and alleviate symptoms of indigestion. - Natural Energy Boost:
Honey contains a combination of glucose and fructose, which provide a quick and steady source of energy. Unlike refined sugar, which gives you a rapid spike in energy followed by a crash, honey’s sugars are absorbed more slowly, providing sustained energy throughout the day. This makes it a great addition to meals for anyone looking for an energy boost, especially before or after a workout. - Helps with Cough and Sore Throat Relief:
Honey has long been a go-to remedy for sore throats and coughs. Its soothing properties coat the throat and help reduce irritation, making it an effective and natural remedy during cold and flu season.
Honey’s Role in the Marinade
In the honey mustard chicken marinade, honey plays a vital role beyond just sweetening the dish. The natural sugars in honey caramelize during cooking, creating a glossy, golden-brown glaze on the chicken. This caramelization adds a rich, complex flavor while keeping the meat juicy and tender. As the honey interacts with the heat, it creates a slightly crispy exterior that enhances the texture of the chicken, providing an irresistible combination of flavors and textures in each bite.
Additionally, honey’s natural viscosity helps the marinade adhere to the chicken, ensuring that each piece is coated evenly with the perfect balance of sweetness and tang.
A Versatile Sweetener for Many Dishes
Honey’s versatility extends beyond this honey mustard chicken marinade. It can be used in countless recipes, from salad dressings to baked goods, smoothies, teas, and marinades for other meats. It’s a great natural substitute for sugar in recipes that require a subtle sweetness, making it a staple in healthy cooking.
Incorporating honey into your meals not only enhances flavor but also supports your health with its many beneficial properties. Whether you’re drizzling it over your chicken or using it to sweeten a dressing, honey brings a natural, wholesome sweetness to the table.
Use Raw or Organic Honey for a Richer Flavor
When it comes to choosing the best honey for your honey mustard chicken marinade, raw or organic honey stands out as the superior choice. These varieties of honey offer a richer, more complex flavor profile compared to the processed, store-bought alternatives. Not only do they contribute to a more authentic taste, but they also come with additional health benefits. Let’s explore why opting for raw or organic honey can elevate your cooking experience and the quality of your dish.
What is Raw Honey?
Raw honey is honey that has not been heated or processed in any way. It’s collected directly from the hive and filtered to remove any large particles like beeswax or propolis, but otherwise, it retains all of its natural properties, including beneficial enzymes, antioxidants, and pollen. Unlike commercial honey, raw honey is not pasteurized, which preserves its full range of nutrients and flavor.
Benefits of Raw Honey:
- Intensely Flavorful:
Raw honey has a more robust, varied flavor compared to processed honey. Depending on the floral source of the honey, raw honey can have distinct notes of fruit, herbs, or even spices. This variety adds depth and richness to your honey mustard marinade, giving it a more authentic and layered flavor. The natural enzymes present in raw honey also contribute to a smoother, more complex taste, enhancing the overall quality of the dish. - Retains Nutrients:
Raw honey contains natural enzymes like diastase and invertase, which aid in the breakdown of sugars and promote the honey’s sweetness without adding excess sugar content. Additionally, raw honey contains beneficial antioxidants, such as flavonoids and phenolic acids, which help protect the body from oxidative stress. These compounds contribute to its health benefits, such as anti-inflammatory and antibacterial properties, which can further enhance the nutritional profile of your meal. - Preserves Pollen and Propolis:
Raw honey retains trace amounts of pollen and propolis, which can support the immune system. Pollen is known to have natural antihistamine properties, making it a great option for seasonal allergies. Propolis is a resin-like substance used by bees to protect their hives and has natural antimicrobial properties. These compounds contribute to the immune-boosting effects of raw honey, making it a wholesome addition to your marinade.
What is Organic Honey?
Organic honey is honey that is produced from flowers that are free from pesticides and other chemicals. The beekeepers must follow strict organic farming standards, ensuring that the bees have access to clean, pesticide-free nectar sources. Organic honey is also generally raw, meaning it has not been heated or processed, preserving its natural flavor and nutrients.
Benefits of Organic Honey:
- Purity and Quality:
Organic honey is produced without the use of synthetic chemicals or pesticides, ensuring that it’s a clean, pure product. Choosing organic honey guarantees that you’re consuming a product that’s free from harmful residues, which is especially important for those looking to avoid chemicals in their diet. - Environmental Sustainability:
Organic honey is often harvested from bees that are kept in more sustainable environments. Organic beekeepers prioritize the health and well-being of the bees, promoting biodiversity and ensuring that the honey is produced in an environmentally responsible manner. Supporting organic honey means supporting more eco-friendly practices in agriculture and beekeeping. - Improved Flavor and Aroma:
Because organic honey comes from pesticide-free flowers, it tends to have a cleaner, more natural taste. The absence of chemicals and artificial additives ensures that the honey’s flavor profile is more authentic, bringing out its natural sweetness and floral undertones. When used in your honey mustard marinade, organic honey can add an extra layer of flavor complexity that enhances the dish.
Why Choose Raw or Organic Honey for Your Marinade?
When making a honey mustard chicken marinade, the quality of your honey can make a significant difference in both the taste and the health benefits of the dish. By choosing raw or organic honey, you’re not only adding a richer, more nuanced sweetness to your chicken, but you’re also supporting your health with the added nutrients, antioxidants, and beneficial enzymes present in these varieties.
- More Complex Flavors:
Raw and organic honeys are typically more flavorful than processed honey, adding an extra depth of taste that complements the tangy mustard in your marinade. The floral and herbal notes from the honey will balance beautifully with the mustard’s sharpness, creating a marinade that’s both sweet and savory with a rich flavor profile. - Healthier Choice:
Raw and organic honey are packed with nutrients that processed honey lacks. By using these types of honey, you’re infusing your meal with antioxidants, enzymes, and other beneficial compounds that can support your immune system, digestion, and overall well-being. - Better Cooking Results:
The natural properties of raw and organic honey help the marinade to better adhere to the chicken, resulting in a more even coating. The sugars in honey also caramelize beautifully during cooking, creating a deliciously golden and slightly crispy exterior while keeping the chicken juicy inside.
Final Thoughts: A Sweet Upgrade for Your Dish
Incorporating raw or organic honey into your honey mustard chicken marinade not only enhances the flavor but also contributes to the overall healthfulness of the dish. With their rich flavors and added nutritional benefits, these types of honey are the perfect way to elevate your marinade and enjoy a meal that’s both delicious and nourishing. The next time you prepare honey mustard chicken, choose raw or organic honey for a truly wholesome, flavorful experience!
Mustard: Dijon vs. Wholegrain
Mustard is a key component of your honey mustard chicken marinade, and the choice between Dijon and wholegrain mustard can significantly affect the flavor profile of your dish. Both types of mustard bring unique qualities to the table, so understanding their differences will help you decide which one best suits your personal taste and desired outcome.
What is Dijon Mustard?
Dijon mustard originated in Dijon, France, and is known for its smooth, creamy texture and sharp, tangy flavor. It is typically made from mustard seeds, white wine or wine vinegar, salt, and water, giving it a slightly more refined taste compared to other mustards. Dijon mustard has a smooth, velvety consistency that allows it to blend easily into marinades and sauces, making it a popular choice for adding a tangy, sophisticated flavor.
Flavor Profile of Dijon Mustard:
- Smooth and Creamy Texture:
Dijon mustard has a fine, smooth texture that coats your food evenly, making it an ideal choice for marinades, dressings, and sauces where a seamless consistency is desired. When used in the honey mustard marinade, Dijon mustard creates a silky base that enhances the honey’s sweetness without overwhelming it. - Sharp and Tangy:
The sharp, tangy flavor of Dijon mustard adds an assertive, piquant kick to the marinade. Its acidity balances the sweetness of the honey, creating a well-rounded taste that complements chicken perfectly. This mustard is perfect for those who enjoy a more refined, vinegary tang. - Versatile in Cooking:
Dijon mustard is a versatile ingredient that works well in both hot and cold dishes. It can be incorporated into dressings, glazes, or marinades without becoming overpowering. Its subtle heat makes it a great choice when paired with sweeter elements like honey, as it brings out the flavors without clashing with them.
Best Uses for Dijon Mustard in Marinades:
- Ideal for creamy sauces, dressings, or vinaigrettes.
- Works well with lean meats like chicken, turkey, and pork.
- Complements the sweetness of honey or other natural sweeteners.
- Adds a sharp flavor without being too spicy or overpowering.
What is Wholegrain Mustard?
Wholegrain mustard, also known as grainy or coarse mustard, is made from mustard seeds that are left whole or coarsely ground, giving it a chunkier texture compared to Dijon. The mustard seeds are typically mixed with vinegar, salt, and spices to create a more textured and flavorful condiment. Wholegrain mustard is slightly milder than Dijon mustard but still offers a nice balance of tanginess and spice, with the seeds adding a bit of crunch.
Flavor Profile of Wholegrain Mustard:
- Coarse, Textured Consistency:
Unlike Dijon, which is smooth and creamy, wholegrain mustard offers a more textured experience. The whole mustard seeds provide bursts of flavor as you bite into them, adding a satisfying crunch that enhances the overall sensory experience of the marinade. - Milder and Earthier:
Wholegrain mustard tends to be milder and less sharp than Dijon. Its flavor is often described as earthy, with a slightly spicy kick that’s less intense but still bold. This makes wholegrain mustard a great choice for those who want a mustard flavor that’s more subtle and less vinegary. - Complex Flavor with a Slightly Sweet Aftertaste:
The vinegar and spices used in wholegrain mustard contribute to its tanginess, but the whole mustard seeds give it a more complex and layered flavor. The result is a mustard that offers more depth and texture in dishes, with a hint of sweetness in the aftertaste.
Best Uses for Wholegrain Mustard in Marinades:
- Ideal for heartier meats like beef, lamb, or sausages.
- Adds texture and visual appeal to sauces or dips.
- Works well in chunky salad dressings or marinades that benefit from a more robust, less refined mustard flavor.
- Pairs excellently with roasted vegetables or earthy dishes where the texture can be showcased.
Dijon vs. Wholegrain Mustard: Which is Best for Honey Mustard Chicken Marinade?
Both Dijon and wholegrain mustard have their own merits when it comes to making a honey mustard marinade, but each will create a slightly different flavor and texture. Your choice between the two will depend on your desired outcome for the dish.
- For a Smooth, Refined Flavor:
If you prefer a more delicate, smooth marinade that seamlessly blends the sweetness of honey with the tanginess of mustard, Dijon mustard is your best bet. Its smooth texture creates a well-integrated marinade that coats the chicken evenly, and its sharpness pairs beautifully with the natural sweetness of honey. - For a Textured, Bold Flavor:
If you enjoy a heartier texture and a more complex flavor profile, wholegrain mustard might be the perfect choice. Its chunkiness adds a visual element to your dish, and the slightly milder, earthy flavor can create a more rustic marinade that still brings the balance of sweet and tangy flavors. - Combining Both for Balance:
For those who want the best of both worlds, combining Dijon and wholegrain mustard can provide a balanced mix of smoothness and texture. The Dijon brings the tangy sharpness and smooth consistency, while the wholegrain mustard adds a rustic texture and subtle sweetness. This combination can create a more dynamic marinade with layers of flavor and texture.
Final Thoughts: Tailoring the Mustard to Your Taste
Ultimately, whether you choose Dijon or wholegrain mustard—or even both—will depend on your personal preferences and the flavor profile you want to achieve in your honey mustard chicken marinade. Dijon offers a refined, smooth, and tangy kick, while wholegrain mustard provides a bolder, textured, and more complex taste. Either way, mustard is a key ingredient that brings balance and vibrancy to your marinade, enhancing the overall experience of your dish.
How Different Types of Mustard Affect Flavor and Texture
Mustard is a versatile and essential ingredient in many recipes, especially in marinades like honey mustard chicken. The type of mustard you choose plays a crucial role in determining the overall flavor, texture, and mouthfeel of the dish. Mustard can be found in various forms, each with its own unique characteristics, and knowing how they differ can help you select the best one for your culinary needs. Let’s break down how different types of mustard impact the flavor and texture of your honey mustard chicken marinade.
1. Yellow Mustard (American Mustard)
Yellow mustard, often referred to as American mustard, is the most commonly used mustard in the U.S. It has a bright yellow color and a tangy, slightly sweet flavor, with a mild heat. It is typically made from yellow or white mustard seeds, vinegar, turmeric, and other spices, giving it its characteristic flavor.
Flavor and Texture:
- Flavor: Yellow mustard is mildly tangy, with a slight sweetness and a gentle heat that doesn’t overwhelm the palate. It has a bright, vinegary taste that can cut through the richness of meats, offering a refreshing balance.
- Texture: Yellow mustard has a smooth and creamy texture, making it easy to incorporate into marinades, dressings, and sauces. Its consistency is uniform, which helps it blend well with other ingredients, such as honey, in a marinade.
Impact on Honey Mustard Marinade:
- Flavor Profile: Yellow mustard will create a tangy and slightly sweet base for your honey mustard marinade, but it will not be as complex or spicy as other mustards. Its mildness ensures that the sweetness of honey remains the dominant flavor.
- Ideal for: Those who prefer a more subtle, classic mustard flavor in their marinade or for more kid-friendly versions of honey mustard chicken.
2. Dijon Mustard
Dijon mustard is one of the most popular mustard varieties worldwide. Originating in France, Dijon mustard is made from brown or black mustard seeds, white wine or vinegar, and spices. It has a smoother, creamier texture than yellow mustard and a sharp, tangy flavor profile.
Flavor and Texture:
- Flavor: Dijon mustard is sharp, tangy, and slightly spicy but less vinegary than yellow mustard. The combination of its acidity and subtle heat makes it ideal for pairing with honey, as it balances the sweetness and adds a refined tang.
- Texture: Dijon mustard has a smooth, velvety texture that is ideal for marinades and dressings. Its finer consistency helps it dissolve more easily into liquids, creating a well-blended sauce that coats meats evenly.
Impact on Honey Mustard Marinade:
- Flavor Profile: Dijon mustard adds a more sophisticated, tangy flavor to the honey mustard marinade, creating a perfect balance between sweet and sour. It offers a deeper, more complex flavor that pairs well with grilled or baked chicken.
- Ideal for: Those who prefer a sharper, more refined mustard flavor in their marinades. It’s particularly great for creating a delicate balance in recipes where the mustard’s tanginess needs to complement the sweetness of honey without overpowering it.
3. Wholegrain Mustard
Wholegrain mustard, also known as coarse mustard, is made from whole or partially crushed mustard seeds, creating a chunky texture. It has a more earthy, robust flavor and is often milder than Dijon or yellow mustard, with a slightly sweet and spicy aftertaste.
Flavor and Texture:
- Flavor: Wholegrain mustard offers a less sharp, more earthy flavor compared to Dijon, with a tangy undertone. The whole mustard seeds create a less refined heat, making it a great choice for adding depth and complexity to the marinade.
- Texture: The coarse texture of wholegrain mustard creates a more rustic and hearty feel. The mustard seeds themselves give the marinade a noticeable crunch, adding an interesting visual and textural element to the dish.
Impact on Honey Mustard Marinade:
- Flavor Profile: Wholegrain mustard introduces a deeper, more complex flavor profile with its slightly sweet and earthy notes. The texture of the whole mustard seeds can also add visual appeal to the dish, making the marinade feel more substantial. When combined with honey, it creates a less sweet and more tangy marinade, ideal for those who enjoy a more rustic, bold flavor.
- Ideal for: People who want a bolder, more textured marinade and prefer the depth of flavor that whole mustard seeds provide. Wholegrain mustard works well in marinades for those who enjoy a balance between sweetness and earthiness, with a satisfying texture.
4. Spicy Brown Mustard
Spicy brown mustard is made from brown or black mustard seeds and is known for its bold, sharp heat. It is often used in deli-style sandwiches and has a more pungent and spicy flavor than yellow mustard. It’s a popular choice for adding heat and tanginess to dishes.
Flavor and Texture:
- Flavor: Spicy brown mustard is intense and fiery, with a strong, sharp flavor that can stand up to robust ingredients. It has a tangy acidity with a noticeable heat, which adds a punch to marinades and sauces.
- Texture: Spicy brown mustard tends to have a coarser texture than Dijon mustard, but it’s smoother than wholegrain mustard. Its medium consistency makes it suitable for creating a thick, well-coating marinade.
Impact on Honey Mustard Marinade:
- Flavor Profile: Spicy brown mustard can elevate the flavor of your honey mustard marinade by adding a bold, zesty kick. While it provides more heat than Dijon or yellow mustard, the sweetness of honey will help temper the spice, offering a sweet and spicy combination. The tangy sharpness of spicy brown mustard adds a more intense, complex flavor.
- Ideal for: Those who enjoy a spicier marinade or want to add more heat and complexity to their honey mustard chicken. This type of mustard is great for grilled or roasted chicken where the bold flavors of the mustard can stand up to the heat and texture of the cooking method.
5. English Mustard
English mustard is known for its incredibly sharp, hot flavor, which can be a bit overwhelming for some. Made with white and brown mustard seeds, it has a strong, pungent kick that’s unmistakable. Unlike the smoother, more refined Dijon, English mustard is often used in small amounts due to its potency.
Flavor and Texture:
- Flavor: English mustard is very sharp, tangy, and spicy, with an intense heat that can linger on the palate. Its flavor is bold and assertive, often adding a fiery punch to dishes.
- Texture: English mustard is typically smooth, but it has a more potent flavor compared to Dijon or yellow mustard. It can blend well into sauces but may need to be used sparingly due to its heat.
Impact on Honey Mustard Marinade:
- Flavor Profile: English mustard creates a very tangy, spicy marinade with a noticeable heat. When combined with honey, it provides a contrast of sweetness and heat that can add a dynamic layer to the flavor profile. However, it’s essential to use it carefully, as its heat can overpower other ingredients if not balanced properly.
- Ideal for: People who prefer a bold, spicy mustard flavor in their honey mustard marinade and are not afraid of a sharp, hot kick. It’s best used in small quantities or blended with other milder mustards for a balanced flavor.
Conclusion: Choosing the Right Mustard for Your Honey Mustard Marinade
Each type of mustard—whether it’s yellow, Dijon, wholegrain, spicy brown, or English—offers a unique combination of flavor and texture that can significantly affect the outcome of your honey mustard chicken marinade. When selecting the mustard for your marinade, consider how much tang, heat, and texture you want to add to the dish.
- For a mild, classic flavor: Yellow mustard or Dijon mustard is your go-to choice.
- For a bold, tangy marinade: Wholegrain mustard and spicy brown mustard provide a more robust, hearty taste.
- For a fiery kick: English mustard will bring the heat, perfect for those who enjoy a spicy, zesty marinade.
Experimenting with different types of mustard or combining them can result in a honey mustard marinade that’s perfectly tailored to your flavor preferences.
Supporting Ingredients for Balance
In creating the perfect honey mustard chicken marinade, the supporting ingredients you add play a crucial role in achieving a harmonious balance of flavors and textures. While honey and mustard are the stars, it’s the supporting elements that enhance and round out the overall profile. These ingredients help balance the sweetness of honey, the tanginess of mustard, and the savory flavors of the chicken. Let’s explore the key supporting ingredients that contribute to making your marinade well-rounded and irresistible.
1. Vinegar: Enhancing Tanginess and Brightness
Vinegar is often used in marinades to provide acidity, which helps to balance out the sweetness and richness of the other ingredients. It can also help tenderize the meat, making the chicken more succulent and flavorful.
Types of Vinegar to Use:
- Apple Cider Vinegar: Apple cider vinegar is mild, slightly fruity, and adds a more subtle tang. It complements the sweetness of honey while maintaining a gentle acidity that enhances the mustard’s flavor.
- White Wine Vinegar: White wine vinegar is another excellent option, offering a crisp, clean acidity that brightens the overall marinade without overpowering the other ingredients.
- Balsamic Vinegar: Balsamic vinegar has a richer, slightly sweet flavor, which pairs well with honey mustard marinades. It adds depth and complexity, especially if you want a more robust flavor in your marinade.
How It Affects the Marinade:
- Vinegar cuts through the sweetness of honey, providing balance and preventing the marinade from feeling overly sugary.
- The acidity from vinegar helps tenderize the chicken, allowing it to absorb more of the marinade’s flavors.
- It also elevates the tangy mustard flavor, bringing out the sharpness without overwhelming the dish.
2. Olive Oil: Adding Richness and Smooth Texture
Olive oil is often added to marinades to provide a smooth, rich texture that helps the ingredients adhere to the chicken. Its subtle flavor allows the more assertive flavors (like mustard and vinegar) to shine through while providing moisture and tenderness to the chicken.
How Olive Oil Contributes to the Marinade:
- Texture and Consistency: Olive oil helps to create a smooth, velvety texture, allowing the marinade to coat the chicken evenly without becoming too thick or pasty.
- Moisture and Tenderness: It also helps prevent the chicken from drying out during cooking. Olive oil’s fat content keeps the chicken juicy and ensures a tender bite.
- Flavor: While olive oil’s flavor is mild, its slight fruitiness can subtly complement the honey and mustard, making the marinade feel more balanced.
3. Garlic: Deepening Flavor and Adding Aroma
Garlic is a powerhouse of flavor and aroma, and it plays a significant role in enhancing the savory notes in your honey mustard chicken marinade. Whether using fresh garlic, garlic powder, or garlic paste, this ingredient adds an aromatic depth that elevates the entire marinade.
How Garlic Enhances the Marinade:
- Flavor Profile: Garlic brings a pungent, savory flavor that contrasts beautifully with the sweetness of honey and the tanginess of mustard. It enhances the umami profile of the chicken, making the dish more flavorful overall.
- Aromatic Qualities: Garlic adds an irresistible aroma when the chicken is marinated and cooked, making it especially enticing. It elevates the dining experience by stimulating the senses.
Fresh vs. Powdered Garlic:
- Fresh Garlic: Fresh garlic adds a more pronounced, robust flavor. It tends to mellow out a bit as it marinates, infusing the chicken with a more complex, savory aroma.
- Garlic Powder: If you want a smoother, more subtle garlic flavor without the chunks, garlic powder can be used. It blends seamlessly into the marinade and provides a more consistent flavor.
4. Salt and Pepper: Basic Seasoning for Balance
Salt and pepper are essential for bringing all the flavors of the marinade together. They enhance the natural flavors of the chicken, the mustard, and the honey, and they help balance out any acidity or sweetness.
The Role of Salt:
- Flavor Enhancement: Salt is a natural flavor enhancer that brings out the best in the other ingredients. It balances sweetness and acidity by amplifying the taste of both the mustard and honey.
- Tenderization: Salt also helps to draw out moisture from the chicken, allowing it to absorb the marinade better and become more flavorful.
The Role of Pepper:
- Mild Heat and Warmth: Black pepper adds a subtle heat and warmth to the marinade, providing contrast to the sweetness of honey and the tanginess of mustard. Its slightly earthy flavor complements the overall dish.
- Aromatic Complexity: The aromatic quality of pepper adds an extra layer of depth, making the marinade more rounded and savory.
5. Lemon Juice or Zest: Adding Freshness and Brightness
Lemon juice and zest are fantastic supporting ingredients for balancing the richness of honey and the tanginess of mustard. They add a fresh, citrusy note that cuts through the other flavors and brightens the overall taste of the marinade.
How Lemon Enhances the Marinade:
- Citrus Acidity: The acidity of lemon juice complements the vinegar in the marinade, intensifying the tanginess without overwhelming the other flavors. It also helps to tenderize the chicken, ensuring it remains juicy and flavorful.
- Freshness and Zest: The zest of the lemon adds a fresh, fragrant aroma, which brings an element of brightness that lifts the entire marinade. It’s particularly effective in creating a well-rounded flavor profile.
6. Soy Sauce or Worcestershire Sauce: Umami Depth
Soy sauce and Worcestershire sauce are excellent additions if you’re looking to add some savory, umami depth to your honey mustard chicken marinade. Both ingredients are known for their rich, savory qualities that deepen the overall flavor of the dish.
How Soy Sauce and Worcestershire Sauce Contribute:
- Umami Flavor: Both soy sauce and Worcestershire sauce add a salty, umami flavor that enhances the natural savory taste of the chicken. They help balance the sweetness of honey and the acidity of mustard, creating a more complex flavor profile.
- Moisture Retention: These sauces also contribute to moisture retention during cooking, ensuring that the chicken remains juicy and tender.
7. Fresh Herbs: Adding Freshness and Aroma
Fresh herbs, such as thyme, rosemary, parsley, or dill, are great additions to your honey mustard chicken marinade. They add complexity, freshness, and an aromatic component that brightens the overall flavor of the dish.
How Fresh Herbs Enhance the Marinade:
- Flavor Depth: Fresh herbs offer a burst of freshness and add nuanced flavors that complement the mustard and honey. For example, thyme adds a savory, earthy note, while rosemary imparts a fragrant, pine-like aroma.
- Aromatic Appeal: The aroma of fresh herbs elevates the cooking experience, making the dish more enticing even before it’s served. The herbs infuse the marinade with their essential oils, which are released as the chicken marinates and cooks.
Conclusion: Creating a Balanced Honey Mustard Marinade
The supporting ingredients in your honey mustard chicken marinade are crucial for creating a balanced and well-rounded flavor profile. By carefully selecting ingredients like vinegar, olive oil, garlic, salt, pepper, lemon, and various sauces, you can enhance the tanginess of the mustard, the sweetness of the honey, and the savory depth of the chicken. These elements not only improve the flavor but also help to tenderize the chicken, ensuring it stays juicy and succulent while cooking. By using these supporting ingredients thoughtfully, you can craft the perfect honey mustard marinade that elevates your chicken to the next level.
Apple Cider Vinegar, Lemon Juice, Garlic, and Olive Oil: Key Ingredients for a Balanced Honey Mustard Marinade
In crafting a marinade for honey mustard chicken, certain ingredients play an essential role in bringing all the flavors together while ensuring a harmonious balance between tangy, savory, and sweet notes. Apple cider vinegar, lemon juice, garlic, and olive oil are all staples that contribute not only to flavor but also to the overall texture, tenderness, and aroma of the chicken. Here’s a deeper look into each of these ingredients and their impact on the honey mustard marinade.
1. Apple Cider Vinegar: A Tangy, Balancing Agent
Apple cider vinegar is a key player in balancing the sweetness of honey and the richness of mustard in your marinade. The tartness of the vinegar cuts through the heaviness of the other ingredients, ensuring that the marinade isn’t too sweet or overly tangy. Additionally, apple cider vinegar offers health benefits, acting as a mild natural preservative that can help extend the shelf life of your marinade.
How Apple Cider Vinegar Contributes:
- Tangy Brightness: The vinegar’s acidity sharpens and highlights the tangy notes in the mustard, creating a complex flavor profile. It cuts through the rich sweetness of honey, making the overall marinade less cloying and more vibrant.
- Tenderizing Effect: Vinegar is known for its tenderizing properties. When used in marinades, it breaks down proteins in meat, allowing the chicken to absorb more of the marinade’s flavors and making it juicier and more succulent during cooking.
- Balancing Sweetness: Apple cider vinegar ensures that the honey does not overpower the other flavors, keeping the balance between sweetness and tang. This balance is essential for an irresistible honey mustard marinade.
2. Lemon Juice: Fresh, Citrusy Acidity
Lemon juice is another acidic ingredient that enhances the overall tanginess of the marinade. While apple cider vinegar provides depth, lemon juice brings a fresh, citrusy brightness that can elevate the flavor profile of the honey mustard marinade. The natural acidity of lemon also helps to tenderize the chicken and infuse it with a burst of freshness.
How Lemon Juice Contributes:
- Freshness and Brightness: Lemon juice adds an additional layer of acidity that brightens up the rich honey mustard combination. It brings an element of freshness that livens up the marinade, preventing it from becoming too heavy or sweet.
- Flavor Balancing: The bright acidity of lemon works in harmony with the vinegar, ensuring that the sweetness of the honey doesn’t dominate the dish. Together, they create a tangy balance that complements the mustard without masking its flavor.
- Tenderizing and Moisture Retention: The natural citric acid in lemon juice helps to break down proteins in the chicken, making it tender while adding a slight zestiness to the flavor. It also helps keep the chicken moist during cooking, preventing it from drying out.
3. Garlic: Pungent Depth and Aromatic Savory Flavor
Garlic is a key ingredient in many marinades for its ability to add depth and complexity to the overall flavor profile. It introduces a savory, slightly pungent taste that contrasts beautifully with the sweet and tangy elements of honey and mustard. Whether you use fresh garlic cloves, garlic powder, or garlic paste, the aromatic properties of garlic will elevate your honey mustard chicken marinade.
How Garlic Contributes:
- Savory Complexity: Garlic adds a deep, savory flavor that enhances the umami quality of the chicken. It introduces earthy undertones that balance the sweetness of honey and the tanginess of mustard, making the marinade more well-rounded.
- Aromatic Appeal: The fragrant aroma of garlic wafts through the marinade, making it even more tempting. As the chicken marinates, the garlic infuses the meat with a rich savory flavor that complements the other ingredients perfectly.
- Flavor Enhancer: Garlic also acts as a natural flavor enhancer, elevating the mustard and honey’s bold flavors while deepening the overall taste profile of the marinade.
4. Olive Oil: Richness and Smooth Texture
Olive oil is an essential ingredient in many marinades due to its ability to add smoothness and richness to the mixture. It helps to bring together the more intense flavors of the vinegar, mustard, and garlic, while also creating a smooth texture that coats the chicken evenly. Olive oil also keeps the chicken moist during cooking, ensuring a juicy, tender bite.
How Olive Oil Contributes:
- Texture and Consistency: Olive oil helps to create a silky-smooth marinade that coats the chicken evenly. This ensures that every bite of chicken is infused with the marinade’s full flavor, creating a cohesive taste experience.
- Moisture Retention: Olive oil helps to keep the chicken juicy and moist during the cooking process by forming a barrier that prevents the meat from drying out. The fat content in olive oil helps retain moisture within the chicken, resulting in a tender, flavorful dish.
- Subtle Flavor: While olive oil’s flavor is mild, its slight fruitiness and rich texture enhance the overall marinade without overshadowing the other ingredients. It brings balance to the sharpness of the vinegar and lemon and allows the honey and mustard to shine.
Conclusion: A Harmonious Blend of Ingredients
The combination of apple cider vinegar, lemon juice, garlic, and olive oil plays a vital role in crafting a honey mustard chicken marinade that is well-balanced and packed with flavor. Each ingredient contributes its own unique characteristics:
- Apple cider vinegar adds tang and helps tenderize the chicken.
- Lemon juice introduces freshness and a burst of citrus acidity.
- Garlic brings depth, savory complexity, and aromatic appeal.
- Olive oil provides smoothness, moisture retention, and richness.
Together, these ingredients create a marinade that not only enhances the flavors of the chicken but also ensures it is tender, juicy, and full of bold, irresistible flavor. Whether you’re grilling, baking, or pan-searing the chicken, this marinade guarantees a delicious meal every time.
Step-by-Step Guide to Making the Marinade
Preparing the Ingredients: The Key to a Perfect Honey Mustard Marinade
The process of preparing your ingredients for a honey mustard chicken marinade is crucial in achieving the best flavor and texture. Proper preparation ensures that each component is evenly distributed, which helps the chicken absorb the marinade’s flavors more effectively. Taking the time to properly prepare your ingredients will elevate the final dish, ensuring your honey mustard chicken is tender, flavorful, and perfectly seasoned. Here’s a step-by-step breakdown of how to prepare the ingredients for an unforgettable marinade.
1. Measuring and Mixing the Honey and Mustard
To create the perfect balance of sweetness and tanginess, start by measuring the honey and mustard. Since these are the primary ingredients in your marinade, it’s essential to achieve the right ratio to ensure that neither flavor dominates.
How to Measure and Mix:
- Honey: Use a measuring cup for liquids to ensure you’re adding the right amount of honey. Honey is thick, so consider lightly greasing the measuring cup with a bit of olive oil to help it pour out more easily. Aim for about 2 to 3 tablespoons for a medium-sized batch of marinade, but you can adjust based on your personal taste preferences.
- Mustard: Dijon mustard is often used for its smooth texture and mild heat, but you can also use yellow mustard for a more traditional tang or wholegrain mustard for added texture. Measure out about 2 to 3 tablespoons, depending on the level of tang you desire. Mix the mustard thoroughly with the honey to combine their flavors evenly.
Pro Tip:
Start by mixing the mustard and honey in a bowl to make sure the consistency is smooth and well-combined. The honey should coat the mustard, creating a thick, slightly creamy mixture that will cling to the chicken.
2. Preparing the Garlic and Lemon
Garlic and lemon are two ingredients that add aromatic depth and brightness to your honey mustard marinade. For the best results, ensure that both the garlic and lemon are prepared correctly to release their full flavor.
How to Prepare Garlic:
- Fresh Garlic: Peel the garlic cloves and mince them finely to release the most flavor. Alternatively, you can crush the garlic with the side of a knife and then finely chop it for a more rustic texture. Minced garlic will distribute evenly throughout the marinade, ensuring that every bite of chicken is infused with its savory goodness.
- Garlic Paste: If you prefer a smoother consistency, you can make garlic paste by using the back of a knife to mash the minced garlic with a pinch of salt. This releases even more flavor and creates a smooth, fragrant paste that blends seamlessly into the marinade.
How to Prepare Lemon:
- Lemon Juice: Roll the lemon on the counter before cutting it in half to maximize juice extraction. Use a citrus juicer or squeeze it by hand to extract the juice. Aim for about 2 tablespoons of lemon juice for the right amount of acidity to balance the sweetness of the honey and the sharpness of the mustard.
- Lemon Zest: If you want to enhance the fresh, citrusy flavor, use a microplane to zest the lemon. Lemon zest adds a fragrant, vibrant note to the marinade that enhances the citrusy qualities of the lemon juice. Be sure to zest the lemon before juicing it to avoid missing any zest.
3. Preparing the Olive Oil and Vinegar
Olive oil and vinegar are essential ingredients that provide balance, texture, and acidity to your honey mustard chicken marinade. Proper preparation ensures that the oil and vinegar blend smoothly with the other ingredients and enhance the overall flavor profile.
How to Prepare Olive Oil:
- Measurement: Measure out about 2 tablespoons of extra virgin olive oil. Use a liquid measuring cup for accuracy, or pour directly into the mixing bowl if you’re working with smaller quantities.
- Choose High-Quality Oil: Opt for high-quality olive oil for the best flavor. Extra virgin olive oil has a fruity, slightly bitter taste that complements the sweet and tangy honey mustard combo. Its richness also ensures that the marinade clings to the chicken, helping the flavors penetrate more deeply.
How to Prepare Vinegar:
- Apple Cider Vinegar or White Wine Vinegar: Vinegar should be added in small amounts, typically 1 to 2 tablespoons, to prevent it from overpowering the other ingredients. Pour the vinegar into a separate measuring spoon or cup to ensure that you’re using the correct amount.
- Whisking: After adding the vinegar to the mixture, whisk the ingredients together thoroughly to ensure the acid is evenly distributed throughout the marinade. This ensures that each piece of chicken is evenly coated with the tangy notes of vinegar, which enhances the overall balance of the marinade.
4. Combining the Ingredients: Mixing for a Smooth Marinade
Once all your ingredients are prepared, it’s time to mix them together. Proper mixing is key to ensuring that all the flavors are evenly distributed throughout the marinade. A smooth, well-combined marinade allows the chicken to soak in the flavors better, resulting in a more flavorful and tender final dish.
How to Mix the Marinade:
- Whisking: Place all the prepared ingredients (honey, mustard, garlic, lemon juice, vinegar, and olive oil) into a large mixing bowl. Use a whisk to mix them together until they form a smooth, homogeneous marinade. This ensures that the oil and vinegar emulsify, preventing separation and creating a uniform texture.
- Adjust for Flavor: Taste the marinade once it’s mixed to check if the flavors are balanced. If you want it sweeter, add a bit more honey. If you prefer a tangier taste, add a little more vinegar or lemon juice. If the garlic flavor is too strong, consider adding a bit more mustard or honey to mellow it out.
Tip for Even Distribution:
If you’re planning to marinate the chicken for a longer period, it’s helpful to transfer the marinade to a ziplock bag or a bowl with a tight-fitting lid. This allows the marinade to coat the chicken evenly as it rests in the refrigerator.
5. Preparing the Chicken: Ready to Marinate
Before adding the chicken to the marinade, make sure the chicken is properly prepared to absorb all the delicious flavors.
How to Prepare Chicken:
- Cutting Chicken into Even Pieces: For even marination, cut the chicken into uniform pieces (such as chicken breasts, thighs, or tenders). This ensures that all parts of the chicken absorb the marinade evenly.
- Poking Holes: If you’re marinating chicken breasts, consider lightly scoring or poking small holes in the meat. This will allow the marinade to penetrate deeper into the chicken for maximum flavor.
- Drying: Pat the chicken dry with paper towels to remove excess moisture. This helps the marinade adhere better to the surface of the chicken.
Conclusion: Proper Ingredient Preparation for the Best Honey Mustard Chicken Marinade
Preparing the ingredients correctly is crucial for ensuring a flavorful and well-balanced honey mustard marinade. From measuring the honey and mustard to finely chopping the garlic and zesting the lemon, each step adds to the marinade’s depth and complexity. Taking the time to prepare each ingredient allows them to work together harmoniously, ensuring your chicken is marinated perfectly and absorbs the flavors more effectively. With this careful preparation, your honey mustard chicken will be bursting with flavor, tender, and juicy, making it a dish that’s sure to impress.
Gather and Measure All Components: Ensuring Precision for a Perfect Honey Mustard Marinade
Gathering and measuring all the ingredients before you start preparing your honey mustard chicken marinade is an essential step in the cooking process. It ensures that everything is in place, which not only streamlines the cooking experience but also guarantees that each ingredient is added in the correct proportion for optimal flavor. Accurate measurements and organized preparation help avoid errors that can result in an imbalance of flavors and ensure that the marinade works seamlessly. Here’s why gathering and measuring are critical and how to do it effectively.
1. Preparation Saves Time and Reduces Stress
One of the key benefits of gathering and measuring all components beforehand is that it simplifies the entire cooking process. By having everything ready, you avoid the stress of scrambling for ingredients or realizing halfway through that you’re missing something.
How It Helps:
- Time-Efficient: Gathering all ingredients before starting allows you to work faster and more efficiently. You won’t need to stop midway to look for an ingredient or make last-minute adjustments, which helps the overall cooking process run smoothly.
- Consistency: By measuring your ingredients before you start, you’re ensuring that the ratios of the ingredients are correct, which results in a consistent flavor every time you prepare the honey mustard marinade.
2. Accurate Measurements for a Balanced Marinade
Measuring ingredients ensures that each component is in the proper proportion. This is particularly important for the honey mustard marinade, where the balance of sweetness, tang, and savory elements is critical to the success of the dish. Too much honey could overwhelm the mustard, while too much mustard could make the marinade overly tangy and sharp. Precise measurements guarantee that all the flavors come together in harmony.
How to Measure Ingredients Accurately:
- Use Standard Measuring Tools: Ensure you have a set of measuring spoons and cups to measure your ingredients accurately. Liquid measuring cups are ideal for honey and olive oil, while dry measuring cups work best for mustard and other spices.
- Consistency in Measurements: When measuring sticky ingredients like honey, coat your measuring cup or spoon lightly with oil or cooking spray. This helps the honey slide out more easily and ensures that you’re getting the exact amount needed for your marinade.
- Adjust for Taste: After measuring all ingredients, it’s always a good idea to taste the marinade before applying it to the chicken. If the balance feels off, adjust the proportions slightly (more honey for sweetness, more mustard for tang, etc.) until you achieve your desired flavor.
3. Streamlining the Marinade Process
By gathering all the components in advance, you’re setting yourself up for a smooth and seamless cooking experience. This preemptive organization eliminates the possibility of last-minute adjustments or missing steps. The result is a well-executed marinade that’s mixed efficiently and applied to the chicken with precision.
How to Organize Ingredients:
- Set Up an Assembly Line: Lay out each ingredient in the order you’ll use them. For example, start with the honey, mustard, and vinegar, followed by the garlic, lemon juice, and olive oil. This organization keeps your workflow efficient and ensures that you’re not missing any crucial ingredients.
- Separate and Label Ingredients: For added organization, especially if you’re preparing multiple marinades or recipes, you can separate the ingredients into small bowls or containers, making it easier to combine them later. Labeling ingredients can help avoid confusion and ensure you’re adding the correct amount of each component.
4. Avoiding Flavor Imbalances
Measuring all the components allows you to avoid over-pouring or under-using ingredients, which can result in an imbalance of flavors. Honey and mustard have a strong influence on the overall taste of the marinade, so it’s important to get their measurements right. Similarly, small additions like vinegar or lemon juice can drastically impact the flavor, so ensuring these are correctly measured is essential for a perfectly balanced marinade.
How Accurate Measurements Impact Flavor:
- Prevent Overpowering Ingredients: By measuring the honey and mustard correctly, you ensure that no single flavor takes over the marinade. The right balance of sweetness and tanginess is essential to creating that signature honey mustard flavor that enhances the chicken without overpowering it.
- Correct Acid Balance: Too much vinegar or lemon juice can make the marinade too acidic and sour, while too little can make the marinade too flat. Properly measuring these acidic components ensures that they add just the right amount of brightness to balance the sweetness of the honey and the richness of the mustard.
5. The Benefit of Pre-Measuring in Large Batches
If you plan to make multiple batches of the honey mustard marinade, having everything pre-measured can be an immense time-saver. It allows you to create consistent marinades every time you cook and provides the convenience of having the ingredients ready for future use.
How to Prepare for Large Batches:
- Scale the Recipe: When making large batches of marinade, multiply the measurements for each ingredient according to the number of batches you need. This ensures that each batch of marinade will be identical in flavor, even if you’re making enough to last for several meals.
- Batch Preparation: To make the process even easier, you can store pre-measured ingredients in small containers or zip-lock bags. This means all you need to do when you’re ready to cook is combine the pre-measured ingredients and marinate your chicken, saving you time in the future.
Conclusion: Why Gathering and Measuring Components Is Key to the Perfect Honey Mustard Marinade
Gathering and measuring all your ingredients before you begin making your honey mustard chicken marinade is a simple yet essential step for achieving a perfectly balanced, flavorful marinade. It saves time, reduces stress, and ensures that the proportions of sweet, tangy, and savory elements are just right. By following this step, you can guarantee that your chicken will be coated with a marinade that’s not only delicious but also consistent every time you cook. Whether you’re making one batch or preparing multiple servings for the week ahead, the careful preparation of your ingredients is the foundation for an unforgettable honey mustard chicken dish.
Whisking Everything Together: The Secret to a Smooth and Well-Blended Honey Mustard Marinade
Whisking your ingredients together is a crucial step in the preparation of a honey mustard marinade. It’s not just about mixing; it’s about ensuring that the ingredients come together harmoniously to form a smooth, emulsified blend that will perfectly coat your chicken. When done correctly, whisking helps create a marinade that sticks to the chicken, infusing it with flavor and ensuring a balanced texture. Here’s a deeper dive into why and how to whisk everything together for the best results.
1. The Importance of Emulsification
One of the main goals of whisking your honey mustard marinade is to emulsify the ingredients. Emulsification is the process of combining two liquids that don’t naturally mix, such as oil and vinegar or mustard and honey, into a smooth, cohesive mixture. Without emulsification, your marinade might separate into different layers, with oil floating on top and vinegar or honey settling at the bottom. A good whisking technique helps break down the oils and vinegar molecules so they can bond together, creating a thicker, more uniform marinade.
Why Emulsification Matters:
- Better Coating: When you emulsify your marinade, you create a thick consistency that will coat your chicken evenly. This ensures that every bite of chicken is infused with the sweet, tangy flavors of the marinade.
- Balanced Flavor Distribution: Emulsification helps evenly distribute the flavors of mustard, honey, vinegar, and other ingredients throughout the marinade, ensuring that each piece of chicken absorbs the perfect amount of sweetness, acidity, and savory notes.
2. Whisking Technique for Optimal Texture
Whisking isn’t just about moving your ingredients around; it’s about doing so in a way that helps break down thicker ingredients and creates an even consistency. The key is using a steady hand and a vigorous motion to incorporate air into the mixture while also ensuring that the denser ingredients like honey and mustard blend seamlessly with the liquids like oil and vinegar.
Step-by-Step Whisking Tips:
- Start Slow: Begin whisking slowly to combine the liquid ingredients, such as olive oil, vinegar, and lemon juice. This helps prevent splattering and gives you better control.
- Increase Speed Gradually: Once the ingredients start to come together, increase your whisking speed. This helps emulsify the ingredients more effectively and creates a smooth texture.
- Circular Motion: Use a circular motion with the whisk to ensure that all the ingredients are incorporated. Make sure to whisk from the sides of the bowl to the center to capture all ingredients and avoid any lumps, especially when dealing with mustard or honey.
3. The Role of Air in Whisking
As you whisk, air is introduced into the marinade, which can actually change its texture. The air helps break up the thicker ingredients, like honey, and allows them to blend more smoothly with the liquid components like oil and vinegar. This aeration process gives the marinade a slightly lighter, smoother texture that will coat the chicken better.
How Air Affects the Marinade:
- Improved Consistency: Adding air to the marinade helps to thin out the mixture without sacrificing its thick texture, which makes it easier to apply to the chicken. This gives the marinade a silky, smooth texture.
- Enhanced Flavor Absorption: A well-aerated marinade will adhere better to the chicken, allowing it to penetrate more deeply. This means that the flavors of the honey, mustard, and supporting ingredients will infuse the chicken more evenly.
4. How Long to Whisk
The time you spend whisking is just as important as the technique. Whisking for too long can cause the oil to separate from the vinegar, and whisking for too little time might leave you with an uneven mixture that doesn’t fully incorporate. The ideal time to whisk is about 1-2 minutes, depending on the ingredients used.
Signs You’re Done Whisking:
- Smooth Texture: The marinade should have a smooth, slightly thick texture without visible separation. It should feel creamy and uniform when you dip a spoon into it.
- Slight Foam: After whisking vigorously, you might notice a small amount of foam at the top of the marinade. This is a good sign, as it means air has been incorporated and the ingredients are thoroughly blended.
5. Adjusting the Consistency After Whisking
After you’ve whisked the marinade together, it’s important to check its consistency. The ideal honey mustard marinade should be thick enough to cling to the chicken without being too runny. If it seems too thin, you can adjust by adding more mustard or honey to thicken it up. On the other hand, if it’s too thick and difficult to coat the chicken, you can add a small amount of olive oil or vinegar to loosen it.
Consistency Adjustments:
- For a Thicker Marinade: Add a little extra mustard, honey, or even a bit of Dijon mustard to thicken the mixture.
- For a Thinner Marinade: If the marinade feels too thick, try adding a teaspoon of olive oil, vinegar, or lemon juice to loosen it up. This will help it coat the chicken more evenly without running off.
6. Whisking in Other Ingredients for Extra Flavor
Once the base ingredients are whisked together, you can whisk in additional ingredients like garlic, herbs, or spices. These ingredients add layers of flavor, and whisking them in ensures they’re evenly distributed throughout the marinade.
How to Add Additional Ingredients:
- Garlic and Herbs: Mince or finely chop any garlic, herbs (such as thyme, rosemary, or parsley), or spices (such as paprika, cayenne pepper, or pepper) and whisk them into the marinade until evenly distributed. This helps the flavors of these ingredients meld seamlessly with the honey mustard base.
- Salt and Pepper: Add salt and pepper after whisking to ensure they dissolve into the marinade. Adjust the seasoning according to your taste.
Conclusion: The Art of Whisking for Perfect Honey Mustard Marinade
Whisking is more than just a simple mixing technique; it’s an essential step in creating a smooth, cohesive honey mustard marinade that will perfectly coat and flavor your chicken. By ensuring proper emulsification, aeration, and consistency, you create a marinade that is flavorful, balanced, and easy to apply. Whether you’re marinating chicken for grilling, baking, or pan-searing, mastering the art of whisking ensures that your marinade will deliver bold, irresistible flavors every time. With the right technique, your honey mustard chicken will be tender, juicy, and bursting with flavor.
Tips for Achieving a Smooth Consistency in Your Honey Mustard Marinade
Achieving a smooth and velvety consistency in your honey mustard marinade is key to ensuring it coats the chicken evenly and imparts a perfectly balanced flavor. A smooth marinade not only helps with texture but also aids in better flavor absorption, creating a more flavorful and juicy chicken. To get your marinade just right, here are some helpful tips for achieving that flawless, smooth consistency.
1. Whisking Properly for Emulsification
As previously mentioned, whisking is crucial for creating a smooth consistency by combining oil-based ingredients with the more aqueous components like mustard, vinegar, or lemon juice. If you fail to whisk properly, you might end up with a split or chunky mixture. Emulsification ensures that all ingredients, including honey, mustard, and oil, come together in harmony.
Whisking Tips:
- Start Slowly: Begin whisking gently at first to combine the liquid components. Gradually increase the speed as the ingredients start blending together. Whisking too fast initially may cause splashing or uneven mixing.
- Circular Motion: Use a consistent, circular motion to create a swirling effect that brings together all ingredients and ensures proper emulsification.
- Maintain a Steady Pace: Whisking for 1-2 minutes at a steady pace should be enough to achieve a smooth consistency. If it starts to feel a little too thick or sticky, continue whisking or add a small amount of liquid (like vinegar or oil) to loosen the texture.
2. Adjusting the Oil-to-Vinegar Ratio
The oil-to-vinegar ratio plays a significant role in determining the final consistency of your marinade. Too much vinegar can make the mixture too thin, while too little oil can result in a dry, chunky marinade that doesn’t adhere well to the chicken. Finding the right balance between these ingredients is key to creating a smooth and well-textured marinade.
Oil-to-Vinegar Tips:
- Start with 3:1 Ratio: A good starting point is a 3:1 ratio of oil to vinegar or acidic liquid (such as lemon juice). This ratio allows for a rich, smooth texture without being too greasy or runny.
- Adjust for Thickness: If your marinade is too thin, add a little more oil. If it’s too thick, add a bit more vinegar or lemon juice to achieve the right balance.
3. Using Mustard as a Binder
Mustard acts as both a flavor and texture enhancer in your honey mustard marinade. It is a natural emulsifier, meaning it helps bind the oil and vinegar together to create a smooth, consistent mixture. By using a high-quality mustard, such as Dijon or yellow mustard, you ensure that the marinade has the perfect texture.
Mustard Tips:
- Choose the Right Mustard: Dijon mustard works especially well in marinades because it has a smoother texture and more complex flavor. Wholegrain mustard can provide texture, but it may not emulsify as easily, potentially leaving a chunkier marinade.
- Add Gradually: When incorporating mustard into your marinade, start with small amounts, especially if you’re looking for a smoother consistency. Gradually whisk in more if you need to thicken the marinade or adjust the flavor.
4. Incorporating Honey without Clumps
Honey is often thick and sticky, which can result in clumps or a lumpy consistency if not properly integrated into the marinade. To achieve a smooth, lump-free marinade, it’s important to gradually add the honey and continue whisking consistently.
Honey Tips:
- Warm the Honey Slightly: If your honey is too thick and sticky, slightly warming it can make it easier to incorporate into the marinade. Place it in a microwave-safe container for 5-10 seconds or heat it gently on the stove.
- Add in Small Amounts: Add honey in small amounts while whisking to ensure it blends well with the other ingredients. This will help prevent clumping and create a smoother texture.
- Opt for Liquid Honey: If possible, choose liquid honey over crystallized honey. Liquid honey is easier to mix and will integrate better with the other liquids in the marinade.
5. Straining the Marinade
If you want an ultra-smooth marinade, consider straining it after whisking. Straining removes any leftover solids, herbs, or spices that may affect the consistency, leaving behind a silky, uniform liquid.
Straining Tips:
- Use a Fine-Mesh Strainer: After whisking the marinade, pour it through a fine-mesh strainer into another bowl. This will catch any bits of mustard seeds, herbs, or garlic pieces that might disrupt the smooth texture.
- Optional Step: This step isn’t always necessary, but for a pristine, smooth consistency, straining can be a helpful touch. It’s particularly useful when you’ve added garlic, ginger, or herbs that can leave behind small particles in the marinade.
6. Adding Olive Oil for Extra Smoothness
Olive oil helps bind the other ingredients together and adds a rich, smooth texture to your honey mustard marinade. It’s important to use a good-quality extra virgin olive oil to get the best flavor and consistency.
Olive Oil Tips:
- Opt for High-Quality Olive Oil: Using extra virgin olive oil will provide a smooth, rich texture to the marinade. Avoid using low-quality oils, as they may result in a less desirable texture and flavor.
- Add Slowly: Add the olive oil in a slow, steady stream while whisking continuously. This gradual incorporation will help the oil blend seamlessly into the marinade, preventing separation or clumping.
7. Mixing for a Uniform Taste and Texture
Once all the ingredients are properly whisked together, let the marinade sit for a few minutes. This resting period allows the flavors to meld together and the mixture to thicken slightly. Stir the marinade again before using it to ensure a uniform taste and texture.
Resting Tips:
- Let It Sit for 5-10 Minutes: After whisking, give the marinade a brief rest to allow the flavors to combine and the texture to set.
- Stir Before Use: If any ingredients have settled at the bottom of the bowl, give the marinade one final stir to ensure an even distribution of flavor and texture before applying it to the chicken.
Conclusion: The Key to Achieving a Smooth Honey Mustard Marinade
Achieving a smooth consistency in your honey mustard marinade is crucial for a well-balanced, flavorful chicken dish. By focusing on proper whisking, balancing the oil-to-vinegar ratio, and choosing the right ingredients, you can create a marinade that coats the chicken evenly and locks in flavor. Don’t forget to take the extra steps of warming your honey, straining the mixture if needed, and allowing the marinade to rest to ensure the perfect smoothness. With these tips in hand, you’ll be able to craft a marinade that enhances every bite of your honey mustard chicken.
Marinating the Chicken: The Key to Tender, Flavorful Meat
Marinating the chicken is one of the most essential steps in the process of creating a delicious honey mustard chicken dish. The marinade not only adds incredible flavor but also helps to tenderize the meat, making it juicy and succulent. When done properly, marinating enhances the chicken’s texture and allows the flavors to penetrate deeply, creating a perfect balance of sweetness, tang, and savory goodness. Let’s dive into the best practices for marinating chicken to ensure maximum flavor and tenderness.
1. Why Marinating is Crucial for Flavor and Tenderness
Marinating chicken helps infuse it with flavor, making it much more delicious than if you were to cook it without marinating. The marinade works its magic by soaking into the chicken’s surface, allowing the flavors of the honey mustard, spices, and other ingredients to penetrate the meat. Additionally, certain ingredients in the marinade, such as acids (vinegar, lemon juice) and enzymes (from ingredients like mustard or pineapple), break down proteins in the chicken, making it more tender and juicy.
Benefits of Marinating:
- Enhanced Flavor: The honey mustard marinade penetrates the chicken, ensuring a sweet, tangy, and savory flavor in every bite.
- Tender Meat: The enzymes and acids in the marinade work to break down proteins in the chicken, resulting in a tender texture.
- Moisture Retention: Marinating also helps retain moisture, which keeps the chicken juicy while it cooks.
2. How Long to Marinate Chicken for Maximum Flavor
The length of time you marinate your chicken is a key factor in determining how much flavor will be absorbed and how tender the meat will become. While marinating chicken for a longer time can deepen the flavor, it’s important to find the right balance, as marinating for too long can cause the chicken to become overly mushy, especially if the marinade is acidic.
Marinating Times:
- For Quick Flavor: If you’re short on time, marinating for at least 30 minutes to 1 hour will allow the flavors to penetrate the surface of the chicken, though a longer marinating time is always better for deep flavor.
- Optimal Marinating Time: For the best results, marinate your chicken for about 2 to 4 hours. This gives the marinade enough time to thoroughly infuse the chicken without compromising its texture.
- Overnight for Full Flavor: If you want to achieve a truly flavorful result, marinate the chicken overnight. This is particularly beneficial for thicker cuts of chicken, like bone-in breasts or thighs, as they need more time to absorb the marinade.
3. Marinating in the Right Container
The type of container you use for marinating is important to ensure even coating and proper flavor absorption. Using the right container also ensures that the chicken stays in contact with the marinade, which is crucial for flavor distribution.
Container Tips:
- Glass or Plastic Containers: For marinating, always use non-reactive containers like glass or food-grade plastic. These containers are great because they won’t react with the acids in the marinade and alter the taste of the chicken.
- Avoid Metal Containers: Never marinate chicken in metal containers, such as aluminum or tin, because the acid in the marinade can react with the metal, leading to off-flavors and potentially altering the taste and texture of the meat.
- Seal the Container: If you’re marinating in a container, cover it with a lid or plastic wrap to keep the marinade in contact with the chicken and prevent any contamination or spills.
- Ziploc Bags for Easy Marinating: A great alternative to containers is using resealable plastic bags. You can place the chicken and marinade in the bag, seal it, and then lay it flat in the fridge. This method helps ensure that the chicken is evenly coated and maximizes the flavor absorption. Plus, it takes up less space in the fridge.
4. How to Ensure Even Coating of Marinade
When marinating chicken, ensuring that the chicken pieces are evenly coated with the marinade is key to flavor consistency. Uneven coating can result in some parts of the chicken being bland, while others are overly seasoned.
Coating Tips:
- Massage the Marinade In: After placing the chicken in the marinade, gently massage the marinade into the chicken to ensure it’s evenly distributed. This is especially important if you’re using larger pieces like whole chicken breasts or thighs.
- Flip the Chicken: If marinating for more than an hour, flip the chicken halfway through the marinating time to ensure that all sides are well-coated and infused with the flavors.
- Use a Marinating Brush: For extra coverage, you can also use a basting brush to apply the marinade directly to the chicken, ensuring every inch of the surface is covered.
- Consider Poking the Chicken: If you’re marinating chicken breasts or other thicker cuts, you can gently poke the meat with a fork to create small holes. This allows the marinade to penetrate deeper into the chicken.
5. Keep It Cool: Refrigeration is Key
While marinating the chicken is essential for flavor and texture, it’s also important to keep the chicken properly chilled during the marinating process. Letting the chicken sit at room temperature can promote bacterial growth, which can lead to foodborne illness.
Refrigeration Tips:
- Always Marinate in the Fridge: Always marinate your chicken in the refrigerator. This helps keep the chicken at a safe temperature and prevents the growth of harmful bacteria.
- Cover the Chicken: Be sure to cover the chicken (either with a lid or plastic wrap) to prevent contamination from other foods in the fridge. It also helps preserve the marinade’s flavor and freshness.
- Marinate in Batches: If you’re making multiple chicken portions, divide the chicken and marinade into smaller batches to ensure each piece gets enough marinade and stays fresh.
6. What to Do After Marinating: Pat Dry Before Cooking
Once the chicken has marinated for the desired time, it’s a good idea to remove it from the marinade and pat it dry before cooking. This ensures that the chicken can sear or brown properly, especially if you’re grilling or pan-searing it.
Patting Dry Tips:
- Use Paper Towels: Gently pat the surface of the chicken with paper towels to remove any excess marinade. This helps ensure that the chicken doesn’t steam when cooking and promotes a crispy, caramelized exterior.
- Leave Some Marinade: Don’t remove all the marinade. Some of the marinade will still cling to the chicken, helping it retain its flavor as it cooks.
Conclusion: Marinating for the Perfect Honey Mustard Chicken
Marinating the chicken is an essential step for infusing it with flavor, enhancing its tenderness, and ensuring a juicy result. By using the right marinating times, containers, and techniques, you can achieve a perfectly seasoned, tender chicken with a beautiful balance of sweet and tangy honey mustard flavors. Whether you’re marinating for a few hours or overnight, following these tips will ensure that your honey mustard chicken is flavorful, juicy, and irresistible.
Ideal Time for Marination and Tips for Even Flavoring
Marinating is essential for infusing the chicken with the perfect balance of flavors, but the timing and even coating are key to achieving optimal results. Understanding how long to marinate and ensuring the marinade is evenly distributed will elevate your honey mustard chicken to its full potential. Let’s explore how to get the timing and technique just right for maximum flavor and tenderness.
1. How Long to Marinate for Best Results
The ideal marinating time depends on the type of chicken and the marinade itself. For a honey mustard chicken marinade, you want enough time for the marinade to work its magic without over-marinating, which could result in a mushy texture or too intense a flavor. Here’s a general guideline based on chicken cuts and flavor absorption:
- Chicken Breasts: Chicken breasts are lean and cook quickly, so they don’t need as much marinating time. 1 to 2 hours of marinating is typically enough for this cut. If you’re in a rush, even 30 minutes of marinating can still give you great results, though longer marination times will yield more intense flavor.
- Chicken Thighs or Drumsticks: These cuts benefit from a longer marination period, as they are a bit more dense and have more connective tissue. 2 to 4 hours of marinating will help the marinade penetrate and tenderize the meat. If you prefer to marinate overnight, this can enhance the flavor even further without compromising texture.
- Whole Chicken or Bone-In Cuts: If you are marinating a whole chicken or bone-in cuts, you should aim for 4 to 6 hours for optimal flavor. This longer time allows the marinade to deeply penetrate the meat, especially when dealing with thicker pieces or cuts with bone.
- Maximum Flavor: For a truly rich, deep flavor, marinating for overnight (12-24 hours) is ideal for cuts like bone-in chicken thighs, drumsticks, or a whole chicken. This gives the marinade more time to work and ensures that every part of the chicken is fully flavored.
2. How to Ensure Even Flavoring: Tips for Thorough Coating
Even distribution of the marinade is essential to ensure that every bite of your honey mustard chicken is equally flavorful. If the marinade isn’t evenly coated, some parts of the chicken might turn out bland, while others could be overpowering. Here’s how you can achieve even flavoring:
a. Use a Ziploc Bag or Sealable Container:
- Ziploc Bags: If you’re looking for the most efficient and easy method for even marination, using a resealable plastic bag is one of the best options. After placing the chicken and marinade inside, seal the bag and give it a gentle massage to distribute the marinade all over the chicken. The bag allows the marinade to come into contact with all sides of the chicken.
- Containers: If you prefer using a container, ensure it’s large enough to allow the chicken to be fully submerged in the marinade. Glass or plastic containers with a tight-fitting lid work best. Flip the chicken halfway through the marination period to ensure both sides get the same level of flavor infusion.
b. Massage the Marinade into the Chicken:
- After placing the chicken in the marinade, gently massage the marinade into the meat. This step is especially important for thicker cuts, like chicken breasts or thighs, to ensure the marinade soaks into the flesh. It’s a simple step that makes a huge difference in achieving uniform flavor.
c. Use a Basting Brush:
- For a more hands-on approach, you can use a basting brush to apply the marinade directly onto the chicken. This method ensures that the marinade is evenly spread across the surface of the chicken, especially if the chicken has skin or a slightly uneven surface.
d. Flip the Chicken Regularly:
- If you’re marinating for an extended period (like 2 to 4 hours or overnight), flipping the chicken halfway through the marination process helps redistribute the marinade. This is especially important if you are marinating larger pieces of chicken or bone-in cuts, as it ensures the marinade doesn’t settle at the bottom of the container.
e. Ensure Even Coverage with a Spoon:
- If you’re using a dish to marinate your chicken, sometimes the marinade can pool at the bottom. Use a spoon to baste the chicken with the marinade and evenly coat all areas, especially the thicker parts of the meat. This helps to avoid any dry spots and ensures uniform flavor throughout.
3. Avoid Over-Marination: Know When to Stop
While marinating chicken for an extended period can create amazing flavors, it’s also important to know when to stop. Over-marination can result in a few undesirable effects:
- Overly Tender or Mushy Texture: Ingredients like vinegar, lemon juice, and mustard in the marinade are acidic, which can break down the proteins in the chicken too much if left for too long. This leads to a mushy texture that is less desirable.
- Overpowering Flavor: If the chicken is left to marinate too long, the flavors of the honey mustard marinade may become too intense or unbalanced. This can overpower the natural taste of the chicken, making it taste more like the marinade than the meat itself.
For best results, try to follow the recommended marinating times based on your chicken cut, but always taste-test the marinade. If you’re marinating overnight, stick to the recommended marinating time to avoid excess acidity from the mustard or vinegar.
4. Marinate at the Right Temperature
Marinating chicken should always be done in the refrigerator to ensure the chicken remains at a safe temperature. Marinating at room temperature is not recommended, as this can cause bacterial growth, leading to foodborne illnesses.
- Keep It Chilled: Always marinate your chicken in the fridge to maintain food safety and preserve the freshness of the marinade.
- Sealed Containers: Make sure the container you are using is sealed tightly to prevent any odors from the refrigerator from affecting the chicken.
Conclusion: Perfect Marination for Honey Mustard Chicken
By following the correct marinating times and ensuring even coating, you can achieve the best flavor and texture for your honey mustard chicken. Whether you’re marinating for a few hours or overnight, the key is to allow the marinade to fully infuse the chicken and tenderize it while avoiding over-marination. With the right approach, your honey mustard chicken will be flavorful, tender, and cooked to perfection every time!
Cooking with Honey Mustard Chicken Marinade
Grilling Instructions for Perfect Honey Mustard Chicken
Grilling chicken with a honey mustard marinade can be a game-changer, creating a smoky, caramelized crust while locking in the juicy, flavorful interior. The combination of sweet and tangy honey mustard with the smoky flavor from grilling makes for a perfect pairing. Here’s how to grill your honey mustard chicken to perfection, ensuring both flavor and texture are at their best.
1. Preheat Your Grill
Before placing your chicken on the grill, ensure the grill is properly preheated. A properly heated grill ensures a seared exterior while keeping the juices locked inside. Here are some important preheating tips:
- Gas Grill: Set your grill to medium-high heat, about 375°F to 400°F (190°C to 200°C). This will allow for a consistent cook and nice sear on the outside.
- Charcoal Grill: If you’re using a charcoal grill, light the coals and let them burn down to a medium heat with a consistent, even layer of hot coals. You can check the temperature by holding your hand over the grill; if you can only hold it there for 3 to 4 seconds, it’s at the right temperature (around 375°F).
2. Prepare the Chicken for Grilling
Before placing the marinated chicken on the grill, ensure it’s properly prepped for the heat:
- Remove Excess Marinade: Let any excess marinade drip off before placing the chicken on the grill. Too much marinade can cause flare-ups, which may burn the chicken.
- Oil the Grill Grates: Lightly oil the grill grates with a paper towel dipped in oil to prevent sticking. This will make flipping the chicken easier and help achieve those perfect grill marks.
- Bring Chicken to Room Temperature: If possible, take the chicken out of the refrigerator about 15 to 20 minutes before grilling. This allows the meat to cook more evenly, avoiding the exterior being overcooked while the inside remains undercooked.
3. Grill the Chicken
Now it’s time to get grilling! Depending on the cut of chicken you’re working with, grilling times will vary:
- Boneless, Skinless Chicken Breasts: These grill quickly, typically needing around 5 to 7 minutes per side over medium-high heat. Because chicken breasts can dry out, keep an eye on them to avoid overcooking.
- Bone-In Chicken Thighs or Drumsticks: These cuts require more time to cook through. Grill them over indirect heat to prevent burning, flipping them occasionally for 7 to 10 minutes per side. The skin should become crispy and golden, while the meat stays juicy inside.
- Whole Chicken or Spatchcocked Chicken: A whole chicken, or chicken that has been spatchcocked (cut along the back and flattened), requires a longer cooking time. Grill it over indirect heat, flipping occasionally for about 45 minutes to 1 hour, depending on the size. Make sure the internal temperature reaches 165°F (74°C) before serving.
4. Tips for Getting the Perfect Grill Marks
Grill marks are not only aesthetic but also enhance the flavor of the chicken by creating those charred bits that give grilled food its signature smokiness. To get those perfect grill marks:
- Don’t Overcrowd the Grill: Ensure there’s enough space between chicken pieces on the grill to allow heat to circulate properly. Overcrowding the grill leads to uneven cooking and can prevent the chicken from getting those crisp grill marks.
- Sear on Each Side: Let the chicken sit undisturbed for about 3 to 4 minutes on each side to allow those grill marks to form. Don’t move the chicken around too much, as this can prevent the caramelization and grilling process.
- Rotate the Chicken: After the first few minutes, you can rotate the chicken 90 degrees to create crosshatch grill marks for that signature “grilled look.” Be sure to flip it once before rotating.
5. Monitor the Internal Temperature
While grilling is an art, it’s crucial to cook the chicken to a safe internal temperature. Use a meat thermometer to ensure the chicken is fully cooked without drying it out:
- Boneless Chicken Breasts: Aim for an internal temperature of 165°F (74°C) to ensure the meat is safe to eat and tender.
- Bone-In Chicken Thighs/Drumsticks: These may take a little longer, so check the internal temperature near the bone to make sure it reaches 165°F (74°C).
- Whole Chicken: For a whole chicken, check the thickest part of the breast and the innermost part of the thigh. The temperature should also reach 165°F (74°C).
6. Resting the Chicken
Once your honey mustard chicken has finished grilling, it’s essential to let it rest for a few minutes before cutting into it. Resting the chicken allows the juices to redistribute throughout the meat, making it more tender and flavorful. Here’s what to do:
- Let It Rest: After removing the chicken from the grill, place it on a clean plate or cutting board and let it rest for about 5 minutes. This helps to keep the chicken juicy and prevents the loss of flavor when sliced.
7. Optional: Baste During Grilling for Extra Flavor
If you want to amp up the flavor, you can baste the chicken with additional honey mustard marinade during grilling. Be cautious, as too much sauce can cause flare-ups or burn, so apply it during the last few minutes of cooking. This will enhance the glossy finish and add an extra layer of flavor to the already delicious grilled chicken.
Conclusion: Grilled Honey Mustard Chicken at Its Best
Grilling honey mustard chicken is a quick and flavorful way to enjoy this savory-sweet marinade. By following these grilling instructions, you’ll be able to achieve a perfectly cooked chicken with a caramelized, crispy exterior and a juicy, tender interior. Whether you’re grilling chicken breasts or thighs, these tips will ensure that your honey mustard chicken is a crowd-pleaser every time.
Steps for Perfectly Grilled Chicken with Caramelized Edges
Achieving perfectly grilled chicken with beautifully caramelized edges is the hallmark of a well-executed grilling process. The caramelization not only enhances the flavor with smoky, sweet, and savory notes but also contributes to an appealing texture and visual appeal. Here are the essential steps to ensure your honey mustard chicken has those beautifully caramelized, golden-brown edges.
1. Preheat the Grill to the Right Temperature
To get those signature caramelized edges, it’s important to begin with a properly preheated grill. Caramelization occurs when the sugars in the honey mustard marinade react with the high heat of the grill, forming a flavorful crust. Here’s how to achieve the ideal temperature:
- Medium-High Heat: For boneless cuts like chicken breasts or thighs, preheat your grill to 375°F to 400°F (190°C to 200°C). This will provide enough heat to sear the exterior and achieve caramelization without overcooking the inside.
- Indirect Heat for Bone-In Cuts: For bone-in pieces, you may want to use a two-zone grilling method. This means having one area of your grill at medium-high heat and another at low heat. Start grilling the chicken on the high heat side to sear and caramelize, then move it to the low heat side to cook through without burning the marinade.
2. Use a Well-Balanced Marinade
The key to achieving perfectly caramelized chicken is a marinade that has a good balance of sugars and acidity. Honey, a key ingredient in the honey mustard marinade, provides the sweetness that will caramelize when exposed to the high heat of the grill. Here’s how to make sure your marinade is ideal for caramelization:
- Honey’s Role: Honey is rich in natural sugars that will brown and caramelize as the chicken grills. It provides that beautiful golden-brown color and adds a sweet, sticky layer to the chicken.
- Acidity from Mustard: Mustard adds a tangy bite that balances the sweetness of the honey. The acidity in mustard also helps tenderize the chicken, allowing it to retain its moisture while grilling.
- Balance is Key: Make sure your marinade has a good balance of sweet (from honey), savory (from mustard), and acidity (from vinegar or lemon juice). This balance will ensure that the sugar caramelizes without burning and the flavors remain vibrant.
3. Apply the Marinade Generously but Avoid Excess
To create that caramelized crust, it’s crucial to coat the chicken with a generous amount of marinade, but not to the point where it pools or drips excessively. Here’s how to do it right:
- Even Coating: When applying the honey mustard marinade, use a basting brush to evenly coat the chicken, ensuring every surface is covered. The marinade should adhere to the chicken, creating a thin layer that can caramelize on the grill.
- Drip-Free Grilling: Let the excess marinade drip off before placing the chicken on the grill. Too much marinade can cause flare-ups, resulting in burnt spots rather than a smooth, caramelized surface.
- Baste During Grilling: For an extra layer of caramelization and flavor, baste the chicken with a small amount of leftover marinade during the last 5 minutes of grilling. This will allow the sugars to thicken and develop a rich glaze.
4. Grill the Chicken Over Direct Heat for Initial Searing
Achieving a caramelized edge starts with high direct heat. Searing the chicken for a few minutes on each side creates that signature crispy, golden-brown crust. Here’s the method:
- Sear Both Sides: Place the chicken on the grill and let it cook for 3 to 5 minutes on each side without moving it around. Don’t flip too often—allow the chicken to develop those caramelized grill marks. If using skin-on chicken, you may want to start with the skin side down to get a crispy, caramelized layer.
- Don’t Overcrowd the Grill: Ensure there’s enough space between the pieces of chicken for the heat to circulate. If you overcrowd the grill, the chicken may not sear properly, and the caramelization process will be less effective.
5. Move the Chicken to Indirect Heat to Finish Cooking
Once your chicken has achieved a nice sear with caramelized edges, move it to the cooler part of the grill to finish cooking. This allows the chicken to cook through evenly without burning the marinade. Here’s how to proceed:
- Use Indirect Heat: After searing both sides, move the chicken to the cooler part of the grill, where the heat is lower (around 300°F to 350°F). This will allow the chicken to continue cooking slowly while keeping the caramelized edges intact.
- Check for Even Cooking: Use tongs to rotate the chicken occasionally to ensure it’s evenly cooked. Make sure to avoid flipping the chicken too often, as it can cause the caramelized edges to break down and lose their texture.
6. Monitor Internal Temperature for Perfect Doneness
To ensure your chicken is perfectly cooked and the caramelization doesn’t get ruined, keep an eye on the internal temperature of the meat. This will help prevent overcooking or undercooking, which can affect the texture and flavor:
- Internal Temperature: The chicken should reach an internal temperature of 165°F (74°C). Use a meat thermometer to check the thickest part of the chicken to make sure it’s fully cooked while maintaining that tender, juicy interior.
- Avoid Overcooking: Overcooking chicken can lead to dry meat, which can also affect the texture of the caramelized edges. Once the chicken reaches the correct temperature, remove it from the grill to allow it to rest.
7. Let the Chicken Rest Before Serving
After removing the chicken from the grill, allow it to rest for about 5 minutes before slicing. Resting the chicken helps the juices redistribute, ensuring a moist and tender bite. During this resting period, the caramelized edges will continue to set, and the flavor will intensify.
8. Final Touch: Garnish for Presentation
Once your honey mustard chicken has rested, consider adding a finishing touch for both flavor and visual appeal:
- Drizzle with Extra Honey Mustard: To enhance the sweetness and tang, drizzle a little extra honey mustard sauce over the chicken right before serving. This will add another layer of flavor and create a glossy, appetizing finish.
- Garnish with Fresh Herbs: A light sprinkle of fresh herbs like parsley or thyme can add a pop of color to the dish, highlighting the golden caramelized edges of your grilled chicken.
Conclusion: Grilled Chicken with Perfect Caramelization
By following these steps, you can achieve perfectly grilled honey mustard chicken with irresistibly caramelized edges. The combination of high heat for searing, a balanced marinade, and careful monitoring ensures that the chicken comes out with a crisp, golden-brown crust while remaining juicy on the inside. With these grilling tips, your honey mustard chicken will not only taste amazing but also have a beautiful, flavorful presentation.
Baking Tips for Perfect Honey Mustard Chicken
Baking honey mustard chicken is an excellent alternative to grilling, offering a more hands-off approach while still delivering juicy, tender chicken with flavorful caramelized edges. Whether you’re using boneless chicken breasts, thighs, or bone-in cuts, these baking tips will help you achieve a perfectly baked honey mustard chicken every time, ensuring that the marinade infuses the meat while still allowing for that caramelized finish.
1. Preheat the Oven for Even Cooking
Just like grilling, ensuring that the oven is preheated to the correct temperature is crucial for achieving evenly baked chicken with delicious caramelization.
- Ideal Temperature: Preheat your oven to 375°F (190°C). This is the optimal temperature for baking chicken, allowing the honey mustard marinade to set and caramelize without burning. It also ensures that the chicken cooks through without drying out.
- Avoid Overcrowding the Pan: Make sure that the chicken pieces are spaced out on the baking sheet. This helps with even heat circulation, ensuring each piece is exposed to the heat, which is necessary for proper caramelization and even cooking.
2. Use a Baking Sheet or Dish Lined with Parchment Paper or Foil
For easy cleanup and to ensure the chicken doesn’t stick to the pan, use parchment paper or foil on your baking sheet or dish. This also helps retain moisture during the baking process.
- Parchment Paper or Foil: Both options are great for preventing the chicken from sticking to the pan and can help achieve slightly crispy edges without the risk of burning. The foil can also trap heat and moisture, making the chicken extra juicy.
- Baking Rack (Optional): If you have a baking rack, place it on top of your baking sheet. Elevating the chicken allows hot air to circulate all around it, promoting even cooking and better caramelization. This method also helps keep the chicken from sitting in its juices, ensuring a crisper texture on the bottom.
3. Coat the Chicken Generously with Honey Mustard Marinade
One of the key steps for ensuring the chicken is packed with flavor and has that beautiful caramelized finish is to apply a generous coat of your honey mustard marinade.
- First Coat: Use a basting brush or your hands to evenly coat the chicken with the marinade before placing it in the oven. Be sure to apply a thin but even layer to allow the sugars in the honey to caramelize.
- Additional Basting: To enhance the caramelization, you can baste the chicken with extra honey mustard marinade halfway through the baking process. This adds an extra layer of sweetness and tang, helping to build up the glaze that caramelizes over time.
4. Baking Time and Monitoring Chicken Doneness
The key to tender, juicy baked chicken is baking it for the right amount of time while ensuring it doesn’t dry out. This requires monitoring the chicken carefully as it bakes.
- Baking Time: Bake your chicken for 20 to 30 minutes (depending on the thickness of the chicken pieces). Boneless chicken breasts or thighs typically take 20-25 minutes, while bone-in cuts may take closer to 30-35 minutes.
- Internal Temperature: To make sure the chicken is fully cooked without drying out, use a meat thermometer to check the internal temperature of the thickest part of the chicken. It should reach 165°F (74°C). The chicken will continue to cook a bit after being removed from the oven, so aim to take it out when it’s a few degrees below this target temperature to avoid overcooking.
5. Adding a Broil at the End for Caramelized Edges
If you want to achieve a more pronounced caramelized finish or crispy edges, the final step is to broil the chicken for a few minutes.
- Broiling for Caramelization: About 3-5 minutes before your chicken is fully cooked, switch your oven to the broil setting and move the chicken closer to the top of the oven. This intense heat will caramelize the sugars in the honey mustard marinade, creating those crispy, golden-brown edges.
- Watch Closely: Keep a close eye on the chicken during broiling to ensure it doesn’t burn. The broiler can quickly cause the sugars to over-caramelize, leading to a burnt flavor if left for too long.
6. Resting the Chicken After Baking
Resting the chicken is an important step to lock in the juices and allow the caramelization to set. After removing the chicken from the oven:
- Let It Rest: Allow the baked chicken to rest for at least 5 minutes before cutting or serving. This resting time allows the juices to redistribute, ensuring the chicken remains moist and tender.
- Caramelization Settles: The caramelized layer of honey mustard will firm up during the resting period, offering a satisfying texture and deep flavor.
7. Serve with Additional Sauce or Glaze (Optional)
For an extra burst of flavor, consider drizzling the chicken with any leftover marinade or a homemade honey mustard glaze after baking. This can add a fresh layer of sweetness and tang to the already caramelized chicken.
- Honey Mustard Glaze: If you want a thicker glaze, simmer the leftover marinade on the stove for a few minutes until it thickens and becomes syrupy. Drizzle this over the chicken just before serving to enhance the flavor and presentation.
Conclusion: Perfect Baked Honey Mustard Chicken
By following these baking tips, you’ll ensure that your honey mustard chicken turns out tender, flavorful, and perfectly caramelized every time. With the right oven temperature, marinade application, and final broiling step, you can enjoy a deliciously sweet and tangy chicken dish with that irresistible crispy exterior. Whether you’re serving it for a weeknight dinner or a special occasion, baked honey mustard chicken is sure to be a crowd-pleaser.
How to Bake Chicken for Juicy Results Every Time
Baking chicken can be tricky—it’s easy to end up with dry, overcooked meat if you’re not careful. But with the right techniques, you can ensure that your baked chicken remains juicy, tender, and full of flavor every time. Here are some essential steps to help you bake chicken that’s succulent and moist.
1. Choose the Right Cut of Chicken
The cut of chicken you choose significantly affects the juiciness of the final result. Different cuts have different fat content and moisture retention abilities.
- Bone-in vs. Boneless: Bone-in chicken tends to retain moisture better than boneless cuts. The bones help insulate the meat during cooking, keeping it juicy and tender. If you’re using boneless chicken breasts, they cook faster but can dry out more easily, so they need a bit more attention.
- Thighs vs. Breasts: Chicken thighs, especially bone-in, skin-on, are naturally juicier than chicken breasts due to their higher fat content. If you want consistently juicy chicken, thighs are a great option.
- Skin-on vs. Skinless: Keeping the skin on the chicken helps lock in moisture during baking. The skin acts as a barrier, preventing the meat from drying out and also adds flavor and texture to the dish. If you prefer skinless chicken, be extra cautious to avoid overcooking.
2. Marinate or Season for Extra Moisture
One of the best ways to ensure juicy baked chicken is to marinate it before baking. The marinade not only enhances the flavor but also helps retain moisture in the chicken during cooking.
- Marinate for at Least 30 Minutes: For a juicy, flavorful chicken, allow it to marinate for at least 30 minutes—preferably longer, up to 4 hours. The longer the chicken sits in the marinade, the more time it has to absorb moisture and flavors.
- Moisture-Rich Marinades: A marinade containing oil, like olive oil, along with acidic ingredients like lemon juice or vinegar, helps the chicken retain moisture while cooking. Adding honey or mustard, like in the honey mustard marinade, can also help create a flavorful crust while sealing in the juiciness.
3. Preheat the Oven Properly
Preheating your oven to the right temperature is crucial for baking chicken evenly and ensuring that it doesn’t dry out. The oven should be fully preheated before you place your chicken inside to prevent any temperature fluctuations that can lead to uneven cooking.
- Optimal Temperature: For most chicken cuts, baking at 375°F (190°C) is ideal. This temperature ensures that the chicken cooks through evenly while giving the marinade enough time to caramelize without burning. Higher temperatures, like 400°F (200°C), can cause the chicken to cook too quickly on the outside and dry out the inside.
4. Use a Meat Thermometer for Precision
To avoid overcooking your chicken, use a meat thermometer to monitor the internal temperature. Overcooking chicken is the main reason it becomes dry and tough, so checking its doneness is the most reliable way to ensure juiciness.
- Target Temperature: The chicken should reach an internal temperature of 165°F (74°C) at its thickest part to be safely cooked. Using a thermometer ensures that the meat stays juicy without becoming overdone.
- Remove Before Fully Done: To avoid overcooking, consider removing the chicken from the oven when it reaches around 160°F (71°C), and let it rest for a few minutes. The internal temperature will continue to rise, bringing it to the ideal 165°F.
5. Baste the Chicken During Baking
Basting the chicken periodically with its own juices or extra marinade is a simple technique that can help retain moisture and add flavor.
- Baste Every 15-20 Minutes: Using a spoon or baster, drizzle the juices from the pan or leftover marinade over the chicken every 15-20 minutes. This keeps the surface moist and prevents the meat from drying out.
- Additional Layer of Flavor: If you want to enhance the flavor while keeping the chicken juicy, you can add extra honey mustard glaze or another sauce during the last 10 minutes of baking. The glaze will caramelize slightly, adding a delicious texture and flavor without drying out the chicken.
6. Don’t Overcrowd the Pan
When baking chicken, it’s important not to overcrowd the baking dish or pan. Overcrowding can trap moisture and steam the chicken, which results in less crispness and a less flavorful roast.
- Give the Chicken Space: Ensure the chicken pieces are spaced apart, allowing the hot air to circulate evenly. If you’re baking multiple pieces, consider using two pans or baking in batches.
7. Rest the Chicken After Baking
Resting is a crucial step that many people overlook. After baking, let the chicken rest for at least 5 minutes before cutting into it.
- Allow Juices to Redistribute: When chicken is baking, the juices inside it are moving around. Allowing it to rest before slicing gives those juices time to redistribute back into the meat, which keeps the chicken moist when you cut into it.
- Prevent Dryness: Cutting into the chicken immediately after baking causes the juices to spill out, resulting in drier meat. Letting it rest helps maintain juiciness and improves the overall eating experience.
8. Tent with Foil for Extra Juiciness
If you’re baking chicken for an extended period of time, like when cooking bone-in pieces, you can tent it with foil for the first part of the baking process to prevent it from drying out.
- Tent with Foil: Loosely cover the chicken with aluminum foil during the first 30-40 minutes of baking. This traps moisture, preventing the chicken from drying out. In the final stages, remove the foil to allow the chicken to crisp up and brown.
Conclusion: Baking Chicken for Perfect Juiciness
Baking chicken to juicy perfection is all about maintaining moisture and careful timing. By choosing the right cut, marinating effectively, preheating the oven, using a meat thermometer, and employing techniques like basting and resting, you can ensure your honey mustard chicken is always tender and juicy. Follow these steps, and you’ll be baking chicken that’s full of flavor and never dry again!
Pan-Frying for Quick Meals: A Fast and Flavorful Cooking Method
Pan-frying is one of the quickest and most effective methods for cooking chicken, especially when you’re looking to get a meal on the table fast. This technique creates a beautifully golden-brown, crispy crust on the outside while keeping the chicken moist and tender on the inside. Pan-frying works especially well for boneless, skinless cuts like chicken breasts, thighs, or tenders, and it can be a great choice when you’re pressed for time. Here’s how to master pan-frying for quick, delicious meals.
1. Choose the Right Pan
The choice of pan is crucial to ensure even cooking and to avoid sticking.
- Non-Stick Skillet: A non-stick skillet is the best choice for pan-frying chicken. The non-stick surface ensures that the chicken doesn’t stick to the pan, making it easier to flip and remove without losing that crispy crust.
- Cast Iron Skillet: If you want an extra crispy finish, a cast iron skillet is an excellent option. It retains heat evenly and can help develop a nice sear. However, you’ll need to make sure it’s well-seasoned to prevent sticking.
- Stainless Steel Skillet: If you don’t have a non-stick or cast iron skillet, a stainless steel skillet will also work, but it requires more care to prevent sticking. A well-heated pan and enough oil will help create a good sear.
2. Preparing the Chicken for Pan-Frying
Before you pan-fry the chicken, proper preparation is key to achieving the best results.
- Pat the Chicken Dry: Moisture is the enemy of crispy chicken, so always pat your chicken dry with paper towels before seasoning or placing it in the pan. Excess moisture will cause the chicken to steam rather than sear.
- Season Well: Season the chicken generously with salt, pepper, and any spices or marinades you prefer. For a honey mustard marinade, ensure that the chicken has absorbed the marinade for at least 15-30 minutes before cooking. If you’re using a dry rub, make sure to coat the chicken evenly for a burst of flavor in every bite.
- Pounding for Even Thickness (Optional): If you’re using chicken breasts, consider gently pounding them to an even thickness. This ensures that the chicken cooks evenly and prevents thinner parts from overcooking while the thicker areas remain underdone.
3. The Right Oil for Frying
Choosing the right oil is vital for achieving a crispy, flavorful crust.
- High Smoke Point Oil: Use an oil with a high smoke point, such as vegetable oil, canola oil, or grapeseed oil. These oils can withstand the high heat necessary for pan-frying without burning or smoking.
- Olive Oil (for Lighter Frying): While olive oil can be used, it has a lower smoke point compared to vegetable or canola oil, so you should cook on medium heat. It adds a slightly fruity flavor but may not give you the same crispy finish as higher smoke point oils.
- Butter for Extra Flavor: If you want to add rich flavor, you can use a combination of butter and oil. Start with the oil to prevent the butter from burning, and then add a tablespoon or two of butter in the last few minutes of frying. The butter will add a lovely, golden finish to the chicken.
4. Preheat the Pan Properly
For the best pan-fried chicken, it’s essential to preheat the pan properly.
- Medium to High Heat: Heat your skillet over medium-high heat for a few minutes before adding the oil. You want the oil to be hot enough to sizzle when the chicken hits the pan but not so hot that it burns the oil.
- Test the Heat: To test if the pan is hot enough, add a small drop of water to the pan. If it sizzles immediately, it’s ready for frying. You can also test with a small piece of chicken to see if it sears without sticking.
5. Cooking the Chicken: Searing and Flipping
Once the pan is ready, it’s time to cook the chicken. Follow these steps for a perfectly pan-fried chicken every time.
- Add Chicken to the Pan: Carefully place the chicken in the skillet, away from you, to avoid splattering hot oil. Arrange the chicken pieces without overcrowding the pan to ensure even cooking and prevent steaming.
- Let It Sear: Let the chicken cook undisturbed for about 4-6 minutes (depending on thickness) to develop a golden-brown, crispy crust. Don’t move the chicken around in the pan; this will break the sear and cause the chicken to stick.
- Flip and Cook the Other Side: After the first side is beautifully seared, flip the chicken over gently with tongs or a spatula. Lower the heat slightly to medium to ensure the chicken cooks through without burning the crust. Continue to cook for another 4-6 minutes on the other side until the chicken reaches an internal temperature of 165°F (74°C).
- Check for Doneness: If you’re unsure about the chicken’s doneness, use a meat thermometer to check the thickest part of the chicken. The ideal temperature should be 165°F (74°C) for safe and juicy chicken.
6. Resting the Chicken for Juiciness
Once the chicken is cooked to perfection, it’s important to let it rest.
- Rest for 5 Minutes: Remove the chicken from the pan and place it on a cutting board or plate. Tent with foil and let it rest for 5 minutes. This resting period allows the juices to redistribute throughout the chicken, ensuring that each bite is juicy and flavorful.
- Juices Will Settle: Resting the chicken also prevents the juices from spilling out when you cut into it, which helps maintain moisture and flavor.
7. Serve and Enjoy
Now that your honey mustard marinated chicken is perfectly pan-fried, you can serve it with your favorite sides.
- Pair with Vegetables or Starch: Pan-fried chicken goes beautifully with roasted vegetables, mashed potatoes, or a crisp salad for a well-rounded meal. The crunchy, golden chicken pairs perfectly with any fresh or comforting side dish.
- Add Extra Glaze or Sauce (Optional): For an extra layer of flavor, drizzle your favorite sauce, such as a honey mustard glaze or another dipping sauce, on top of the chicken before serving.
Conclusion: Quick and Flavorful Pan-Fried Honey Mustard Chicken
Pan-frying is a fantastic method for cooking honey mustard chicken when you want a fast, flavorful meal. The technique of searing the chicken creates a crispy, caramelized exterior while preserving the juiciness inside. With the right oil, proper heat, and careful attention, you’ll have a deliciously crispy, golden-brown honey mustard chicken ready to enjoy in no time. Whether you’re making it for a quick dinner or serving it to guests, pan-frying offers a simple and satisfying solution for a weeknight meal.
Quick Searing Techniques for a Flavorful Crust
Searing is a fundamental cooking technique that involves cooking the surface of the chicken at a high temperature to create a caramelized, crispy crust. This process not only enhances the flavor but also seals in the juices, making the meat tender and juicy. Mastering the art of searing will ensure that your honey mustard chicken has a golden-brown, mouthwatering crust that’s packed with flavor. Here’s a detailed guide on quick searing techniques to achieve the perfect crust on your chicken.
1. Preheat the Pan Properly
The first step in achieving a flavorful crust is to ensure your pan is at the right temperature before adding the chicken.
- Heat the Pan Well: Preheat your pan on medium-high heat for a few minutes. The pan should be hot enough that when you add the oil, it sizzles immediately. This high heat is key to developing the beautiful golden-brown crust you’re aiming for.
- Test the Heat: To test if the pan is hot enough, you can drop a small amount of water into the pan. If it dances and evaporates immediately, it’s ready. Alternatively, you can test with a small piece of chicken to see if it starts to sear right away.
2. Use the Right Type of Oil
The oil you use plays a significant role in achieving the perfect sear. Choosing an oil with a high smoke point is crucial to prevent burning and to create a crispy, flavorful crust.
- High Smoke Point Oils: Opt for oils like vegetable oil, canola oil, or grapeseed oil. These oils can handle high temperatures without burning, allowing the chicken to develop a deep golden color and a delicious, crispy exterior.
- Avoid Olive Oil for Searing: While olive oil has great flavor, it has a lower smoke point and can burn at high temperatures, which may affect the flavor and texture. If you prefer olive oil, use it in combination with a higher smoke point oil or for finishing after the chicken is cooked.
3. Pat the Chicken Dry
Before placing the chicken in the hot pan, it’s crucial to pat the meat dry with paper towels. This ensures the surface is as dry as possible, which is key to achieving a crispy crust.
- Moisture Prevents Searing: If the chicken has moisture on the surface, it will steam rather than sear. Steaming can cause the chicken to lose its texture and will result in a less appetizing outcome. Patting the chicken dry allows the oil to coat the surface and aids in achieving a beautiful golden crust.
4. Avoid Overcrowding the Pan
To get a proper sear, it’s important not to overcrowd the pan with chicken.
- Cook in Batches: If you’re cooking multiple pieces of chicken, do so in batches. Crowding the pan will cause the chicken to release moisture, and instead of searing, it will steam. Give each piece enough space to sear on its own, which will result in a more evenly browned and crispy crust.
- Maintain the Right Temperature: When you overcrowd the pan, the temperature of the pan drops, and this can prevent the chicken from searing properly. By cooking in batches, you ensure the temperature remains high enough for the perfect sear.
5. Sear on Each Side for Even Browning
To get an evenly seared, flavorful crust, it’s important to sear the chicken on each side.
- Initial Searing: When you first add the chicken to the hot pan, don’t move it around. Let it sit undisturbed for 3-5 minutes on the first side to allow the crust to form. You should hear a sizzle when the chicken hits the pan, which indicates the searing process is working.
- Flip Only Once: After the first side is seared to a golden brown, flip the chicken and sear the other side. Avoid flipping the chicken repeatedly. Let each side cook for a few minutes before flipping to ensure even browning and a good sear. Overturning the chicken can break the crust and make it less crispy.
6. Control the Heat During Searing
Searing is best done at high heat, but once the chicken has a golden-brown crust, you may need to adjust the heat to avoid burning the crust.
- Medium-High to High Heat: For the initial sear, keep the heat at medium-high to high. This will ensure the chicken develops a rich, caramelized exterior. However, once the sear is achieved, you can lower the heat slightly to medium to ensure the chicken cooks through without burning the outside.
- Monitor for Burning: If the chicken starts to smoke excessively or the crust is turning too dark, lower the heat immediately. The goal is to get the crispy crust without burning it.
7. Use a Lid for Even Cooking (Optional)
If you’re concerned about the chicken cooking all the way through while maintaining the perfect sear, you can use a lid to trap heat.
- Trap Heat for Even Cooking: After searing both sides, you can place a lid on the pan for the last few minutes of cooking. This will create an oven-like effect, helping the chicken cook through without drying out. It’s especially useful for thicker cuts of chicken, like breasts or thighs.
- Don’t Cover for Long: Only cover the chicken towards the end of cooking. If you cover it too early, it could cause the crust to lose its crispy texture.
8. Rest the Chicken After Searing
Once your chicken is seared to perfection, it’s important to let it rest before serving.
- Allow the Juices to Settle: Once the chicken is removed from the pan, let it rest for 5 minutes to allow the juices to redistribute within the meat. This step is especially important for juicy, flavorful chicken.
Conclusion: Achieving the Perfect Sear
Mastering quick searing techniques will elevate your honey mustard chicken to the next level. By preheating the pan, using the right oil, and ensuring your chicken is properly dried and not overcrowded, you can achieve a golden-brown, crispy crust that locks in flavor and juices. Searing not only enhances the texture of the chicken but also intensifies the natural flavors of the honey mustard marinade, making each bite irresistible. With these simple searing techniques, you’ll be able to create a flavorful crust on your chicken every time.
Storing and Serving Suggestions
How to Store Leftover Marinade
Storing leftover honey mustard chicken marinade properly is essential for both food safety and preserving its flavor for future use. Here’s a comprehensive guide on how to store leftover marinade safely and efficiently:
1. Refrigeration: The Key to Freshness
Marinades that contain raw chicken or meat should always be refrigerated immediately after use to prevent bacterial growth.
- Place in an Airtight Container: After using your marinade, pour any leftover marinade into an airtight container. This helps to lock in the flavors and prevents any cross-contamination with other foods in your refrigerator.
- Temperature: Ensure the refrigerator is set to 40°F (4°C) or lower to keep the marinade fresh and safe for future use. Always store it at the back of the fridge where the temperature is most consistent.
2. How Long Can You Store Leftover Marinade?
Marinade longevity depends on the ingredients used and how it’s stored.
- Storage Duration: If the marinade has been used with raw meat, it’s generally safe to store it for up to 3 days in the fridge. If it’s just the marinade (without meat), you can store it for up to 5 days. Always check for any signs of spoilage such as off smells or discoloration before using it again.
- Freezing for Long-Term Use: If you don’t plan to use the leftover marinade within a few days, you can freeze it for longer storage. Freezing helps preserve the marinade’s flavors while allowing you to use it at a later time.
3. Freezing Leftover Marinade
Freezing leftover marinade is a great way to extend its shelf life without compromising its quality.
- Freezing Containers: Pour the leftover marinade into freezer-safe plastic bags or airtight containers. If using bags, flatten them out before sealing to save space in the freezer and make it easier to thaw later. Make sure to label the bags with the date so you know how long it’s been stored.
- Freezer Duration: Leftover marinade can be frozen for up to 3 months. When ready to use, defrost it in the refrigerator overnight to maintain its flavor and consistency.
4. How to Reuse Leftover Marinade
If you’ve stored the marinade properly, it can be reused for additional batches of chicken or other proteins, adding more layers of flavor to your dishes.
- Avoid Reusing Marinade That Has Been in Contact with Raw Meat: If the marinade has been in contact with raw chicken, do not reuse it without cooking it first. The marinade will have absorbed raw meat juices and could harbor harmful bacteria. To safely reuse the marinade, bring it to a boil and simmer it for a few minutes to kill any potential bacteria before applying it to your next batch of chicken.
- Use as a Sauce or Glaze: After boiling and reducing, the leftover marinade can also serve as a delicious sauce or glaze for grilled, baked, or pan-seared chicken, adding a final touch of flavor to the dish.
5. Signs of Spoilage
Even if you’ve stored your marinade in the fridge or freezer, it’s essential to monitor it for any signs of spoilage before using it again.
- Smell: If the marinade smells sour, rancid, or off in any way, it’s a sign that it’s gone bad and should be discarded.
- Color or Texture Changes: Discoloration or the appearance of mold indicates that the marinade is no longer safe to use. Always inspect it thoroughly before reuse.
Conclusion: Safe Storage and Reuse of Marinade
By following these guidelines, you can ensure that your leftover honey mustard chicken marinade is stored safely while preserving its delicious flavors for future use. Whether you choose to refrigerate it for short-term storage or freeze it for longer-term use, proper handling will keep the marinade fresh and ready for your next meal. With careful storage, your marinade can be reused creatively in a variety of dishes, ensuring you never waste any of its sweet, tangy goodness.
Safe Storage Practices for Leftovers
Properly storing leftovers, including honey mustard chicken and any side dishes, is essential to maintain food safety, quality, and taste. Following safe storage practices not only prevents foodborne illnesses but also ensures that your leftovers retain their flavor and texture for future enjoyment. Here’s a comprehensive guide on how to store your leftover honey mustard chicken and marinades safely:
1. Cooling Leftovers Quickly
The first step to safely storing leftovers is to ensure that they cool down to a safe temperature before refrigeration.
- Avoid Leaving Food at Room Temperature: Perishable foods, including honey mustard chicken, should not be left at room temperature for more than 2 hours (or 1 hour if the temperature is above 90°F/32°C). Leaving food at unsafe temperatures for extended periods allows bacteria to grow, which could lead to foodborne illness.
- Cool Quickly Using Shallow Containers: To expedite the cooling process, divide larger portions of leftover chicken into shallow containers. This increases the surface area, helping the food cool down more quickly. If you’re storing the marinade, pour it into smaller portions to cool it faster.
- Use Ice Baths for Faster Cooling: If you’re in a hurry to cool down large quantities of food, you can use an ice bath. Place your container in a larger bowl filled with ice and water to quickly lower the temperature of the food. Once cooled, transfer the food to the refrigerator.
2. Store in Airtight Containers
To keep your leftover chicken and marinade fresh, it’s essential to store them in airtight containers that prevent air from entering and causing spoilage.
- Choose the Right Containers: Use containers with secure, tight-fitting lids or resealable plastic bags for storing leftovers. For marinades and sauces, opt for glass or plastic containers with tightly sealed lids to keep odors from contaminating other foods in the refrigerator.
- Label and Date Your Leftovers: To keep track of when the leftovers were stored, label your containers with the date you placed them in the fridge or freezer. This helps ensure that you consume the leftovers within a safe timeframe.
3. Proper Refrigeration Temperature
Once your leftovers are stored in airtight containers, it’s time to refrigerate them at the proper temperature.
- Refrigerator Settings: Set your refrigerator to 40°F (4°C) or lower. This temperature slows down bacterial growth, keeping food fresh for a longer time. A thermometer can help you monitor the temperature of your fridge to ensure it remains at a safe level.
- Avoid Overcrowding: While it may be tempting to stack containers, overcrowding the fridge can affect its ability to maintain a consistent temperature. Store leftovers on shelves with adequate airflow around the containers, ensuring even cooling.
4. Freezing Leftovers for Long-Term Storage
If you won’t be eating your leftovers within a few days, freezing is an excellent option for long-term storage.
- Freezer-Safe Containers: For leftovers you plan to freeze, use freezer-safe containers or resealable freezer bags. These are designed to protect food from freezer burn and preserve its quality for longer periods. Remove as much air as possible from bags to reduce freezer burn.
- Freezer Duration: Most cooked chicken dishes, including honey mustard chicken, can be safely frozen for up to 3 months. After that, the flavor and texture may degrade, though it will still be safe to eat if properly stored.
5. Thawing Leftovers Safely
When you’re ready to eat your frozen leftovers, proper thawing is crucial to maintain food safety and avoid bacterial growth.
- Thaw in the Refrigerator: The safest method to thaw frozen leftovers, including chicken and marinades, is in the refrigerator. This allows the food to thaw gradually at a safe temperature. Plan ahead and allow at least 12 hours for proper thawing.
- Avoid Thawing at Room Temperature: Never thaw chicken or other leftovers at room temperature, as this allows bacteria to multiply rapidly. If you need to thaw food quickly, consider using the microwave or cold water thawing method (by sealing food in a plastic bag and submerging it in cold water).
6. Reheating Leftovers to Safe Temperatures
When reheating leftovers, it’s essential to reach a high enough temperature to ensure any harmful bacteria are killed.
- Reheat to 165°F (74°C): Reheat your leftovers to an internal temperature of 165°F (74°C) to ensure they’re safe to eat. Use a food thermometer to check the temperature in the center of the dish, especially for large portions or thicker cuts of chicken.
- Even Reheating: Stir or turn the food during reheating to ensure it heats evenly. This prevents cold spots where bacteria may survive. In the microwave, it’s helpful to cover the food and stir it halfway through the reheating process.
7. Handling Leftovers Safely After Reheating
Once you’ve reheated your leftovers, they should not be returned to the fridge.
- Don’t Refreeze Once Thawed or Reheated: Once you’ve thawed or reheated leftover chicken, avoid freezing it again, as repeated temperature changes can compromise the texture and safety of the food. Only reheat the amount you intend to eat to prevent wasting food and to keep it safe.
- Consume Within a Few Days: Leftover food that has been reheated should be consumed within 3-4 days. Always store leftovers properly and check for any signs of spoilage (such as unpleasant odors or a change in texture) before consuming.
8. Practice FIFO (First In, First Out)
FIFO is a food safety practice that helps ensure you use older leftovers before newer ones.
- Use Older Leftovers First: Store older leftovers at the front of the fridge or freezer, and consume them first before newer items. This practice minimizes waste and ensures you don’t keep leftovers for too long.
- Organize Your Storage Areas: Arrange your refrigerator and freezer in a way that makes it easy to access older leftovers first. If necessary, make a list of stored items to help you track when they were placed in storage.
Conclusion: Safe and Efficient Leftover Storage
Storing leftovers, including honey mustard chicken and its marinade, with proper techniques ensures food safety, preserves quality, and reduces waste. By cooling leftovers quickly, using airtight containers, and following storage guidelines for both refrigeration and freezing, you can enjoy your honey mustard chicken for several days or even weeks after the initial meal. Always remember to reheat leftovers to the correct temperature, and consume them within the recommended timeframes to enjoy a safe, tasty meal every time.
Perfect Side Dishes for Honey Mustard Chicken
The beauty of honey mustard chicken lies in its versatility, allowing it to pair perfectly with a wide variety of side dishes. The sweet and tangy flavor of the chicken can be complemented with sides that add balance, texture, and freshness to your meal. Here are some ideal side dishes that enhance the flavor profile of honey mustard chicken while offering nutritional value and aesthetic appeal.
1. Roasted Vegetables: A Colorful and Healthy Addition
Roasted vegetables are an excellent side dish to serve with honey mustard chicken. Their natural sweetness and slightly caramelized edges make a perfect contrast to the tangy and savory flavors of the chicken.
- Choose a Variety of Veggies: Opt for root vegetables like carrots, parsnips, sweet potatoes, and beets for their natural sweetness, as well as cruciferous vegetables like broccoli, cauliflower, and Brussels sprouts for a satisfying crunch.
- Seasoning and Roasting Tips: Toss your vegetables in olive oil, salt, pepper, and a pinch of herbs like rosemary or thyme for extra flavor. Roast them at 400°F (200°C) for about 20-30 minutes, or until they’re golden brown and tender. Their crispy texture and caramelized flavors provide a perfect balance with the juicy honey mustard chicken.
- Why It Works: Roasted vegetables add a nutritional punch with fiber, vitamins, and minerals, while their flavors complement the savory-sweet profile of the chicken without overpowering it.
2. Mashed Potatoes: Creamy Comfort
Mashed potatoes are a classic, comforting side that pairs wonderfully with honey mustard chicken, offering a creamy texture that contrasts nicely with the crisp, caramelized chicken.
- Creamy and Fluffy Texture: For the fluffiest mashed potatoes, opt for starchy potatoes like Russet or Yukon Gold. Boil them until fork-tender, and mash them with butter, heavy cream, or milk. You can also add roasted garlic, sour cream, or Parmesan cheese for an extra layer of richness.
- Why It Works: The creamy, smooth texture of mashed potatoes balances the tanginess of the honey mustard marinade. They absorb the flavors of the chicken and any extra sauce, making every bite a comforting, delicious experience.
3. A Crisp Green Salad: Fresh and Light
A light, refreshing salad can help balance out the rich flavors of the honey mustard chicken, offering a crisp texture and fresh, vibrant flavors.
- Leafy Greens: Start with a base of mixed greens, baby spinach, or arugula for a peppery bite. Add crunchy vegetables like cucumbers, carrots, and bell peppers for extra texture.
- Dressing Choices: A light vinaigrette made with olive oil, balsamic vinegar, or lemon juice can complement the sweetness of the chicken without overwhelming the flavors. For extra richness, add a small amount of crumbled feta or goat cheese.
- Why It Works: The fresh crunch and acidity from the salad help to balance out the sweetness of the honey mustard chicken, making for a well-rounded meal that isn’t too heavy. Plus, it adds a variety of textures to keep the meal exciting.
4. Rice Pilaf: A Savory, Flavorful Base
Rice pilaf is a versatile and flavorful side dish that works beautifully with honey mustard chicken. Its subtle flavors and light, fluffy texture provide a perfect base for the chicken and any sauces you may have.
- Flavor Variations: Enhance your rice pilaf by cooking the rice in chicken broth for added richness. Add herbs like parsley, thyme, or oregano, along with sautéed onions, garlic, or mushrooms to infuse the rice with flavor. You can also incorporate toasted almonds, pine nuts, or dried cranberries for a touch of texture and sweetness.
- Why It Works: The light, savory nature of rice pilaf serves as the perfect accompaniment to the honey mustard chicken. It absorbs the sauce well and creates a satisfying base that complements the chicken without overshadowing it.
5. Steamed Asparagus: A Bright and Elegant Side
For a more refined, slightly tangy side dish, steamed asparagus pairs exceptionally well with honey mustard chicken. The natural earthiness of the asparagus complements the sweetness of the chicken and provides a pleasant contrast.
- Simple Preparation: Trim the tough ends of the asparagus and steam until just tender (about 4-6 minutes). Drizzle with olive oil, a squeeze of lemon juice, and a sprinkle of salt and pepper. For extra flavor, you can garnish with parmesan cheese or toasted breadcrumbs.
- Why It Works: The bright, vegetal flavor of asparagus adds freshness to the meal, while the lemony finish cuts through the sweetness of the honey mustard marinade, creating a well-balanced plate.
6. Corn on the Cob: A Sweet and Buttery Treat
For a more casual and fun side dish, serve corn on the cob with your honey mustard chicken. The sweetness of the corn pairs wonderfully with the tangy honey mustard flavor.
- Grilled or Boiled: You can grill or boil the corn, then slather it with butter and a sprinkle of salt. For added flavor, you can season the corn with paprika or parmesan for a smoky or cheesy twist.
- Why It Works: Corn on the cob’s natural sweetness enhances the honey notes in the chicken marinade, and the buttery flavor gives the meal a comforting, indulgent touch.
Conclusion: Elevating Your Honey Mustard Chicken Meal
The perfect side dishes can take your honey mustard chicken meal from delicious to unforgettable. Whether you choose roasted vegetables, mashed potatoes, a crisp salad, rice pilaf, asparagus, or corn on the cob, each side provides a unique texture and flavor that complements the sweet and tangy chicken. By balancing richness, freshness, and crunch, you create a well-rounded meal that will satisfy both your taste buds and your nutritional needs.
Suggestions for Side Dishes: Roasted Veggies, Rice Pilaf, or a Fresh Green Salad
When serving honey mustard chicken, selecting the right side dishes can elevate the meal, enhancing the chicken’s sweet and tangy flavors while providing a balanced and satisfying dining experience. Let’s explore three side dish ideas that pair beautifully with honey mustard chicken: roasted veggies, rice pilaf, and a fresh green salad.
1. Roasted Veggies: The Ultimate Flavor Boost
Roasted vegetables are a fantastic choice to accompany honey mustard chicken due to their natural sweetness, hearty textures, and ability to complement the savory-sweet profile of the chicken. Roasting vegetables enhances their flavors, caramelizing their sugars and making them even more delicious. Here’s how you can prepare them:
- Variety is Key: A mix of colorful root vegetables, such as carrots, sweet potatoes, parsnips, and beets, creates a visually appealing dish while offering different textures. Additionally, include Brussels sprouts, broccoli, or cauliflower for a bit of crunch and earthiness.
- Seasoning Tips: Toss the vegetables in olive oil, salt, pepper, and herbs such as rosemary, thyme, or oregano for a Mediterranean-inspired flavor. Roasting at 400°F (200°C) for 20-30 minutes will give them a perfect crispy exterior and tender interior.
- Why it Works: The sweet caramelization of roasted vegetables balances the tangy, mustardy kick of the chicken. The natural sugars in the veggies, like those in carrots and sweet potatoes, complement the sweetness of the honey mustard marinade, creating a harmonious balance of flavors.
2. Rice Pilaf: A Savory and Flavorful Side
Rice pilaf is another excellent side dish that pairs well with honey mustard chicken. The fluffy, savory rice serves as a neutral base that lets the chicken shine while providing a satisfying texture. Here’s how to make the most of it:
- Infuse Flavor: Cook the rice in chicken broth instead of water for added depth of flavor. Toss in sautéed onions, garlic, or mushrooms to infuse the rice with savory aromas. You can also add nuts like toasted almonds, pine nuts, or dried cranberries for a touch of sweetness and crunch.
- Herb It Up: Add a combination of fresh herbs like parsley, thyme, or oregano for a fresh, aromatic element. You can also experiment with spices like cumin or coriander for an extra layer of flavor.
- Why it Works: The mild flavor of rice pilaf complements the bold taste of honey mustard chicken without overwhelming it. Additionally, rice pilaf provides a delightful texture contrast, with its light, fluffy grains and the savory, rich undertones from the broth and sautéed vegetables. The rice also soaks up any remaining honey mustard glaze, ensuring no flavor is left behind.
3. Fresh Green Salad: A Light and Refreshing Contrast
A fresh green salad is a perfect way to balance the richness of honey mustard chicken with something crisp, light, and refreshing. The contrast in textures between the crunchy salad and the tender chicken creates an enjoyable dining experience. Here’s how you can create a salad that complements the dish:
- Leafy Greens: Use a mix of arugula, baby spinach, mixed greens, or romaine lettuce for a variety of textures. Arugula adds a peppery bite, while baby spinach provides a smooth, delicate texture.
- Add Crunch and Color: Add vegetables like cucumbers, carrots, and cherry tomatoes for additional freshness and crunch. You can also toss in thinly sliced radishes or bell peppers for added color and bite.
- Dressing Suggestions: A simple vinaigrette made with olive oil, lemon juice, apple cider vinegar, and a touch of honey will tie the salad together without overpowering the honey mustard chicken. For a creamier dressing, consider a Greek yogurt-based dressing with fresh herbs like dill or parsley.
- Why it Works: The crisp, fresh vegetables in the salad add a bright contrast to the honey mustard chicken’s rich and tangy flavors. The acidity from the vinaigrette cuts through the sweetness of the chicken, while the variety of textures in the salad helps balance the overall meal. The refreshing salad acts as a palate cleanser between bites of the rich and flavorful chicken.
Conclusion: Perfect Pairings for a Well-Rounded Meal
Pairing honey mustard chicken with sides like roasted vegetables, rice pilaf, or a fresh green salad provides a balanced and satisfying meal. The sweetness of the chicken marinates beautifully with the earthy richness of roasted veggies, while the fluffy rice pilaf adds substance and the light salad refreshes the palate. Together, these sides enhance the chicken’s flavor while providing a variety of textures and nutritional value. Whether you’re serving it for a weeknight dinner or a special occasion, these side dishes are sure to make your honey mustard chicken meal a hit.
Reheating Marinated Chicken: How to Retain Flavor and Texture
Reheating marinated chicken can be a delicate process. The goal is to preserve the flavor, juiciness, and tenderness that come from the marinating process, without overcooking or drying out the meat. Whether you’re reheating leftover honey mustard chicken or any marinated variety, there are specific techniques to follow that will help retain the best possible results. Here’s an in-depth guide to reheating marinated chicken effectively:
1. Oven Reheating: Slow and Steady for Tenderness
The oven is one of the best methods for reheating marinated chicken because it allows for even heating and helps preserve the texture of the meat. Here’s how you can do it:
- Preheat the Oven: Begin by preheating your oven to 350°F (175°C). This moderate temperature ensures the chicken will heat through without overcooking the exterior or drying out.
- Cover the Chicken: Place the chicken on a baking sheet lined with parchment paper or in a shallow baking dish. Cover the chicken loosely with aluminum foil. This helps to trap moisture and prevent the chicken from becoming dry.
- Reheat Gently: Depending on the size and thickness of the chicken pieces, heat for about 15-25 minutes. If you’re reheating whole pieces like chicken breasts or thighs, check the internal temperature with a meat thermometer. It should reach 165°F (74°C) to ensure it is fully reheated.
- Why it Works: The oven offers a consistent, indirect heat that warms the chicken slowly. Covering the chicken prevents it from drying out by trapping the moisture. Additionally, the marinade that the chicken was soaked in can continue to infuse the meat as it heats.
2. Stovetop Reheating: Quick and Flavorful
If you need to reheat marinated chicken quickly, the stovetop method works well, especially for boneless cuts. This method helps to retain moisture and can even allow you to refresh the marinade flavor while reheating.
- Use a Skillet or Pan: Heat a non-stick skillet or cast-iron pan over medium heat. Add a small amount of olive oil or butter to the pan to prevent sticking and enhance flavor.
- Reheat the Chicken: Place the marinated chicken in the pan, ensuring it’s not crowded. If necessary, you can add a splash of water, chicken broth, or even a little extra marinade to help prevent the chicken from drying out.
- Cover and Cook: Cover the skillet with a lid to create steam and heat the chicken evenly. Flip the chicken halfway through cooking to ensure both sides are heated through. Depending on the size of the chicken pieces, this process may take about 5-10 minutes.
- Why it Works: The stovetop method heats the chicken quickly, retaining moisture through the use of a lid and liquids. The high heat of the pan helps to re-sear the chicken slightly, creating a bit of crispy texture on the exterior while keeping the inside juicy.
3. Microwave Reheating: Quick, But with Caution
The microwave is the fastest way to reheat marinated chicken, but it can also be tricky. The high heat of the microwave can cause chicken to become rubbery or dry if not handled carefully.
- Place the Chicken in a Microwave-Safe Dish: Arrange the chicken in a microwave-safe dish and cover it with a microwave-safe lid or damp paper towel. This helps trap moisture and prevents the chicken from drying out.
- Use Low Power Settings: Set the microwave to 50-60% power to avoid cooking the chicken too quickly. This helps heat the chicken more evenly, preserving its moisture and texture.
- Check for Even Heating: Reheat the chicken in 30-second intervals, checking the temperature and turning the chicken over if necessary. Be sure the chicken reaches 165°F (74°C) internally.
- Why it Works: Covering the chicken and using lower microwave power helps to retain moisture. However, this method is less ideal for crispy textures but can be an acceptable choice for reheating quickly.
4. Grilling or Pan-Frying for a Crispy Finish
If you prefer a crispy exterior, grilling or pan-frying your marinated chicken can help refresh both the flavor and texture. This method works best for chicken that has already been cooked and just needs to be reheated with a bit of extra crispiness.
- Grill or Pan-Fry Over Medium Heat: Preheat your grill or skillet to medium heat. Lightly oil the grill grates or pan to avoid sticking.
- Reheat the Chicken: Place the chicken on the grill or in the pan. Heat for 2-4 minutes per side, depending on the thickness of the chicken. If you’d like, you can add a little more marinade during the last minute of cooking to refresh the flavors.
- Why it Works: The heat from the grill or skillet helps to bring back the chicken’s crispness, which is often lost during the reheating process. The charred, smoky exterior adds a new layer of flavor while the inside remains tender.
5. Storing Leftover Marinated Chicken for Future Use
If you have extra marinated chicken that you don’t plan to eat immediately, proper storage is essential for keeping it fresh and flavorful until you’re ready to reheat it.
- Refrigerate Within Two Hours: If you plan to store leftover marinated chicken, refrigerate it within two hours of cooking. Place the chicken in an airtight container or wrap it tightly with plastic wrap or foil to prevent air exposure.
- Storage Time: For best quality, use the leftover chicken within 3-4 days. If you need to store it for longer, freeze the chicken for up to 3 months. Just make sure to separate individual portions before freezing so that reheating is easier later on.
- Why it Works: Proper storage ensures the chicken stays fresh, flavorful, and safe to eat. When stored correctly, the chicken will retain its texture and can be reheated using any of the methods outlined above.
Conclusion: Reheating Marinated Chicken with Care
Reheating marinated chicken can be done in a variety of ways, each offering different results in terms of texture and flavor. The oven and stovetop methods provide the best balance of juiciness and flavor retention, while the microwave offers a quick, though less ideal, option. For a crispy finish, grilling or pan-frying can help refresh the chicken while adding a new layer of texture. With these reheating tips, you can enjoy your marinated chicken leftovers just as much as when it was freshly made.
Methods to Preserve Flavor and Avoid Dryness in Reheated Chicken
Reheating marinated chicken can sometimes lead to dryness or loss of flavor if not done properly. To ensure that your chicken stays moist, juicy, and full of flavor, there are several methods you can employ. These techniques focus on both the reheating process and the way you store and prepare your chicken to maintain its best qualities.
1. Moisture Retention: Cover and Seal for Even Heating
One of the primary reasons chicken becomes dry during reheating is the loss of moisture. Whether you’re using the oven, stovetop, or microwave, covering the chicken during reheating can help to lock in the natural juices and prevent it from drying out.
- Oven or Stovetop Method: When reheating chicken in the oven or stovetop, always cover the chicken with aluminum foil or a lid to trap the steam. This creates a humid environment around the chicken that helps it retain moisture. The foil or lid helps to heat the chicken evenly and prevents the exterior from becoming too tough or overcooked while the inside warms up.
- Microwave Method: In the microwave, use a damp paper towel to cover the chicken. The moisture from the towel will help prevent the meat from drying out. Be sure to use a microwave-safe dish with a cover or wrap the chicken loosely to ensure moisture retention.
2. Reheating with Liquids: Adding Flavor and Moisture
A great way to preserve both flavor and moisture during reheating is by adding extra liquid, especially if the chicken has absorbed some of its original marinade. This helps to create a steam effect that prevents it from becoming dry.
- Chicken Broth or Stock: Adding a small amount of chicken broth or stock to your chicken while reheating can provide additional moisture. The broth will not only keep the chicken moist but also enhance its flavor, especially if the chicken has been refrigerated for a while and the marinade has absorbed into the meat.
- Extra Marinade: If you have leftover marinade, adding a spoonful to the chicken while reheating can help refresh the original flavors. This method is particularly effective if you’re using the stovetop or pan-frying, as it allows you to coat the chicken with extra flavor while keeping it juicy.
- Olive Oil or Butter: Adding a little olive oil or butter to the pan when reheating on the stovetop can also help to lock in moisture and keep the chicken from becoming dry. The fat helps to seal the meat’s surface, preventing moisture loss during the reheating process.
3. Low and Slow Heat: Preventing Overcooking
One of the biggest mistakes people make when reheating chicken is using too high a temperature, which can quickly dry out the meat. To preserve both flavor and moisture, it’s important to use low and slow heat, no matter the reheating method.
- Oven Reheating: If you’re using the oven, set the temperature to around 325°F (165°C) and allow the chicken to warm gradually. This slower heating process ensures the chicken doesn’t overcook and dry out on the outside before the inside is fully reheated.
- Stovetop Reheating: When reheating on the stovetop, keep the heat at medium to low settings. High heat can cause the chicken to cook too quickly, drying out the meat. Be patient, and allow the chicken to heat through gradually.
- Microwave Reheating: If you’re using a microwave, heat the chicken on 50-60% power instead of full power. This reduces the chance of overheating and losing moisture while still warming the chicken effectively.
4. Check Internal Temperature to Avoid Overcooking
To prevent your chicken from drying out during the reheating process, it’s essential to monitor the internal temperature. Overcooking the chicken will result in a loss of moisture, making it tough and dry.
- Use a Meat Thermometer: Insert a meat thermometer into the thickest part of the chicken to ensure it has reached the correct internal temperature of 165°F (74°C). If you don’t have a thermometer, check that the chicken is heated through and no longer cold in the center.
- Avoid Long Reheating Times: Prolonged exposure to heat is a common cause of dryness. Once the chicken reaches the right temperature, remove it from the heat immediately to avoid overcooking it.
5. Searing or Crisping at the End: Adding Flavor and Texture
While it’s important to focus on retaining moisture while reheating, adding a little bit of crispiness or texture can enhance the overall flavor and prevent it from tasting too dry or bland.
- Grill or Pan-Fry for a Crispy Finish: After gently reheating the chicken, use high heat on a grill or stovetop to quickly sear the outside. This creates a flavorful crust that locks in the moisture and gives the chicken an appealing texture.
- Add Some Fresh Marinade During Reheating: As you reheat your chicken, you can brush it with a little fresh marinade or a glaze to add a layer of flavor and moisture. For example, a drizzle of honey mustard glaze after reheating will not only enhance the taste but also help the chicken stay moist.
6. Proper Storage to Prevent Dryness
The way you store your marinated chicken before reheating can impact how well it retains moisture. If you’re saving leftovers or prepping for the future, follow these tips for storing the chicken to maintain its flavor and texture:
- Airtight Containers: Store leftover marinated chicken in an airtight container to minimize exposure to air, which can cause it to dry out.
- Refrigeration: Always refrigerate marinated chicken if it’s not going to be eaten right away. Ideally, use the chicken within 3-4 days for the best texture and flavor.
- Freezing for Long-Term Storage: If you’re storing the chicken for a longer period, consider freezing it. Freeze the chicken in a vacuum-sealed bag or tightly wrapped in plastic wrap and foil. This will help preserve the moisture and flavor. When ready to reheat, allow the chicken to thaw in the refrigerator overnight before reheating.
Conclusion: Keeping Your Marinated Chicken Juicy and Flavorful
To prevent dryness when reheating marinated chicken, it’s crucial to retain moisture, use low and slow heat, and monitor internal temperatures carefully. Incorporating liquids like broth or marinade can help rejuvenate the chicken’s moisture and flavor, while using a lid or cover during reheating ensures that the chicken stays tender. If you want to enhance flavor further, consider adding a crispy finish through grilling or pan-frying. Lastly, proper storage techniques before reheating will go a long way in preserving both the taste and texture of your marinated chicken.