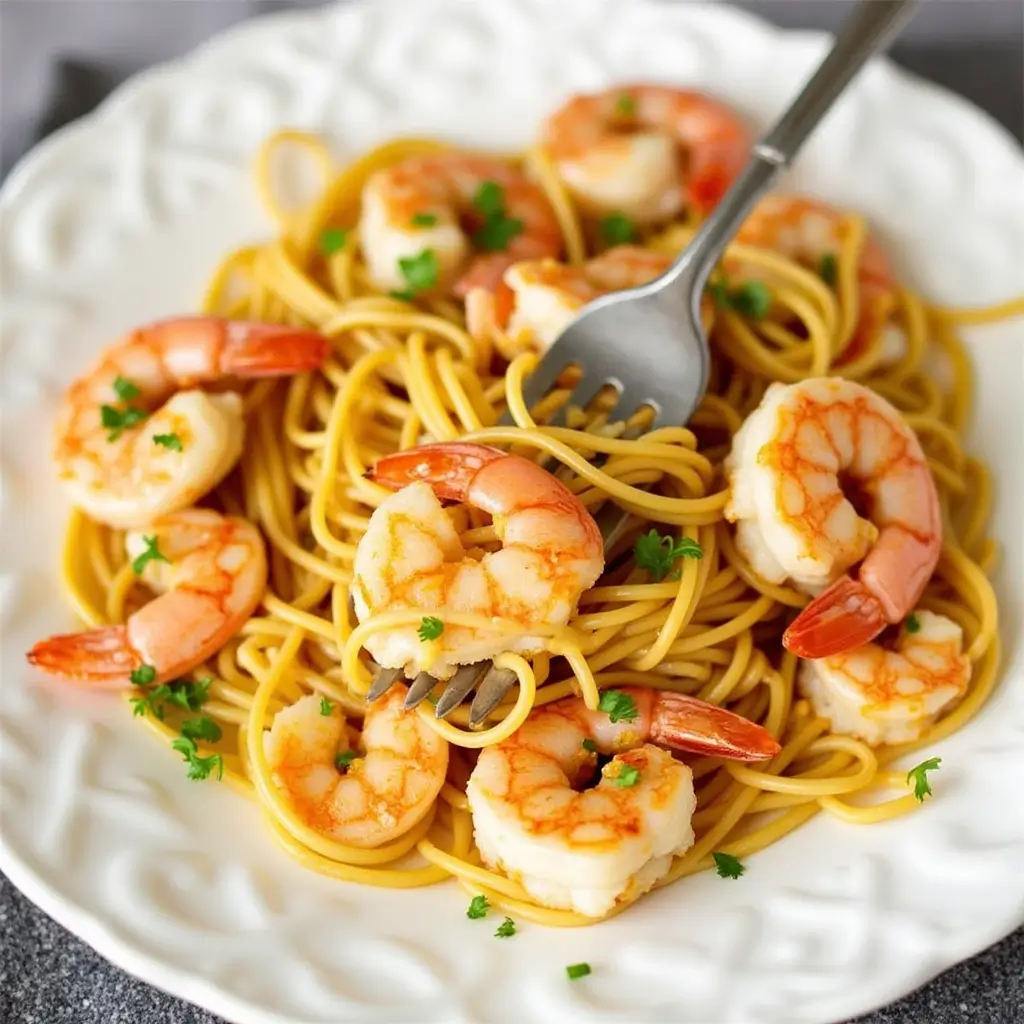
Spaghetti with shrimp is a classic seafood pasta dish that’s elegant and easy to make. With tender shrimp, perfectly cooked spaghetti, and a rich garlic butter sauce, this recipe brings restaurant-quality flavors straight to your kitchen. Whether you’re cooking for a special occasion or just craving a quick, satisfying meal, this dish is a perfect choice.
In this step-by-step guide, you’ll learn how to prepare the best spaghetti with shrimp using simple ingredients like olive oil, garlic, Parmesan, and a touch of white wine for extra depth. We’ll cover everything from selecting the right shrimp to achieving the perfect pasta texture. Get ready to impress your family and friends with this delicious and flavorful meal!
Ingredients Needed for Spaghetti with Shrimp
Main Ingredients: Spaghetti, Shrimp, Olive Oil, Garlic, Parmesan Cheese
To make the best spaghetti with shrimp, choosing high-quality ingredients is key. Each component plays an essential role in creating a balanced and flavorful dish. Let’s take a closer look at these main ingredients and how they contribute to the overall taste and texture of the recipe.
1. Spaghetti: The Perfect Pasta Choice
Spaghetti is the ideal pasta for this dish because of its smooth texture and ability to absorb flavors. When tossed with shrimp and a light garlic butter sauce, it creates a delicious and well-balanced bite. For the best results:
- Use high-quality durum wheat spaghetti for a firm texture.
- Cook it al dente to maintain a slight chewiness.
- Reserve some pasta water to help emulsify the sauce later.
2. Shrimp: The Star of the Dish
Shrimp adds a delicate sweetness and a tender bite to the pasta. To enhance its flavor and texture:
- Opt for large or jumbo shrimp for a meatier bite.
- Use fresh shrimp if possible, but frozen shrimp (thawed properly) works well too.
- Devein and clean the shrimp before cooking for a cleaner taste.
- Season lightly with salt, pepper, and lemon zest to boost its natural flavors.
3. Olive Oil: A Rich and Flavorful Base
Extra virgin olive oil serves as the foundation of the sauce, infusing the dish with rich, fruity flavors. It also helps coat the spaghetti evenly, making every bite flavorful. Choose cold-pressed, high-quality extra virgin olive oil for the best taste.
4. Garlic: A Bold, Aromatic Essential
Garlic is a key ingredient in this dish, providing a deep, savory aroma that complements the shrimp beautifully. When sautéed in olive oil, it releases its natural sweetness and enhances the overall flavor of the pasta. For the best results:
- Use fresh garlic cloves instead of pre-minced garlic for a more robust taste.
- Slice or finely mince the garlic to infuse the oil evenly.
- Sauté until fragrant but not browned to avoid bitterness.
5. Parmesan Cheese: The Finishing Touch
Parmesan cheese adds a nutty, salty depth that enhances the pasta without overpowering the shrimp’s delicate flavor. To maximize its impact:
- Use freshly grated Parmesan instead of pre-shredded for better melting and taste.
- Add it at the end, off the heat, to prevent clumping.
- Sprinkle extra on top before serving for an added cheesy bite.
By carefully selecting and preparing these key ingredients, you’ll ensure that your spaghetti with shrimp is bursting with flavor and has the perfect texture. Now that you know what goes into this dish, let’s move on to preparing the shrimp for an even more delicious outcome!
Optional Additions: Cherry Tomatoes, Red Pepper Flakes, Italian Herbs
While the main ingredients form the foundation of this delicious spaghetti with shrimp dish, adding a few optional ingredients can elevate the flavors even further. These additions bring depth, color, and complexity to the dish, making it even more irresistible. Let’s take a closer look at how cherry tomatoes, red pepper flakes, and Italian herbs can enhance your pasta.
1. Cherry Tomatoes: A Sweet and Juicy Burst of Flavor
Cherry tomatoes add a delightful sweetness and a pop of freshness to the dish. As they cook, they release their natural juices, creating a light and flavorful sauce that blends beautifully with the garlic butter and shrimp.
- Why Use Cherry Tomatoes?
- They add a slight acidity that balances the richness of the olive oil and Parmesan cheese.
- Their natural sweetness complements the shrimp’s delicate flavor.
- They provide a visually appealing contrast with their vibrant red color.
- How to Use Cherry Tomatoes in the Dish:
- Halve them for a softer, saucier texture, or leave them whole for a juicy burst in each bite.
- Sauté them in olive oil until they start to soften and release their juices.
- If you prefer a richer sauce, you can mash them slightly while cooking.
2. Red Pepper Flakes: A Spicy Kick for Extra Depth
A pinch of red pepper flakes can take this spaghetti with shrimp recipe to the next level by adding a gentle heat that enhances the dish without overpowering the other flavors.
- Why Use Red Pepper Flakes?
- They add a mild to medium heat, making the dish more dynamic and flavorful.
- The spice balances the natural sweetness of the shrimp and tomatoes.
- A little goes a long way—just a pinch can make a big difference.
- How to Use Red Pepper Flakes in the Dish:
- Add them to the pan while sautéing the garlic to infuse the oil with heat.
- Adjust the amount to suit your spice preference—start with ¼ teaspoon and add more if desired.
- For a smoky depth, lightly toast the flakes in olive oil before adding the other ingredients.
3. Italian Herbs: A Fragrant Blend of Traditional Flavors
Italian herbs bring an aromatic and earthy depth to the dish, tying all the flavors together. Whether you use a dried Italian seasoning blend or fresh herbs, they add warmth and complexity to the pasta.
- Common Italian Herbs to Use:
- Basil: Adds a sweet, slightly peppery flavor that pairs well with tomatoes.
- Oregano: Provides an earthy, slightly bitter taste that enhances the overall balance of the dish.
- Parsley: A fresh, bright herb that complements shrimp beautifully.
- Thyme or Rosemary: Adds a subtle depth without overpowering the pasta.
- How to Use Italian Herbs in the Dish:
- Add dried Italian seasoning while cooking the shrimp to infuse the dish with flavor.
- Toss fresh herbs into the pasta just before serving for a burst of freshness.
- Sprinkle extra parsley or basil on top as a final garnish.
Bringing It All Together
By incorporating these optional ingredients, you can customize your spaghetti with shrimp to your taste. Cherry tomatoes add a fresh sweetness, red pepper flakes provide a spicy kick, and Italian herbs bring a traditional depth of flavor. Whether you use all three or just one, these additions will take your pasta dish to the next level!
Best Shrimp to Use: Fresh vs. Frozen Shrimp and How to Prepare Them
Shrimp is the star ingredient of this dish, so choosing the right type is crucial for achieving the best flavor and texture. Whether you use fresh or frozen shrimp, proper selection and preparation will ensure a delicious result. Let’s break down the pros and cons of each option and go over the best preparation methods.
1. Fresh vs. Frozen Shrimp: Which One is Better?
Fresh Shrimp: The Ideal Choice (If Available)
Fresh shrimp is always the best option if you can find it. It offers a natural sweetness, firm texture, and a briny taste that enhances the dish.
- Pros of Fresh Shrimp:
- Superior flavor and texture.
- No need to thaw before cooking.
- Available at seafood markets and some grocery stores.
- Cons of Fresh Shrimp:
- Can be expensive and harder to find.
- Must be cooked quickly to prevent spoilage.
- May not always be the freshest due to transportation and storage.
- How to Choose Fresh Shrimp:
- Look for shrimp with a firm texture and a mild, ocean-like scent (avoid any fishy smell).
- The shells should be shiny and translucent, without black spots or discoloration.
- If buying peeled shrimp, ensure the flesh is plump and not slimy.
Frozen Shrimp: A Convenient and Reliable Alternative
Most shrimp sold in grocery stores have been previously frozen, even if labeled as “fresh.” Buying frozen shrimp can be a great option because it is flash-frozen at peak freshness, locking in flavor and texture.
- Pros of Frozen Shrimp:
- Readily available year-round.
- More affordable than fresh shrimp.
- Freezing preserves the shrimp’s natural sweetness and texture.
- Can be stored for months, making it convenient.
- Cons of Frozen Shrimp:
- Requires thawing before cooking.
- Some frozen shrimp are treated with preservatives that can affect flavor.
- Excess moisture from thawing can lead to a slightly different texture.
- How to Choose the Best Frozen Shrimp:
- Look for wild-caught shrimp for the best flavor and sustainability.
- Avoid shrimp labeled “treated with sodium tripolyphosphate” (a chemical that affects texture).
- Choose individually quick frozen (IQF) shrimp, which prevents clumping and freezer burn.
2. How to Prepare Shrimp for Cooking
Step 1: Thawing Frozen Shrimp (If Using)
If you’re using frozen shrimp, it’s important to thaw them properly to maintain their texture and flavor.
- Best Thawing Method (Recommended):
- Place frozen shrimp in a colander and set it in the sink.
- Run cold water over them for 5-10 minutes, tossing occasionally.
- Pat dry with paper towels before cooking.
- Alternative Thawing Method (Refrigerator):
- Transfer shrimp from the freezer to the fridge the night before cooking.
- Place them in a bowl and cover loosely to prevent excess moisture buildup.
- Avoid These Mistakes:
- Do not thaw shrimp in warm or hot water—this can cause uneven defrosting and a mushy texture.
- Do not microwave shrimp to defrost—this can partially cook them and ruin their texture.
Step 2: Cleaning and Deveining Shrimp
If your shrimp are fresh or have shells, you’ll need to clean and devein them before cooking.
How to Peel Shrimp:
- Hold the shrimp firmly and gently pull off the legs.
- Peel back the shell from the underside, removing it from the body.
- If the recipe calls for tail-on shrimp, leave the tail intact for presentation.
How to Devein Shrimp (If Necessary):
- Use a small knife or shrimp deveiner to make a shallow slit along the back of the shrimp.
- Locate the dark vein (the digestive tract) and gently pull it out with the tip of the knife or a toothpick.
- Rinse the shrimp under cold water to remove any remaining debris.
Pro Tip: Some shrimp come pre-peeled and deveined, saving you time in the kitchen. If you want a quick and easy prep, opt for this option!
Step 3: Marinating or Seasoning Shrimp for Maximum Flavor
Shrimp absorb flavors quickly, so even a short marinade can enhance the taste of your dish.
- Simple Seasoning for Shrimp:
- Olive oil: Adds richness and helps prevent sticking.
- Garlic: Infuses a savory aroma.
- Lemon zest: Brightens up the flavor.
- Salt and pepper: Enhances the shrimp’s natural sweetness.
- Quick Marinade Option (10-15 minutes):
- Mix shrimp with olive oil, minced garlic, lemon zest, and a pinch of salt.
- Let them rest at room temperature before cooking.
Final Thoughts: Choosing and Preparing Shrimp the Right Way
Whether you use fresh or frozen shrimp, proper selection and preparation are essential for making the best spaghetti with shrimp. Fresh shrimp offer unbeatable flavor and texture, but high-quality frozen shrimp can be just as delicious when prepared correctly. By cleaning, deveining, and lightly seasoning your shrimp, you’ll ensure they are tender, juicy, and packed with flavor in every bite.
Now that your shrimp are prepped and ready, let’s move on to cooking the perfect spaghetti for this delicious pasta dish! 🍤🍝
Preparing the Shrimp for the Perfect Pasta
Cleaning and Deveining Shrimp: Step-by-Step Guide
Cleaning and deveining shrimp is an essential task that ensures your dish is both visually appealing and delicious. While it may seem daunting at first, it’s a straightforward process once you know the steps. Let’s dive into the detailed guide for cleaning and deveining shrimp to achieve perfect results.
1. Peeling the Shrimp
The first step in preparing shrimp is peeling them. While some prefer to leave the shells on for presentation purposes, peeling is usually necessary for most dishes, including spaghetti with shrimp. Here’s how to peel shrimp efficiently:
Step 1: Remove the Legs
- Hold the shrimp by the body and gently pull off the legs from the underside.
- The legs should come off easily without damaging the body of the shrimp.
Step 2: Peel Back the Shell
- Starting from the underside, grasp the shell and peel it back toward the shrimp’s head.
- The shell should come off in one piece, but if it doesn’t, simply peel off the remaining bits.
- For tail-on shrimp (if you plan to leave the tails for presentation), stop peeling just before you reach the tail. Otherwise, feel free to remove the tail along with the shell.
Pro Tip: If you want to keep the tails on for a more elegant presentation, simply pinch the tail and remove the rest of the shell, leaving the tail intact.
2. Deveining the Shrimp
Deveining is the process of removing the dark vein that runs along the back of the shrimp. This vein is actually the shrimp’s digestive tract, which can sometimes hold grit or debris, and it’s better to remove it for a cleaner taste. Here’s how you do it:
Step 1: Make a Shallow Slit Along the Back
- Using a small paring knife or a shrimp deveiner, make a shallow incision along the back of the shrimp.
- The slit should go from just beneath the head to the tail, exposing the vein.
Step 2: Remove the Vein
- Once the slit is made, you will see a dark, string-like vein running along the back.
- Using the tip of the knife, gently pull the vein out. If it’s difficult to grab, use a toothpick to help pull it out.
- Discard the vein once removed.
Step 3: Rinse the Shrimp
- After deveining, rinse the shrimp under cold water to remove any remaining bits of the vein and other debris.
- Pat the shrimp dry with a paper towel to remove excess moisture before cooking.
3. Optional: Removing the Shell from the Tail (If Desired)
Some recipes may call for completely peeled shrimp, while others will keep the tail on for presentation. If you prefer to remove the shell from the tail, follow these steps:
Step 1: Grab the Tail
- Hold the shrimp firmly and grab the tail with your fingers.
Step 2: Peel the Shell from the Tail
- Gently peel the shell back from the tail until it is completely removed.
- If you plan to leave the tail on for presentation, simply leave the last segment of the tail intact.
Pro Tip: Some chefs prefer to leave the tail on, as it makes the shrimp easier to handle during serving and adds an aesthetic touch to the dish.
4. Tips for Faster and Easier Shrimp Preparation
- Pre-Packaged Peeled and Deveined Shrimp:
If you don’t want to spend time peeling and deveining shrimp, you can always purchase pre-peeled and deveined shrimp. These options are widely available and can save you time in the kitchen. Just make sure to buy high-quality shrimp, preferably wild-caught. - Use a Shrimp Deveiner Tool:
If you plan to devein shrimp often, consider investing in a shrimp deveining tool. These tools make the process quicker and more efficient, especially when dealing with large quantities of shrimp. - Don’t Overcook Shrimp:
Whether you leave the shell on or remove it, avoid overcooking the shrimp. Overcooked shrimp can become rubbery, so cook them quickly—usually for no more than 2-3 minutes per side, depending on the size.
Why Deveining Is Important
While deveining shrimp is often a matter of personal preference, it’s recommended for a cleaner presentation and better taste. The vein can sometimes contain grit or a slight bitterness, especially if the shrimp is not properly cleaned. For a smoother, more enjoyable eating experience, it’s best to remove it.
Conclusion
Now that you know how to properly peel and devein shrimp, you can confidently prepare your shrimp for cooking spaghetti with shrimp or any other shrimp dish. Whether you choose to peel and devein the shrimp yourself or buy pre-prepared shrimp, the key is to ensure they are cleaned thoroughly for the best flavor and texture. With just a little practice, you’ll be able to prepare shrimp like a pro every time. 🍤
Marinating for Extra Flavor: Using Garlic, Lemon Zest, and Olive Oil
Marinating shrimp before cooking is a fantastic way to infuse them with rich, vibrant flavors that elevate any dish. Garlic, lemon zest, and olive oil form a simple but powerful marinade that works perfectly with shrimp, giving them an irresistible aroma and taste. Here’s how to marinate shrimp using these ingredients and the steps to maximize flavor.
1. Why Marinate Shrimp?
Marinating shrimp is important because it allows the flavors to penetrate the meat, enhancing both the taste and tenderness. Shrimp, being naturally delicate, absorb marinades quickly, which makes them perfect for infusing flavors. A well-balanced marinade can elevate the dish and help the shrimp stand out in recipes like spaghetti with shrimp.
- Flavor Absorption: Shrimp’s soft texture and porous nature allow them to absorb flavors quickly, giving a more intense taste in less time.
- Moisture Retention: Marinating helps shrimp stay moist during cooking, preventing them from becoming rubbery or dry.
- Taste Enhancement: The right balance of ingredients can bring out the natural sweetness of shrimp while complementing it with fresh, zesty, and savory notes.
2. Garlic: The Flavor Base
Garlic is one of the most common ingredients in marinades due to its ability to enhance flavors with a savory, aromatic punch. When using garlic in your marinade, you can adjust the intensity based on your preference.
Why Use Garlic in the Marinade?
- Bold, Savory Flavor: Garlic has a strong, aromatic flavor that pairs perfectly with the sweetness of shrimp, creating a well-rounded taste.
- Antioxidant Properties: Garlic contains natural antioxidants and compounds like allicin, which offer health benefits, including anti-inflammatory properties.
- Versatility: Garlic complements other marinade ingredients, like lemon and olive oil, and works well in a wide range of cuisines.
How to Use Garlic in the Marinade
- Fresh Garlic: Mince or finely chop 2-3 cloves of fresh garlic to release its full flavor. You can also use a garlic press for finer results.
- Roasted Garlic: For a sweeter, milder garlic flavor, roast the garlic beforehand. Roasting softens the sharpness and brings out a deep, caramelized sweetness.
- Garlic Powder: If you’re short on fresh garlic, garlic powder can be a great substitute. It still offers a savory base but without the texture of minced garlic.
3. Lemon Zest: Bright and Zesty Notes
Lemon zest is the thin outer peel of the lemon, packed with aromatic oils that give it an intense, citrusy flavor. It’s an excellent addition to shrimp marinades because it adds a refreshing, tangy note that balances the richness of olive oil and complements the natural sweetness of shrimp.
Why Use Lemon Zest in the Marinade?
- Citrus Brightness: The zest brings a bright, fresh burst of citrus flavor without the acidity of lemon juice, which can sometimes overpower delicate shrimp.
- Aromatic Oils: Lemon zest contains essential oils that add a fragrant depth to the marinade, making the shrimp smell as good as they taste.
- Tenderizing Effect: While lemon juice can toughen shrimp if left too long, the zest won’t affect the texture, making it ideal for short marination times.
How to Use Lemon Zest in the Marinade
- Grate the Zest: Use a fine grater or zester to remove the outer peel of the lemon. Avoid grating too deeply into the white pith, which is bitter.
- Amount to Use: For every pound of shrimp, use the zest of 1 lemon. This gives enough flavor without overwhelming the dish.
- Complementary Ingredients: Pair lemon zest with fresh herbs like parsley or basil for an added layer of freshness.
4. Olive Oil: Rich, Smooth Base
Olive oil is a key ingredient in any marinade because it helps carry the flavors of garlic and lemon zest while contributing its own rich, smooth texture. It also helps keep the shrimp moist as it cooks, ensuring they don’t dry out.
Why Use Olive Oil in the Marinade?
- Flavor Carrier: Olive oil helps distribute the garlic and lemon flavors evenly, allowing the marinade to coat the shrimp uniformly.
- Moisture Retention: The oil forms a protective layer around the shrimp, locking in moisture and preventing them from becoming rubbery when cooked.
- Health Benefits: Olive oil, especially extra virgin olive oil, is known for its heart-healthy monounsaturated fats and antioxidants, making it a healthier choice for marinades.
How to Use Olive Oil in the Marinade
- Use High-Quality Olive Oil: For the best flavor, opt for extra virgin olive oil, which is made from the first cold press of the olives and has a more robust, fruity flavor.
- Amount to Use: For every pound of shrimp, use about 3 tablespoons of olive oil. This ensures that the shrimp are well-coated without being greasy.
- Balance with Acidity: Olive oil pairs beautifully with lemon zest and a dash of lemon juice, balancing the richness of the oil with the tanginess of the citrus.
5. How to Marinate the Shrimp
Now that you have your marinade ingredients, here’s how to combine them for maximum flavor:
Step 1: Combine the Ingredients
- In a small bowl, combine minced garlic (2-3 cloves), lemon zest (from 1 lemon), and extra virgin olive oil (3 tablespoons).
- Add a pinch of salt and a sprinkle of black pepper to taste. You can also include fresh herbs like parsley or basil for added freshness.
Step 2: Marinate the Shrimp
- Place the peeled and deveined shrimp into a ziploc bag or bowl.
- Pour the marinade over the shrimp, making sure they are all evenly coated.
- Seal the bag or cover the bowl and let the shrimp marinate in the fridge for 15-30 minutes. This allows the flavors to develop without over-marinating and affecting the shrimp’s texture.
Step 3: Cook the Shrimp
- After marinating, cook the shrimp according to your recipe, whether by grilling, pan-searing, or adding them to your spaghetti with shrimp. The shrimp will already be full of flavor from the garlic, lemon zest, and olive oil.
6. Additional Tips for a Perfect Marinade
- Don’t Over-marinate: Shrimp are delicate and can become mushy if marinated for too long. Stick to a 15-30 minute marination time.
- Serve Immediately: Once marinated, cook the shrimp immediately for the best texture and flavor.
- Enhance with Herbs or Spices: If you like a little heat, you can add a pinch of red pepper flakes or a small amount of crushed black pepper to your marinade for extra flavor.
Conclusion
Marinating shrimp with garlic, lemon zest, and olive oil is a simple yet powerful way to enhance the flavor of your dish. The garlic provides a savory base, while the lemon zest offers a fresh citrus punch, and the olive oil ensures the shrimp stay moist and tender. By marinating your shrimp for just the right amount of time, you create a flavorful and juicy base for your spaghetti with shrimp, transforming a basic meal into a delectable culinary experience! 🍤🍝
Cooking the Spaghetti to Perfection
Choosing the Right Pasta: Why Spaghetti Works Best
When it comes to making the perfect spaghetti with shrimp, choosing the right type of pasta is just as important as the shrimp itself. While there are many pasta shapes available, spaghetti stands out as the best choice for this dish. Let’s explore why spaghetti is the ideal pasta for shrimp and how it complements the flavors and textures of the dish.
1. Classic Pairing: Spaghetti and Shrimp
Spaghetti is an iconic pasta shape that works well in Italian-inspired seafood dishes. Its long, thin strands make it the perfect vessel for holding onto a variety of sauces, including light, flavorful options that are commonly paired with shrimp. This pasta shape allows for the shrimp to shine, providing a balanced ratio of noodle to seafood in each bite.
Why Spaghetti Works with Shrimp:
- Light Texture: Spaghetti’s thin texture doesn’t overpower the delicate shrimp. Instead, it allows the shrimp to remain the star of the dish while still providing a satisfying amount of pasta.
- Sauce Cling: The long strands of spaghetti are excellent at holding onto sauces, whether they’re made with olive oil, garlic, lemon, or a creamy base. The pasta easily absorbs the flavors, making every bite taste perfectly seasoned.
- Even Distribution: Spaghetti ensures that the shrimp and pasta are evenly distributed in each serving. Whether you toss the shrimp through the pasta or layer them on top, the structure of spaghetti allows for even portioning of both pasta and shrimp.
2. Versatility of Spaghetti in Seafood Dishes
Spaghetti is a versatile choice for a wide variety of seafood pasta dishes, from shrimp to clams and scallops. The neutral flavor and smooth texture of spaghetti pair well with many different types of sauces, ensuring that the shrimp remain the focal point without being overpowered by the starch of the pasta. Its long strands also make it easier to twirl, making it a practical choice for a dish where the shrimp and sauce need to mix perfectly with the pasta.
3. The Right Consistency for Sauces and Shrimp
One of the primary reasons why spaghetti is often chosen for seafood pasta dishes, particularly with shrimp, is the way it holds sauce. Unlike short pasta shapes like penne or fusilli, which might trap too much sauce in their grooves, spaghetti allows the sauce to cling more evenly and uniformly along the noodles, making each bite just the right amount of saucy. The smooth texture of spaghetti complements the natural sweetness and tenderness of the shrimp, resulting in a harmonious balance between pasta, shrimp, and sauce.
4. Aesthetics and Presentation
Beyond flavor, presentation plays an important role in elevating the overall dining experience, and spaghetti delivers in this regard as well. The long, flowing strands of pasta create a beautiful visual appeal when plated, offering a clean, sophisticated look. When paired with shrimp, the long strands of spaghetti allow for an attractive presentation, whether you decide to arrange the shrimp on top or toss them through the pasta. The elegant appearance of the dish adds to the overall enjoyment, making it not only delicious but also visually appealing.
5. How Spaghetti Complements Other Additions
Spaghetti also works wonderfully when you introduce optional additions like cherry tomatoes, red pepper flakes, or Italian herbs. The pasta serves as a neutral base that balances the flavors of these ingredients while allowing them to complement the shrimp. The light, slightly firm texture of spaghetti provides the perfect contrast to the tenderness of the shrimp and enhances the flavors of any herbs or spices you choose to add.
- Cherry tomatoes burst with flavor and add a refreshing juiciness to the dish, which is beautifully complemented by the neutral spaghetti.
- Red pepper flakes provide a touch of heat that is perfectly balanced by the mild taste of the pasta.
- Italian herbs like basil or oregano can be sprinkled on top for a burst of aroma and flavor, and spaghetti allows them to infuse into each bite.
6. Other Pasta Options and Why They Don’t Work as Well
While spaghetti is the obvious choice, there are other pasta shapes that could be used in shrimp pasta dishes, but they may not work quite as well for a few reasons:
- Fusilli or Rotini: These short, spiral-shaped pastas tend to be better suited for heavier sauces, such as meat-based ragùs. They don’t provide the same balance of shrimp and pasta in the dish because they can become too overwhelming when paired with delicate seafood.
- Penne or Ziti: While these tubes are versatile, they might not provide the same elegant experience as spaghetti. Their short length and shape are more suited for chunky, hearty sauces rather than light, flavorful seafood pairings.
- Farfalle or Bowtie: While farfalle might look cute and appealing, its shape doesn’t cling to the sauce as well as spaghetti, and the shrimp might not distribute as evenly throughout the dish.
7. How to Cook Spaghetti Perfectly for Shrimp Dishes
To ensure that your spaghetti with shrimp dish is as delicious as possible, cooking the pasta to the right texture is key:
- Al Dente: Cook the spaghetti until it’s al dente (firm to the bite), as this provides the best texture to balance the shrimp. Overcooked spaghetti can become mushy and lack the bite that pairs so well with the shrimp.
- Salted Water: Always cook pasta in well-salted water to infuse it with flavor. This helps enhance the pasta itself and prevents it from tasting bland in the final dish.
- Reserve Some Pasta Water: Before draining the spaghetti, reserve a cup of the starchy pasta water. This water can be used to help loosen up the sauce and ensure it coats the pasta perfectly. It also helps to make sure the shrimp and pasta stick together seamlessly.
8. Final Thoughts on Choosing Spaghetti
In summary, spaghetti is the ideal pasta for a shrimp pasta dish because it offers the right texture, sauce absorption, and visual appeal. Its classic nature makes it a reliable choice that lets the shrimp shine, while also holding onto the sauce in all the right ways. Whether you’re creating a simple olive oil and garlic-based sauce or something richer, spaghetti’s versatility and ability to complement shrimp’s natural flavor make it the perfect base for a truly delicious dish.
How to Cook Spaghetti Al Dente: Boiling Time and Salt-to-Water Ratio
Cooking spaghetti al dente is a fundamental step in achieving the perfect texture for your pasta, especially when making a dish like spaghetti with shrimp. Al dente, which translates from Italian as “to the tooth,” refers to pasta that is firm to the bite but not hard. The right balance of texture makes a huge difference in the final outcome of your dish, providing a satisfying contrast to the tender shrimp and light sauce. Here’s a detailed guide on how to cook spaghetti al dente, including the proper boiling time and salt-to-water ratio.
1. The Importance of Al Dente Pasta
Before diving into the specifics, it’s important to understand why cooking spaghetti al dente is so essential:
- Better Texture: Al dente spaghetti has the ideal firmness that doesn’t turn mushy when mixed with sauces, offering a pleasant chewiness that complements tender shrimp.
- Flavor Absorption: When cooked al dente, spaghetti is better at absorbing the sauce without becoming overly soggy, which allows the sauce to cling more evenly to the noodles.
- Digestibility: Al dente pasta is generally easier to digest. Its firmer texture means that the starches in the pasta are less likely to break down fully, which can aid in slower digestion and help you feel fuller longer.
2. Boiling Time: How Long to Cook Spaghetti
The boiling time for spaghetti can vary slightly depending on the brand, thickness, and even the type of pasta you are using. Generally, here’s what you should consider when cooking your spaghetti:
- Check Package Instructions: Always check the cooking instructions on the package as a starting point. The time will vary depending on whether you’re using fresh or dried pasta.
- Dried Spaghetti: Typically, 8 to 10 minutes is the range for cooking dried spaghetti to al dente.
- Fresh Spaghetti: Fresh pasta cooks much faster, usually in 2 to 4 minutes.
- Start Timing After Boiling Water: It’s important to begin timing once your water is boiling vigorously. Make sure you add the spaghetti to a rolling boil (the water should be bubbling actively) to avoid the pasta becoming too soft and sticky.
- Taste Test: The best way to determine if your spaghetti is al dente is by tasting it. It should be slightly firm but tender, with a slight resistance when you bite into it. If you bite into it and feel a hard center, it needs more time. Conversely, if it’s too soft, you’ve overcooked it.
3. Salt-to-Water Ratio: Why It’s Crucial
The right salt-to-water ratio is key to enhancing the flavor of your spaghetti. Salt is essential not only for seasoning the pasta but also for improving the texture. Here’s how to get it just right:
How Much Salt to Use:
- For every 4 quarts (16 cups) of water, use about 1 to 1.5 tablespoons of salt.
- Salt is vital because it helps the pasta absorb flavor while it cooks. If you don’t salt the water properly, the pasta will taste bland, even after you add sauce.
Why Salt Makes a Difference:
- Flavor Enhancement: Salt enhances the natural flavor of the pasta itself, creating a flavorful base that pairs better with the sauce, especially when making a light sauce like olive oil, garlic, and shrimp.
- Texture: Adding salt to the water also slightly increases the boiling point, helping the pasta cook more evenly and achieve the perfect texture.
Salt in the Water vs. Adding Later:
- It’s always better to salt the water at the beginning of the cooking process rather than adding salt later on. This ensures that the pasta is seasoned from the inside out and allows for a more even distribution of flavor.
4. The Process of Cooking Spaghetti Al Dente
Here’s a step-by-step breakdown of how to cook spaghetti al dente to perfection:
Step 1: Boil the Water
- Start by bringing a large pot of water to a rolling boil. The more water you use, the better. This ensures the pasta has plenty of space to move around and cook evenly.
- Once the water is boiling, add salt—1 to 1.5 tablespoons per 4 quarts of water.
Step 2: Add the Spaghetti
- Drop the spaghetti into the boiling water, stirring occasionally to prevent it from sticking together.
- Do not break the spaghetti in half; just let it naturally bend and immerse fully into the water.
Step 3: Boil for the Right Time
- Follow the package instructions for the recommended cooking time, but start checking a minute or two earlier. When the pasta is almost done (tender but with a slight bite), it’s time to taste test.
- Test by removing a strand of pasta with tongs, letting it cool briefly, and then biting into it. You should feel a bit of resistance but not an uncooked, hard center.
Step 4: Drain the Pasta
- Once the spaghetti is al dente, drain it immediately. Do not overcook the pasta, as it will continue cooking from residual heat once it’s drained.
- Tip: Reserve 1 cup of pasta water before draining. This starchy water can be used later to adjust the consistency of your sauce if necessary, helping the sauce adhere to the pasta.
5. Additional Tips for Perfect Spaghetti Al Dente
Stir the Pasta Regularly:
- Stir the spaghetti occasionally while cooking, especially in the first couple of minutes. This helps prevent the noodles from sticking together and ensures even cooking.
Do Not Overcrowd the Pot:
- Don’t overcrowd the pot with too much pasta at once. If you’re cooking a large batch, it’s better to cook the pasta in two separate pots to maintain the water temperature and ensure even cooking.
Finish Cooking the Spaghetti in the Sauce:
- For extra flavor and to achieve a seamless dish, you can finish cooking the pasta in the sauce. Once the spaghetti is al dente and drained, add it to your shrimp and sauce mixture and toss it together. The pasta will absorb some of the sauce, and you’ll get a richer, more flavorful dish.
6. Final Thoughts
Cooking spaghetti al dente is a simple yet crucial step to making a perfect spaghetti with shrimp dish. By following the correct boiling time, ensuring the right salt-to-water ratio, and tasting for firmness, you’ll achieve a wonderful texture that pairs perfectly with tender shrimp and your choice of sauce. Keep these tips in mind for pasta that’s just the right texture, and you’ll elevate your seafood pasta dishes to the next level.
Saving Pasta Water: How it Helps Create a Silky Sauce
When making a dish like spaghetti with shrimp, one of the most crucial but often overlooked steps is saving the pasta water. This simple addition can elevate the sauce from basic to velvety smooth and perfectly coated on each strand of pasta. The key lies in the starch in the pasta water, which acts as a natural thickening agent. Here’s how saving pasta water can transform your sauce and improve your overall dish.
1. Why Save Pasta Water?
Pasta water contains starch released from the spaghetti during cooking. When you save this water, it has two major benefits:
- Thickening Power: The starch makes the pasta water slightly thick, which allows it to help bind and thicken your sauce, creating a creamier and smoother texture.
- Better Sauce Adherence: The starch in the water also helps the sauce cling to the pasta better, so every bite of spaghetti with shrimp is flavorful and coated with the perfect amount of sauce.
Without pasta water, sauces can sometimes slide off the pasta or become too thin. This is especially important when making lighter sauces, like olive oil and garlic, where you want a silky consistency rather than a watery one.
2. How to Save Pasta Water
Saving pasta water is an easy step, but it requires a little planning ahead. Here’s the process:
Step 1: Before Draining the Pasta
- Reserve Pasta Water Before Draining: Before you drain the spaghetti, use a measuring cup or heatproof bowl to scoop out 1 cup (or more) of pasta water. This should be done before the pasta is drained entirely from the pot, as the water is most starchy right before the noodles are removed.
- Tip: If you’re cooking a larger batch of pasta, consider saving more pasta water just in case you need extra to adjust your sauce later.
Step 2: Set Aside and Continue Cooking
- Set the pasta water aside in a warm spot while you prepare the rest of your dish (i.e., sauté the shrimp, garlic, and any other ingredients in your sauce). This water can be used immediately in your sauce or added later as needed.
3. How to Use Pasta Water in the Sauce
Once you’ve saved your pasta water, it’s time to use it in your sauce. Here’s how:
Step 1: Finish Cooking the Pasta in the Sauce
- After sautéing your shrimp and garlic (or preparing the other components of the sauce), add the drained spaghetti directly to the pan with the sauce. Toss the spaghetti to coat it well.
- If the sauce feels too thick or the pasta seems to be absorbing the sauce too quickly, add a small amount of pasta water—about ¼ cup at a time—to adjust the consistency. The starch will work its magic, helping the sauce adhere better to the noodles.
Step 2: Stir and Toss to Combine
- Stir the pasta and sauce together, adding more pasta water as needed to achieve a silky, well-coated dish. The pasta water will help the sauce bind to the noodles without making it too runny.
- Tip: If your sauce is already looking great, you can add a bit of pasta water just to make sure it’s perfectly smooth and evenly distributed over the pasta.
4. How Pasta Water Enhances the Shrimp Dish
The addition of pasta water can have a profound impact on dishes like spaghetti with shrimp, where a delicate balance of flavors and textures is crucial. Here’s how it benefits the dish:
Creates a Smooth, Velvety Sauce
- The starch in the pasta water helps to emulsify the sauce, which creates a silky, smooth consistency. This is particularly beneficial in shrimp pasta dishes, as it helps the flavors of the garlic, olive oil, and any other seasonings blend seamlessly with the shrimp and pasta.
Enhances Flavor
- Pasta water has absorbed a small amount of the pasta’s flavor, so it brings a touch of that pasta essence into the sauce, enriching the overall dish. It also helps meld the flavors of the shrimp and the sauce more effectively, creating a more cohesive taste profile.
Helps Adjust the Texture
- Sometimes, sauces can be too thick or not enough to fully coat the pasta. Adding pasta water can adjust the texture to your liking, making the sauce less runny and more substantial. The slightly thickened pasta water helps keep the sauce in place and ensures it sticks to the spaghetti strands.
5. Tips for Using Pasta Water in Your Sauce
To get the best results from pasta water, keep these tips in mind:
- Don’t Overdo It: While pasta water is incredibly useful, it’s best to add it gradually. Start with small amounts and mix well. You can always add more if the sauce needs it, but adding too much at once can make the sauce too thin.
- Use Fresh Pasta Water: Always use the pasta water you’ve saved from freshly boiled pasta. It’s at its most starchy right after the noodles are cooked and will be more effective in helping thicken the sauce.
- Don’t Forget to Taste: After adding pasta water, always taste your sauce to check the consistency and seasoning. The added water can sometimes dilute the flavors, so you may need to adjust with a pinch of salt, pepper, or additional garlic to bring everything into balance.
6. Final Thoughts
Saving pasta water is a simple but powerful technique that can transform a good pasta dish into an exceptional one. By adding this starchy water to your sauce, you’ll create a velvety, well-coated finish that enhances the texture and flavor of your spaghetti with shrimp. Whether you’re aiming for a silky olive oil-based sauce or a garlic-infused delight, pasta water will make your sauce come together smoothly, ensuring your pasta is flavorful and perfectly coated. So, next time you cook spaghetti, don’t forget to save that liquid gold!
Making the Flavorful Shrimp Pasta Sauce
Garlic Butter Base: Sautéing Garlic in Olive Oil
The garlic butter base is the flavor foundation of many delicious pasta dishes, including spaghetti with shrimp. It’s a key step that brings rich, aromatic flavors to the dish, creating a savory and aromatic experience. Sautéing garlic in olive oil is a technique that maximizes the flavor of the garlic and the oil, creating a perfect base for your shrimp and pasta.
Here’s an expanded look at this vital step:
1. Why Garlic Butter Works So Well
The combination of garlic and butter is iconic for a reason. It adds depth of flavor to the dish, infusing the oil with a subtle sweetness and savory aroma. When garlic is sautéed in olive oil, it releases its natural oils, making the oil fragrant and full of umami. This not only enhances the shrimp’s flavor but also coats the pasta perfectly, creating a deliciously rich sauce.
- Butter adds richness and creaminess to the dish, while olive oil brings a smooth texture and mild flavor that balances the richness. This combo creates the ideal sauce base for the shrimp and spaghetti.
2. How to Sauté Garlic in Olive Oil
Sautéing garlic in olive oil is simple, but timing is key. Overcooking the garlic can cause it to turn bitter, while undercooking it leaves the garlic too raw and harsh. Here’s the process for the perfect garlic sauté:
Step 1: Prepare the Garlic
- Peel and Slice the Garlic: For the best flavor, it’s ideal to use fresh garlic. Peel the garlic cloves, then slice them thinly or mince them finely, depending on your preference. Sliced garlic will give you a more delicate, mild flavor, while minced garlic will infuse the oil more quickly, giving a more robust garlic taste.
- Tip: You can also use garlic powder if you prefer a subtler garlic flavor, but fresh garlic is always the better option for an authentic, flavorful base.
Step 2: Heat the Olive Oil
- In a large skillet, heat olive oil over medium heat. You want to allow the oil to warm up without getting too hot. If it starts to smoke, lower the heat, as this will burn the garlic and compromise the flavor.
- Tip: Use extra virgin olive oil for the best flavor. It’s slightly fruitier and adds an extra layer of richness to the dish.
Step 3: Add the Garlic
- Once the olive oil is hot (but not smoking), add the garlic to the pan. Immediately start stirring the garlic with a wooden spoon to prevent it from sticking to the bottom or burning.
- Watch for the Garlic’s Aroma: As the garlic cooks, it will start to release its signature aroma. This is a great sign that the oil is absorbing all that garlicky goodness. You want to sauté the garlic until it’s golden brown but not darkened or crispy, as this is when it starts to become bitter.
Step 4: Control the Cooking Time
- Timing is Key: Garlic can go from perfect to burnt in a matter of seconds. Typically, sautéing for 1–2 minutes should be enough to infuse the oil with garlic flavor without it becoming bitter. If the garlic starts to turn brown quickly, reduce the heat or remove the pan from the heat source briefly to control the cooking process.
3. How the Garlic Butter Base Elevates the Dish
Once the garlic is perfectly sautéed in olive oil, it creates a flavorful base that is rich in both aroma and taste. Here’s how this foundation helps your dish:
Flavor Infusion for Shrimp
- The shrimp will absorb the garlic flavor when added to the pan. The sautéed garlic creates an aromatic and flavorful coating on the shrimp, which infuses them with a wonderful garlic taste without overpowering their natural sweetness.
Base for the Sauce
- The garlic-infused oil and butter create a rich and silky sauce that clings to both the shrimp and the pasta. This combination of olive oil and garlic is essential for making sure your pasta is coated in a flavorful sauce. As you toss the cooked spaghetti into this mixture, the flavors get beautifully melded together, creating a cohesive and aromatic dish.
Complementing Other Ingredients
- If you’re adding any other vegetables or seasonings, the garlic butter base will seamlessly tie everything together. For instance, if you choose to include cherry tomatoes, red pepper flakes, or Italian herbs, the garlic flavor will complement these ingredients, creating a harmonious flavor profile. The garlic will also blend well with the shrimp, ensuring the final dish has layers of flavor without anything tasting out of place.
4. Optional: Enhancing the Garlic Butter Base with Additional Flavor
To further elevate the garlic butter base, you can experiment with adding a few extra ingredients for extra depth:
1. Lemon Zest
- Adding a hint of lemon zest to the garlic butter base can infuse your dish with a fresh, zesty note, balancing the richness of the butter and complementing the shrimp beautifully.
2. Fresh Herbs
- Fresh herbs like parsley, basil, or oregano can be stirred into the garlic butter base to add brightness and herbal freshness, further elevating the flavor of the pasta and shrimp.
3. White Wine
- For added depth and acidity, you could deglaze the pan with a splash of white wine after sautéing the garlic. This will add a slight tanginess and complexity to the sauce, making it even more irresistible.
5. Final Thoughts on Garlic Butter Base
Sautéing garlic in olive oil is the foundation of creating a rich, flavorful base for your spaghetti with shrimp. When done correctly, this step sets the tone for the entire dish. The combination of garlic’s aromatic, savory flavors with the smoothness of olive oil helps to infuse the shrimp and pasta with a deep, satisfying taste. Whether you’re preparing a simple pasta or a more elaborate dish with added ingredients, the garlic butter base is essential for creating a rich, well-seasoned meal that will have everyone coming back for seconds.
Adding the Shrimp and White Wine: Infusing Flavor
The step of adding shrimp and white wine to the sautéed garlic butter base is pivotal in infusing the dish with layers of flavor. This stage not only enhances the taste of the shrimp but also contributes to the overall depth and complexity of the sauce. Here’s a detailed look at how this process works and how to do it correctly:
1. Why Shrimp and White Wine Make the Perfect Pairing
Shrimp is a delicate and subtly sweet seafood that absorbs flavors quickly, making it the perfect ingredient to cook with a garlic butter base. Adding white wine further elevates the flavors, bringing acidity, freshness, and a hint of complexity to the dish. White wine’s natural acidity complements the richness of the butter while balancing the flavors of the shrimp.
- Shrimp: When cooked correctly, shrimp are tender, juicy, and subtly sweet, acting as the perfect vehicle for the garlic butter and wine. The cooking process intensifies their natural flavors, allowing them to absorb the aromatic garlic, oil, and wine mixture.
- White Wine: The addition of white wine not only brings a delicate acidity that cuts through the richness of the butter and olive oil but also enhances the seafood flavor of the shrimp. A good, dry white wine like Sauvignon Blanc or Chardonnay works best, as it won’t overpower the dish but will add just the right balance of brightness and depth.
2. How to Add Shrimp and White Wine to the Garlic Butter Base
Adding shrimp and white wine is an easy process, but timing and heat management are essential for bringing out the best flavors. Here’s how to do it:
Step 1: Add the Shrimp
- Once the garlic is perfectly sautéed and aromatic, it’s time to add the shrimp. If using fresh shrimp, make sure they are properly cleaned, deveined, and patted dry before adding them to the pan. If using frozen shrimp, ensure they are completely thawed and drained of any excess water before cooking.
- Tip: Add the shrimp in a single layer to the pan, ensuring that they are evenly distributed. This helps the shrimp cook evenly and sear beautifully.
Step 2: Sauté the Shrimp
- Cook the shrimp over medium heat for about 2–3 minutes per side, or until they turn pink and opaque. The shrimp should have a nice sear and slightly golden edges, which creates flavor and texture.
- Tip: Avoid overcrowding the pan, as this can cause the shrimp to steam instead of sear. If necessary, cook the shrimp in batches to ensure they are perfectly seared.
Step 3: Add the White Wine
- Once the shrimp are cooked on one side, it’s time to deglaze the pan with white wine. Pour about 1/4 to 1/3 cup of dry white wine into the pan. The wine will help lift any flavorful bits of garlic and shrimp that have caramelized on the bottom of the pan, adding even more depth to the sauce.
- Tip: Scrape up the bits of garlic and shrimp with a wooden spoon as the wine simmers. This creates a rich, flavorful sauce and ensures that none of the delicious seasoning is left behind.
3. Why White Wine Infuses Flavor Into the Shrimp
The addition of white wine serves a few key purposes in infusing flavor into the dish:
1. Elevating the Shrimp Flavor
- White wine complements the natural sweetness of shrimp, adding a slight tanginess that enhances the flavor without overpowering it. The wine’s acidity helps to highlight the delicate notes of the shrimp, bringing out the best of both ingredients.
2. Tenderizing the Shrimp
- While shrimp are already tender, the acidic nature of white wine helps slightly tenderize the meat further, ensuring that they stay juicy and succulent throughout the cooking process. The wine gently breaks down the proteins in the shrimp, making them even more tender without losing their natural texture.
3. Adding Depth and Complexity
- As the wine simmers and reduces, it intensifies in flavor, enriching the garlic butter base. This concentrated wine flavor becomes part of the sauce, creating a well-balanced, multi-layered flavor profile that complements the shrimp and pasta beautifully.
4. Enhancing the Sauce with Wine Reduction
After the shrimp are cooked, the white wine will have reduced a bit, creating a simmered sauce that enhances the dish’s overall flavor. The reduction process serves two main purposes:
1. Creating a Flavorful Sauce
- As the wine reduces, it thickens slightly, allowing it to coat the shrimp and the pasta. The sauce will have a velvety texture, combining the smoothness of the olive oil and butter with the slight acidity from the wine.
2. Balancing the Richness
- The acidity from the white wine cuts through the richness of the butter and olive oil, ensuring the dish doesn’t become too heavy. This balancing act keeps the flavors fresh, making each bite of spaghetti with shrimp feel light yet indulgent.
5. Tips for Infusing Maximum Flavor
To make sure you get the most out of this crucial step, here are a few tips for infusing the best possible flavor from the shrimp and white wine:
- Use a Dry, Crisp White Wine: A dry wine like Sauvignon Blanc, Pinot Grigio, or Chardonnay will add the right level of acidity without overpowering the dish. Avoid sweet wines, as they can make the sauce too sugary.
- Don’t Overcook the Shrimp: Shrimp cook quickly, so be mindful of the timing. Overcooking shrimp can lead to rubbery and tough texture, so always remove them from the heat as soon as they are opaque and pink.
- Let the Wine Simmer Gently: Allow the wine to reduce for 2–3 minutes without boiling too aggressively. A gentle simmer helps preserve the delicate flavors and keeps the sauce from becoming too sharp or bitter.
6. Final Thoughts on Shrimp and White Wine
Adding shrimp and white wine to the garlic butter base is a key step in making spaghetti with shrimp extraordinary. The shrimp becomes infused with the rich flavors of garlic and wine, while the white wine adds acidity and depth to the sauce, perfectly balancing the richness of the butter. This technique not only enhances the shrimp but also ties together the entire dish, creating a well-rounded and flavor-packed meal that everyone will love. By following the proper method of adding and cooking the shrimp and wine, you’ll ensure that your dish is both delicate and bold—with every bite perfectly seasoned.
Bringing It All Together: Tossing Pasta with Sauce and Garnishing with Parmesan
The final step in creating the perfect spaghetti with shrimp is where everything comes together. This stage is essential for ensuring that each strand of pasta is perfectly coated in the flavorful sauce, and the dish is presented beautifully with the finishing touches. Here’s how to bring all the components together seamlessly:
1. Tossing Pasta with Sauce: The Secret to Flavorful Coating
The key to a successful pasta dish lies in how well you mix the pasta and sauce. Once your shrimp are cooked and the white wine has reduced to create a rich, flavorful sauce, it’s time to combine everything with the cooked spaghetti. This step allows the pasta to soak up the sauce, ensuring each bite is packed with flavor.
Step 1: Use the Right Amount of Pasta Water
- Before draining the pasta, make sure to reserve some pasta water (about 1/2 to 1 cup). This starchy water will be essential in creating the perfect texture for the sauce. After draining the pasta, immediately add the pasta to the pan with the shrimp and sauce, and then gradually incorporate the reserved pasta water if needed. This water helps to bind the sauce to the pasta, making the sauce silky and smooth.
- Tip: The starch in the pasta water helps to create a slightly creamy texture for the sauce, making it adhere perfectly to the noodles without being too watery.
Step 2: Toss, Toss, Toss
- Once the pasta is added to the pan, toss the spaghetti gently with the sauce using tongs or a large spoon. This step is crucial in ensuring that each strand of pasta is coated in the rich garlic-butter sauce with the shrimp. Be sure to toss thoroughly, but carefully, to prevent breaking the shrimp or overcooking the pasta.
- Tip: If the sauce feels too thick or if it doesn’t coat the pasta properly, add a little more reserved pasta water, one tablespoon at a time, to reach the desired consistency.
2. Adjusting the Flavor and Consistency
Once the pasta is combined with the sauce, it’s time to check for balance and consistency. At this point, you can adjust the sauce to make sure everything is just right:
- Flavor Adjustment: Taste the sauce and see if it needs more seasoning. You may want to add a pinch of salt, a dash of black pepper, or even a squeeze of lemon juice to brighten it up. If the sauce feels too rich or heavy, the lemon juice will bring an additional layer of acidity that balances it perfectly.
- Sauce Consistency: If the sauce has become too thin or runny, cook the pasta and sauce together for an additional 1–2 minutes to allow the sauce to thicken. If the sauce is too thick, you can add more pasta water or a little extra olive oil to loosen it.
3. Garnishing with Parmesan: The Finishing Touch
Once you’ve tossed the pasta and shrimp together and achieved the desired flavor and consistency, it’s time to elevate the dish with garnishes. Garnishing adds an extra layer of flavor and texture, and it makes the dish visually appealing.
Step 1: Freshly Grated Parmesan Cheese
- Sprinkle a generous amount of freshly grated Parmesan cheese over the top of the pasta. Parmesan adds a savory, nutty flavor that perfectly complements the shrimp and garlic butter sauce. The cheese will melt into the hot pasta, enriching every bite with its creamy texture.
- Tip: For the best flavor, always use freshly grated Parmesan rather than pre-grated cheese. Freshly grated cheese has a more intense flavor and a smoother texture, making it the ideal choice for garnishing pasta.
Step 2: Fresh Herbs and Lemon Zest (Optional)
- While Parmesan is the classic garnish, you can also add freshly chopped herbs like parsley or basil for an aromatic touch. These herbs will not only add color but also enhance the dish with their fresh, bright flavors.
- A light sprinkle of lemon zest can also be added to bring a fresh citrusy note that cuts through the richness of the butter and Parmesan.
4. Final Touches: The Art of Plating
The way you plate the dish can elevate its visual appeal, making it more appetizing and inviting. Here are some tips for plating the perfect spaghetti with shrimp:
- Twirl the Spaghetti: For a beautiful presentation, twirl the spaghetti into a nest-like mound using a fork and spoon. Place the pasta in the center of the plate and allow it to form an attractive mound.
- Arrange the Shrimp: Arrange the shrimp around the pasta or on top of the mound for a neat, professional look. The shrimp should be visible and evenly distributed, allowing the vibrant colors of the seafood to stand out.
- Sprinkle with Garnishes: Finish off the plating with a final sprinkle of Parmesan cheese and fresh herbs, along with a light drizzle of olive oil for extra shine and flavor.
5. Serving Suggestions
Now that your spaghetti with shrimp is perfectly tossed and garnished, it’s time to serve! This dish is best enjoyed fresh and hot. Pair it with a light salad (such as a simple arugula salad) to balance the richness of the pasta. If you want to add some extra flair, serve the dish with garlic bread or crusty bread to soak up the leftover sauce.
6. Conclusion: A Perfectly Balanced Dish
By tossing the pasta with the rich garlic butter sauce and adding a generous garnish of Parmesan cheese and fresh herbs, you’ll have a perfectly balanced and visually stunning spaghetti with shrimp. This step is the final touch that transforms the dish from simple to exceptional, ensuring that each bite is full of flavor, texture, and visual appeal. Whether you’re preparing this for a weeknight dinner or a special occasion, bringing it all together in this way ensures that your dish will shine and impress your guests.
Serving and Enjoying Your Spaghetti with Shrimp
Best Garnishes: Fresh Herbs, Lemon Wedges, Extra Parmesan
The garnishing stage is the final touch that elevates your spaghetti with shrimp from a simple meal to a restaurant-quality dish. While the sauce and pasta provide the foundation, the garnishes bring the flavor to life, offering a pop of color, texture, and additional taste. Here’s how to choose the best garnishes to complete your dish:
1. Fresh Herbs: A Burst of Freshness
Herbs not only add visual appeal but also infuse the dish with aromatic freshness that contrasts perfectly with the richness of the shrimp and garlic butter sauce.
Best Herbs to Use:
- Parsley: Fresh parsley is a classic garnish for pasta dishes. Its bright, slightly peppery flavor balances out the richness of the garlic butter sauce. Chop it finely and sprinkle over the dish just before serving for a burst of color and flavor.
- Basil: Fresh basil works wonderfully, especially if you’re making a variation of spaghetti with shrimp that has a more Mediterranean flavor profile. Basil offers a sweet, slightly peppery taste and pairs beautifully with seafood.
- Chives: Chives bring a mild onion flavor that adds a touch of sharpness without overwhelming the dish. Chopped chives also create a delicate look on top of the pasta.
- Thyme or Oregano: If you want to incorporate a more earthy, savory element, fresh thyme or oregano can add complexity to the flavor profile, particularly if your pasta has Italian seasoning or tomatoes incorporated.
How to Use Fresh Herbs:
- Chop herbs finely for an even distribution over the pasta.
- Sprinkle just before serving, as fresh herbs can lose their color and flavor if they’re added too early.
- Layer herbs under and on top of the pasta to ensure they’re evenly spread.
2. Lemon Wedges: Brightening the Dish
A lemon wedge or a squeeze of fresh lemon juice is an excellent way to cut through the richness of the garlic butter sauce and provide a refreshing citrus note. The zesty acidity from lemon can help balance the flavors and make the dish feel lighter and more vibrant.
How to Use Lemon:
- Lemon Wedges: Serve the spaghetti with shrimp alongside lemon wedges so your guests can squeeze fresh lemon juice over the dish to taste. This allows them to customize the level of acidity and freshness they want.
- Lemon Zest: If you’re aiming for a more subtle lemon flavor, finely grated lemon zest can be sprinkled over the dish before serving. This provides an aromatic burst of citrus that enhances the overall experience.
- Lemon Juice: Alternatively, squeeze fresh lemon juice directly over the shrimp and pasta just before serving. The juice works wonders in brightening up the flavors, particularly if the dish feels a bit too rich or heavy.
3. Extra Parmesan: A Creamy, Nutty Finish
Parmesan cheese is an essential part of the spaghetti with shrimp experience, providing a rich, nutty, and savory flavor that complements the pasta and seafood. A generous sprinkle of freshly grated Parmesan adds a luxurious finish to the dish.
How to Use Extra Parmesan:
- Freshly Grated Parmesan: Always use freshly grated Parmesan instead of pre-shredded versions for the best flavor. Grating it just before serving ensures it melts beautifully into the hot pasta, adding a creamy texture and intensifying the flavor.
- Generous Sprinkle: Don’t be shy with the cheese! A generous sprinkle of Parmesan on top of the finished dish creates an inviting, flavorful layer that pairs perfectly with the garlic butter sauce.
- Parmesan Crumbles: For a slightly different texture and presentation, you can also add small Parmesan crumbles or thin shavings on top of the pasta. This can provide a bit of crunch and a more rustic feel.
4. Optional Garnishes for Extra Flair
While fresh herbs, lemon, and Parmesan are the staples for garnishing spaghetti with shrimp, you can also incorporate additional garnishes for extra visual appeal and flavor. Here are some optional suggestions:
Crushed Red Pepper Flakes: A Touch of Heat
- If you enjoy a bit of heat, crushed red pepper flakes are a great addition. The slight spiciness complements the shrimp and enhances the richness of the garlic butter sauce.
- Tip: Sprinkle just a small pinch of red pepper flakes, or offer them as an optional topping on the side for guests who prefer more heat.
Toasted Pine Nuts or Almonds: Adding Crunch
- For added texture, sprinkle toasted pine nuts or slivered almonds on top of the dish. Their mild, nutty flavor works harmoniously with shrimp, and their crunch provides a satisfying contrast to the soft pasta.
Microgreens: A Gourmet Touch
- Microgreens, such as arugula or basil, are an elegant way to elevate your dish. They not only add flavor but also make the presentation look professional and refined.
- Tip: Sprinkle a small handful of microgreens on top just before serving to add an upscale touch.
Balsamic Glaze (Optional):
- For a burst of sweet tanginess, you could drizzle a small amount of balsamic glaze over the pasta. This works particularly well if you’ve added tomatoes to the dish, as it enhances the overall Mediterranean-inspired flavors.
5. Serving Suggestions with Garnishes
When garnishing spaghetti with shrimp, it’s important to consider the overall look and flavor harmony of the dish. A well-garnished plate not only makes the dish more appealing but also enhances the eating experience. Serve the dish with a side of garlic bread, a crusty baguette, or a light arugula salad dressed with a simple vinaigrette to complement the flavors of the pasta and shrimp.
Pairing Suggestions: Wine, Salad, or Garlic Bread
When serving spaghetti with shrimp, the right pairings can enhance the flavors and create a well-rounded meal. Whether you’re planning a casual dinner or a special occasion, the right wine, side salad, or bread can elevate the dish and make your meal feel more complete. Let’s explore some excellent pairing options for this flavorful seafood pasta.
1. Wine Pairing: Complementing the Flavors
The right wine can enhance the delicate flavors of shrimp and garlic butter while balancing the richness of the pasta. When choosing a wine, consider the lightness and richness of the dish, as well as the acidity and flavor profile of the wine.
White Wine Pairings:
- Sauvignon Blanc: This dry white wine is one of the best choices to pair with shrimp pasta. Its crisp acidity and citrus notes help cut through the richness of the garlic butter sauce while complementing the light sweetness of the shrimp.
- Pinot Grigio: Another excellent option, Pinot Grigio has a light, crisp flavor that won’t overpower the shrimp. It offers subtle fruit and floral notes that harmonize well with the pasta’s delicate flavors.
- Chardonnay (Unoaked): If you prefer a fuller-bodied wine, go for an unoaked Chardonnay. Its creamy texture pairs wonderfully with the richness of the garlic butter sauce without being too heavy, and its slight acidity enhances the shrimp’s natural sweetness.
- Vermentino: For a more Mediterranean vibe, Vermentino offers a fresh, crisp, and slightly herbal profile that pairs beautifully with seafood dishes, including spaghetti with shrimp.
Red Wine Pairings:
While red wine is not traditionally the go-to option for seafood, a light-bodied red wine can still work if you prefer reds. Opt for a wine that doesn’t overpower the delicate flavors of shrimp and garlic butter.
- Pinot Noir: With its low tannin and fresh fruit flavor, Pinot Noir can be a good red wine option. It offers a mild acidity and subtle berry flavors that won’t clash with the shrimp and pasta.
- Gamay (Beaujolais): Gamay, especially from the Beaujolais region, is a light and fruity red wine that pairs well with seafood pasta. Its soft tannins and fresh acidity help balance the richness of the garlic butter sauce without being overwhelming.
2. Salad Pairing: Light and Fresh
A light and refreshing salad is a perfect side to balance the richness of spaghetti with shrimp. Look for salads that offer crisp textures and bright flavors to complement the dish without overshadowing it.
Mediterranean Salad:
A Mediterranean salad works wonderfully with shrimp pasta. The tangy and refreshing flavors of cucumbers, tomatoes, red onions, olives, and feta cheese provide a contrast to the richness of the pasta. Drizzle with olive oil and lemon juice for a simple, zesty dressing that brings the flavors together.
Arugula Salad:
An arugula salad is a great choice for pairing with seafood pasta. Its peppery flavor provides a nice contrast to the sweetness of the shrimp, and the slight bitterness of the arugula balances out the garlic butter. Toss the arugula with a light balsamic vinaigrette or lemon dressing for extra flavor.
Caesar Salad:
For those who love the classic pairing, a Caesar salad can be a satisfying choice. The creamy dressing, crispy croutons, and Parmesan cheese add richness and crunch that complement the pasta’s flavors. However, keep the dressing light so as not to overwhelm the shrimp.
Simple Mixed Greens Salad:
If you want something even lighter, opt for a mixed greens salad. Use a combination of baby spinach, kale, and other fresh greens with a tangy lemon vinaigrette. This simple salad provides freshness without competing with the flavors of the shrimp and pasta.
3. Garlic Bread: The Ultimate Sidekick
A warm, crispy slice of garlic bread is the ultimate side to serve with spaghetti with shrimp. The garlicky, buttery flavor of the bread complements the garlic butter sauce in the pasta, creating a satisfying harmony of flavors.
Homemade Garlic Bread:
- Make it yourself for the best result. Spread butter, garlic, and parsley on fresh baguette slices and bake until golden and crispy. The warm, buttery bread provides the perfect texture to dip into the garlic butter sauce from the pasta.
- Crispy Crust: Ensure the garlic bread has a crispy crust. The contrast between the soft, buttery inside and the crisp exterior is perfect for scooping up extra sauce from the spaghetti.
Cheese Garlic Bread:
For a richer side, cheese garlic bread adds a creamy, melty layer that pairs beautifully with the pasta. Simply top your garlic bread with shredded mozzarella or Parmesan and bake until golden brown.
4. Optional Pairing Enhancements:
Light and Refreshing Beverage:
If you’re not in the mood for wine, consider a chilled sparkling water or a lemonade for a refreshing, non-alcoholic pairing. These beverages add a touch of acidity and brightness, perfect for balancing the richness of the garlic butter pasta.
Charred Vegetables:
For a more robust meal, pair the dish with charred vegetables like zucchini, bell peppers, or asparagus. The smoky flavor of grilled vegetables adds complexity to the meal and balances out the seafood’s sweetness.
Roasted Potatoes:
For a heartier side, roasted potatoes are a classic pairing. The crisp, seasoned exterior and soft interior of roasted potatoes make them a satisfying accompaniment to spaghetti with shrimp.
By choosing the right pairings, whether it’s a crisp white wine, a refreshing salad, or a side of garlic bread, you can enhance the flavors of your spaghetti with shrimp and create a memorable dining experience. Each of these pairing suggestions helps to balance the richness of the shrimp pasta while adding new layers of flavor and texture to your meal.
Storage and Reheating Tips: Keeping Leftovers Fresh
Leftovers from your spaghetti with shrimp are a wonderful treat for the next day, but to preserve their flavor, texture, and quality, it’s essential to store and reheat them correctly. Here are some helpful tips to ensure your dish stays fresh and delicious for future meals.
1. Storing Leftovers: Proper Techniques for Freshness
The key to keeping spaghetti with shrimp fresh in the fridge is ensuring that it is stored in an airtight container. Here’s how to store your leftovers:
Cool Down Before Storing:
- Before placing your leftovers in the fridge, allow the pasta to cool down to room temperature. This helps prevent condensation inside the container, which can lead to soggy pasta and shrimp.
- Avoid leaving the dish at room temperature for too long—no more than two hours—to minimize the risk of bacterial growth.
Separate Pasta and Shrimp:
- If you have large portions left over, it’s best to store the pasta and shrimp separately. This will prevent the shrimp from absorbing too much sauce, which can cause it to become mushy when reheated.
- Alternatively, store everything together in an airtight container if you don’t mind a bit of sogginess in the shrimp. Just make sure there is enough room for air to circulate in the container.
Use Glass Containers:
- Glass containers are ideal for storing leftovers as they prevent odors from permeating into the pasta and shrimp. They are also easy to clean and prevent discoloration that can occur with plastic containers over time.
Labeling for Freshness:
- If you’re preparing leftovers ahead of time, label your containers with the date you cooked the meal. This way, you can keep track of when the dish was made and ensure it is consumed within the safe window for leftovers, typically within 3 to 4 days.
2. Freezing Leftovers: Extending Shelf Life
If you have more leftovers than you can eat within a few days, you can freeze spaghetti with shrimp for later enjoyment. Freezing can help preserve the flavor and quality, but keep in mind that the shrimp may lose some of its original texture.
How to Freeze Spaghetti with Shrimp:
- Portion it out: Divide the pasta and shrimp into individual meal-sized portions. This way, you can defrost only what you need, avoiding waste.
- Wrap it tightly: Wrap the portions in plastic wrap or place them in freezer-safe airtight bags. Be sure to remove as much air as possible to prevent freezer burn.
- Label and Date: As with refrigeration, label the containers or bags with the date so you can keep track of how long they’ve been frozen. Frozen pasta and shrimp can be kept for up to 2 months.
What to Know About Freezing Shrimp:
- Freezing shrimp for long periods can affect its texture. It may become a bit rubbery after reheating, especially if it’s been frozen for too long. If you plan to freeze this dish, try to eat it within 1 to 2 months for the best quality.
3. Reheating Leftovers: How to Bring Back the Freshness
When it’s time to reheat your spaghetti with shrimp, the goal is to preserve the flavor and texture of the dish as much as possible. Follow these steps to make your leftovers taste as fresh as when they were first made.
Reheating in the Microwave:
- Microwave with care: If you choose to microwave the dish, place it in a microwave-safe container and cover it with a damp paper towel to retain moisture. Microwave it in short intervals, stirring occasionally, to ensure even heating.
- Add a splash of liquid: If the pasta looks dry, add a small splash of olive oil, butter, or a bit of the reserved pasta water to bring moisture back into the dish.
- Heat shrimp gently: Shrimp can easily overcook in the microwave, so heat it for no more than 1-2 minutes at a time, checking between intervals.
Reheating on the Stovetop:
- Use a pan or skillet: Reheating on the stovetop allows for better control over the heat and helps maintain the shrimp’s texture. Heat the pasta and shrimp in a large skillet over medium heat.
- Add moisture: If the pasta has become dry during storage, add a little bit of olive oil or a spoonful of butter to help bring back its moisture and flavor. You can also add a splash of white wine or vegetable broth to help rejuvenate the dish.
- Stir gently: Stir gently to ensure the shrimp and pasta warm evenly without breaking the shrimp apart.
Avoid Overheating:
- One of the most important things when reheating spaghetti with shrimp is not to overheat. Shrimp can easily become rubbery and tough when exposed to too much heat. Warm the dish slowly and gently to preserve its texture.
4. Enjoying Leftovers: Fresh and Delicious the Next Day
When stored and reheated properly, spaghetti with shrimp can be just as enjoyable the next day as it was when first served. The garlic butter sauce may even taste more flavorful after the ingredients have had time to meld together.
Recap the Recipe’s Simplicity and Deliciousness
In conclusion, spaghetti with shrimp is a simple yet incredibly delicious dish that combines a handful of fresh ingredients to create an unforgettable meal. Its straightforward preparation and minimalist ingredients make it an excellent choice for both novice cooks and experienced chefs alike. Let’s recap why this recipe works so well and why you’ll want to make it over and over again.
1. Simple Ingredients, Big Flavor
The beauty of spaghetti with shrimp lies in its simplicity. With just a few essential ingredients—spaghetti, shrimp, garlic, olive oil, and Parmesan cheese—you can create a meal that’s both flavor-packed and satisfying. These ingredients are commonly found in most kitchens, meaning this recipe is quick and easy to whip up, even on busy days when you don’t have a lot of time to cook.
2. Perfect Balance of Flavors and Textures
Each component in the dish adds its own unique element, creating a perfect balance of flavors and textures. The tender shrimp, combined with the rich garlic butter sauce, pairs beautifully with the al dente spaghetti, creating a mouthwatering harmony that feels luxurious, yet uncomplicated. The touch of Parmesan cheese and a sprinkle of fresh herbs enhance the overall flavor profile, bringing everything together in one satisfying bite.
3. Customizable to Your Taste
Another great aspect of this recipe is its flexibility. You can easily adjust the flavors to suit your preferences by adding or omitting ingredients like cherry tomatoes, Italian herbs, or even spicy red pepper flakes. Whether you enjoy a bit of heat in your dish or prefer a more mild flavor, spaghetti with shrimp can be adapted to meet any taste.
4. Quick and Easy
In addition to being simple in terms of ingredients, this recipe also boasts quick cooking times. With just 20 minutes from start to finish, you can have a delicious meal on the table in no time. The combination of a garlic butter base, perfectly sautéed shrimp, and freshly cooked spaghetti ensures you get a restaurant-quality meal without the wait or complexity.
5. A Crowd-Pleaser
Whether you’re cooking for a family dinner, a weekend gathering, or an intimate date night, spaghetti with shrimp is a dish that will impress. Its versatility and ease make it an excellent choice for any occasion, and the beautiful presentation of the dish, garnished with fresh herbs and Parmesan cheese, is sure to wow your guests. Plus, with its balanced flavors and elegant simplicity, this dish is perfect for both seasoned home cooks and those just starting out in the kitchen.
In summary, spaghetti with shrimp is a perfect marriage of simplicity and taste—an easy-to-make dish that feels fancy yet remains approachable. The tender shrimp, creamy garlic butter sauce, and al dente pasta come together to create a meal that’s as enjoyable to eat as it is to prepare. Whether you’re looking for a quick weeknight dinner or a crowd-pleasing dish for a special occasion, this recipe is sure to be a hit every time.