If you’ve ever visited the bustling streets of New York City, you know that nothing beats grabbing a slice of authentic New York-style pizza. With its thin, crispy crust, perfectly melted cheese, and rich tomato sauce, it’s a food lover’s dream come true. But what if you could recreate that iconic slice right in your own kitchen? In this step-by-step guide, we’ll show you how to make New York-style pizza at home, from preparing the dough to achieving the perfect bake. Whether you’re a pizza enthusiast or a home cook looking to impress, this recipe will bring the classic flavors of NYC straight to your table. Let’s dive into the process of crafting a mouthwatering, thin-crust pizza that’s as good as the ones you’d find in the heart of Manhattan.
Understanding the Key Elements of New York-Style Pizza
Certainly! Here’s an expanded version of the section titled “What Makes New York-Style Pizza Unique?” focusing on the thin, crispy crust, the balance of sauce, cheese, and toppings, and the iconic foldable slice:
What Makes New York-Style Pizza Unique?
New York-Style pizza is much more than just a meal; it’s a cultural icon that has been shaped by the city’s history, lifestyle, and culinary traditions. From its thin, crispy crust to its perfect balance of sauce, cheese, and toppings, every element contributes to the pizza’s unique appeal. Here’s what makes New York-Style pizza stand out from the rest:
1. The Thin, Crispy Crust
The hallmark of New York-Style pizza is its ultra-thin crust, which is crispy on the outside yet soft and chewy on the inside. This texture is achieved by using high-gluten flour and a special dough recipe, which helps it maintain strength and elasticity while also allowing it to crisp up in the oven. Unlike other pizzas with thick or doughy crusts, New York-Style pizza’s thin base holds up well to a variety of toppings without becoming soggy or flimsy.
The dough is hand-tossed, a technique that ensures the perfect thickness throughout. It’s also baked at high temperatures (around 800°F or 427°C) in a gas or coal-fired oven, which creates that signature crispiness on the edges while keeping the center soft and pliable. This balance between crunchy and chewy is a crucial part of the pizza’s appeal, giving it a satisfying texture with every bite.
2. The Iconic Foldable Slice
Another signature feature of New York-Style pizza is its large, foldable slices. When you order a slice of New York pizza, you’ll typically receive a massive, thin piece that is perfectly suited for folding in half. The ability to fold the slice in half is a defining characteristic of this pizza style and is not only practical but enhances the flavor experience.
Folding the slice helps concentrate the sauce, cheese, and toppings, making each bite a little more intense. It also makes the pizza easier to eat on the go, which is why it’s so popular in New York’s bustling street food culture. Whether you’re grabbing a quick bite on your lunch break or walking down the street, the foldable slice makes New York-Style pizza the ideal street food. The structure of the slice holds everything together while still providing that satisfying crunch in every bite.
3. The Balance of Sauce, Cheese, and Toppings
What truly sets New York-Style pizza apart is the perfect harmony between its sauce, cheese, and toppings. The sauce is made with high-quality, fresh tomatoes, often San Marzano tomatoes, which provide a slightly sweet and tangy flavor. The sauce is spread thinly on the dough, allowing the flavor to shine through without overwhelming the other ingredients. Unlike some pizzas that drown their crust in sauce, New York pizza achieves the perfect balance of flavors by using just enough sauce to complement the cheese and toppings.
Speaking of cheese, mozzarella is the cheese of choice for New York-Style pizza. It’s usually whole-milk mozzarella, which has a great melt and creates that signature gooey, stretchy texture. The cheese is generously applied, but not to the point where it overpowers the sauce or crust. The goal is a perfect ratio of cheese to sauce, ensuring that each bite is a harmonious blend of creamy, tangy, and savory elements.
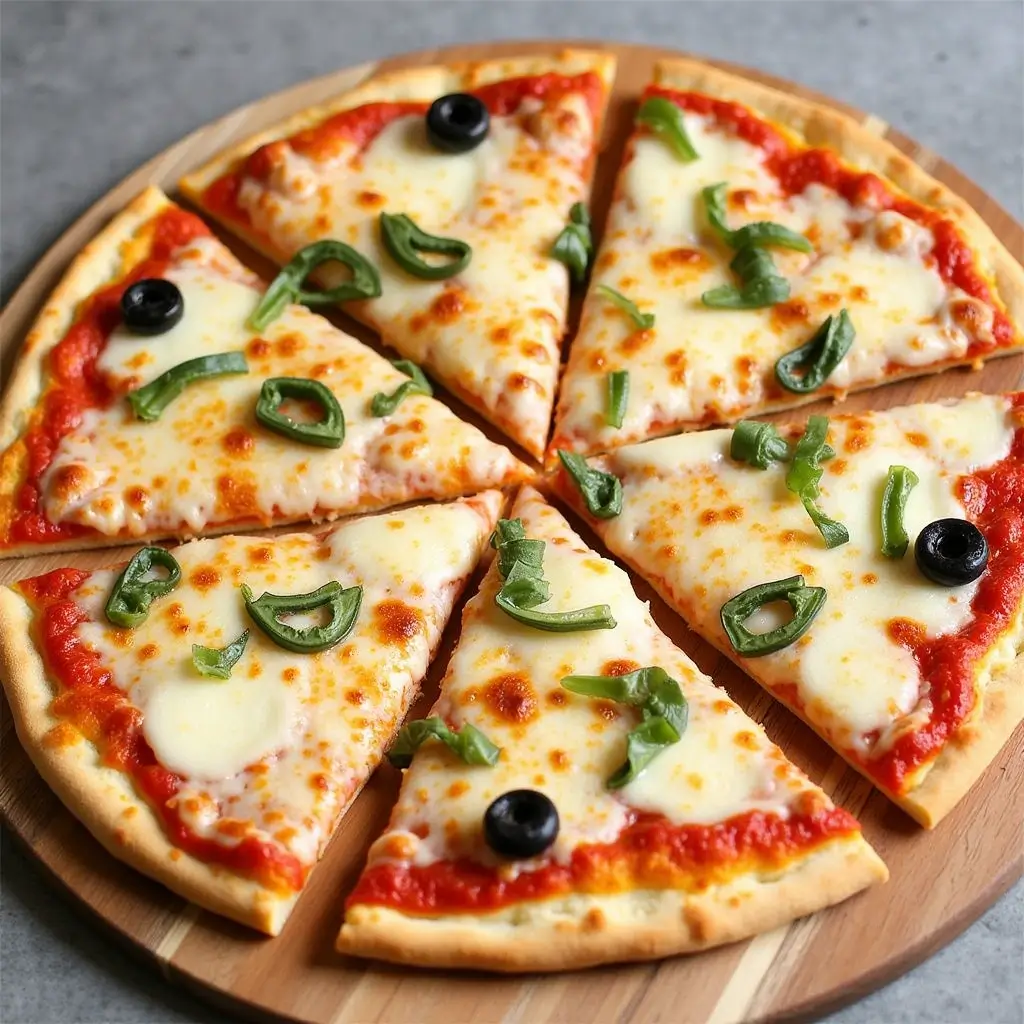
As for the toppings, New York-Style pizza tends to keep things simple and fresh. Classic toppings include pepperoni, sausage, mushrooms, green peppers, and fresh basil. These toppings are typically sliced thinly to ensure they cook evenly and don’t weigh down the pizza. The key is maintaining balance—the toppings should enhance the pizza’s flavor without dominating it. In New York, it’s common to find pizzas topped with just a few select ingredients to let the quality of each shine through.
4. The Quick, High-Temperature Baking Process
The high-heat baking process is another factor that makes New York-Style pizza unique. The pizza is cooked in a very hot oven, typically around 800°F (427°C), for a short period of time, usually 2-3 minutes. This intense heat creates the ideal crispiness on the crust while maintaining a light, airy texture in the center. It also allows the cheese to melt perfectly and the toppings to cook evenly without losing their flavor.
Summary
In conclusion, what makes New York-Style pizza so unique is the combination of its thin, crispy crust, iconic foldable slice, and the perfect balance of sauce, cheese, and toppings. Every detail, from the hand-tossed dough to the choice of ingredients and high-temperature baking process, comes together to create a pizza that’s crisp, flavorful, and absolutely delicious. Whether you fold it or eat it flat, the New York-Style pizza is a true reflection of the city’s dynamic, fast-paced culture, offering a one-of-a-kind pizza experience that’s loved around the world.
Certainly! Here’s an expanded version of the section titled “Essential Ingredients for New York-Style Pizza” focusing on key ingredients like mozzarella cheese, high-gluten flour for the dough, fresh tomatoes for the sauce, and the importance of fresh toppings:
Essential Ingredients for New York-Style Pizza
Making an authentic New York-Style pizza at home requires careful attention to the ingredients. These ingredients are crucial for achieving the characteristic flavor and texture that set this pizza style apart from others. From the dough to the toppings, every component plays a pivotal role in creating that perfect slice. Here’s a breakdown of the essential ingredients needed to make New York-Style pizza:
1. Mozzarella Cheese: The Heart of the Pie
The cheese used in New York-Style pizza is integral to its flavor and texture. Fresh, high-quality mozzarella cheese is the gold standard for this style. Traditionally, mozzarella is made from cow’s milk (whole-milk mozzarella), which gives it a creamy, rich taste and perfect melting qualities.
When choosing mozzarella for your pizza, it’s important to use either fresh mozzarella or low-moisture mozzarella. Fresh mozzarella offers a milder, delicate flavor, but it can add excess moisture to the pizza if not drained properly. Low-moisture mozzarella, which is often used in pizzerias, has a firmer texture and a more concentrated flavor. It melts beautifully, forming that signature stretchy, gooey cheese layer that’s so characteristic of New York-Style pizza.
The cheese should be evenly distributed over the pizza to ensure every bite has the right amount of cheese without overpowering the sauce or crust. The key is achieving the perfect balance, where the cheese complements the other flavors rather than dominating them.
2. High-Gluten Flour: The Foundation of the Dough
The dough is the base of any pizza, and for New York-Style pizza, the dough is what makes it unique. High-gluten flour, which has a higher protein content than regular all-purpose flour, is essential for creating the pizza’s chewy yet crisp texture. The gluten content helps the dough hold its structure while still being flexible enough to be stretched thin.
High-gluten flour gives the dough its distinctive texture: it’s firm yet pliable, with a slightly chewy bite that’s characteristic of New York-Style pizza. The dough is usually hand-tossed to create the perfect thinness while maintaining strength, ensuring that the pizza will hold up under the weight of the sauce, cheese, and toppings. This flour also allows the dough to achieve that satisfying crispiness when baked at high temperatures, creating a light and airy crust with a delicate crunch.
3. Fresh Tomatoes: The Secret to a Flavorful Sauce
The sauce on a New York-Style pizza is simple yet flavorful, and it all starts with fresh tomatoes. The quality of the tomatoes used in the sauce can make a huge difference in the overall taste of the pizza. Many pizzerias in New York use canned San Marzano tomatoes, which are prized for their balance of sweetness and acidity. However, if you prefer to use fresh tomatoes, choose ripe, in-season varieties with a rich, deep flavor.
The tomatoes are typically crushed or pureed to create a smooth, somewhat chunky sauce that’s spread thinly on the dough. The sauce should not overpower the pizza but rather provide a subtle, tangy backdrop for the cheese and toppings. Some pizzerias add a pinch of sugar to balance the acidity of the tomatoes, along with garlic, oregano, and basil for a boost of flavor. The goal is to create a fresh-tasting sauce that complements the pizza without overwhelming it.
4. Fresh Toppings: Keep It Simple, Keep It Fresh
The toppings are what make each pizza unique, but when it comes to New York-Style pizza, simplicity is key. Freshness is paramount, as the toppings should enhance the overall flavor without overpowering the delicate balance of the crust, sauce, and cheese.
Popular toppings for New York-Style pizza include classics like pepperoni, sausage, mushrooms, green peppers, onions, and fresh basil. It’s important to slice the toppings thinly so that they cook evenly in the high-heat oven. This ensures that the toppings don’t overwhelm the pizza or make the crust soggy.
While toppings are important, New York-Style pizza is known for keeping things relatively simple. Rather than piling on too many ingredients, the focus is on using fresh, high-quality toppings that complement the flavors of the crust and sauce. For example, the combination of fresh basil and mozzarella is a classic that highlights the balance of rich and fresh flavors. When it comes to meats like pepperoni or sausage, make sure they are sliced thinly to avoid any greasy residue on the pizza.
5. Olive Oil and Seasonings: The Finishing Touches
Olive oil is often drizzled lightly over the pizza just before or after baking to add a touch of richness and shine to the crust. It also adds a subtle flavor that enhances the overall experience. Seasonings such as garlic powder, red pepper flakes, and a sprinkle of oregano are commonly added to the pizza for an extra layer of flavor.
While not essential to the structure of the pizza, these finishing touches can elevate the taste and appearance, bringing out the flavors of the sauce and toppings. A sprinkle of parmesan cheese or fresh basil after baking adds a final touch that enhances the overall pizza experience.
Summary
In conclusion, the essential ingredients for an authentic New York-Style pizza include high-quality mozzarella cheese, high-gluten flour for the dough, fresh tomatoes for the sauce, and simple, fresh toppings. Each of these ingredients contributes to the unique flavor and texture that makes New York-Style pizza so beloved. By using the best ingredients and focusing on balance and freshness, you can recreate the flavors of this iconic pizza right in your own kitchen.
Certainly! Here’s an expanded version of the “Tools You’ll Need to Make Authentic New York-Style Pizza” section, covering essential equipment such as a pizza stone, pizza peel, and high-heat oven (or alternatives like a pizza steel):
Tools You’ll Need to Make Authentic New York-Style Pizza
To achieve the perfect New York-Style pizza at home, having the right tools is just as important as using quality ingredients. The tools you use will help you replicate the high-heat conditions of a professional pizzeria oven, ensuring that your pizza has that crisp, thin crust and bubbly, melted cheese. Here’s a guide to the essential equipment you’ll need:
1. Pizza Stone: For That Perfect Crispy Crust
One of the most important tools for making New York-Style pizza at home is a pizza stone. A pizza stone is a flat, heat-retaining surface that you place in your oven. It mimics the effect of a traditional pizza oven by absorbing and evenly distributing heat, creating the perfect environment for cooking a pizza.
The pizza stone is essential for achieving that crisp, well-browned crust, which is one of the defining features of New York-Style pizza. By preheating the stone in the oven, it ensures that the pizza dough begins to cook immediately upon contact, which helps the crust become crisp and golden without becoming soggy. Additionally, a pizza stone absorbs moisture from the dough, resulting in a drier, crisper texture.
To use a pizza stone, place it in the oven when you begin preheating (around 30 minutes at 500°F or higher). Once the stone is hot, carefully slide your prepared pizza onto it for baking. The high heat from the stone will help create that iconic crispy yet tender crust that New York-Style pizza is known for.
2. Pizza Peel: For Easy Transfer and Removal
A pizza peel is a long-handled tool that allows you to easily transfer your pizza in and out of the oven. Made from wood or metal, the pizza peel acts like a giant spatula, helping you place your pizza on the pizza stone and remove it once it’s cooked.
Using a peel is essential for maintaining the shape and integrity of the pizza during the transfer process. The key advantage of a pizza peel is that it allows you to handle the pizza with precision, ensuring that it slides onto the hot stone without stretching or losing shape. When using a pizza peel, dust it lightly with flour or cornmeal to prevent the dough from sticking to it. This will make it easier to slide the pizza into the oven and remove it after baking.
If you don’t have a pizza peel, you can use a flat baking sheet or even a cutting board as a makeshift peel. However, using an authentic pizza peel will make the process smoother and more professional.
3. High-Heat Oven: The Secret to a Perfect Pizza
A high-heat oven is crucial when making New York-Style pizza at home. Traditional pizzerias bake their pizzas in extremely hot, wood-fired ovens, often reaching temperatures upwards of 800°F (427°C). While most home ovens can’t reach these temperatures, it’s still important to get your oven as hot as possible.
Preheat your oven to the highest setting, usually around 500°F (260°C), and allow it to fully heat for at least 30 minutes before baking your pizza. A high-heat oven is necessary to achieve the quick cooking time needed for a New York-Style pizza—typically 7-10 minutes. The rapid cooking ensures that the crust becomes crisp and the toppings cook without releasing too much moisture or becoming soggy.
If your home oven can’t achieve high enough temperatures, there are alternatives. Pizza steels are a great solution. Made of heavy steel, pizza steels conduct heat more effectively than a stone and can help your pizza cook faster and more evenly. Like a pizza stone, a pizza steel should be preheated in the oven to ensure the best results.
4. Rolling Pin (Optional) or Hands: For Shaping the Dough
When it comes to shaping your pizza dough, you can either use a rolling pin or, more traditionally, your hands. While a rolling pin is helpful for getting an even thickness, using your hands to stretch the dough is the best way to achieve the thin, even crust that New York-Style pizza is famous for. Hand-stretching the dough also gives it that light, airy texture that is characteristic of this style.
To stretch the dough by hand, start from the center and gently pull the edges outward, rotating the dough as you go. If you prefer a more uniform, slightly thicker crust, you can use a rolling pin to roll the dough out to your desired thickness. Just make sure to work quickly and gently to avoid deflating the dough.
5. A Sharp Pizza Cutter or Knife: For Perfect Slices
Once your pizza is perfectly baked and golden, you’ll need a sharp pizza cutter or pizza wheel to slice it into the signature large, foldable slices. A pizza cutter with a sharp blade ensures that you can cut through the crust and toppings cleanly, allowing you to get the perfect slice every time.
Alternatively, you can use a large kitchen knife, but a pizza cutter is specifically designed for the job, with its round blade allowing you to easily roll through the pizza. When cutting your New York-Style pizza, remember that the slices are large, so it’s important to cut through both the crust and the toppings in a single, smooth motion to avoid disturbing the balance of the pizza.
Summary
In conclusion, to make authentic New York-Style pizza at home, you’ll need a few key tools: a pizza stone or pizza steel to create a crispy, well-cooked crust, a pizza peel for easy transfer, and a high-heat oven to ensure the pizza cooks quickly at a high temperature. Additionally, you may find a rolling pin useful for shaping the dough and a pizza cutter to easily slice your pizza into large, foldable pieces. With these tools, you’ll be well on your way to making a New York-Style pizza that rivals those from the heart of New York City.
Preparing the Perfect New York-Style Pizza Dough
Certainly! Here’s an expanded version of the “Making the Dough from Scratch” section, detailing the process of mixing and kneading pizza dough using high-gluten flour, water, salt, and yeast.
Making the Dough from Scratch
The dough is the foundation of any great New York-Style pizza. While the ingredients themselves are simple, the technique for making the dough is crucial to achieving the perfect thin and chewy crust. Here’s a step-by-step guide on how to mix and knead the dough from scratch using high-gluten flour, water, salt, and yeast.
1. Gather Your Ingredients
To make the dough, you’ll need the following ingredients:
- High-gluten flour (about 4 cups): This flour contains more protein than all-purpose flour, which helps create the chewy texture New York-Style pizza is known for.
- Warm water (about 1 1/2 cups): The warmth of the water helps activate the yeast.
- Active dry yeast (2 teaspoons): Yeast helps the dough rise and gives it a light, airy texture.
- Salt (1 1/2 teaspoons): Salt enhances the flavor of the dough.
- Olive oil (optional, 1 tablespoon): While not always used in New York-Style pizza dough, a small amount of olive oil can make the dough a bit more tender and add flavor.
2. Activate the Yeast
The first step in making the dough is activating the yeast. This is a critical step, as it ensures that the yeast will work properly and allow the dough to rise.
- In a small bowl, combine the warm water (around 110°F/43°C) and active dry yeast. Stir gently to dissolve the yeast into the water.
- Let the yeast mixture sit for about 5 to 10 minutes. After this time, it should become frothy or bubbly. This means that the yeast has been activated and is ready to be used.
3. Mix the Dough
Once the yeast is activated, it’s time to combine it with the dry ingredients to form the dough.
- In a large mixing bowl, combine the high-gluten flour and salt. Stir the dry ingredients together to ensure they are evenly mixed.
- Pour the activated yeast mixture into the flour and salt mixture. If you’re using olive oil, add it now as well.
- Mix the ingredients together using a spoon or your hands until they begin to come together into a sticky dough.
4. Knead the Dough
Kneading the dough is one of the most important steps in creating the chewy, elastic texture that defines New York-Style pizza crust. Kneading develops the gluten in the flour, which gives the dough its structure and elasticity.
- Transfer the dough onto a clean, lightly floured surface.
- Begin kneading the dough by pushing it down with the heels of your hands, folding it over, and then pushing it down again. Turn the dough a quarter turn after each push to ensure even kneading.
- Continue kneading for about 8 to 10 minutes, or until the dough becomes smooth, elastic, and slightly tacky but not sticky. If the dough is too sticky, add a small amount of flour. If it’s too dry, add a tiny splash of water.
5. Let the Dough Rise
After kneading, the dough needs time to rise and develop its flavor. This is where patience is key.
- Lightly oil a large bowl and place the dough inside. Cover the bowl with a clean kitchen towel or plastic wrap to prevent the dough from drying out.
- Place the bowl in a warm area (around 75°F/24°C) and let the dough rise for at least 1 to 1.5 hours, or until it has doubled in size. If you have time, letting it rise for 2 hours will result in even better texture and flavor.
If you don’t have time for a full rise, you can place the dough in the refrigerator and let it rise slowly overnight. This cold fermentation allows the dough to develop more complex flavors.
6. Punch Down the Dough
After the dough has risen, it’s time to punch it down to release the air bubbles and ensure that it has the right texture.
- Gently press down on the dough with your fist to deflate it. This step is necessary to make sure the dough is uniform and doesn’t have large air pockets.
- Turn the dough out onto a lightly floured surface and give it a few more gentle kneads to remove any excess air.
7. Portion and Shape the Dough
New York-Style pizza typically makes one large pie, but you can divide the dough into smaller portions for individual pizzas.
- Divide the dough into two equal pieces if you want to make two medium pizzas, or leave it whole for one large pizza.
- Gently stretch the dough into a round shape, using your hands to pull the edges while rotating the dough. You want it thin, but not so thin that it tears. If necessary, you can use a rolling pin to roll out the dough, but hand-stretching it gives it the signature New York-Style texture.
8. Preheat the Oven and Prepare for Baking
Once the dough is shaped, it’s time to preheat the oven. Set the oven to its highest temperature, usually around 500°F (260°C), and allow it to fully preheat for at least 30 minutes. If you’re using a pizza stone, make sure to preheat it in the oven to ensure even heat distribution.
9. Bake Your Pizza
Once your dough is stretched, you’re ready to top it with sauce, cheese, and any other toppings you like. After topping, bake your pizza on the preheated pizza stone (or baking sheet) for about 7 to 10 minutes, or until the crust is golden and the cheese is bubbly and slightly browned.
Summary
Making New York-Style pizza dough from scratch is a rewarding process that, when done correctly, results in a chewy, crispy crust that is perfect for supporting all of your favorite toppings. The key to success is using high-gluten flour, properly activating the yeast, and taking the time to knead and allow the dough to rise. With a little patience and the right technique, you’ll have the perfect dough ready for your homemade pizza masterpiece.
Certainly! Here’s an expanded version of the “How to Achieve the Right Consistency for the Perfect Crust” section, with a focus on the importance of dough elasticity and tips for getting the right stretch without tearing:
How to Achieve the Right Consistency for the Perfect Crust
When it comes to making a New York-Style pizza, the perfect crust is essential. It should be thin yet sturdy enough to hold the toppings without becoming soggy. Achieving the right consistency for the dough ensures that it’s both stretchy and elastic, allowing you to create the signature New York-Style pizza with its thin, crisp crust. Here’s a detailed breakdown of what you need to know to achieve that ideal dough consistency.
1. The Role of Gluten in Dough Elasticity
The key to a perfectly stretchy pizza dough is gluten, a natural protein found in wheat flour. When mixed with water and kneaded, gluten forms a network of long, stretchy strands that give the dough its elasticity and ability to stretch without tearing. This elasticity is essential for New York-Style pizza, as you need to stretch the dough thin without losing its structure.
To achieve the right consistency for your dough, it’s essential to use the right type of flour. High-gluten flour is ideal for pizza dough because it has a higher protein content compared to all-purpose flour. The extra protein results in more gluten development, which gives the dough its chewy, elastic texture.
2. Proper Kneading for Elasticity
Kneading is a crucial step in developing the gluten network that makes your dough elastic. The more you knead the dough, the stronger and more elastic the gluten strands will become. Here’s how to knead the dough effectively to achieve the perfect consistency:
- Knead for 8-10 Minutes: Kneading for the right amount of time ensures that the gluten develops properly. As you knead, the dough should gradually become smoother and more elastic. The dough should feel slightly tacky but not sticky. If it sticks to your hands or the surface, add small amounts of flour as needed, but avoid over-flouring the dough, as this can make it dry and tough.
- Kneading Technique: Use the heel of your hands to push the dough away from you, then fold it over and push again. Turn the dough a quarter turn each time you fold it. This technique encourages even development of the gluten and ensures that the dough stays pliable.
3. The Windowpane Test: Checking Dough Elasticity
A great way to test if your dough has the right elasticity is the windowpane test. This simple test checks whether the dough is fully kneaded and elastic enough to stretch without tearing.
- Take a small piece of dough (about the size of a golf ball).
- Gently stretch it between your fingers.
- If the dough stretches into a thin membrane without tearing, and you can see light through it (like a windowpane), then the dough has the right consistency. If it tears easily, it needs more kneading.
Performing the windowpane test ensures that the dough is smooth, elastic, and ready for shaping.
4. Allow the Dough to Rest for Better Stretching
After kneading, let the dough rest for at least 1 hour to allow the gluten to relax. Resting the dough is crucial because it gives the gluten time to loosen up, making it easier to stretch the dough without it snapping back or tearing. If the dough is too tight after kneading, it will be difficult to stretch and shape.
You can also refrigerate the dough for an extended rest, which allows the dough to ferment slowly, developing more flavor. If you do this, take the dough out of the fridge about 30 minutes before stretching to bring it to room temperature.
5. Stretching the Dough Without Tearing
Once your dough has rested and relaxed, it’s time to stretch it into shape. Here are some tips to ensure you stretch the dough without tearing:
- Use Your Hands, Not a Rolling Pin: While a rolling pin can flatten dough, it doesn’t provide the same stretch that hand-stretching does. To achieve a thin, uniform crust, use your hands to gently stretch the dough from the center outwards. This technique allows the dough to maintain its elasticity while getting thinner.
- Work from the Center Outward: Start by pressing your fingers into the center of the dough and gently pushing it outward, rotating it as you go. This helps the dough stretch evenly without creating weak spots that could tear.
- Use Gravity: Once the dough is flattened into a rough circle, hold it up by the edges and let gravity help with the stretching. Gently pull the dough outward while rotating it in your hands. This method helps maintain even thickness and prevents uneven stretching.
- Avoid Overworking the Dough: Don’t over-stretch or overwork the dough. If you find that the dough is resistant and difficult to stretch, let it rest for a few more minutes. Overworking the dough can cause it to become tough, which will make it harder to stretch without tearing.
6. Achieving the Perfect Thickness
For New York-Style pizza, the crust should be thin but not so thin that it becomes fragile or tears easily. The dough should be stretched to about 12–14 inches in diameter for a typical pizza. When stretching the dough, focus on the edges, making them slightly thicker than the center. This creates the characteristic puffy outer crust while keeping the center thin and crispy.
7. Common Issues and How to Fix Them
If your dough isn’t achieving the right consistency, there are a few issues you might be facing, and here’s how to fix them:
- Dough is too sticky: If the dough is sticky and hard to work with, you may not have added enough flour during the kneading process. Add small amounts of flour, a little at a time, until the dough is tacky but not sticky. However, be cautious not to add too much, as this can result in a dry dough.
- Dough is too tough or hard to stretch: If your dough is tough and resistant to stretching, it’s likely that you didn’t knead it long enough or allowed it to rest for long enough. Give it a bit more kneading and let it rest longer to relax the gluten.
Summary
Achieving the right consistency for your pizza dough is crucial for creating a perfect New York-Style crust. Focus on using high-gluten flour for elasticity, kneading the dough thoroughly to develop the gluten, and allowing the dough to rest so it’s easier to stretch. By following these tips and techniques, you can stretch your dough without tearing, resulting in a beautifully thin, chewy, and crispy crust that will make your New York-Style pizza stand out.
Certainly! Here’s an expanded version of the “Resting and Proofing the Dough” section, explaining why letting the dough rise is essential for achieving a light and airy texture:
Resting and Proofing the Dough
Resting and proofing are critical steps in making pizza dough, especially when aiming for the perfect New York-Style pizza. While the mixing and kneading phases are essential for developing the right dough consistency and elasticity, it’s during the resting and proofing stages that the dough develops its texture, flavor, and overall character. Here’s a breakdown of why these steps are essential to creating a light and airy pizza crust.
1. What is Dough Resting and Proofing?
- Resting is the period after you’ve finished kneading the dough, where it is allowed to sit and relax. During this time, the gluten strands in the dough begin to loosen, making the dough easier to stretch and shape. Resting allows the dough to become more pliable and manageable.
- Proofing, or fermentation, refers to the process of letting the dough rise and develop gas bubbles. This is typically done after resting, as the yeast ferments the sugars in the flour, producing carbon dioxide gas. These gas bubbles expand, causing the dough to rise and become airy. Proofing also contributes to the flavor development in the dough.
2. Why is Resting Important for Dough Texture?
After kneading, the dough is tight and its gluten strands are fully developed, which means it’s less elastic and more resistant to stretching. Letting the dough rest for at least 1 hour (or longer if you are using cold fermentation) is essential because:
- Relaxing the Gluten: As the dough rests, the gluten network relaxes, making the dough more extensible. This allows the dough to be stretched thin without tearing and gives the crust its characteristic chewy texture.
- Prevents Shrinking: Without resting, dough that is immediately stretched or shaped may shrink back due to the tension in the gluten network. Resting releases this tension, allowing for a more controlled and smooth stretch of the dough.
- Softer, Lighter Texture: Resting also allows the water in the dough to be evenly absorbed, which contributes to a softer, more tender texture. This is particularly important for New York-Style pizza, where the dough should be chewy yet light and airy.
3. Proofing for a Light and Airy Texture
Proofing is where the magic happens for achieving a light, airy texture in your crust. As the dough proofs, yeast ferments the sugars in the flour, producing carbon dioxide gas. This gas gets trapped inside the dough, forming bubbles and causing it to rise. Here’s why this process is vital for your pizza dough:
- Gas Bubbles Create Lightness: The carbon dioxide gas produced during proofing creates small air pockets inside the dough. When the dough is baked, these pockets expand, resulting in a lighter, airier crust. The gas bubbles create the lift that helps the dough achieve its crispy yet chewy texture, which is characteristic of New York-Style pizza.
- Flavor Development: The fermentation process during proofing also enhances the flavor of the dough. Yeast fermentation leads to the development of complex flavors in the dough, giving it a slightly tangy, more sophisticated taste. The longer you proof the dough, the more flavor it will develop, which contributes to the overall depth of your pizza.
- Texture Variations: The length of proofing time can affect the final texture of the pizza crust. For example, a shorter proofing period (1–2 hours) will give the dough a softer, more pliable texture, while a longer, slower proof (e.g., cold fermentation over 24-48 hours in the fridge) will result in a crust with more flavor and a lighter, airier texture.
4. The Importance of Temperature in Proofing
The temperature at which you proof your dough plays a significant role in how it rises and develops its texture:
- Room Temperature Proofing: If you’re proofing the dough at room temperature (usually between 70°F to 75°F / 21°C to 24°C), the process will take around 1-2 hours. This faster proofing time is suitable for making pizza the same day, but the dough may not have as deep a flavor as dough that undergoes a slower fermentation process.
- Cold Proofing (Slow Fermentation): For the best flavor and texture, consider cold proofing your dough in the fridge. This process slows down the yeast activity, allowing the dough to ferment more slowly and develop more complex flavors. Cold proofing typically takes 24-48 hours, and it results in a dough that has a lighter texture with an enhanced depth of flavor.
- Avoid Over-Proofing: While proofing is essential for texture, it’s also important not to over-proof the dough. If the dough rises too much or is left to proof for too long, the air pockets will become too large and fragile, which can cause the dough to collapse or lose its structure when baked. Over-proofed dough can result in a crust that is too airy and lacks the right balance of chewiness and crispiness.
5. How to Proof Dough Properly
To ensure your dough proofs correctly, follow these tips:
- Cover the Dough: To prevent the dough from drying out, cover it with a clean, damp cloth or plastic wrap. This will keep moisture in and ensure that the dough doesn’t form a hard skin while proofing.
- Place in a Warm, Draft-Free Area: Dough rises best in a warm, draft-free environment. A warm kitchen counter or an oven with a light on can be a good spot. If you’re cold proofing, place the dough in the fridge in an airtight container.
- Check the Dough During Proofing: Keep an eye on the dough as it proofs. Once it has doubled in size, it’s ready to be shaped and used for your pizza. If you’re cold proofing, take the dough out of the fridge about 30 minutes before using it, so it’s easier to stretch.
6. The Importance of Resting After Shaping
After you’ve shaped your pizza dough into rounds, let it rest again for about 10-15 minutes before adding toppings and baking. This second rest allows the dough to relax even more and prevents it from shrinking back when you try to stretch or top it. This step ensures that you have an evenly stretched, smooth dough that holds its shape during baking.
Summary
Resting and proofing are essential for achieving a light, airy, and flavorful New York-Style pizza dough. Resting helps relax the gluten and makes the dough easier to stretch, while proofing allows the dough to rise and develop the bubbles necessary for a soft, chewy, and crispy crust. By understanding the importance of these steps and managing the temperature and time properly, you can create the ideal dough for your homemade pizza.
Crafting the Perfect Pizza Sauce and Cheese
Certainly! Here’s an expanded version of the “Making the Classic Pizza Sauce” section, with a simple recipe for the tangy, fresh tomato sauce that is perfect for New York-Style pizza:
Making the Classic Pizza Sauce
The pizza sauce is one of the most important components of a great pizza, and for New York-Style pizza, it should have the perfect balance of tangy, sweet, and savory flavors. The sauce should complement the crispness of the thin crust without overpowering the other ingredients. A classic New York-Style pizza sauce is simple to make but packs a punch of flavor, using fresh ingredients like tomatoes, garlic, and olive oil. Here’s how to make it:
1. Key Ingredients for Classic Pizza Sauce
To make a classic pizza sauce that’s fresh and tangy, you’ll need a few basic ingredients that bring out the best flavors:
- Canned San Marzano Tomatoes: These are a top choice for pizza sauce due to their sweet, low-acid taste. They have a rich, slightly tangy flavor that’s perfect for pizza. You can also use fresh Roma tomatoes when in season, but canned tomatoes will give you the most consistent flavor.
- Garlic: Adds depth and fragrance to the sauce. Fresh garlic, finely minced or grated, gives the sauce a nice savory kick.
- Olive Oil: A good quality extra virgin olive oil is ideal for this sauce. It adds richness and helps bring all the flavors together.
- Dried Oregano: This herb is a must for classic pizza sauce. It gives a warm, aromatic flavor that complements the acidity of the tomatoes and enhances the overall sauce.
- Salt and Sugar: A pinch of salt is necessary for seasoning the sauce, while a small amount of sugar helps balance out the acidity of the tomatoes, creating the perfect sweet-tangy ratio.
- Red Pepper Flakes (optional): If you like a bit of heat, adding a pinch of red pepper flakes gives your sauce a subtle spicy kick.
2. The Simple Pizza Sauce Recipe
This is a no-cook pizza sauce recipe, which is perfect for New York-Style pizza. It preserves the fresh, vibrant flavor of the tomatoes and takes just a few minutes to prepare.
Ingredients:
- 1 can (28 oz) of San Marzano tomatoes (or any good-quality canned whole tomatoes)
- 2 tablespoons extra virgin olive oil
- 2 cloves garlic, finely minced
- 1 teaspoon dried oregano
- 1/2 teaspoon sugar
- 1/4 teaspoon salt (to taste)
- A pinch of red pepper flakes (optional)
Instructions:
- Prepare the Tomatoes: If using whole canned tomatoes, pour the tomatoes into a bowl and crush them by hand or with a potato masher. You can also blend them if you prefer a smoother sauce. If using crushed tomatoes, you can skip this step.
- Infuse the Olive Oil and Garlic: In a small pan, heat the olive oil over medium heat. Add the minced garlic and sauté for about 1 minute, or until the garlic is fragrant and golden. Be careful not to burn the garlic, as it can turn bitter.
- Mix the Sauce: In a medium bowl, combine the crushed tomatoes with the sautéed garlic and olive oil. Stir in the dried oregano, sugar, salt, and red pepper flakes (if using). Adjust the seasoning to taste, adding more salt or sugar if needed.
- Rest and Marinate: Let the sauce sit for at least 10-15 minutes before using it. This allows the flavors to meld together. You can also prepare the sauce in advance and store it in the fridge for up to 3 days, allowing the flavors to develop further.
- Spread on Your Dough: Once your sauce is ready, spread a thin, even layer over your prepared pizza dough, leaving a small border for the crust. It’s essential to not over-sauce, as this can weigh down the thin New York-Style crust. Less is more when it comes to pizza sauce!
3. Tips for the Best Pizza Sauce
- Use Fresh, Quality Tomatoes: The best pizza sauce starts with high-quality tomatoes. San Marzano tomatoes are prized for their balance of sweetness and acidity, and they are often considered the gold standard for pizza sauce. If you can’t find them, any good-quality canned tomatoes will work, but avoid the pre-seasoned ones to keep control over the flavors.
- Don’t Overcook the Sauce: The beauty of a classic pizza sauce is its freshness. Unlike pasta sauces, pizza sauce doesn’t require long cooking times. This preserves the natural tomato flavor and keeps the sauce vibrant and bright.
- Add Fresh Basil: If you like the flavor of fresh basil, you can tear a few leaves and stir them into the sauce just before spreading it on the dough. Fresh basil adds an aromatic note that enhances the overall flavor profile of the pizza.
- Consistency: New York-Style pizza sauce should be thick enough to cling to the pizza but not too thick that it doesn’t spread easily. If the sauce is too watery, it can make the dough soggy, so it’s important to strain any excess liquid before using it.
- Adjust for Heat: Depending on your preference, you can adjust the heat level of your pizza sauce by adding more or less red pepper flakes. For a milder version, simply omit them altogether.
4. Why Fresh Sauce is Key for New York-Style Pizza
The simplicity and freshness of the sauce are what make it ideal for New York-Style pizza. Unlike some other pizza styles where the sauce is cooked down and has complex, layered flavors, the New York-Style sauce is all about highlighting the fresh, tangy taste of the tomatoes, with just a touch of seasoning. It should provide a vibrant contrast to the crispy, thin crust, while not overpowering the other toppings like the mozzarella cheese and fresh herbs.
This balance of freshness and simplicity is a hallmark of New York-Style pizza, where each bite should offer a harmonious blend of crispy, chewy crust, melted cheese, and zesty tomato sauce.
Summary
Making classic pizza sauce at home is easy and rewarding. By using high-quality ingredients like San Marzano tomatoes, fresh garlic, and olive oil, you can create a tangy, flavorful sauce that complements the thin, crispy crust of New York-Style pizza. Keep it simple, fresh, and balanced to achieve that perfect bite that’s synonymous with this iconic pizza style.
Certainly! Here’s an expanded version of the “Choosing the Right Cheese for Your Pizza” section, with more detail on the importance of mozzarella and optional cheese additions like Parmesan:
Choosing the Right Cheese for Your Pizza
The cheese is one of the most crucial components of any pizza, especially New York-Style pizza, where the texture, melt, and stretch of the cheese play an essential role in the overall experience. New York-Style pizza is known for its gooey, stretchy mozzarella cheese that beautifully complements the crispy, thin crust. However, the choice of cheese doesn’t end with mozzarella – other cheeses, such as Parmesan or provolone, can be added to elevate the flavor profile. Let’s dive into what makes the perfect cheese for New York-Style pizza:
1. The Importance of Mozzarella Cheese
- Melt and Stretch: The most important cheese for New York-Style pizza is mozzarella. It’s known for its ideal balance of meltability, creaminess, and stretch. When mozzarella melts, it creates a soft, gooey layer of cheese that beautifully stretches with each bite, a hallmark of the New York pizza experience. This is why mozzarella is the most popular choice for pizza in general, and it is a must-have for that authentic New York pizza look and feel.
- Fresh vs. Low-Moisture: There are two primary types of mozzarella used for pizza: fresh mozzarella and low-moisture mozzarella. While fresh mozzarella is often used in other styles of pizza, low-moisture mozzarella is the preferred choice for New York-Style pizza due to its firmer texture and ability to maintain that signature stretch without releasing too much liquid. This helps prevent the pizza from becoming soggy. Fresh mozzarella is softer and wetter, making it better suited for other types of pizza, like Neapolitan-style, but it’s generally not the best for a thin-crust pizza that requires cheese that holds its shape.
- Whole Milk vs. Part-Skim: Mozzarella comes in different fat-content variations, including whole milk and part-skim. For New York-Style pizza, whole milk mozzarella is the preferred choice because it has a richer flavor and melt, producing the creamy, gooey texture that people expect from a classic slice. Part-skim mozzarella, on the other hand, is slightly less creamy but still works in a pinch. It’s often used for a lower-fat alternative.
2. Why Stretch and Melt Matter
The key feature that distinguishes New York-Style pizza from others is the ability to fold the slice without it falling apart. The cheese plays a critical role in making that fold easy and satisfying. The melt and stretch are essential to this, as they allow the cheese to remain on the crust as you fold the slice and take a bite. Low-moisture mozzarella’s low water content means that it melts evenly and doesn’t create a watery mess, keeping the pizza crisp.
3. Enhancing the Flavor with Other Cheeses
While mozzarella is the star of New York-Style pizza, it doesn’t hurt to enhance the flavor with a few other cheeses to add complexity. Here are a few optional additions:
- Parmesan: Grated Parmesan (or Parmigiano Reggiano) is often sprinkled on top of the pizza before or after baking to add a sharp, nutty flavor. It’s not as melty as mozzarella, but it contributes a wonderful savory taste and an extra layer of umami. Just a light dusting of Parmesan over the pizza adds depth without overpowering the mozzarella.
- Provolone: Another cheese that’s sometimes used in conjunction with mozzarella is provolone, which offers a slightly tangy, savory profile. It melts well and adds richness to the cheese blend without changing the essential texture of the pizza. Provolone can be combined with mozzarella for a more complex cheese flavor, and it pairs well with both traditional toppings like pepperoni or mushrooms.
- Ricotta: For a more indulgent pizza, you might consider adding ricotta cheese as a small accent. Ricotta doesn’t melt the same way as mozzarella but adds a creamy, rich texture that contrasts nicely with the other cheeses. It’s particularly good on white pizzas or pizzas with fewer toppings.
- Cheddar: Although not traditionally used in New York-Style pizza, cheddar cheese can be added for a sharper, tangier flavor. It’s often combined with mozzarella for certain specialty pizzas, like a four-cheese pizza.
4. Choosing Quality Cheese
When it comes to mozzarella, quality is key. Pre-shredded mozzarella may be convenient, but it’s often coated with anti-caking agents, which can affect the melt and texture. For the best results, it’s ideal to buy mozzarella in block form and shred it yourself. Not only does this improve the meltability, but it also enhances the flavor. Opt for a high-quality mozzarella that doesn’t have too much moisture, especially if you’re going for a classic New York-Style pizza. Look for cheese that’s made from high-quality cow’s milk, as this typically yields a smoother, creamier melt.
5. The Right Cheese-to-Sauce Ratio
The cheese-to-sauce ratio is important to get the perfect slice. New York-Style pizza tends to have a generous layer of cheese, but it should still allow the flavor of the tomato sauce to shine through. The cheese should completely cover the sauce without overwhelming it, providing a perfect balance of flavors. This helps ensure that each bite is a harmonious blend of crispy crust, savory sauce, and melty cheese.
6. How to Layer the Cheese
When assembling your pizza, it’s important to distribute the cheese evenly across the dough. Begin by spreading your sauce first, then sprinkle an even layer of mozzarella over the sauce. For best results, don’t overdo it on the cheese – a thin to medium layer is usually ideal. If you’re using additional cheeses like Parmesan or provolone, sprinkle those on top of the mozzarella to allow them to melt nicely.
Summary
Choosing the right cheese for New York-Style pizza is essential for achieving that signature melt, stretch, and gooey texture. While mozzarella is the go-to cheese for this style, adding small amounts of other cheeses like Parmesan or provolone can deepen the flavor. Fresh, high-quality mozzarella ensures that your pizza has the perfect combination of creaminess, stretch, and meltability, while other cheeses can be used to add complexity without overshadowing the essential mozzarella base. The key is finding the right balance that complements the crispy, thin crust and fresh, tangy sauce that define New York-Style pizza.
Certainly! Here’s an expanded version of the “Customizing Your Sauce and Cheese for Extra Flavor” section, which dives into ways you can enhance the flavor of your pizza by adjusting both the sauce and cheese:
Customizing Your Sauce and Cheese for Extra Flavor
While the traditional New York-Style pizza is known for its simple, fresh ingredients, one of the best things about making pizza at home is the opportunity to customize your sauce and cheese to suit your tastes. By adding herbs, spices, and additional flavor elements to the sauce, or experimenting with different cheese combinations, you can elevate your pizza from good to great.
1. Enhancing the Sauce with Fresh Herbs and Spices
The tomato sauce on a New York-Style pizza is typically tangy and fresh, but it can easily be enhanced by adding herbs and spices that will deepen the flavor profile. Here are a few ideas:
- Basil: Fresh basil is a classic herb that pairs beautifully with tomato sauce. Adding fresh or dried basil to the sauce can bring a fragrant, slightly sweet flavor that complements the acidity of the tomatoes. If you’re using fresh basil, tear the leaves and stir them into the sauce towards the end of the cooking process to keep the bright, aromatic flavors intact. Alternatively, you can sprinkle some fresh basil on top of the pizza just before serving for an extra burst of flavor.
- Oregano: This herb is a staple in many Italian dishes and a perfect match for pizza sauce. Its warm, earthy flavor can add depth to your sauce. Whether you use dried or fresh oregano, adding it to your sauce brings out the classic Italian flavor that pairs so well with the mozzarella and toppings. Dried oregano is often the go-to option for sauce, but fresh oregano can also be used for an even more vibrant taste.
- Garlic: Garlic is a powerful ingredient that can bring a savory depth to your pizza sauce. Adding minced garlic to your sauce while cooking will infuse it with a rich, aromatic flavor. For an even more intense garlic experience, you could also drizzle garlic oil over your pizza crust before adding the sauce and cheese. If you love garlic, consider adding a little garlic powder or roasted garlic to your sauce for extra flavor.
- Crushed Red Pepper Flakes: For those who like a little heat, adding crushed red pepper flakes to the sauce is a great way to add some spice. Just a pinch can bring the perfect amount of heat without overpowering the flavors of the other ingredients. You can also sprinkle red pepper flakes on top of the pizza after baking for a finishing touch.
- Italian Seasoning: If you want a more complex flavor profile without using individual herbs, Italian seasoning can be an easy way to add a variety of herbs like oregano, basil, rosemary, and thyme all at once. This seasoning blend can give your sauce a well-rounded flavor that’s both fragrant and flavorful.
- Sweeteners: If your tomato sauce is too acidic, adding a small amount of sugar or honey can balance the flavor. A pinch of sugar can help tone down the acidity of the tomatoes without making the sauce overly sweet.
2. Customizing the Cheese for Extra Richness
While mozzarella is the quintessential cheese for New York-Style pizza, there are many ways to customize the cheese layer to add extra flavor and richness.
- Blend Different Types of Cheese: While mozzarella is the base, combining it with other cheeses can make your pizza even more flavorful. For example, a small amount of Parmesan or Romano can be sprinkled on top for a sharp, nutty kick. Mixing in a bit of provolone cheese will introduce a slightly smoky flavor, while ricotta can add a creamy texture. For a more indulgent twist, consider adding fontina or gorgonzola to the mix for a more complex, tangy taste.
- Seasoning the Cheese: If you want to add extra flavor to the cheese itself, consider sprinkling it with garlic powder, onion powder, or Italian seasoning before baking. These spices will blend into the mozzarella and add an extra layer of savory flavor. Another option is drizzling a bit of olive oil over the cheese before baking, which will enhance its richness and give the pizza a beautiful golden-brown finish.
- Cheese on the Crust: For an extra cheesy experience, you can also sprinkle some cheese directly onto the crust before baking. This is a technique often used in specialty pizzas, such as stuffed crust or cheese-filled crusts. Adding cheese along the edges of the crust will give you an extra cheesy bite in every slice.
- Use of Fresh Cheeses: If you’re feeling adventurous, adding a few dollops of fresh ricotta on top of the pizza, after it’s baked, can add an incredibly creamy and rich texture. This can be particularly delicious when paired with vegetables like spinach, mushrooms, or sun-dried tomatoes.
3. Mixing and Matching Sauces
While tomato sauce is traditional for New York-Style pizza, don’t hesitate to experiment with other types of sauces or even blend them together for unique flavor profiles:
- White Sauce: If you prefer a creamy alternative, consider using a white garlic sauce or Alfredo sauce instead of tomato sauce. This can create a richer, more decadent pizza with a smooth, buttery finish.
- Barbecue Sauce: For a more modern take, try using barbecue sauce as the base. Its sweet and smoky flavors pair especially well with chicken, bacon, and onions. You can even use a combination of both barbecue and tomato sauce for a unique twist.
- Pesto: Pesto can add a vibrant, herbaceous note to your pizza. Made from basil, garlic, olive oil, pine nuts, and Parmesan, pesto sauce gives a fresh and zesty flavor that can complement cheese and vegetables beautifully.
4. Adjusting Flavor with Toppings
Toppings are another way to customize your pizza’s flavor profile, but the sauce and cheese are the foundation. Consider how your sauce and cheese pair with the following topping ideas:
- Vegetables: If you’re using vegetables like mushrooms, bell peppers, onions, or olives, try lightly sautéing them before adding them to your pizza. This helps release their flavor and prevents excess moisture from watering down the pizza.
- Meats: Adding meats like pepperoni, sausage, or bacon will also influence the flavor of your sauce and cheese. For instance, a slightly spicy sausage pairs wonderfully with a mild tomato sauce, while the rich, savory flavor of pepperoni enhances the mozzarella’s creaminess.
- Fresh Herbs After Baking: For the freshest flavor, add a sprinkle of fresh herbs like parsley or arugula after the pizza has finished baking. This adds a burst of freshness that contrasts with the richness of the cheese and sauce.
Summary
Customizing your pizza’s sauce and cheese allows you to bring out unique flavors that suit your preferences. Enhancing the tomato sauce with fresh herbs like basil, oregano, and garlic adds depth and complexity, while mixing different cheeses can elevate the pizza’s richness and flavor profile. By experimenting with various ingredients and techniques, you can make a New York-Style pizza that’s perfectly tailored to your taste and truly one-of-a-kind.
Assembling Your New York-Style Pizza
Certainly! Here’s an expanded version of the “Shaping and Stretching the Dough” section, which dives into the techniques of properly stretching and shaping pizza dough:
Shaping and Stretching the Dough
Shaping and stretching pizza dough is a crucial step in making the perfect New York-Style pizza. The goal is to achieve a thin, even crust that’s sturdy enough to hold the sauce, cheese, and toppings without falling apart. However, this requires a delicate balance—stretching the dough too thin could cause it to tear or fail to support the toppings, while not stretching it enough could result in a thick, chewy crust that’s not characteristic of the style. Here’s a step-by-step guide to help you achieve the ideal dough consistency and shape for your pizza:
1. Begin with Room Temperature Dough
One of the key factors in successfully stretching pizza dough is ensuring that it’s at the right temperature. Cold dough can be tough and resistant to stretching. Let your dough come to room temperature by taking it out of the refrigerator about 1-2 hours before you plan to shape it. The dough should be soft and slightly puffed up from proofing, which will make it more pliable and easier to stretch.
2. Flour the Surface and Your Hands
To prevent the dough from sticking, sprinkle a light layer of flour on your work surface and your hands. Be careful not to use too much flour, as this can make the dough dry. You want just enough flour to prevent sticking while still allowing the dough to maintain its smooth texture. For a different texture or slightly different flavor, you can also use semolina flour for dusting, as it gives the dough a little extra bite and crunch on the bottom.
3. Start by Flattening the Dough with Your Hands
Before you begin stretching, flatten the dough into a small disk using your fingertips and palms. Press gently but firmly to create an even, round shape. Start from the center of the dough and work your way out, pressing down to flatten it evenly. Be sure to leave a small border around the edge for the crust. You can also use the back of your hands to gently push the dough outward, which helps avoid deflating any air pockets inside that could give the crust its light, airy texture.
4. Stretch the Dough with Your Hands
Once the dough is flattened into a disk, it’s time to start stretching. The best way to stretch dough for New York-Style pizza is by hand, as this method allows you to control the thickness and keep it uniform. Here are two common techniques for hand-stretching the dough:
- Using the Knuckles: Gently hold the dough at the edges with your fingers, and then drape it over your knuckles. With your knuckles facing down, move your hands in a circular motion while letting gravity pull the dough down, allowing it to stretch naturally. This technique is especially useful for getting the outer edges of the dough to stretch evenly without thinning the center too much.
- Lifting and Stretching: Hold the dough by the edge and gently pull it outwards, letting it hang down a bit to let gravity do some of the work. As the dough hangs, continue to stretch it with your hands, moving around the perimeter and allowing the dough to elongate evenly. It’s important to keep the dough in motion to avoid over-stretching any one section.
5. Be Gentle, But Firm
As you stretch, it’s important not to be too rough with the dough. Stretching should be done gently and gradually, working from the center to the edges. Applying too much force can cause tears or uneven thickness, which will make it difficult to hold your toppings. Focus on maintaining an even thickness throughout the dough, especially towards the center, where it can easily become too thin. If the dough resists stretching, let it rest for a few minutes before continuing. This will allow the gluten to relax and make it easier to shape.
6. Achieve the Right Thickness
For New York-Style pizza, you want a thin crust, but it’s essential that the dough retains enough strength to support the sauce, cheese, and toppings. Aim for a thickness of about 1/8 to 1/4 inch for the center of the pizza. This will give the pizza a crispy bite without being too fragile. The outer crust should be slightly thicker, about 1/2 inch, to form that signature New York-Style pizza crust that’s chewy but crisp. If you stretch it too thin, it may not hold the weight of the toppings, so always check for even thickness.
7. Avoid Over-Stretching
While it’s tempting to stretch the dough as thin as possible to achieve a delicate crust, over-stretching can be detrimental to the texture and structure of the pizza. If you notice any holes forming in the dough, stop stretching and gently pinch the edges to seal them. The dough should still have a little bit of elasticity to it; if it becomes too stiff, it means you’ve overworked it. If you feel resistance, let the dough rest for a few minutes to allow the gluten to relax before continuing.
8. Shaping the Final Pizza
Once you’ve stretched the dough to the desired size and thickness, you can finish shaping it by gently turning it in a circular motion, using both hands. You can also adjust the shape by pressing on the edges or pinching the crust to form a slight lip. This helps create a uniform shape that will bake evenly.
If your dough ends up larger than your baking surface (whether a pizza stone or a baking sheet), you can carefully trim any excess dough or fold the edges to ensure it fits perfectly.
Tips for a Perfect Stretch Every Time:
- Work in small batches: If you have a large batch of dough, divide it into smaller portions for easier handling.
- Work on a pizza peel: A pizza peel (or a piece of parchment paper) is helpful when transferring the pizza to the oven. Shape the dough directly on the peel, which will make it easier to slide onto the pizza stone or baking surface.
- Use gentle, even pressure: Avoid pressing too hard or using your fingertips aggressively. Gentle, even pressure will give you that perfectly stretchy dough without tearing.
Summary
Shaping and stretching New York-Style pizza dough is an art that requires practice, patience, and a light touch. By using the right techniques, you can achieve a thin, even crust that’s just the right thickness for holding all your delicious toppings. Remember to be gentle, work from the center to the edges, and rest the dough as needed. With these tips, you’ll be able to shape the perfect New York-Style pizza every time!
Certainly! Here’s an expanded version of the “Layering the Sauce, Cheese, and Toppings” section, providing a step-by-step guide on how to layer the ingredients for the perfect New York-Style pizza:
Layering the Sauce, Cheese, and Toppings
When it comes to creating the perfect New York-Style pizza, the way you layer the sauce, cheese, and toppings is crucial for achieving the right flavor and texture balance. Every component needs to work together harmoniously to ensure that the crust is crisp, the cheese melts just right, and the toppings enhance rather than overpower the flavor. Here’s how to layer your pizza for the best result:
1. Start with the Sauce: A Light, Even Layer
The foundation of your pizza is the sauce. New York-Style pizza traditionally uses a simple, fresh tomato sauce that’s slightly tangy with a rich, natural sweetness from the tomatoes. When layering the sauce, the key is to avoid overloading the pizza, as too much sauce can make the crust soggy and heavy.
- How much sauce to use: Begin by spreading a thin, even layer of sauce across the dough, leaving about a 1-inch border around the edges for the crust. Use a ladle or spoon to distribute the sauce in a circular motion from the center outwards. The layer should be enough to add flavor without overwhelming the dough.
- Tips for the right consistency: If your sauce is too watery, you might end up with a soggy pizza. Aim for a sauce that’s thick enough to stay in place when spread, but still has a bit of moisture to create a luscious, flavorful base. If you’re making your sauce from scratch, cook it down until it has a thicker consistency before using it on the pizza.
- Seasoning the sauce: Depending on your recipe, you can add herbs like basil, oregano, and garlic into the sauce for an extra flavor boost. This helps bring a bit of Italian authenticity to the dish, enhancing the overall experience.
2. Add the Cheese: The Key to That Perfect Melt
Next, comes the cheese—one of the most important elements of New York-Style pizza. Mozzarella cheese is the classic choice for its meltability, stretchiness, and mild flavor that complements the tangy tomato sauce perfectly.
- Using fresh mozzarella: For the most authentic taste and texture, opt for whole milk mozzarella or fresh mozzarella. Fresh mozzarella, especially when it’s torn into pieces, melts beautifully and provides a deliciously creamy, gooey texture. If you prefer a firmer, more consistent melt, you can use pre-shredded mozzarella, though fresh mozzarella will always be more flavorful.
- Cheese distribution: When layering the cheese, spread it evenly across the sauce, covering the entire surface. You want a consistent layer of cheese without any gaps. However, don’t go overboard—too much cheese can overwhelm the other flavors. Aim for a moderate amount, ensuring that each bite has a balanced ratio of cheese to sauce.
- Extra cheese tip: If you like extra gooey cheese, you can always sprinkle a little more on top once the pizza is baked for that extra melty goodness.
3. Toppings: The Final Touch
Once the sauce and cheese are layered, it’s time to add your toppings. New York-Style pizza is known for its simplicity, so it’s important not to overcrowd the pizza with too many toppings. The goal is to highlight the flavors of the sauce and cheese, not overwhelm them. Here’s how to add the right balance of toppings:
- Classic toppings: The classic New York-Style pizza usually features toppings like pepperoni, sausage, mushrooms, green peppers, or onions. If you’re making a traditional pepperoni pizza, distribute the slices evenly across the cheese, making sure there’s enough room between each one for even cooking.
- Distribute toppings evenly: Make sure that all the toppings are spread out evenly over the pizza. This ensures that each slice has a balanced amount of flavor. For example, when using mushrooms, slice them thin so that they cook quickly and evenly. For onions, you can either thinly slice them or use caramelized onions for a sweeter flavor. Always avoid overloading the pizza with too many toppings, as this can cause the pizza to become soggy or cook unevenly.
- Layering certain toppings: Some toppings, like pepperoni, can be placed directly on top of the cheese, while others, like mushrooms or bell peppers, can go underneath the cheese layer to allow them to cook in the sauce and cheese. This ensures the toppings are cooked properly and prevents them from burning.
- Specialty toppings: If you’re adding more delicate or gourmet toppings, such as arugula, prosciutto, or fresh basil, these should be added after the pizza is baked. Add them right before serving to keep their flavors fresh and vibrant, and avoid them becoming too wilted or overcooked.
4. Balance is Key
The most important factor when layering your pizza is to strike the right balance between the sauce, cheese, and toppings. Each component should complement the others, allowing each bite to have a harmonious combination of flavors. Too much of one ingredient can overshadow the others, making the pizza taste unbalanced. By keeping the sauce thin and flavorful, using a moderate amount of cheese, and carefully selecting and distributing your toppings, you’ll create the perfect foundation for your New York-Style pizza.
5. Don’t Forget the Drizzle (Optional)
For an extra touch of flavor, consider drizzling a bit of extra virgin olive oil over the pizza before baking. This will help the crust become golden and crispy while also adding richness to the flavor. You can also sprinkle a little parmesan cheese on top for an added salty, savory finish.
Summary
Layering the sauce, cheese, and toppings correctly is essential for making an authentic New York-Style pizza. Start with a light but flavorful sauce, followed by a moderate amount of cheese for that perfect melt. Carefully place your toppings, ensuring they’re evenly distributed and balanced to avoid sogginess or overwhelming the other flavors. By following these steps, you’ll create a pizza that showcases the classic flavors and textures of New York-Style pizza, from its crispy crust to its gooey cheese and perfectly balanced toppings.
Sure! Here’s a more detailed version of the “Layering the Sauce, Cheese, and Toppings” section, with a deeper focus on the balance and the order in which to add each ingredient for the perfect New York-Style pizza:
Layering the Sauce, Cheese, and Toppings
The way you layer the ingredients on your pizza has a direct impact on the final texture, flavor, and overall experience. New York-Style pizza is known for its perfect balance of sauce, cheese, and toppings—each element should complement the others, and each step plays a crucial role. Here’s an in-depth guide on how to layer your pizza ingredients for the ideal outcome:
1. Starting with the Sauce: A Light and Even Layer
The sauce is the foundation of your pizza, and in New York-Style pizza, it’s typically a simple, flavorful tomato sauce. The sauce should be spread evenly across the dough, with a moderate amount to ensure you’re not overloading the pizza. Too much sauce can make the crust soggy, and too little can make the pizza dry.
- How to spread the sauce: Using a ladle or spoon, start at the center of the dough and work your way outward in a circular motion. You want to cover the dough, but leave about 1 inch from the edge of the crust for a nice golden, crispy crust. The sauce should be spread thin enough to coat the surface, but not too thick that it becomes overwhelming.
- Consistency of the sauce: For the best result, the sauce should be thick but still spreadable. If your sauce is too watery, it can seep into the dough and create a soggy crust. To get the right texture, make sure your sauce is well-cooked and has reduced down to a thicker consistency. If it’s too runny, simmer it a little longer to allow the excess moisture to evaporate.
- Additional flavoring: New York-Style pizza sauce often includes a mix of garlic, olive oil, and a pinch of oregano or basil. If you like extra seasoning, consider adding a bit of red pepper flakes for heat or a dash of sugar to balance the acidity of the tomatoes.
2. Cheese: The Heart of New York-Style Pizza
The cheese on New York-Style pizza is what truly sets it apart. For the perfect cheese layer, you’ll want to use fresh mozzarella for that stretchiness and mild, creamy flavor. Other types of cheese can be used for variety, but mozzarella is a staple.
- Using fresh mozzarella: Fresh mozzarella is your go-to cheese for that perfect melt and texture. The cheese should be torn into small chunks or slices before adding to the pizza. For extra melt and creaminess, you can also use whole milk mozzarella or a low-moisture mozzarella that helps it melt beautifully without being too watery.
- How to layer the cheese: After spreading the sauce, evenly distribute the mozzarella over the sauce. The cheese should cover the sauce completely, ensuring that it melts into the sauce without any gaps. The goal is a uniform layer that helps create that perfect balance of flavor and texture with each bite. Be careful not to go overboard with the cheese, as it can overpower the pizza. A moderate amount works best.
- Optional cheese additions: If you want a deeper, more complex cheese flavor, consider adding a little Parmesan or pecorino Romano cheese on top of the mozzarella. These cheeses add a nutty, salty finish and contribute to a beautiful golden crust after baking.
3. Toppings: Balance is Key
Now comes the fun part—adding your toppings. New York-Style pizza is known for its simplicity, so while you can choose a variety of toppings, it’s best not to overcrowd the pizza. The sauce and cheese should remain the stars of the show, with the toppings enhancing the flavor rather than overpowering it.
- Classic New York toppings: Common toppings for New York-Style pizza include pepperoni, sausage, mushrooms, green peppers, and onions. Pepperoni is often the go-to topping, with its crispy edges adding a smoky, savory flavor to the pizza. For a classic sausage pizza, crumble the sausage and sprinkle it evenly over the cheese.
- How to layer the toppings: After the cheese is in place, it’s time to add your toppings. Distribute them evenly across the pizza, ensuring that they’re spread out in a way that each bite has a little bit of everything. This is particularly important when using toppings like mushrooms or onions, which can release moisture during cooking. Spread the toppings thinly to avoid sogginess. For meats like pepperoni or sausage, you can layer them directly on top of the cheese.
- Avoid overcrowding: While it can be tempting to pile on lots of toppings, New York-Style pizza doesn’t typically have thick layers of toppings. The key is to use a few ingredients but to distribute them evenly to ensure every slice has a balanced ratio of sauce, cheese, and toppings.
4. Specialty Toppings and Additional Flavors
For those who like to experiment, specialty toppings can elevate the pizza further. Some of the popular choices are fresh basil, arugula, or anchovies. However, these are typically added after baking to preserve their fresh flavor and texture.
- Fresh basil or arugula: These herbs add an aromatic, peppery note to the pizza. If you’re using fresh basil, tear it into pieces and add it once the pizza comes out of the oven. Similarly, arugula can be added after baking for a fresh, vibrant taste.
- Finishing touches: If you want to enhance the flavor even further, drizzle a little extra virgin olive oil over the pizza before or after baking. A sprinkle of Parmesan or crushed red pepper flakes can also bring extra depth and zest to your pizza.
5. Getting the Right Balance
The most important thing to keep in mind when layering the sauce, cheese, and toppings is balance. Each layer should complement the others, creating a harmonious combination of flavors and textures. Too much cheese or too many toppings can overwhelm the pizza, while too little sauce or cheese will make it dry and unappealing.
- Taste and texture balance: You want a crisp crust, melty cheese, and a balanced sauce-to-topping ratio. The sauce should provide a tangy, flavorful base, the cheese should melt beautifully and offer a creamy texture, and the toppings should add flavor without detracting from the other elements.
- Slice integrity: One of the signature features of New York-Style pizza is its foldability. By layering the ingredients evenly, you ensure that the pizza holds together properly and isn’t too runny or greasy. This allows you to fold your slice in half without it falling apart, creating that authentic New York pizza experience.
Summary
Layering the sauce, cheese, and toppings is more than just a step in making pizza—it’s an art. Start with a thin, evenly spread sauce, followed by a moderate layer of fresh mozzarella cheese, and finish with carefully selected toppings. Keep everything balanced to ensure that each bite is a perfect combination of flavors. With the right layering technique, your New York-Style pizza will have the perfect crisp crust, melt-in-your-mouth cheese, and flavorful toppings that come together to create a pizza you can proudly call authentic.
Certainly! Here’s a more detailed version of the “How Much Sauce and Cheese Should You Use?” section, providing a clear guide on achieving the ideal ratio for that authentic New York-Style pizza texture:
How Much Sauce and Cheese Should You Use?
When making New York-Style pizza, getting the right ratio of sauce to cheese is crucial to achieving that classic balance between crisp crust, creamy cheese, and tangy sauce. Too much sauce can make the pizza soggy, while too little can make it dry and unflavored. Similarly, the cheese should be enough to create a creamy, gooey layer without overwhelming the sauce.
Here’s a guide to help you get the perfect ratio of sauce and cheese for your New York-Style pizza:
1. The Ideal Sauce-to-Cheese Ratio
New York-Style pizza typically strikes a balance between sauce and cheese, ensuring neither overwhelms the other. The cheese should melt evenly and cover the sauce, while the sauce should peek through, offering a tangy flavor that enhances the overall taste of the pizza.
- Sauce ratio: The sauce layer should be spread thin, about ¼ to ⅓ cup of sauce per pizza for a 14-inch pizza. This allows the flavor of the tomatoes to come through without making the pizza soggy. Keep in mind that the sauce should be spread evenly, covering most of the surface but leaving a border near the crust.
- Cheese ratio: For the cheese, you’ll want to use about 8 to 10 ounces of mozzarella cheese for a 14-inch pizza. This should create a nice, thick layer of cheese that melts beautifully but doesn’t overpower the sauce. The cheese should be spread evenly across the pizza, ensuring that each bite has a satisfying amount of cheese.
2. Sauce Consistency Matters
The consistency of the sauce plays an important role in how much you use and how it spreads. If the sauce is too runny, it can seep into the dough and make the pizza soggy, which is the opposite of what you want for New York-Style pizza. If it’s too thick, it can create clumps and disrupt the balance with the cheese.
- Ideal sauce consistency: A well-cooked, reduced sauce will have a thicker texture that spreads easily without running. If your sauce is too watery, simmer it for a few extra minutes to allow some of the excess moisture to evaporate. A thick sauce ensures that it doesn’t run off the cheese or sink into the dough, keeping the crust crispy.
3. Cheese Distribution: Evenness is Key
When layering the cheese, make sure it is distributed evenly across the pizza. You don’t want clumps of cheese that will melt unevenly, nor do you want bare spots without cheese. The goal is to create a smooth, continuous layer that will melt and bubble nicely in the oven.
- How to distribute the cheese: After spreading the sauce, tear the mozzarella cheese into small, bite-sized pieces and scatter them evenly across the sauce. Avoid putting the cheese too close to the edges of the pizza to prevent it from burning. The cheese should cover the entire sauce layer, but there should be no visible gaps.
4. Additional Cheese Considerations
While mozzarella is the star of New York-Style pizza, you can also consider adding other types of cheese for added flavor and texture. Parmesan or Pecorino Romano can be sprinkled over the mozzarella for a sharp, salty finish. However, these cheeses should be used sparingly to avoid overpowering the pizza’s overall flavor.
- Sprinkle on top: A light dusting of Parmesan or Pecorino Romano after the pizza is baked adds a nice finishing touch. You can also drizzle a bit of extra virgin olive oil over the cheese for an added richness.
5. Adjusting for Different Pizza Sizes
The sauce and cheese ratios may need to be adjusted depending on the size of the pizza you’re making. For smaller pizzas (12-inch or smaller), you’ll use less sauce and cheese. For larger pizzas (16-inch or more), you can increase the amounts proportionally while maintaining the same balance.
- 12-inch pizza: Use around ⅓ cup of sauce and 6 to 8 ounces of mozzarella cheese.
- 16-inch pizza: Use around ½ cup of sauce and 12 ounces of mozzarella cheese.
6. The Perfect Texture: A Golden Ratio
New York-Style pizza should have a crispy crust, a creamy melt of cheese, and a light tomato flavor from the sauce. Achieving this texture means ensuring the right amounts of each component, with the sauce and cheese working together harmoniously.
- Crispy, not soggy: The key to avoiding a soggy pizza is making sure you don’t use too much sauce, and that the sauce is the right consistency. Too much cheese can make the pizza greasy and cause it to be too heavy, while too little cheese can result in a pizza that’s dry and lacks flavor.
- Melted but not greasy: The mozzarella should melt evenly and create that satisfying stretch that New York pizza is known for, without becoming too oily. High-quality mozzarella will melt well and create that creamy texture without excess grease.
Summary
Getting the right amount of sauce and cheese is critical to achieving the perfect New York-Style pizza. The sauce should be thin and evenly spread, while the cheese should be abundant but not excessive. With a balance between the two, you’ll achieve the desired crisp crust, melty cheese, and flavorful sauce that defines this iconic pizza style. Adjusting the ratios depending on the size of the pizza and maintaining consistency in both the sauce and cheese will help ensure that your New York-Style pizza has the perfect texture and taste with every slice.
Baking and Serving the Perfect New York-Style Pizza
Certainly! Here’s a more detailed version of the “How to Bake Your Pizza for the Ideal Crust” section:
How to Bake Your Pizza for the Ideal Crust
Baking your New York-Style pizza is just as important as preparing the dough, sauce, and toppings. Achieving that perfectly crispy bottom and golden, airy crust relies heavily on your baking method. A key component in this process is using a pizza stone or pizza steel, which can help simulate the high-heat environment of a professional pizza oven. This ensures that your pizza bakes quickly, evenly, and develops that sought-after crispness that defines New York pizza.
Here’s a step-by-step guide to help you bake your pizza for the ideal crust:
1. Preheat Your Oven to High Heat
New York-Style pizza is all about achieving that crispy, yet airy, crust in a short amount of time. For the best results, preheat your oven to a high temperature, typically around 475°F to 500°F (245°C to 260°C). This high heat is necessary to cook the pizza quickly, which helps develop the ideal texture: crispy on the bottom while keeping the crust soft and chewy on the inside.
- Oven placement: If you’re using a pizza stone or pizza steel, place it in the oven before preheating. This allows the stone or steel to absorb the heat, which in turn will give the pizza a fast, even bake from the bottom.
2. Using a Pizza Stone or Pizza Steel
To get that crispy, golden bottom that is characteristic of New York-Style pizza, the use of a pizza stone or pizza steel is essential. These tools help to mimic the floor of a brick pizza oven by retaining heat and transferring it directly to the pizza’s dough, resulting in a perfectly crisped crust.
- Pizza Stone: A pizza stone is made from ceramic or cordierite and retains heat well. It helps distribute heat evenly across the pizza, ensuring a crispy and evenly baked crust.
- Preheat the stone: Place the pizza stone in the oven during preheating, ideally for at least 30 minutes. This ensures the stone is hot enough to bake the pizza quickly once placed inside.
- Pizza Peel: To transfer the pizza onto the hot stone, you’ll need a pizza peel. Dust the peel with a little flour or cornmeal to prevent the dough from sticking when you slide it onto the stone.
- Pizza Steel: A pizza steel is made from metal and heats up faster and more evenly than a stone. It retains heat well and produces even more crispiness in the crust. It’s a great option if you want an even faster, more efficient bake.
- Use the same process as with the stone, but note that a pizza steel may require a slightly shorter bake time, so keep an eye on the pizza as it cooks.
3. Use a Pizza Peel for Smooth Transfer
When your oven and pizza stone (or pizza steel) are preheated and ready, use a pizza peel to slide the pizza onto the stone or steel. This is a crucial step, as it ensures the pizza does not lose its shape or get stuck during the transfer.
- Prepare your peel: Dust your pizza peel with flour or cornmeal to prevent sticking. You can also use parchment paper as a base to make it easier to slide the pizza onto the stone.
- Sliding the pizza: Once the pizza is assembled on the peel, gently slide it onto the hot stone or steel. Be careful not to over-squeeze the pizza or let it lose its shape in the process.
4. Bake for the Perfect Time
The key to achieving a crispy crust and evenly cooked toppings is to bake the pizza for a short amount of time at a high temperature. Here’s how to do it:
- Baking time: Depending on your oven and the thickness of your dough, bake your New York-Style pizza for 8-12 minutes at 475°F to 500°F. You want the crust to be golden and crisp, with the cheese bubbling and lightly browned.
- Check for doneness: The pizza is ready when the cheese has melted, the crust is golden and crisp, and the bottom of the pizza is firm and slightly browned. You can gently lift the pizza with a spatula or tongs to check the underside.
- Rotating the pizza: For an even bake, rotate the pizza halfway through the cooking time, especially if your oven has hot spots. This helps ensure that the pizza bakes uniformly, with no burnt spots or undercooked areas.
5. Alternate Baking Methods (If No Pizza Stone or Steel)
While using a pizza stone or steel is highly recommended for the best results, you can still achieve a decent pizza without these tools.
- Cast Iron Skillet: If you don’t have a pizza stone or steel, a cast iron skillet can be a great alternative. Heat the skillet in the oven or on the stovetop before placing the pizza in it. The cast iron retains heat well and will create a crisp crust.
- Baking Sheet: If you don’t have either, you can bake the pizza on a baking sheet. Just be sure to preheat the sheet in the oven for 10-15 minutes before placing the pizza on it. The results won’t be quite as crispy, but the pizza will still cook through.
6. Let Your Pizza Rest
Once your pizza is done, let it rest for 2-3 minutes before slicing. This allows the cheese to set, preventing it from oozing out when you cut it. It also helps the crust hold its shape after being removed from the hot oven.
Summary
To bake your New York-Style pizza to perfection, it’s essential to use a pizza stone or pizza steel to achieve a crispy bottom and golden, airy crust. Preheating your oven and baking at a high temperature (475°F to 500°F) is key to getting the ideal texture. Baking for 8-12 minutes, rotating the pizza halfway through, and ensuring the cheese is melted and bubbly are important steps to achieving that perfect pie. Even without a pizza stone, alternatives like a cast iron skillet or baking sheet can help, but the result may be slightly less crispy.
By following these steps, you can enjoy a New York-Style pizza with a beautifully crisp crust and perfect bake every time!
Certainly! Here’s an expanded version of the “Tips for Cooking in a Home Oven vs. Professional Pizza Oven” section:
Tips for Cooking in a Home Oven vs. Professional Pizza Oven
When making New York-Style pizza at home, one of the biggest challenges is replicating the high-heat environment of a professional pizza oven. Traditional New York pizza ovens operate at temperatures between 700°F and 900°F (370°C – 480°C), which allows the dough to cook quickly, achieving that signature crispy bottom while maintaining a chewy, airy crust. Home ovens typically reach a maximum of around 500°F (260°C), which can make it harder to achieve that same level of crispiness and texture.
However, with a few clever tips and techniques, you can come very close to replicating the high-heat baking environment of a New York pizza oven in your own kitchen.
1. Preheat Your Oven to the Highest Temperature
To simulate the high-heat conditions of a professional pizza oven, it’s crucial to preheat your home oven to its highest setting. Most home ovens can reach a maximum temperature of 500°F (260°C), which is the ideal target temperature for baking New York-style pizza.
- Allow plenty of time for preheating: Set your oven to the highest temperature and preheat for at least 30 minutes to ensure it has reached its maximum heat before placing your pizza inside. The longer the oven preheats, the more heat will be absorbed into the pizza stone or pizza steel, ensuring a crispy bottom.
- Avoid opening the oven door: When baking pizza, try not to open the oven door too often. Every time you open the door, the temperature inside drops significantly, which can affect how well your pizza cooks.
2. Use a Pizza Stone or Pizza Steel
One of the key differences between a professional pizza oven and a home oven is the floor material. A pizza stone or pizza steel helps bridge the gap by absorbing heat and distributing it evenly across the pizza. Both materials retain heat well and can help replicate the high heat of a pizza oven, ensuring that the bottom of your pizza cooks quickly and crisps up nicely.
- Pizza Stone: A pizza stone is made of ceramic or cordierite and is known for its ability to retain and evenly distribute heat. Place the stone in the oven while it’s preheating so it reaches the right temperature.
- Pizza Steel: A pizza steel is a more modern option and has even better heat retention properties than a stone. Because of the metal’s high thermal conductivity, pizza steels cook pizzas even faster, creating a crispier crust in less time.
Both of these tools work by mimicking the hot surface of a professional pizza oven, so be sure to preheat them thoroughly before use.
3. Use the Broiler to Simulate Intense Heat
In a professional pizza oven, heat comes from both the floor (the pizza stone or steel) and the ceiling, where intense heat radiates down onto the pizza. To replicate this top heat, you can use your oven’s broiler.
- Activate the broiler: Once your pizza is in the oven, turn on the broiler for the last 1-2 minutes of baking. The broiler directs intense heat from the top, allowing the cheese to brown and the toppings to cook quickly, much like they would in a professional pizza oven.
- Watch closely: Since broiling can cause food to cook quickly, keep an eye on the pizza during this step to prevent burning. The broiler should be used only for the final stage of baking, when the pizza is nearly done and you want that perfect golden, bubbly finish.
4. Use a Pizza Peel for Easy Transfer
A professional pizza oven often has a large surface area, which makes it easy to slide the pizza in and out quickly. At home, the limited space in your oven might make this trickier. To achieve the same quick and smooth transfer, you’ll need a pizza peel.
- Prepare your pizza: Assemble your pizza on a floured or cornmeal-dusted pizza peel. The flour or cornmeal helps the pizza slide off easily when it’s time to bake.
- Quick transfer: Once the pizza is ready to bake, use the peel to slide the pizza onto the preheated stone or steel. This fast transfer minimizes any loss of heat, ensuring the crust crisps up right away.
5. Consider Using a Pizza Oven Attachment
If you are serious about getting as close as possible to the New York-style pizza experience at home, you might want to consider investing in a pizza oven attachment or a countertop pizza oven.
- Pizza oven attachments: These are devices that sit inside your regular oven and help amplify heat by creating a more controlled environment for baking pizza. Some of these attachments can reach higher temperatures (up to 800°F) and cook your pizza in just 90 seconds, similar to a traditional pizza oven.
- Countertop pizza ovens: These compact ovens are designed specifically for pizza and can often reach higher temperatures than your regular home oven, making them a great option for achieving professional-level results.
6. Maintain an Even Heat Distribution
One of the biggest advantages of a professional pizza oven is that heat is distributed evenly around the pizza. To replicate this in your home oven:
- Rotate the pizza: To ensure even cooking, rotate your pizza halfway through the baking time. This helps the pizza cook uniformly, especially if your home oven has hot spots.
- Use convection heat: If your oven has a convection setting, use it to help circulate the hot air around the pizza. This mimics the airflow in a professional pizza oven and can help cook your pizza more evenly.
7. Alternative High-Heat Baking Methods
If you don’t have a pizza stone or steel, there are still ways to cook your pizza at high temperatures.
- Cast Iron Skillet: If you don’t have access to a pizza stone or steel, a cast iron skillet can work wonders. Preheat the skillet in your oven or on the stovetop, then carefully slide your pizza into the hot skillet. The cast iron will give the pizza a crispy bottom similar to what you’d get in a professional oven.
- Grill: Another alternative is to use a grill to cook your pizza. Preheat the grill to a high temperature, and place the pizza directly on the grill grates for a unique, smoky flavor. The heat from the grill will also cook the pizza quickly, producing a crispy crust.
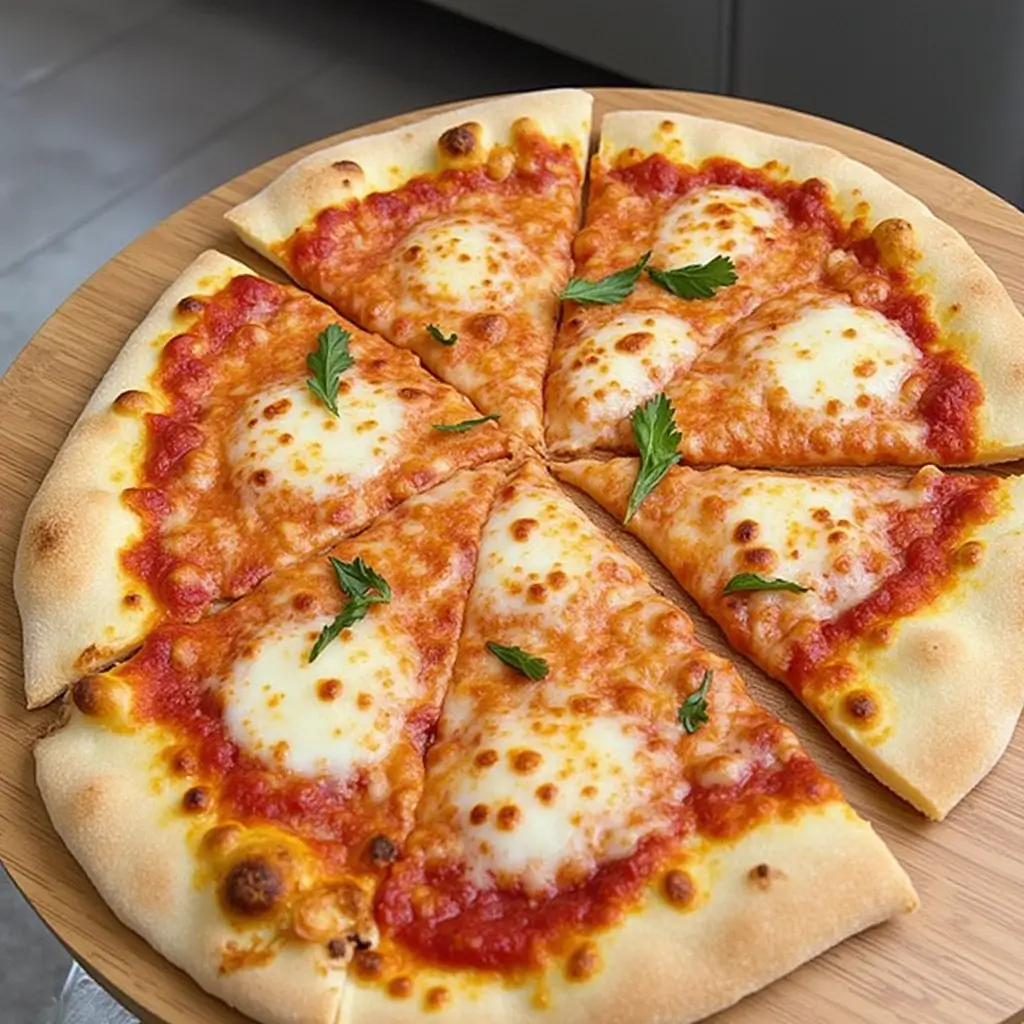
Summary
While cooking pizza in a home oven is not quite the same as in a professional pizza oven, there are several ways to replicate the high-heat environment that makes New York-Style pizza so special. Using tools like a pizza stone or pizza steel, preheating your oven properly, utilizing the broiler, and investing in a pizza oven attachment or countertop pizza oven can help you achieve a crispy crust and delicious pizza in the comfort of your home. By following these tips, you can bring a slice of New York pizza straight to your kitchen, even if you’re not working with a traditional pizza oven.
Serving and Enjoying Your Pizza Like a True New Yorker
Once your New York-style pizza is hot and fresh out of the oven, it’s time to slice and enjoy it just like a true New Yorker. The way you serve and savor the pizza is almost as important as the recipe itself, and there are some key details that make eating pizza in New York an experience. Here’s a guide to serving and enjoying your pizza just like they do in the Big Apple:
1. The Art of Slicing New York-Style Pizza
One of the signature characteristics of New York-style pizza is the big, wide slices that are perfect for folding. To get the ideal slice every time, here are some tips:
- Use a sharp pizza cutter or knife: Ensure that you have a sharp tool to slice through the thin, crispy crust without mangling the pizza. A pizza cutter wheel works best, but a chef’s knife can also do the trick if you don’t have one.
- Cut into large, triangular slices: New York-style pizza is traditionally cut into large, wide triangle slices that allow you to fold the pizza down the center. This folding technique makes it easier to hold the pizza, and it adds to the authentic experience of eating a New York slice.
- Be gentle with the sauce: Because New York-style pizza has a relatively thin crust, it’s important not to put too much pressure on the pizza when slicing, as this can cause the sauce and cheese to slide off. Let the pizza cool for a minute or two before cutting to ensure the cheese sets slightly, making it easier to slice without losing the toppings.
2. The Iconic Fold
In New York, pizza is often eaten with a specific technique: the fold. This folding method has become synonymous with New York pizza culture, and it’s a defining characteristic of the experience. The pizza is so big and floppy that folding it allows you to hold it in one hand while walking down the street—just like a true New Yorker would!
- How to fold: To achieve the iconic fold, simply pick up your slice from the crust end, fold it in half lengthwise, and take a bite. This helps you enjoy the pizza with the right balance of crispy crust, melty cheese, and tangy sauce in every bite.
- A note on folding: While folding is a fun and traditional way to eat New York pizza, it’s not a strict requirement. Some pizza lovers may prefer to eat it flat and crispy. It’s all about personal preference, but in New York, folding is often seen as the ultimate way to enjoy your slice.
3. Classic Drink Pairings
The right drink can elevate your pizza experience, and there are a few classic choices that perfectly complement New York-style pizza. Here are some classic drink pairings that locals love:
- Soda: In New York, a cold soda is the classic drink pairing with a slice of pizza. A cola or root beer provides a refreshing, fizzy contrast to the richness of the pizza. Many New Yorkers opt for a can or bottle of soda, which makes it easy to take your pizza and drink on the go.
- Iced Tea: For a more refreshing, lighter option, iced tea—especially unsweetened iced tea—can complement the flavors of the pizza without overwhelming them. You can add a slice of lemon for a tangy twist.
- Beer: If you’re in the mood for something a little stronger, a cold beer is a perfect choice. Many pizza lovers prefer a light lager or pilsner, which has a clean, crisp flavor that balances the pizza’s richness.
- Water: Of course, a simple cold glass of water is always a great choice, especially when the pizza is piping hot. It helps cleanse your palate between bites and keeps you hydrated.
4. Fresh Basil or Oregano for Extra Flavor
To enhance the flavor of your pizza and give it a fresh, herbaceous kick, you can add a sprinkle of fresh basil or oregano on top. Here’s how to do it like a pro:
- Fresh basil: For a classic touch, you can tear a few fresh basil leaves and sprinkle them on top of your pizza right after it comes out of the oven. The heat from the pizza will release the basil’s fragrant oils, adding a burst of flavor without overpowering the other ingredients. Many pizzerias in New York top their pizzas with fresh basil for an aromatic finish.
- Dried oregano: If you prefer a more traditional approach, a pinch of dried oregano can be sprinkled over the pizza before or after baking. Oregano has a slightly peppery flavor that pairs perfectly with the tomato sauce and cheese, adding a touch of Mediterranean essence.
5. Pairing with Side Dishes
In New York, pizza is often paired with simple side dishes that complement the meal without overshadowing the main attraction. Here are a few classic side options:
- Garlic knots: These delicious, buttery knots of bread covered in garlic and herbs are a New York pizza staple. Served warm with a side of marinara dipping sauce, they’re a perfect complement to your pizza.
- Salads: A simple green salad with lettuce, tomatoes, and a light vinaigrette can be the ideal side dish for a New York pizza. The freshness of the salad helps balance the richness of the pizza’s cheese and sauce.
- Antipasto platter: For a more substantial side, consider serving an antipasto platter with cured meats, olives, cheese, and marinated vegetables. This offers a great contrast to the hot pizza and can be served as a starter or a side dish.
6. The New York Pizza Experience: Sharing with Friends
While New Yorkers may often enjoy a slice on the go, pizza in New York is often an event best shared with friends and family. Whether you’re sitting in a pizzeria or enjoying a slice at home, pizza is a communal experience. Sharing multiple pies with a group gives everyone the chance to sample different toppings and combinations.
- Casual eating: When eating pizza in New York, there’s no need for fancy table settings. Grab a few plates, serve the pizza, and enjoy the meal in a relaxed, casual environment. If you’re out with friends, don’t hesitate to order a few different kinds of pizza to sample and share.
- Street-style pizza: If you’re lucky enough to enjoy a slice from a street vendor, you might be standing and eating your pizza with one hand, drink in the other, and walking down the street—just like the classic New York experience.
7. Finishing Touches: Enjoying the Moment
After you’ve savored the last bite of your pizza, it’s not uncommon to wash it down with a final sip of your drink. Enjoy the satisfaction of that perfect slice and the unique flavors that come from a freshly baked New York-style pizza. Whether you’ve chosen to fold your slice or eat it flat, the key is to savor every bite and enjoy the experience.
Summary
Eating New York-style pizza is as much about the experience as it is about the taste. From the art of slicing and folding your pizza to pairing it with classic drinks and sides, these small details can transform your pizza night into something truly special. By following these tips and embracing the New York way of eating pizza, you can enjoy an authentic, delicious meal just like the locals do in the heart of the Big Apple. So grab a slice, fold it up, and enjoy!