
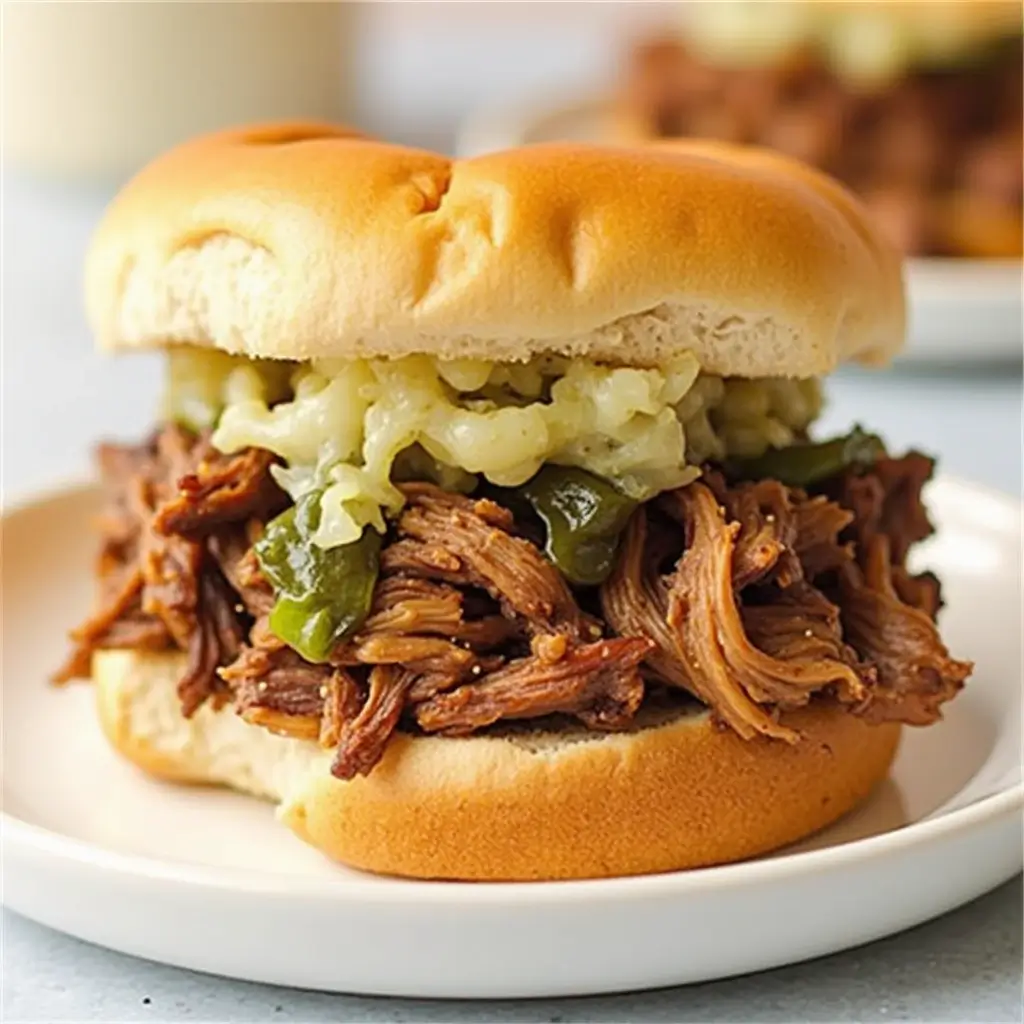
Pulled pork sandwiches are the ultimate comfort food—a perfect blend of tender, flavorful pork, smoky barbecue sauce, and soft, pillowy buns. Whether you’re hosting a backyard BBQ, planning a game-day feast, or simply craving a hearty meal, this classic dish never fails to impress.
But what truly makes the best pulled pork sandwich? It’s all about the right cut of meat, the perfect seasoning, and a foolproof cooking method that guarantees juicy, melt-in-your-mouth pork every time. In this step-by-step guide, we’ll walk you through everything you need to know—from selecting the perfect pork shoulder to assembling a sandwich that will have everyone asking for seconds.
So grab your apron, fire up your slow cooker, smoker, or Instant Pot, and let’s get started on making the best pulled pork sandwich you’ve ever tasted!
Choosing the Best Cut of Pork for Pulled Pork
Why Pork Shoulder is the Best Choice
When it comes to making pulled pork, the cut of meat you choose plays a crucial role in achieving the juicy, tender texture and rich flavor that defines this dish. Pork shoulder, also known as pork butt or Boston butt, is widely regarded as the best choice for pulled pork, and here’s why:
1. Perfect Fat Content for Moist, Tender Meat
Pork shoulder is naturally marbled with fat, which slowly renders during the cooking process. This fat not only keeps the meat moist but also enhances its flavor. Unlike leaner cuts, pork shoulder is forgiving, making it ideal for slow cooking, smoking, or braising without the risk of drying out.
2. High Collagen Content for Rich Texture
Pork shoulder is rich in collagen, a connective tissue that breaks down during long, slow cooking. This process transforms the meat into the tender, melt-in-your-mouth texture that’s perfect for shredding. The breakdown of collagen also adds a silky, rich mouthfeel to the meat.
3. Affordability and Availability
Pork shoulder is one of the most budget-friendly cuts of pork, making it accessible for home cooks looking to create a crowd-pleasing meal without breaking the bank. It’s also widely available at grocery stores and butcher shops, making it a convenient option for most people.
4. Versatility and Flavor Absorption
Thanks to its slightly firm texture before cooking, pork shoulder holds up well to marinades, dry rubs, and seasonings. It absorbs flavors beautifully during cooking, whether you’re going for a sweet and tangy barbecue profile or a smoky, spicy rub. This versatility makes it the ideal canvas for creating a pulled pork sandwich tailored to your taste.
In summary, pork shoulder is the perfect choice for pulled pork because of its balance of fat, collagen, and affordability. Whether you’re slow-cooking it in a crockpot, smoking it for hours, or using a pressure cooker for a quicker method, pork shoulder guarantees a tender, flavorful result every time.
Alternative Cuts You Can Use
While pork shoulder is the gold standard for pulled pork, there are several other cuts of pork that can work well if you’re looking for alternatives. Depending on your preferences, cooking method, or what’s available at your local store, here are some cuts that can still deliver tender, flavorful pulled pork:
1. Pork Loin
Pork loin is a leaner cut compared to pork shoulder, making it a good option for those who want a lighter version of pulled pork. While it lacks the marbling and collagen of pork shoulder, it can still produce delicious results if cooked properly. To prevent it from drying out, consider using a moist cooking method like braising with plenty of liquid, such as broth or barbecue sauce. Keep in mind that pork loin may require shorter cooking times.
2. Pork Tenderloin
Similar to pork loin, pork tenderloin is a lean, tender cut that cooks quickly. It’s not traditionally used for pulled pork because it doesn’t have the fat content needed to create that signature juicy texture. However, if you’re in a pinch, pork tenderloin can work when cooked in a slow cooker with added fats (like butter or oil) and flavorful sauces. Shred the meat carefully as it’s more delicate and less fibrous than pork shoulder.
3. Picnic Shoulder (Picnic Roast)
The picnic shoulder, which comes from the lower part of the pork shoulder, is another great option for pulled pork. It’s slightly less marbled than the Boston butt but still contains enough fat and connective tissue to produce tender, flavorful meat. Picnic shoulder often comes with the skin on, which can be removed or left on for additional flavor during cooking.
4. Country-Style Ribs
Country-style pork ribs aren’t actually ribs—they’re cut from the shoulder or loin. These meaty, boneless cuts have a good amount of fat and connective tissue, making them an excellent substitute for pork shoulder. They cook well in a slow cooker or smoker and shred easily once tender.
5. Pork Belly
For a unique twist on pulled pork, you can use pork belly. This cut is extremely fatty, so it creates an ultra-rich and indulgent version of pulled pork. While it’s not the most common choice, pork belly can be slow-cooked or braised, resulting in succulent meat with a melt-in-your-mouth texture.
6. Bone-In Ham
If you’re looking for a different flavor profile, bone-in ham can be used to make pulled pork with a slightly smoky, salty edge. It’s not as fatty as pork shoulder but can still yield tender meat when slow-cooked with a bit of added liquid or sauce.
Tips for Using Alternative Cuts
- Adjust cooking times and methods to account for the fat content and texture of the cut you’re using. Leaner cuts like loin or tenderloin require more liquid and shorter cooking times.
- If your chosen cut lacks fat, consider adding ingredients like broth, butter, or a fatty sauce to keep the meat moist.
- Be mindful of flavor—some cuts, like ham or pork belly, will bring unique characteristics to your pulled pork.
In conclusion, while pork shoulder is the traditional and preferred cut, these alternative options can still produce delicious pulled pork if prepared with care. Choose the cut that best suits your needs, and don’t be afraid to experiment!
Tips for Picking Quality Meat at the Store
Choosing the right cut of meat is the foundation of a great pulled pork sandwich. To ensure you’re getting the best quality pork shoulder (or an alternative cut), here are some practical tips to guide you during your next trip to the store:
1. Look for Good Marbling
Marbling refers to the white streaks of fat running through the meat. For pulled pork, you want a cut with plenty of marbling because this fat will render down during cooking, keeping the meat juicy and flavorful. Avoid cuts that appear too lean, as they can result in dry, less flavorful pulled pork.
2. Check the Color of the Meat
Fresh pork should have a pinkish-red hue, which indicates freshness and quality. Avoid meat that looks pale, grayish, or discolored, as this could be a sign that it’s not fresh or has been sitting on the shelf for too long.
3. Opt for Bone-In Cuts When Possible
If you have the option, go for a bone-in pork shoulder. The bone helps retain moisture during cooking and adds extra flavor to the meat. Plus, it can act as a natural gauge for tenderness—when the meat is fully cooked, the bone should slide out easily.
4. Consider the Fat Cap
A good pork shoulder will have a visible layer of fat on one side, often called the “fat cap.” This layer adds flavor and keeps the meat moist during cooking. Look for a cut with a moderate fat cap—about 1/4 inch thick. Too much fat can make the meat greasy, while too little may leave it dry.
5. Pay Attention to the Packaging
Inspect the packaging for any signs of damage, like tears or leaks. The meat should be vacuum-sealed or tightly wrapped to maintain freshness. If the packaging has excess liquid pooling inside, it may indicate the meat has been frozen and thawed, which can affect its texture and flavor.
6. Check the Weight and Size
Choose a cut of pork that suits your cooking method and the number of servings you need. Pork shoulders typically range from 4 to 10 pounds. For pulled pork, aim for a 5-8 pound cut, which is ideal for slow cooking and shredding. If cooking for a smaller group, you can opt for a half shoulder or smaller cuts like country-style ribs.
7. Opt for Pasture-Raised or Heritage Pork When Available
If your budget allows, consider selecting pasture-raised or heritage-breed pork. These options are typically higher in quality, with better marbling and a richer flavor. They may cost more, but the taste difference is often worth the investment, especially for special occasions or gatherings.
8. Look for Trusted Labels
Pay attention to certifications or labels that indicate quality, such as:
- USDA Grade: Look for “USDA Choice” or “USDA Prime” for higher quality pork.
- No Added Hormones or Antibiotics: These labels can indicate better farming practices.
- Local or Sustainable Farms: Supporting local farms often ensures fresher, ethically raised pork.
9. Ask the Butcher for Recommendations
If you’re unsure, don’t hesitate to ask your local butcher for advice. Butchers are a great resource for understanding different cuts of meat, and they can help you find the freshest, highest-quality pork shoulder or alternative cuts. They may even be able to custom-trim a piece for you.
10. Avoid Pre-Seasoned or Pre-Marinated Cuts
While it may seem convenient, pre-seasoned or pre-marinated cuts often contain additives, artificial flavors, or excess salt that can overpower the natural taste of the pork. Choosing plain, fresh pork gives you full control over the seasoning and allows you to create a flavor profile that suits your recipe.
By following these tips, you’ll be equipped to pick the perfect cut of meat for your pulled pork, ensuring a tender, juicy, and delicious result every time. Happy shopping!
Preparing Your Pork Shoulder
Essential Ingredients and Seasonings for Flavor
Crafting the perfect pulled pork sandwich is all about layering flavors to create a rich, mouthwatering experience. While the slow-cooked pork is the star of the show, the right ingredients and seasonings are what elevate it to unforgettable heights. Here’s a breakdown of the essential elements and how each contributes to the overall flavor profile of your pulled pork masterpiece:
1. The Pork Rub: Building a Flavorful Foundation
A good dry rub is crucial for infusing the pork with bold, well-rounded flavors before it even starts cooking. A basic pork rub typically includes the following:
- Brown Sugar: Adds a touch of sweetness and helps create a caramelized crust during cooking.
- Smoked Paprika: Introduces a smoky depth, enhancing the barbecue essence.
- Garlic Powder and Onion Powder: Provide a savory, aromatic base.
- Chili Powder or Cayenne Pepper: Adds a subtle heat for balance.
- Salt and Black Pepper: Essential for seasoning and bringing out the natural flavors of the meat.
Feel free to customize your rub with spices like cumin, mustard powder, or even a hint of cinnamon for a unique twist. Generously coat the pork shoulder with the rub, massaging it into every nook and cranny to ensure even flavor distribution.
2. Liquid Ingredients: Enhancing Moisture and Flavor
During the cooking process, adding the right liquids ensures the pork stays moist and tender while infusing it with additional flavor. Consider these options:
- Apple Cider Vinegar: A classic choice for pulled pork, it adds tanginess and helps tenderize the meat.
- Chicken or Beef Broth: Provides a savory base for braising or slow-cooking.
- Apple Juice or Pineapple Juice: Adds a subtle sweetness and balances smoky or spicy flavors.
- Beer or Cola: Both add depth and richness; beer offers earthy undertones, while cola brings caramel-like sweetness.
- Barbecue Sauce: Add it during the last hour of cooking to avoid burning, or mix it in after shredding for a saucy finish.
3. Aromatics: Adding Complexity
Incorporating fresh aromatics enhances the overall flavor and aroma of the dish. Popular choices include:
- Onions: Slice and layer them at the bottom of your slow cooker or roasting pan for a sweet, mellow flavor.
- Garlic Cloves: Add whole cloves or minced garlic to boost savory notes.
- Bay Leaves: Provide subtle herbal undertones.
- Fresh Herbs: Thyme, rosemary, or parsley sprigs can add a fresh, earthy aroma.
4. Finishing Sauces and Condiments
Once the pork is shredded, finishing sauces and condiments are essential for tying all the flavors together. These include:
- Barbecue Sauce: A rich, smoky, and slightly sweet barbecue sauce is a must. Look for sauces with a balance of tanginess, sweetness, and spice. Homemade or store-bought options work equally well.
- Mustard-Based Sauce: Perfect for a tangy Southern twist, especially popular in Carolina-style pulled pork.
- Hot Sauce: Adds a spicy kick for heat lovers.
- Vinegar Sauce: A light, tangy dressing often used in North Carolina-style pulled pork, made with apple cider vinegar, sugar, and spices.
5. Bread: The Unsung Hero
A pulled pork sandwich is only as good as the bread it’s served on. Choose soft, sturdy buns that can hold up to the juicy pork and sauce without falling apart. Options include:
- Brioche Buns: Buttery and slightly sweet, these are a popular choice.
- Potato Rolls: Soft, fluffy, and perfect for soaking up sauce.
- Kaiser Rolls: More robust and ideal if you’re loading up your sandwich with toppings.
- Hawaiian Rolls: Sweet and soft, these add a unique flavor contrast to the smoky pork.
6. Toppings: Adding Texture and Balance
Elevate your sandwich with toppings that add crunch, freshness, or an extra layer of flavor. Popular options include:
- Coleslaw: Creamy or vinegar-based coleslaw provides a refreshing crunch and balances the richness of the pork.
- Pickles: Dill or bread-and-butter pickles add acidity and a satisfying tang.
- Fried Onions or Onion Rings: Add crunch and a touch of sweetness.
- Jalapeños: For a spicy kick.
- Cheese: Melted cheddar or a slice of pepper jack can take your sandwich to the next level.
By combining these essential ingredients and seasonings, you’ll achieve a pulled pork sandwich bursting with flavor, texture, and balance. The beauty of this dish is its versatility—feel free to adjust the spices, liquids, and toppings to match your personal preferences or to explore different regional barbecue styles.
How to Properly Trim and Season the Pork
Mastering the art of trimming and seasoning pork is key to creating tender, flavorful pulled pork. Each step in this process enhances the final product, ensuring the meat cooks evenly, retains its moisture, and delivers a perfect balance of seasoning. Here’s a detailed guide to help you get it right:
1. The Importance of Proper Trimming
Trimming the pork shoulder (or other chosen cut) helps optimize the cooking process by removing excess fat while keeping enough to ensure flavor and juiciness. Here’s how to do it:
- Assess the Fat Cap: Most pork shoulders have a thick layer of fat, called the “fat cap,” on one side. While fat is essential for flavor and moisture, a fat cap thicker than 1/4 inch can prevent seasoning from penetrating the meat. Use a sharp knife to carefully trim the fat cap down to a manageable thickness, leaving enough for flavor without overwhelming the meat.
- Remove Excess Surface Fat: Check for any large clumps of fat around the edges of the meat. While some internal fat will render down during cooking, these exterior chunks can leave the meat greasy and unappealing. Trim them away to avoid this.
- Keep the Meat Intact: Be cautious not to over-trim or cut into the meat itself, as this could reduce its integrity and lead to uneven cooking. Focus on removing only excess fat and tough membranes.
2. Preparing the Pork for Seasoning
Once trimmed, it’s important to prepare the pork so it can fully absorb the seasoning. Follow these steps:
- Pat Dry: Use paper towels to pat the pork dry. This removes excess moisture and helps the seasoning stick to the meat.
- Optional Scoring: For thicker fat caps, you can score the fat by making shallow cuts in a crisscross pattern. This allows the seasoning to penetrate deeper and helps the fat render more effectively during cooking.
3. Seasoning the Pork: Layering Flavor
Seasoning is where the magic happens. The goal is to create a flavor-packed crust that enhances the meat without overpowering it. Here’s how to build the perfect seasoning:
- Start with a Dry Rub:
A flavorful dry rub is essential for pulled pork. Apply it generously, as the meat’s long cooking time ensures the spices meld beautifully. A classic dry rub includes:- Brown Sugar: Adds sweetness and helps create a caramelized bark.
- Salt: Enhances the meat’s natural flavor and draws out moisture for a juicier result. Use kosher salt for even coverage.
- Smoked Paprika: Adds a smoky, earthy depth to the pork.
- Black Pepper: Provides a mild kick and balances the sweetness.
- Garlic and Onion Powder: Create a savory, aromatic base.
- Cayenne or Chili Powder (Optional): For a hint of heat.
- Add a Binder (Optional):
To help the rub stick better, you can apply a thin layer of a liquid binder before seasoning. Common options include:- Yellow Mustard: Mild in flavor and helps the rub adhere to the meat.
- Olive Oil: A neutral option that prevents the meat from drying out.
- Hot Sauce: Adds a spicy kick while securing the rub.
Spread the binder evenly over the pork before sprinkling on the rub.
4. Marinating for Maximum Flavor
If time allows, let the seasoned pork rest before cooking. This step helps the rub penetrate the meat for a deeper flavor.
- Refrigerate: Place the seasoned pork in a large dish or wrap it tightly in plastic wrap. Let it marinate in the refrigerator for at least 2 hours or up to overnight.
- Bring to Room Temperature: Before cooking, allow the pork to come to room temperature for about 30-60 minutes. This ensures even cooking and prevents the meat from seizing when exposed to heat.
5. Don’t Skip the Salt
Salt plays a dual role in seasoning and tenderizing. If you’re short on time, a quick dry brine can make a big difference:
- Generously sprinkle kosher salt over the pork and let it sit for 30-60 minutes. The salt will draw out moisture, which then reabsorbs, carrying flavor deep into the meat.
By properly trimming and seasoning the pork, you’re setting the stage for perfectly cooked pulled pork with a flavorful crust and juicy interior. These steps ensure the meat is infused with flavor inside and out, making every bite irresistible.
Marinating Tips for Maximum Flavor
Marinating your pork shoulder is one of the best ways to ensure that every bite is packed with flavor. A well-balanced marinade can penetrate the meat, helping it absorb spices and liquids that will enhance both its taste and tenderness. Whether you’re looking for a simple rub or a more complex marinade, following these tips will elevate your pulled pork to new heights.
1. The Role of Acid in a Marinade
Acidic ingredients are essential in a marinade because they help break down the muscle fibers in the meat, making it tender and juicy. Common acidic ingredients include:
- Apple Cider Vinegar: This is a classic choice for pulled pork, giving it a tangy flavor that balances the richness of the pork.
- Citrus Juices: Lemon, lime, or orange juice can add fresh, zesty notes while also helping to tenderize the meat.
- Wine or Beer: Alcoholic liquids like white wine, red wine, or beer introduce depth and complexity, while also acting as a tenderizing agent. Beer, in particular, works wonders due to its carbonation and acidity.
When using an acidic base, make sure not to marinate the pork for too long (more than 12-24 hours) to avoid over-tenderizing and potentially turning the meat mushy.
2. The Importance of Sweetness
Balancing the acidity with sweetness creates a harmonious flavor profile, which is key for pulled pork. Sweet ingredients help caramelize during cooking, adding a beautiful crust to the exterior of the pork. Common sweeteners to use in marinades include:
- Brown Sugar: Adds a rich, molasses-like sweetness. It caramelizes as the pork cooks, contributing to a delicious bark.
- Honey or Maple Syrup: These natural sweeteners bring a different layer of complexity, adding subtle sweetness without being overpowering.
- Pineapple or Apple Juice: Besides their sweetness, these juices also contribute a slight fruity undertone, pairing beautifully with the pork.
When using sweet ingredients, be mindful of the balance—too much sugar can result in burnt edges, so add just enough to complement the tang of the acids.
3. Herbs and Spices for Flavor Depth
Seasonings are the heart of any marinade, giving your pork the bold, vibrant flavor that will stand out in every bite. When marinating pulled pork, it’s important to focus on a combination of savory, aromatic, and spicy ingredients. Here’s how to use them effectively:
- Garlic and Onion: Minced garlic or garlic powder and onion powder are classic additions to any marinade, providing an aromatic base.
- Paprika: Smoked or sweet paprika introduces a smoky depth and a touch of color.
- Mustard Powder: Adds a tangy, mustardy note that pairs well with pork, enhancing the overall flavor profile.
- Cumin and Coriander: These spices give a warm, earthy undertone to the marinade.
- Chili Flakes or Cayenne Pepper: If you want to add heat to your pulled pork, a pinch of red pepper flakes or cayenne will do the trick. The spice should be balanced to ensure it enhances, not overpowers, the flavor.
- Fresh Herbs: Fresh rosemary, thyme, or oregano provide a bright, herbal touch. Alternatively, dried herbs work well in marinades since they concentrate their flavor over time.
4. Salt and Sweet Balance for Moisture Retention
Salt plays a crucial role in marinating because it helps to draw moisture out of the meat and then reabsorb it, carrying flavors deep inside the pork. However, salt must be used carefully in a marinade:
- Kosher Salt: This is the best choice for marinades because it dissolves easily and ensures an even distribution across the meat.
- Brining: If you have extra time, a quick brine (saltwater solution) can help the pork shoulder retain moisture and flavor throughout the cooking process. A saltwater bath for a few hours before marinating will help lock in the moisture and season the pork evenly.
- Don’t Over-Salt: While salt is essential, too much can result in a salty taste that overwhelms the other flavors. A balanced amount, combined with the sweet and acidic ingredients, is key to achieving harmony in the marinade.
5. The Right Time for Marination
The amount of time you marinate the pork is crucial. Marinating for too long can sometimes break down the meat’s texture too much, while too little time means the flavors won’t fully penetrate. Follow these guidelines:
- Minimum Time: If you’re short on time, marinating the pork for at least 2-4 hours can still impart a noticeable flavor boost.
- Optimal Time: For the best results, marinate the pork overnight (12-24 hours). This gives the meat ample time to soak up the flavors and become more tender.
- Maximum Time: Although it’s tempting to marinate for several days, keep in mind that after 48 hours, the acidity in the marinade can begin to break down the meat too much. Aim to marinate within a 24-hour window for optimal results.
6. Marinating Methods: Wet vs. Dry
While both wet and dry marinades can be effective, wet marinades generally offer more depth of flavor because the liquids help penetrate the meat and coat it. However, dry rubs are still essential when it comes to creating a flavorful crust during cooking. Here’s how to use both methods:
- Wet Marinades: Combine your acidic liquids, sweeteners, spices, and herbs in a large bowl or resealable bag. Make sure the pork is fully submerged in the marinade, and refrigerate for optimal results.
- Dry Rubs: If you prefer a dry rub, you can combine spices, herbs, and salt directly on the pork. It will create a flavorful crust once cooked, and it’s a more hands-off approach to marination.
7. Massage the Marinade In
To ensure the marinade is evenly distributed, massage the liquid or dry rub into the pork. Using your hands (or a spoon for dry rubs), gently work the marinade into every crevice of the meat. This step ensures the flavor soaks in evenly, giving you the most flavorful pulled pork possible.
8. Cover and Rest
Always cover the pork while marinating to prevent contamination and to lock in moisture. Using plastic wrap, a resealable plastic bag, or an airtight container ensures the pork stays fresh and the flavors don’t escape. Resting the pork in the fridge while marinating also allows the ingredients to mingle and develop flavor, which can’t happen if the pork is left at room temperature.
By following these marinating tips, you’ll achieve a pulled pork that’s packed with flavor and boasts a perfectly tender texture. The key is balancing acidity, sweetness, salt, and spices to complement the richness of the pork, and giving it the right amount of time to marinate for the best possible outcome.
Cooking Methods for Perfect Pulled Pork
Slow Cooker Pulled Pork: A Convenient Option
When it comes to preparing pulled pork, the slow cooker (or Crockpot) is one of the best tools for creating tender, juicy, and flavorful meat with minimal effort. It’s a convenient cooking method that allows you to set it and forget it, producing perfectly cooked pulled pork every time. Here’s why using a slow cooker is a game-changer for making pulled pork, along with tips for achieving the best results.
1. The Benefits of Using a Slow Cooker
Using a slow cooker offers several advantages when it comes to making pulled pork:
- Hands-Off Cooking: The slow cooker does most of the work for you. Once you’ve seasoned and placed the pork in the cooker, you don’t need to monitor it constantly. This makes it a great choice for busy individuals or anyone who wants to enjoy tender pulled pork without the fuss of constantly checking the meat.
- Set It and Forget It: With a slow cooker, you can easily prepare your pulled pork in the morning and come back to it in the evening, ready to shred and serve. This hands-off nature makes it perfect for meal prepping, family dinners, or gatherings.
- Tender, Juicy Results: Slow cooking at low temperatures breaks down the tough connective tissues in the pork, resulting in incredibly tender meat that practically falls apart when you shred it. The meat retains moisture, so it doesn’t dry out during the long cooking process.
- Great for Large Quantities: A slow cooker is an excellent option for cooking large cuts of pork, such as pork shoulder, which can easily feed a crowd. The convenience of cooking a large piece of meat all at once means you can feed your family or guests without needing to cook multiple batches.
2. Preparing the Pork for the Slow Cooker
To get the most out of your slow cooker, it’s important to prepare the pork properly before it goes into the pot. Here’s how to get it ready for the cooking process:
- Trim the Fat: As mentioned earlier, trimming the excess fat from the pork is key. While some fat is beneficial for flavor, a large fat cap can prevent the seasonings from penetrating the meat and result in a greasy final dish. Trim the fat down to about 1/4 inch to ensure a flavorful, juicy roast.
- Season Well: Coat the pork with your dry rub or marinade before placing it in the slow cooker. The seasoning will penetrate the meat as it cooks, and you’ll get that great, flavorful crust once it’s finished cooking. While some people prefer to sear the meat in a skillet before adding it to the slow cooker, this step is optional as the slow cooker will still produce tender meat without it.
- Add Aromatics and Liquids: Layer the bottom of the slow cooker with aromatics such as sliced onions, garlic, and herbs to infuse the meat with additional flavor. Then, pour in some liquid—such as chicken broth, apple cider vinegar, or even cola—to help the pork stay moist while cooking. The liquid doesn’t need to cover the meat completely, but just enough to create steam and keep the pork from drying out.
3. Slow Cooking Time and Temperature
The beauty of the slow cooker is in its ability to cook low and slow, but it’s essential to get the timing right. Here’s how to make sure you achieve perfect results:
- Low and Slow Cooking: Set the slow cooker to low and cook the pork for 8-10 hours. This slow cooking process will break down the collagen and fat, making the meat incredibly tender. The long cooking time allows the pork to absorb all the flavors from the seasoning and liquids.
- High Heat Option: If you’re in a hurry, you can set the slow cooker to high for 4-5 hours. While this will still yield tender pork, it won’t be quite as melt-in-your-mouth tender as the low-heat method. However, the high-heat method is a good option when you need to get dinner on the table in a shorter amount of time.
- Check for Tenderness: The pork is done when it reaches an internal temperature of 190°F-205°F (88°C-96°C) and the meat is fork-tender. It should easily pull apart when you shred it with two forks. If it’s still tough, let it cook for a little longer.
4. Enhancing Flavor While Cooking
While slow cooking helps tenderize the meat and infuse it with flavors, there are a few tips to enhance the overall flavor profile of the pulled pork:
- Layering in Barbecue Sauce: You can add barbecue sauce to the slow cooker towards the end of the cooking process, about 30 minutes before serving. This prevents the sauce from burning and allows it to meld with the meat, creating a deliciously saucy pulled pork. If you prefer a more “dry” pulled pork, you can serve the sauce on the side.
- Use Wood Chips or Liquid Smoke (Optional): If you’re craving that smoky flavor that comes from traditional grilling or smoking, consider adding a small amount of liquid smoke to the slow cooker. Alternatively, you can place some wood chips in a pouch made of aluminum foil and place them on top of the pork for an additional smoky infusion.
- Adjust the Liquid: If you find that there’s too much liquid in the slow cooker after cooking, simply remove the pork and let it rest while you simmer the juices down in a separate pot on the stove to concentrate the flavor. This liquid can then be added back to the pulled pork for extra moisture and flavor.
5. Shredding the Pork and Serving
Once the pork is done cooking, it’s time to shred it and serve it up! Follow these steps for perfectly shredded pulled pork:
- Rest the Meat: After removing the pork from the slow cooker, let it rest for 10-15 minutes before shredding. This helps the juices redistribute and keeps the pork moist.
- Shred with Forks: Use two forks to pull the meat apart. The pork should easily shred, creating perfect, bite-sized pieces. If you prefer a finer texture, you can use your hands or a meat shredder for a more uniform result.
- Add Some of the Cooking Liquid: As you shred the pork, mix in some of the cooking liquid to keep it moist and flavorful. You can also add additional barbecue sauce, if desired.
- Serve: Pile the shredded pork onto soft buns for a classic pulled pork sandwich or serve it with sides like coleslaw, baked beans, or cornbread.
6. Leftovers and Storage
One of the great things about making pulled pork in the slow cooker is that it often makes plenty of leftovers. Here’s how to store and repurpose it:
- Refrigerate: Let any leftover pulled pork cool to room temperature before transferring it to an airtight container. It will last in the fridge for up to 4 days.
- Freeze: Pulled pork freezes well for up to 3 months. Store it in a freezer-safe container or a heavy-duty freezer bag for easy reheating.
- Reheat: To reheat, simply warm the pulled pork in a covered pan on the stovetop with a bit of added liquid or microwave it until hot. You can also reheat it in a slow cooker for several hours on low.
Using a slow cooker to make pulled pork is a reliable and convenient method for achieving delicious, tender meat with minimal effort. With the right seasoning, cooking time, and a few helpful tips, you’ll be able to serve up a mouthwatering pulled pork sandwich or platter with ease.
Smoker Pulled Pork: Traditional BBQ Flavor
Using a smoker to prepare pulled pork is the gold standard for achieving authentic, smoky barbecue flavor. This method requires time and patience but yields a result that is deeply flavorful, tender, and rich in aroma. Smoking enhances the natural flavors of the pork while infusing it with a mouthwatering smokiness that’s impossible to replicate with other cooking methods. Here’s everything you need to know to master smoker pulled pork.
1. Why Smoking is Ideal for Pulled Pork
Smoking is a traditional cooking method that combines low heat with wood smoke, which penetrates the meat and imparts a distinct, savory flavor. Here’s why it’s ideal for pulled pork:
- Flavor Depth: The slow cooking process allows the smoky flavors to fully infuse the pork. Depending on the type of wood chips you use, you can achieve a range of flavors from mild and sweet to bold and earthy.
- Perfect Bark: Smoking creates a caramelized crust, known as the bark, on the outside of the meat. This flavorful crust is made from a combination of the rub, natural juices, and smoke.
- Tenderness: The low-and-slow cooking process breaks down the connective tissues in the pork shoulder, making it tender enough to shred easily.
2. Choosing the Right Smoker
There are various types of smokers available, and the one you choose can influence the cooking process and flavor. Here are the most popular options:
- Charcoal Smokers: These provide a classic smoky flavor and allow for precise control over temperature. They require a bit more skill to maintain steady heat but are well-loved by traditionalists.
- Electric Smokers: These are beginner-friendly and convenient, as they maintain a consistent temperature with minimal supervision.
- Pellet Smokers: These versatile smokers use wood pellets for fuel and provide excellent flavor with the ease of automatic temperature control.
- Offset Smokers: Known as the hallmark of serious pitmasters, these smokers use a separate firebox for wood or charcoal. They provide exceptional smoke control and flavor but require more attention during cooking.
3. Preparing the Pork for Smoking
Proper preparation ensures the pork absorbs maximum flavor and cooks evenly:
- Trim the Fat: Leave a thin layer of fat (about 1/4 inch) to keep the pork moist during the long smoking process. Remove any excess fat cap and silver skin to allow the seasoning and smoke to penetrate the meat.
- Apply a Dry Rub: A good dry rub is key to building flavor. Combine ingredients like brown sugar, paprika, salt, black pepper, garlic powder, and chili powder. Rub the mixture generously all over the pork, ensuring even coverage. Let the pork rest for at least an hour, or refrigerate it overnight for deeper flavor.
- Room Temperature: Before placing the pork on the smoker, allow it to sit at room temperature for about 30 minutes to ensure even cooking.
4. Selecting the Right Wood for Smoking
The type of wood you use will significantly impact the flavor of your pulled pork. Here are some popular options:
- Hickory: A strong, bold flavor that pairs perfectly with pork. It adds a classic smoky taste that many barbecue enthusiasts love.
- Applewood: A milder, slightly sweet smoke that complements the natural sweetness of the pork.
- Cherrywood: Similar to applewood but with a richer, fruity aroma that adds depth.
- Oak: A medium-strength wood that provides a well-rounded smoke flavor without overpowering the meat.
- Pecan: Offers a subtle, nutty flavor that enhances the richness of the pork.
For a more complex flavor profile, try mixing wood types, such as hickory and cherry, or oak and apple.
5. The Smoking Process
Smoking pulled pork is a time-intensive process, but the results are well worth the wait. Follow these steps to ensure success:
- Preheat the Smoker: Preheat your smoker to a temperature of 225°F (107°C). Maintaining a low, steady temperature is critical for tender, juicy pulled pork.
- Add the Wood: Add your chosen wood chips or chunks to the smoker. If you’re using a charcoal smoker, place the wood on the hot coals. For electric or pellet smokers, follow the manufacturer’s instructions.
- Position the Pork: Place the pork shoulder on the smoker grate, fat side up. This allows the fat to render and baste the meat as it cooks.
- Monitor the Temperature: Use a meat thermometer to track the internal temperature of the pork. The goal is to reach an internal temperature of 190°F-205°F (88°C-96°C), at which point the connective tissues will have fully broken down, making the pork tender and easy to shred.
- Spritz for Moisture: Every hour or so, spritz the pork with a mixture of apple juice, apple cider vinegar, or water to keep the meat moist and enhance the flavor.
6. Managing the Stall
During the smoking process, you may encounter “the stall,” where the internal temperature of the pork stops rising. This happens as moisture evaporates from the meat, cooling it down. To overcome this:
- The Texas Crutch: Wrap the pork in aluminum foil or butcher paper once it reaches 150°F-170°F (66°C-77°C). This traps moisture and heat, helping the pork push through the stall.
- Patience is Key: If you prefer a crispier bark, you can simply wait out the stall without wrapping the pork. It may take longer, but the results are worth it.
7. Resting and Shredding the Pork
Once the pork reaches the desired internal temperature, remove it from the smoker and let it rest:
- Resting Period: Wrap the pork in foil or butcher paper and let it rest for 30-60 minutes. This allows the juices to redistribute, resulting in moist, flavorful meat.
- Shredding the Meat: Use two forks to pull the pork apart, or use your hands if you prefer a coarser texture. Mix the shredded pork with some of the juices from the smoker to keep it moist and flavorful.
8. Serving Suggestions
Smoker pulled pork shines on its own or as the star of a delicious meal. Here are some serving ideas:
- Classic Sandwiches: Pile the pork onto a soft bun and top with coleslaw and barbecue sauce.
- Tacos: Fill tortillas with smoked pulled pork, fresh salsa, and a drizzle of lime crema.
- Plates: Serve the pork with traditional barbecue sides like baked beans, cornbread, or potato salad.
Instant Pot Pulled Pork: Quick and Easy
When you’re craving pulled pork but don’t have hours to dedicate to slow cooking or smoking, the Instant Pot comes to the rescue. This versatile pressure cooker is a game-changer for busy home cooks, delivering tender, juicy pulled pork in a fraction of the time it would normally take. With the right preparation and a few key steps, you can achieve flavorful pulled pork that tastes like it’s been slow-cooked for hours.
1. Why Use an Instant Pot for Pulled Pork?
The Instant Pot is a powerful kitchen tool that combines the benefits of pressure cooking with convenience. Here’s why it’s a great option for pulled pork:
- Time-Saving: Unlike slow cookers or smokers, which require hours of cooking, the Instant Pot can produce fork-tender pulled pork in about an hour (including pressurizing and cooking time).
- Flavorful Results: The sealed environment of the Instant Pot locks in moisture and flavors, ensuring the pork is juicy and seasoned throughout.
- Easy to Use: With its straightforward settings and minimal hands-on effort, the Instant Pot is perfect for both experienced cooks and beginners.
- Consistent Results: The controlled environment of the Instant Pot ensures even cooking, eliminating the guesswork of temperature fluctuations.
2. Preparing the Pork for the Instant Pot
Before cooking, it’s essential to prep the pork properly to ensure the best results:
- Choose the Right Cut: Pork shoulder or Boston butt is ideal for Instant Pot pulled pork because it has enough fat and marbling to stay moist during pressure cooking.
- Trim the Fat: While you want some fat for flavor, trimming excess fat ensures the pork doesn’t become greasy. Aim to leave a thin layer of fat, about 1/4 inch thick.
- Cut into Chunks: To ensure even cooking and quicker pressure build-up, cut the pork into 4-6 large chunks. This also allows the seasoning to coat more surface area of the meat.
- Season Generously: Apply a dry rub made of your favorite spices, such as paprika, garlic powder, onion powder, salt, pepper, and brown sugar. Rub it into the meat thoroughly for maximum flavor.
3. Setting Up the Instant Pot
Once your pork is prepped, it’s time to set up the Instant Pot:
- Sauté for Extra Flavor (Optional): Use the sauté function to sear the chunks of pork on all sides until browned. This step adds depth of flavor and creates a nice crust on the meat. If you’re short on time, you can skip this step and still achieve great results.
- Add Liquid: Liquid is essential for pressure cooking. Pour 1-2 cups of your chosen liquid into the Instant Pot, such as chicken broth, apple cider, or even cola. The liquid helps build pressure and keeps the pork moist during cooking.
- Layer Flavors: Add aromatics like sliced onions, minced garlic, and a splash of apple cider vinegar to the pot for extra flavor. If you love barbecue, you can also add a bit of your favorite barbecue sauce at this stage.
4. Cooking Pulled Pork in the Instant Pot
Now that everything is ready, it’s time to cook the pork:
- Set the Cooking Time: Secure the lid and set the Instant Pot to “Pressure Cook” or “Manual” on high pressure for 45-60 minutes. The exact time depends on the size of your pork chunks (larger pieces require more time).
- Natural Release: Once the cooking time is complete, allow the pressure to release naturally for 10-15 minutes. This step ensures the meat stays tender and juicy. Afterward, perform a quick release to let out any remaining pressure.
- Check for Doneness: The pork is done when it’s tender enough to shred easily with a fork. If it’s not quite tender enough, you can return it to the Instant Pot for an additional 5-10 minutes of pressure cooking.
5. Shredding and Enhancing Flavor
Once the pork is cooked to perfection, it’s time to shred and add finishing touches:
- Shred the Pork: Remove the pork from the Instant Pot and let it rest for 5-10 minutes. Use two forks to pull the meat apart into shreds.
- Mix with Juices: For maximum flavor, mix the shredded pork with some of the cooking liquid. Strain the liquid to remove any solids and skim off excess fat before adding it back to the meat.
- Add Barbecue Sauce: If you’re making barbecue pulled pork, mix in your favorite barbecue sauce for a rich, tangy flavor. Serve extra sauce on the side for those who love it saucy.
6. Tips for the Best Instant Pot Pulled Pork
- Use the Right Amount of Liquid: Too much liquid can result in soggy meat, while too little can cause the Instant Pot to fail to pressurize. Stick to 1-2 cups of liquid for the best results.
- Don’t Skip the Natural Release: Allowing the pressure to release naturally helps the pork retain its juices and stay tender.
- Experiment with Flavors: Customize the flavor profile by using different liquids (e.g., pineapple juice for sweetness or beer for depth) and spice blends.
7. Serving Instant Pot Pulled Pork
Instant Pot pulled pork is incredibly versatile and can be served in many delicious ways:
- Classic Sandwiches: Pile the shredded pork onto buns and top with coleslaw and barbecue sauce.
- Tacos: Use the pork as a filling for soft tortillas, topped with fresh salsa, guacamole, and lime.
- Rice Bowls: Serve the pulled pork over a bed of rice with roasted veggies and a drizzle of sauce.
- Sliders: Make mini pulled pork sliders for parties or gatherings.
8. Storing and Reheating Leftovers
Instant Pot pulled pork is perfect for meal prep or saving for later:
- Refrigerate: Store leftovers in an airtight container in the fridge for up to 4 days.
- Freeze: Pulled pork freezes well for up to 3 months. Divide it into portioned containers or freezer bags for easy thawing.
- Reheat: Reheat the pork gently in a covered skillet with a splash of water or broth to keep it moist. You can also use the Instant Pot’s sauté function for quick reheating.
With its quick cooking time and consistently delicious results, the Instant Pot makes pulled pork more accessible than ever. Whether you’re whipping up a weeknight dinner or preparing for a party, this method delivers all the flavor of traditional pulled pork in a fraction of the time.
Assembling the Perfect Pulled Pork Sandwich
Choosing the Right Sandwich Buns
The choice of sandwich buns can make or break the perfect pulled pork sandwich. While the pulled pork itself is the star of the show, the bun serves as the foundation, tying the flavors and textures together. The right bun will complement the juicy, tender pork without overpowering it and provide the perfect balance of softness and structure. Here’s how to select the best sandwich bun for your pulled pork masterpiece.
1. Key Qualities to Look for in a Bun
When choosing a bun for pulled pork sandwiches, consider the following qualities to enhance your dining experience:
- Soft Yet Sturdy: The bun should be soft enough to bite into easily but sturdy enough to hold up against the juiciness of the pulled pork and any added sauces or toppings. A bun that falls apart too quickly can ruin the sandwich experience.
- Neutral Flavor: The bun’s flavor should complement the pulled pork without overpowering it. Subtle, slightly sweet, or buttery flavors work well.
- Size Matters: Choose a bun that’s the right size for the portion of pulled pork you’re serving. Too small, and it won’t hold enough meat; too large, and it can overwhelm the sandwich.
2. Best Types of Buns for Pulled Pork Sandwiches
Here are some popular bun options and what makes them great for pulled pork sandwiches:
- Brioche Buns:
- Why It Works: These buns are soft, buttery, and slightly sweet, making them a favorite for pulled pork. Their richness pairs beautifully with the savory and smoky flavors of the pork.
- Best Use: Ideal for sandwiches with barbecue sauce and toppings like coleslaw.
- Potato Buns:
- Why It Works: Made with potato flour, these buns are soft, pillowy, and slightly sweet. They are sturdy enough to handle saucy pulled pork without becoming soggy.
- Best Use: Perfect for pulled pork sandwiches with a tangy vinegar-based barbecue sauce.
- Kaiser Rolls:
- Why It Works: These rolls are denser and more robust, making them ideal for larger sandwiches or heavier servings of pulled pork.
- Best Use: Great for sandwiches loaded with toppings like pickles, onions, and extra sauce.
- Hawaiian Sweet Rolls:
- Why It Works: With their signature sweetness and soft texture, these rolls add a delightful contrast to the smoky and savory flavors of the pulled pork.
- Best Use: Best suited for mini pulled pork sliders or sweeter barbecue styles.
- Sesame Seed Buns:
- Why It Works: The added crunch and nuttiness from the sesame seeds enhance the overall texture and flavor of the sandwich.
- Best Use: Great for traditional pulled pork sandwiches with minimal toppings.
- Pretzel Buns:
- Why It Works: These buns have a chewy texture and a slight saltiness, which pairs beautifully with the smoky and savory elements of pulled pork.
- Best Use: Perfect for gourmet-style pulled pork sandwiches with sharp cheese or mustard-based sauces.
3. Toasting the Buns: A Crucial Step
Toasting your buns is a small but impactful step that can elevate your sandwich:
- Why Toasting Matters: Toasting adds a slight crunch to the surface of the bun, helping it hold up better against the juiciness of the pulled pork and sauce. It also adds a subtle layer of flavor through caramelization.
- How to Toast: Lightly butter the cut sides of the buns and toast them on a skillet, griddle, or under a broiler until golden brown.
4. Customizing Your Buns
Take your pulled pork sandwich to the next level by adding personalized touches to your buns:
- Flavored Buns: Experiment with flavored buns like garlic, onion, or jalapeño for a unique twist.
- Glazed Toppings: Brush the tops of the buns with honey butter or garlic butter for added richness and shine.
- Stuffed Rolls: Hollow out thicker rolls, such as sourdough or ciabatta, to create a vessel for holding pulled pork and sauce without spilling.
5. Pairing the Bun with the Sauce and Toppings
Matching the type of bun with the pulled pork’s sauce and toppings is key to a well-balanced sandwich:
- For Sweet Barbecue Sauce: Use brioche, Hawaiian rolls, or potato buns to complement the sweetness.
- For Vinegar-Based Sauce: Choose a neutral or slightly dense bun like kaiser rolls to let the tangy flavors shine.
- For Mustard-Based Sauce: Pretzel buns are a perfect pairing, as their saltiness balances the tanginess of the mustard.
- For Heavily Sauced Sandwiches: A sturdier bun like ciabatta or kaiser rolls works best to avoid a soggy mess.
6. Alternative Options for Dietary Needs
If you or your guests have dietary restrictions, consider these alternatives:
- Gluten-Free Buns: There are many high-quality gluten-free options available that mimic the texture and flavor of traditional buns.
- Lettuce Wraps: For a low-carb or keto-friendly option, use large lettuce leaves like romaine or iceberg to wrap the pulled pork.
- Whole Grain Buns: Add a nutty, wholesome flavor to your sandwich with whole grain or multigrain buns.
Choosing the right sandwich bun for your pulled pork is just as important as preparing the meat itself. By selecting buns that complement the flavors and textures of your pulled pork, you’ll create a sandwich that’s balanced, satisfying, and utterly delicious.
Topping Ideas: Coleslaw, Pickles, and Beyond
The toppings on a pulled pork sandwich can take it from delicious to unforgettable. They add texture, contrast, and flavor, enhancing the savory richness of the pork while providing balance to the overall dish. While classics like coleslaw and pickles are timeless, there’s a whole world of creative toppings to explore. Whether you prefer traditional accompaniments or bold, adventurous flavors, the right toppings will elevate your sandwich to new heights.
1. Coleslaw: A Classic Choice
Coleslaw is the most popular topping for pulled pork sandwiches, and for good reason. Its creamy texture and tangy flavor perfectly complement the smoky, juicy pork.
- Creamy Coleslaw: A mayonnaise-based coleslaw with a touch of vinegar, sugar, and mustard creates a smooth, tangy topping. The creaminess helps balance the spice or smokiness of the pork.
- Vinegar Coleslaw: If you prefer a lighter option, vinegar-based coleslaw provides a refreshing, zesty kick without the richness of mayo. It’s ideal for pairing with sweet or heavy barbecue sauces.
- Spicy Coleslaw: Add a twist by mixing in ingredients like jalapeños, sriracha, or cayenne pepper for a bit of heat. Spicy coleslaw pairs well with milder pulled pork to create a balanced bite.
- Colorful Slaws: Use purple cabbage, shredded carrots, or bell peppers to add color and crunch to your sandwich.
2. Pickles: The Perfect Tangy Bite
Pickles bring a bright, tangy contrast to the smoky richness of pulled pork. They’re easy to add and offer a satisfying crunch.
- Classic Dill Pickles: Slices of dill pickles are a go-to choice for their familiar tangy flavor and crisp texture. They work well with both sweet and smoky barbecue sauces.
- Bread and Butter Pickles: For a touch of sweetness, bread and butter pickles add a subtle sugary note that complements the savory pork.
- Pickled Red Onions: These bring a tangy yet slightly sweet flavor with a pop of vibrant color. They pair well with pulled pork and vinegar-based coleslaw.
- Spicy Pickles: If you want to turn up the heat, try pickles infused with jalapeños or red pepper flakes.
3. Beyond the Classics: Creative Toppings
While coleslaw and pickles are staples, there’s no reason to stop there. Experiment with these creative toppings to make your pulled pork sandwich truly unique:
- Caramelized Onions: Slow-cooked onions add a sweet, savory flavor that pairs beautifully with the smoky pork.
- Fried Onions: Crispy fried onion strings or French-fried onions add crunch and a salty kick to your sandwich.
- Cheese: Melted cheddar, Monterey Jack, or smoked Gouda can take your sandwich to the next level with added creaminess and flavor.
- Jalapeños: Whether fresh or pickled, jalapeños add heat and a tangy kick that pairs well with sweet barbecue sauces.
- Pineapple Salsa: A tropical twist with diced pineapple, cilantro, and lime juice offers a sweet, refreshing contrast to smoky pulled pork.
- Bacon: Because why not? Crispy bacon adds an extra layer of savory goodness.
- Avocado or Guacamole: Creamy avocado slices or guacamole can bring a rich, buttery element to your sandwich.
4. Sauces: The Glue That Brings It Together
While technically not a topping, the sauce is essential to the overall flavor profile. Here are a few popular options:
- Classic Barbecue Sauce: Sweet, smoky, and tangy, this is the quintessential sauce for pulled pork sandwiches.
- Vinegar-Based Sauce: A thin, tangy sauce cuts through the richness of the pork and adds a zesty flavor.
- Mustard Sauce: Tangy and slightly spicy, mustard-based sauces are a great option for Southern-style pulled pork.
- Hot Sauce: Add a few dashes of your favorite hot sauce for a fiery kick.
5. Building Layers for Balance
Creating the perfect pulled pork sandwich is all about balance. Here’s how to layer your toppings for optimal texture and flavor:
- Start with the Bun: Toasted buns provide a sturdy foundation and a hint of crunch.
- Add the Pork: Generously pile on the pulled pork as the base layer.
- Spread the Sauce: Drizzle or spread your chosen barbecue sauce over the pork for a burst of flavor.
- Top with Crunch: Add coleslaw, fried onions, or fresh greens for texture.
- Add Tang: Place pickles, pickled onions, or jalapeños on top for a tangy bite.
- Finish with Cheese or Bacon (Optional): If using cheese or bacon, add it before the top bun for an extra indulgent touch.
6. Tips for Choosing Toppings
- Match the Flavor Profile: Choose toppings that complement the sauce and seasoning of your pulled pork. For example, sweet toppings pair well with spicy pork, while tangy toppings enhance sweet barbecue sauce.
- Don’t Overload: While it’s tempting to add lots of toppings, too many can make the sandwich messy and overpower the pork. Aim for a balanced combination of flavors and textures.
- Experiment: Don’t be afraid to get creative! Try new toppings or combinations to find your perfect pulled pork sandwich.
The Secret to Perfect BBQ Sauce for Sandwiches
The BBQ sauce is the soul of a pulled pork sandwich, transforming slow-cooked meat into a savory masterpiece. While the pork provides tender, smoky goodness, the sauce brings the flavor together, offering balance, depth, and a touch of personality to every bite. The perfect BBQ sauce for sandwiches isn’t just about taste—it’s about the right texture, consistency, and balance of flavors. Here’s everything you need to know to craft or choose the ultimate BBQ sauce for your pulled pork sandwiches.
1. Balance is Key: Sweet, Tangy, and Savory
The best BBQ sauce achieves a harmonious balance of sweet, tangy, and savory flavors to complement the richness of the pulled pork.
- Sweetness:
Sweet notes help counterbalance the smoky or spicy flavors in the pork. Ingredients like brown sugar, molasses, honey, or maple syrup are common sweeteners.- Example: A hint of brown sugar adds warmth and depth, while honey gives a lighter, floral sweetness.
- Tanginess:
Tangy flavors cut through the richness of the pork, adding brightness and vibrancy. Vinegar is the most common ingredient for tang, but citrus juice or mustard can also play a role.- Example: Apple cider vinegar provides a mild tang with a touch of fruitiness, while mustard adds sharpness.
- Savory Depth:
A savory base rounds out the sauce and ties the flavors together. Ingredients like Worcestershire sauce, soy sauce, or even a splash of coffee add umami notes.- Example: Worcestershire sauce offers a bold, savory backbone with hints of anchovy and spice.
2. Choosing the Right Texture and Consistency
For pulled pork sandwiches, the texture and consistency of the BBQ sauce are just as important as the flavor:
- Not Too Thick, Not Too Thin: The sauce should coat the pork evenly without making the sandwich messy or soggy. A sauce that’s too thick may overpower the meat, while a thin sauce may soak into the bun.
- Silky and Smooth: Strain the sauce if needed to remove any lumps, ensuring a smooth texture that blends seamlessly with the pork.
- Sticky and Glossy: A well-made BBQ sauce clings to the meat, creating a glossy, irresistible finish that enhances presentation and flavor.
3. Types of BBQ Sauce and Regional Variations
Different regions have their own take on BBQ sauce, and understanding these styles can help you find the perfect match for your pulled pork sandwiches:
- Kansas City Style:
- Flavor Profile: Sweet, smoky, and tangy with a thick, sticky consistency.
- Ingredients: Tomato paste or ketchup, molasses, brown sugar, vinegar, and spices.
- Best For: Sandwiches with a classic flavor profile.
- Carolina Style:
- Flavor Profile: Vinegar-forward with a tangy, sharp bite. Often thinner than other sauces.
- Ingredients: Apple cider vinegar, red pepper flakes, sugar, and a touch of mustard.
- Best For: Enhancing the natural flavor of the pork without overpowering it.
- Memphis Style:
- Flavor Profile: Balanced between sweet and tangy, often with a mild heat.
- Ingredients: Tomato base, brown sugar, mustard, and cayenne pepper.
- Best For: Pulled pork sandwiches with a touch of spice.
- Alabama White Sauce:
- Flavor Profile: Creamy, tangy, and slightly peppery.
- Ingredients: Mayonnaise, apple cider vinegar, lemon juice, and black pepper.
- Best For: Adding a unique, creamy twist to pulled pork sandwiches.
4. Crafting Your Own BBQ Sauce at Home
Making BBQ sauce from scratch allows you to customize the flavor to your liking and ensures a fresh, homemade touch:
- Base Ingredients: Start with a tomato base, such as ketchup or tomato sauce, for a classic flavor.
- Sweeteners: Experiment with brown sugar, honey, or agave syrup to find your preferred level of sweetness.
- Acidity: Add a splash of apple cider vinegar, lemon juice, or balsamic vinegar for tanginess.
- Seasonings: Use garlic powder, onion powder, paprika, chili powder, and cayenne for depth and heat.
- Secret Ingredients: Enhance your sauce with unique additions like bourbon, espresso, or smoked paprika for extra complexity.
- Simmer and Taste: Simmer your sauce on low heat for 20–30 minutes to let the flavors meld together, tasting and adjusting as needed.
5. Tips for Pairing Sauce with Pulled Pork
Pairing the right BBQ sauce with your pulled pork is essential for creating a balanced sandwich:
- Sweet Pork with Spicy Sauce: If your pulled pork is naturally sweet, opt for a spicier sauce to create contrast.
- Smoky Pork with Vinegar Sauce: Smoky pulled pork pairs beautifully with a tangy vinegar-based sauce to brighten the flavors.
- Neutral Pork with Bold Sauce: If your pork has a milder flavor, use a rich and complex sauce to add depth.
6. Pro Tips for Using BBQ Sauce on Sandwiches
- Don’t Overdo It: Use enough sauce to coat the pork evenly but not so much that it overpowers the meat or makes the sandwich messy.
- Add Layers of Sauce: Mix some sauce into the pulled pork and drizzle a little more on top when assembling the sandwich for extra flavor.
- Serve Extra Sauce on the Side: Let guests add more sauce to their liking. It’s always better to have extra on hand!
Mastering the art of BBQ sauce is key to creating pulled pork sandwiches that are unforgettable. By understanding the balance of flavors, experimenting with regional styles, and pairing the sauce perfectly with the pork, you can craft a sandwich that’s not just good—it’s extraordinary.
Tips and Tricks for the Best Pulled Pork Sandwich
How to Keep Your Pulled Pork Juicy and Tender
One of the most important aspects of making the best pulled pork is ensuring it remains juicy and tender throughout the cooking process and when served. Pulled pork should be succulent, flavorful, and moist, with no hint of dryness. Achieving this takes attention to detail during preparation, cooking, and serving. Here’s a comprehensive guide on how to ensure your pulled pork stays juicy and tender every time.
1. Start with the Right Cut of Meat
The foundation of juicy pulled pork lies in choosing the right cut of pork.
- Pork Shoulder or Pork Butt: These cuts are marbled with fat and connective tissue that break down during cooking, making the meat tender and juicy.
- Bone-In vs. Boneless: Bone-in pork tends to retain more moisture and flavor during cooking, but boneless works well if you’re short on time.
- Avoid Lean Cuts: Stay away from cuts like pork loin or tenderloin, as they don’t have enough fat content to stay moist during the long cooking process.
2. Proper Preparation is Key
How you prepare your pork before cooking significantly impacts its juiciness.
- Trim, but Don’t Overdo It: Trim excess fat from the exterior, but leave enough to render during cooking and keep the meat moist.
- Season Generously: A flavorful dry rub adds a crust of spices and helps lock in juices.
- Optional Brine: Soaking the pork in a saltwater solution (with optional seasonings) for 8–12 hours before cooking helps the meat retain moisture. A brine also infuses flavor deep into the meat.
- Let It Sit at Room Temperature: Before cooking, allow the pork to come to room temperature to ensure even cooking.
3. Slow and Low Cooking is the Secret
Cooking pork at low temperatures for a long time is the key to breaking down the connective tissues and fat, resulting in juicy, tender meat.
- Ideal Cooking Methods:
- Slow Cooker: Set to low and cook for 8–10 hours for tender, fall-apart pork.
- Smoker: Cook at 225–250°F (107–121°C) for several hours for tender pork with smoky flavor.
- Oven: A low temperature of 275°F (135°C) and covered tightly with foil ensures even cooking and moisture retention.
- Monitor Internal Temperature: Use a meat thermometer to cook the pork to the ideal internal temperature of 195–205°F (90–96°C). This ensures the collagen and fat have fully rendered, making the pork tender.
4. Keep It Moist During Cooking
To avoid drying out your pork during the long cooking process, take these precautions:
- Add Liquid: Add a small amount of liquid (such as apple juice, broth, or beer) to the cooking vessel. This creates steam, which keeps the pork moist.
- Use a Drip Pan (For Smoking): Place a pan of water underneath the pork in the smoker. This helps maintain humidity and prevents the meat from drying out.
- Cover Tightly: Whether using foil, a lid, or butcher paper, covering the pork traps moisture and ensures even cooking.
5. Rest the Pork After Cooking
Once the pork reaches the desired temperature, it’s crucial to let it rest before shredding:
- Why Resting Matters: Resting allows the juices to redistribute throughout the meat rather than escaping when you shred it.
- How to Rest: Tent the pork loosely with foil and let it rest for 20–30 minutes.
6. Shred It Properly
The way you shred your pork can also impact its tenderness:
- Shred While Warm: Pull the pork apart while it’s still warm to make shredding easier and ensure the juices mix with the meat.
- Avoid Over-Shredding: Shred into larger chunks to prevent the meat from becoming mushy.
7. Keep It Juicy After Cooking
Even after the pork is cooked, there are ways to ensure it stays moist until serving:
- Mix in the Juices: After shredding, mix the pulled pork with its drippings or cooking liquid. This reintroduces moisture and enhances flavor.
- Add a Finishing Sauce: Toss the pork in a small amount of BBQ sauce or vinegar-based sauce to keep it moist and flavorful.
- Store Properly: If you’re not serving the pork immediately, store it in an airtight container with some of the cooking juices to retain moisture.
8. Reheating Without Drying Out
If you’re reheating pulled pork, the key is to keep it juicy:
- Reheat with Liquid: Place the pork in a covered dish with a splash of broth, apple juice, or leftover drippings before reheating in the oven or microwave.
- Use Low Heat: Reheat gently at 300°F (150°C) in the oven or on a low setting in the microwave to prevent drying.
- Steam It: If you have a steamer, reheating the pork this way helps retain moisture.
9. Bonus Tips for Extra Moisture
- Fat Cap Trick: When cooking pork shoulder, cook it with the fat cap on top. As the fat renders, it bastes the meat, keeping it moist.
- Baste the Meat: Periodically baste the pork with its juices or a marinade during cooking for extra moisture.
- Inject the Meat: For an extra layer of juiciness, use a meat injector to infuse the pork with a marinade or seasoned liquid before cooking.
By following these techniques, you can ensure that your pulled pork is always juicy, tender, and full of flavor—no matter the cooking method. These tips will take your pulled pork sandwiches to the next level and leave everyone asking for seconds.
Storing and Reheating Leftovers
One of the best parts of making pulled pork is that it often yields enough for leftovers, which can be just as delicious as the freshly prepared dish—if stored and reheated properly. To maintain the juicy, tender quality of your pulled pork and ensure food safety, follow these comprehensive tips for storing and reheating your leftovers.
1. Properly Storing Leftover Pulled Pork
To keep your pulled pork fresh and safe to eat, it’s essential to store it correctly:
- Cool It Quickly:
- After cooking, let the pulled pork cool to room temperature (but no longer than two hours) before storing. This helps prevent bacteria growth while protecting its texture and flavor.
- Separate It into Portions:
- Divide the pulled pork into smaller, meal-sized portions before storing. This makes reheating easier and reduces the chance of reheating more than needed.
- Use Airtight Containers or Bags:
- Store leftovers in airtight containers or resealable freezer bags to prevent air exposure, which can lead to freezer burn or drying out.
- Add Juices or Sauce:
- Include a bit of the cooking liquid, broth, or BBQ sauce when storing the meat. This helps retain moisture and enhances flavor when reheated.
- Label and Date:
- Clearly label the container with the date to ensure you use it before it spoils.
2. Storage Times for Pulled Pork
Knowing how long pulled pork stays fresh is essential for enjoying it safely:
- Refrigerator:
- Store in the refrigerator for up to 3–4 days at 40°F (4°C) or below.
- Freezer:
- Pulled pork freezes exceptionally well and can be stored for up to 3 months. Properly sealing it in an airtight container or vacuum-sealing will help preserve its quality for longer.
3. Reheating Pulled Pork Without Drying It Out
Reheating pulled pork correctly ensures it remains as tender and flavorful as when it was first made.
Oven Method (Best for Large Quantities):
- Preheat your oven to 300°F (150°C).
- Place the pulled pork in an oven-safe dish or a roasting pan.
- Add a splash of broth, leftover drippings, or apple juice to the dish.
- This liquid helps create steam and keeps the pork moist.
- Cover the dish tightly with aluminum foil to trap the steam.
- Heat for about 20–30 minutes, stirring occasionally to ensure even reheating.
Stovetop Method (Quick and Effective):
- Heat a skillet over medium-low heat.
- Add the pulled pork and a splash of liquid (broth, water, or BBQ sauce).
- Cover the skillet with a lid and let it heat gently, stirring occasionally until warmed through.
Microwave Method (Best for Small Portions):
- Place the pulled pork in a microwave-safe dish.
- Add a little liquid to keep it moist, then cover the dish with a damp paper towel or microwave-safe lid.
- Heat on medium power for 1–2 minutes, stirring halfway through.
Slow Cooker Method (Ideal for Meal Prep):
- Add the pulled pork and a small amount of liquid to the slow cooker.
- Set to low heat and allow it to warm gently for 1–2 hours.
4. Tips to Avoid Dryness When Reheating
- Don’t Overheat:
- Overheating will cause the meat to dry out and lose its tenderness. Aim to warm it gently until just heated through.
- Add Fresh Sauce:
- Tossing the reheated pulled pork with fresh BBQ sauce or a vinegar-based sauce can revitalize its flavor and moisture.
- Steam It:
- For extra moisture, use a steamer to reheat your pulled pork, as the steam helps retain its juiciness.
5. Creative Ways to Use Leftover Pulled Pork
Reheating doesn’t always mean eating the same sandwich! Leftover pulled pork is versatile and can be used in various dishes:
- Pulled Pork Tacos:
- Warm the pork and serve it in tortillas with fresh toppings like salsa, guacamole, and cilantro.
- Pulled Pork Pizza:
- Spread BBQ sauce on pizza dough, add pulled pork, onions, and cheese, then bake.
- Pulled Pork Nachos:
- Layer pulled pork, cheese, jalapeños, and other toppings over tortilla chips, then bake or broil until melted.
- Pulled Pork Quesadillas:
- Place pulled pork and cheese between tortillas, then grill until crispy.
- Pulled Pork Salad:
- Top a bed of greens with pulled pork, veggies, and a tangy vinaigrette for a lighter option.
- Pulled Pork Hash:
- Sauté the pork with potatoes, onions, and bell peppers for a hearty breakfast or brunch.
6. Freezing and Thawing Pulled Pork
To enjoy leftovers at their best, follow these freezing and thawing tips:
- Freezing Tips:
- Use freezer bags or vacuum-seal the meat for the best results.
- Lay bags flat in the freezer for easy storage and faster thawing.
- Thawing Tips:
- Thaw in the refrigerator overnight for even and safe defrosting.
- In a hurry? Use the microwave’s defrost setting or submerge the sealed bag in cold water, changing the water every 30 minutes until thawed.
7. Food Safety Reminders
- Reheat Once:
- Only reheat pulled pork once after storing it. Repeated reheating can affect its texture and increase the risk of foodborne illness.
- Check the Temperature:
- Ensure the pork reaches an internal temperature of 165°F (74°C) when reheated.
Storing and reheating pulled pork doesn’t have to compromise its quality. With proper handling and a few techniques, your leftovers can taste as incredible as the day they were made, allowing you to enjoy the flavors of your hard work for days—or even weeks—to come!
Pairing Pulled Pork Sandwiches with the Best Sides
A pulled pork sandwich is a star on its own, but pairing it with the right side dishes can elevate your meal to a feast. The smoky, savory flavors of pulled pork are versatile, making them perfect for a variety of accompaniments. From classic BBQ sides to creative twists, the right pairings can enhance the texture, flavor, and overall experience of your pulled pork sandwich. Here’s an in-depth look at the best sides to serve with this beloved dish.
1. Classic BBQ Sides
These timeless sides have long been favorites at BBQ joints and backyard cookouts:
- Coleslaw:
- A cool, creamy coleslaw provides the perfect contrast to the smoky, tender pulled pork. Opt for a tangy vinegar-based slaw if you prefer a lighter option or stick to the classic mayo-based version for a richer pairing.
- Baked Beans:
- Sweet and smoky baked beans complement the pulled pork’s flavor profile. Add some bacon or a hint of brown sugar for an extra depth of flavor.
- Cornbread:
- Soft, crumbly, and slightly sweet, cornbread is a perfect side to soak up the juices and sauces from your pulled pork sandwich. Serve it warm with a touch of butter or honey.
- Potato Salad:
- Whether creamy with mayo or tangy with a mustard base, potato salad adds a hearty and refreshing component to your meal.
2. Fresh and Light Sides
Balance out the richness of the pulled pork with these lighter, refreshing options:
- Green Salad:
- A crisp salad with fresh greens, cucumbers, and cherry tomatoes dressed in a tangy vinaigrette provides a refreshing contrast.
- Grilled Vegetables:
- Grilled zucchini, bell peppers, and asparagus offer smoky flavors that harmonize beautifully with the pulled pork.
- Fruit Salad:
- A mix of fresh fruits like watermelon, pineapple, and berries adds sweetness and acidity, cleansing the palate between bites of the sandwich.
- Pickles:
- Tangy, crunchy pickles—whether dill, bread-and-butter, or spicy—are a simple yet impactful side that cuts through the richness of the pork.
3. Starchy Sides for Comfort
For those who enjoy a hearty meal, these starchy sides pair wonderfully with pulled pork sandwiches:
- French Fries or Sweet Potato Fries:
- Crispy, golden fries are a crowd-pleasing side. Sweet potato fries offer a slightly sweet flavor that complements the smoky pulled pork.
- Mac and Cheese:
- Creamy, cheesy macaroni pairs indulgently with the sandwich, creating a satisfying comfort food combo.
- Mashed Potatoes:
- Fluffy mashed potatoes, especially when served with a touch of gravy or garlic butter, make a comforting addition to the meal.
- Corn on the Cob:
- Fresh, buttery corn on the cob adds a summery touch and pairs beautifully with BBQ flavors.
4. Bold and Creative Sides
Take your meal to the next level with these unique and bold options:
- BBQ Brussels Sprouts:
- Roasted or grilled Brussels sprouts glazed with BBQ sauce offer a smoky, caramelized flavor that pairs beautifully with pulled pork.
- Loaded Potato Skins:
- Crispy potato skins topped with cheese, bacon, and green onions are a decadent and satisfying side dish.
- Jalapeño Poppers:
- Cream cheese-stuffed jalapeños wrapped in bacon add a spicy kick to the meal, perfect for those who enjoy bold flavors.
- Fried Green Tomatoes:
- Crispy on the outside and tender on the inside, fried green tomatoes add a Southern twist to your pulled pork feast.
5. Sauces and Condiments for Extra Flavor
No pulled pork sandwich meal is complete without a variety of sauces and condiments that enhance both the sandwich and the sides:
- BBQ Sauce:
- Offer a selection of BBQ sauces—sweet, tangy, spicy, or smoky—for dipping fries or drizzling over your sandwich.
- Hot Sauce:
- A dash of hot sauce can add a punch of heat to any side or directly to your sandwich.
- Ranch Dressing:
- Perfect for dipping fries, veggies, or even drizzling over your coleslaw.
6. Beverage Pairings to Complement Your Meal
The right drink can enhance the flavors of your pulled pork sandwich and its sides:
- Sweet Tea or Lemonade:
- These classic Southern beverages provide a sweet and refreshing contrast to the smoky flavors.
- Craft Beer:
- A hoppy IPA or malty lager pairs beautifully with the richness of pulled pork.
- Sparkling Water with Citrus:
- For a lighter option, sparkling water with a splash of lemon or lime cleanses the palate.
- Bourbon or Whiskey Cocktails:
- If you’re feeling indulgent, the caramel and smoky notes of bourbon complement the flavors of the sandwich and BBQ sides.
Pro Tips for Pairing Sides
- Consider Balance:
- If your pulled pork sandwich is rich and saucy, opt for lighter sides like coleslaw or salad to balance the meal. For simpler sandwiches, pair with heartier sides like mac and cheese.
- Customize for the Occasion:
- Choose sides based on the setting. For a casual BBQ, go for classics like baked beans and cornbread. For a more elegant meal, consider creative sides like grilled vegetables or gourmet potato salad.
- Offer Variety:
- If serving a crowd, provide a mix of sides—some classic, some light, and some bold—to cater to different tastes.
Pairing your pulled pork sandwich with the right sides can transform a simple meal into an unforgettable dining experience. From timeless classics to inventive new flavors, there’s no shortage of ways to enhance the smoky, savory delight of pulled pork.