Craving the classic crunch of fish and chips but want a healthier, gut-friendly option? Look no further! This lectin-free fish and chips recipe is the perfect way to enjoy a beloved British classic without compromising your health. Packed with flavor, this version uses wholesome, lectin-free ingredients like almond flour and sweet potatoes to give you that satisfying crispy texture while staying true to a lectin-free lifestyle.
Whether you’re avoiding lectins for digestive health, following a gluten-free diet, or simply looking for a creative twist on a traditional dish, this recipe has you covered. In this guide, we’ll show you how to make the best lectin-free fish and chips at home, with easy-to-follow steps and expert tips for perfect results every time. Let’s dive in and redefine comfort food—lectin-free style!
What Makes This Recipe Lectin-Free and Healthy?
How to Make the Best Lectin-Free Fish and Chips Recipe at Home
Creating the perfect lectin-free fish and chips at home is easier than you think. By substituting traditional ingredients with healthier, gut-friendly alternatives, you can enjoy this classic dish without compromising your health. Follow these steps to achieve crispy, golden perfection:
Step 1: Choose the Right Fish
The key to great fish and chips starts with the fish. Opt for fresh, flaky, and mild white fish such as:
- Cod: A classic choice with a mild flavor and tender texture.
- Haddock: Slightly firmer than cod, with a subtle sweetness.
- Halibut: A premium option for those who enjoy a meatier texture.
Make sure to pat the fish dry with paper towels before coating it. This helps the batter adhere properly and prevents sogginess.
Step 2: Prepare the Lectin-Free Batter
Traditional batters use wheat flour, but for a lectin-free version, you’ll need gut-friendly alternatives:
- Almond Flour: Adds a nutty flavor and crispy texture.
- Coconut Flour: Lightweight and perfect for achieving a golden crust.
- Tapioca Starch: Helps bind the batter and adds extra crispiness.
Ingredients for the Batter:
- 1/2 cup almond flour
- 1/4 cup coconut flour
- 1/4 cup tapioca starch
- 1 tsp baking powder (optional, for fluffiness)
- 1/2 tsp garlic powder
- 1/2 tsp paprika
- 1/2 tsp sea salt
- 1/4 tsp black pepper
- 1/2 cup sparkling water or club soda (for a light and airy texture)
Instructions:
- In a mixing bowl, combine the dry ingredients.
- Gradually add sparkling water while whisking until the batter is smooth and slightly thick.
- Let the batter rest for 5 minutes to ensure even coating.
Step 3: Prepare the Chips
For a lectin-free alternative to traditional potatoes, use sweet potatoes or yuca:
- Sweet Potatoes: Naturally sweet and rich in nutrients.
- Yuca: Crispy and satisfying when fried or baked.
Instructions:
- Peel and cut the sweet potatoes or yuca into even-sized strips for uniform cooking.
- Toss with a tablespoon of avocado oil and season with sea salt and smoked paprika.
- Bake at 400°F (200°C) for 20-25 minutes, flipping halfway through, or air-fry for 15-20 minutes until crispy.
Step 4: Fry or Bake the Fish
Frying Method:
- Heat avocado oil in a deep skillet or frying pan to 350°F (175°C).
- Dip each piece of fish into the batter, ensuring an even coat.
- Carefully place the fish in the hot oil and fry for 3-4 minutes per side, or until golden brown and cooked through.
- Transfer to a plate lined with paper towels to drain excess oil.
Baking Method:
- Preheat the oven to 425°F (220°C) and line a baking sheet with parchment paper.
- Place the battered fish on the sheet and lightly spray with avocado oil.
- Bake for 15-20 minutes, flipping halfway through, until crispy and golden.
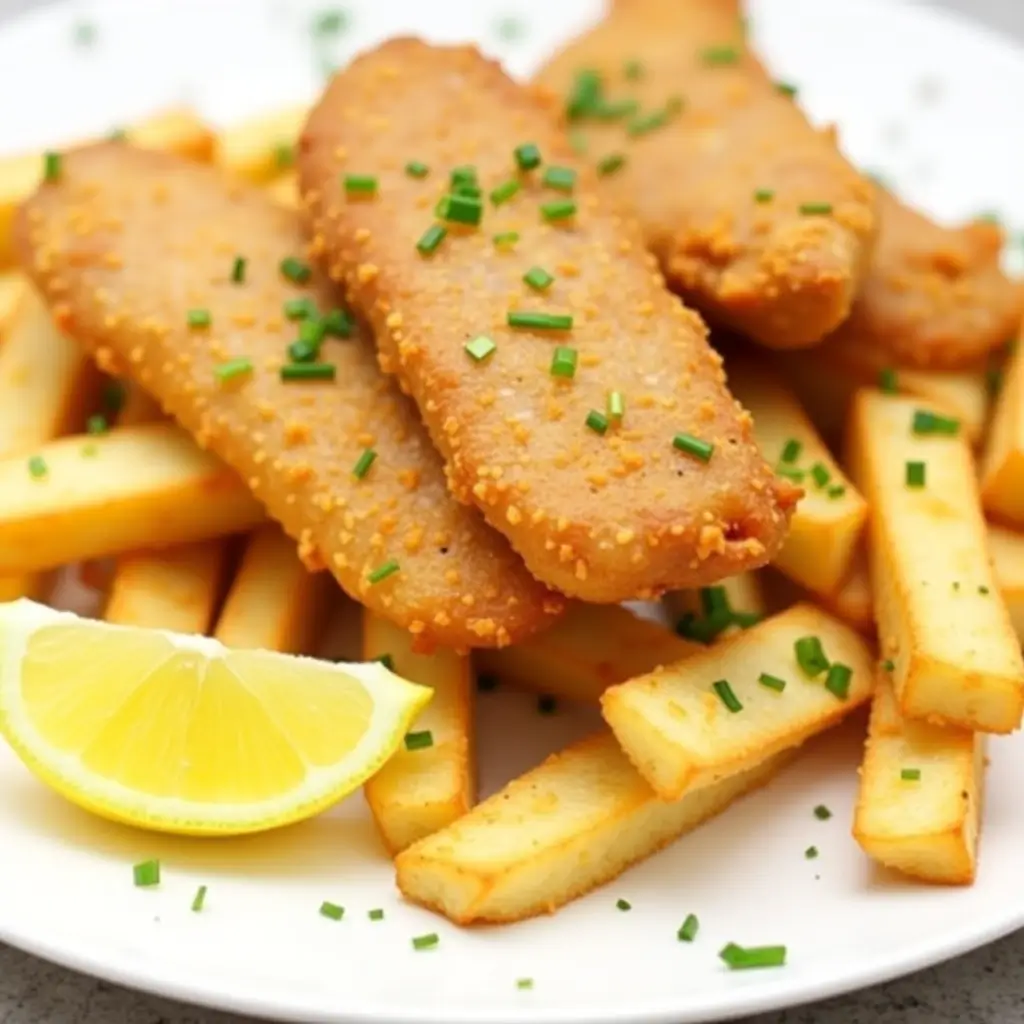
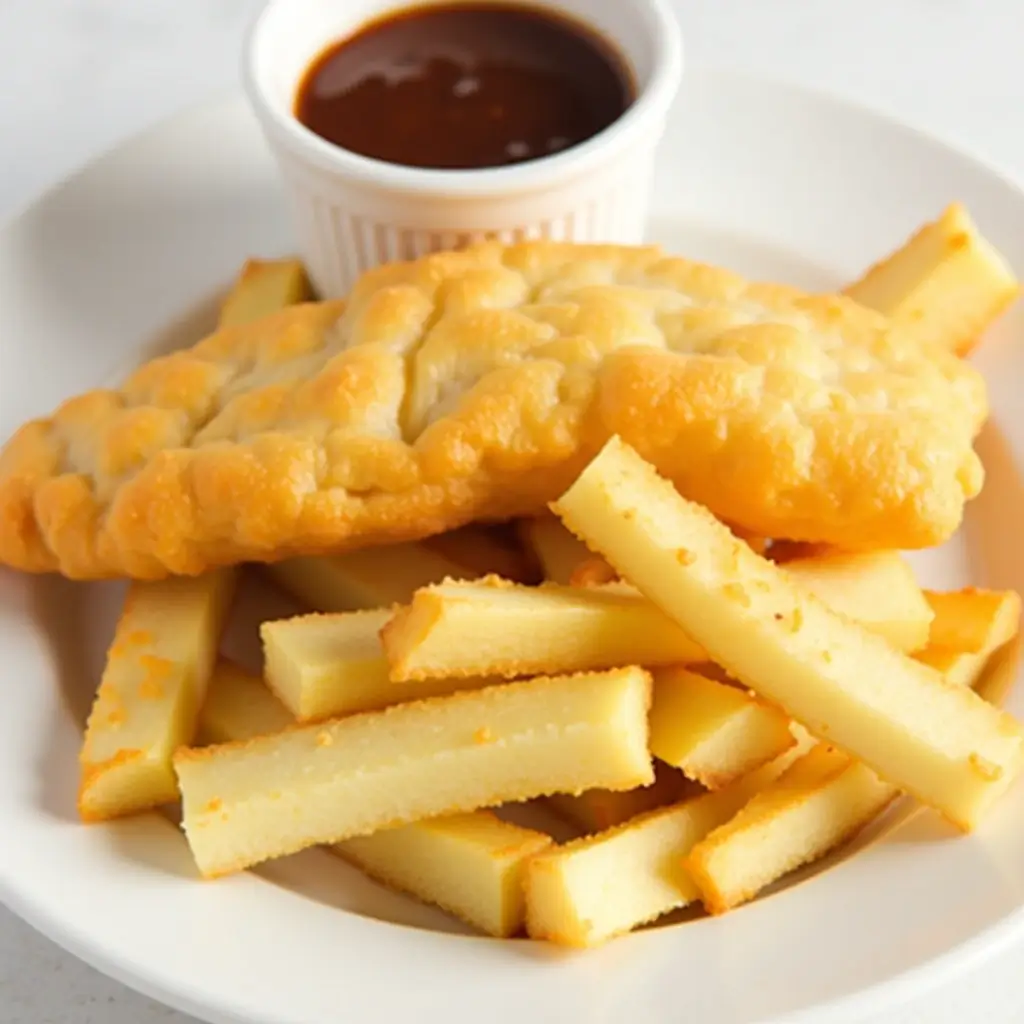
Step 5: Serve and Enjoy
Plate your crispy fish fillets alongside the sweet potato fries. Add a side of lectin-free dipping sauces like:
- Homemade tartar sauce made with avocado oil mayo, lemon juice, and fresh dill.
- A squeeze of fresh lemon for added zest.
- Apple cider vinegar for a tangy British-style touch.
Sprinkle chopped parsley over the dish for a touch of freshness. Serve immediately for the best texture and flavor.
With this recipe, you can indulge in the satisfying crunch and rich flavors of fish and chips while staying true to a lectin-free lifestyle. Enjoy this healthier take on a classic dish, and don’t forget to share your masterpiece with family and friends!
Why Go Lectin-Free with Fish and Chips?
The traditional fish and chips recipe, though delicious, can sometimes be hard on the digestive system due to the presence of certain ingredients that may contain lectins. Lectins are naturally occurring proteins found in many foods, particularly legumes, grains, and some vegetables. While lectins play an important role in plant defense mechanisms, they can also disrupt human digestion and health when consumed in large quantities or improperly prepared.
Going lectin-free with fish and chips offers several benefits for those who are mindful of gut health, digestive issues, or inflammation. Here are some key reasons why opting for a lectin-free version of this classic comfort food can be beneficial:
1. Improved Digestion
Lectins, especially those found in grains like wheat (used in traditional batter), can interfere with the digestive process by binding to the lining of the intestines. This can lead to uncomfortable symptoms such as bloating, gas, or indigestion. By swapping out lectin-rich ingredients like wheat flour for alternatives like almond or coconut flour, you’re making the dish gentler on the stomach and supporting better digestive health. These lectin-free flours are much easier for the body to process, promoting smoother digestion.
2. Reduced Inflammation
For individuals who suffer from conditions like autoimmune disorders, irritable bowel syndrome (IBS), or chronic inflammation, lectins can worsen symptoms. Lectins have been shown to potentially trigger immune responses that cause inflammation in the body. By avoiding lectins in your fish and chips, you can help reduce inflammation and support overall well-being. This is particularly important for those following anti-inflammatory diets like the lectin-free diet or autoimmune protocol (AIP).
3. Better Nutrient Absorption
Lectins can also interfere with the absorption of essential nutrients, especially minerals like calcium, zinc, and iron. This is due to their ability to bind to these nutrients and prevent them from being absorbed properly in the digestive system. By making lectin-free fish and chips, you can ensure that you’re not only enjoying a delicious meal but also maximizing your nutrient intake without worrying about nutrient blockages.
4. Gut-Friendly Alternatives
Lectin-free ingredients like almond flour, coconut flour, and tapioca starch are naturally more compatible with the gut microbiome. They tend to be less inflammatory and easier to digest compared to their lectin-rich counterparts. For example, sweet potatoes or yuca, instead of traditional potatoes, are often easier on the digestive system while still providing a rich source of vitamins and fiber. These swaps help balance the gut, leading to better overall gut health.
5. Support for Blood Sugar Regulation
Traditional breaded fish and fries, particularly when made with wheat flour, can cause blood sugar spikes due to their high carbohydrate content. By opting for lectin-free flours and healthier sides like sweet potatoes, which have a lower glycemic index than white potatoes, you can help maintain more stable blood sugar levels. This is particularly beneficial for individuals who are diabetic or trying to manage their weight.
6. Greater Control Over Ingredients
By preparing your fish and chips at home with lectin-free ingredients, you have full control over what goes into your food. You can avoid hidden additives, preservatives, and other potentially harmful substances found in store-bought or restaurant versions. Homemade versions allow for customization to meet your dietary needs, whether you’re following a gluten-free, paleo, or low-carb lifestyle, making this dish more adaptable to various health goals.
7. Supports a Healthier Lifestyle
Ultimately, opting for lectin-free fish and chips is part of a broader commitment to a healthier lifestyle. It aligns with modern approaches to eating clean and focusing on foods that nourish the body rather than potentially causing harm. With more people adopting diets focused on reducing inflammation and improving gut health, this version of fish and chips offers a tasty and nutritious alternative that fits within these health-conscious trends.
Lectin-Free Ingredients in This Recipe
The beauty of a lectin-free version of fish and chips lies in the thoughtful selection of ingredients that are both delicious and easier on your digestive system. By replacing typical lectin-rich ingredients with alternatives that are low in lectins or do not contain them, you can still enjoy a comforting and satisfying meal while supporting your health. Here’s an in-depth look at the lectin-free ingredients used in this recipe and why they’re beneficial:
1. Almond Flour
Why it’s Lectin-Free: Almond flour is an excellent lectin-free alternative to wheat flour, which is commonly used in traditional batters. Almond flour is made from finely ground almonds and is naturally low in lectins. This makes it a gentler option for those sensitive to lectins or following a lectin-free diet.
Nutritional Benefits:
- High in Healthy Fats: Almond flour is rich in monounsaturated fats, which are beneficial for heart health.
- Protein-Rich: It offers a good amount of plant-based protein, which can help build and repair tissues.
- Low in Carbs: Almond flour has a lower carbohydrate content than wheat flour, making it a good choice for those following low-carb or keto diets.
- Rich in Vitamins and Minerals: Almond flour is a good source of vitamin E, magnesium, and fiber, all of which support various bodily functions, including antioxidant protection and healthy digestion.
How it Works in the Recipe: Almond flour provides the perfect texture for the batter, ensuring that it crisps up beautifully when fried or baked. Its slightly nutty flavor also adds depth to the dish, complementing the mild taste of the fish.
2. Coconut Flour
Why it’s Lectin-Free: Coconut flour, made from dried coconut meat, is another fantastic lectin-free flour. Unlike wheat flour, it contains very few antinutrients, including lectins. Coconut flour is naturally gluten-free, which makes it ideal for anyone avoiding gluten as well as lectins.
Nutritional Benefits:
- High in Fiber: Coconut flour is an excellent source of dietary fiber, which promotes healthy digestion and can help regulate blood sugar levels.
- Low Glycemic Index: Because it is low in carbohydrates and high in fiber, coconut flour has a minimal impact on blood sugar, making it a good option for those with blood sugar concerns or on a diabetic-friendly diet.
- Rich in Healthy Fats: Like almond flour, coconut flour also provides healthy fats, including medium-chain triglycerides (MCTs), which are known for their metabolism-boosting properties.
How it Works in the Recipe: Coconut flour’s light and absorbent nature gives the batter a delicate texture and golden color when cooked. It also adds a mild coconut flavor, enhancing the taste of the dish without overpowering the fish.
3. Tapioca Starch
Why it’s Lectin-Free: Tapioca starch (or tapioca flour) is derived from the cassava root and is naturally free from lectins. It’s a common ingredient in lectin-free cooking because it helps bind ingredients together without the digestive issues that come with lectin-rich alternatives. Unlike many starches, tapioca is highly digestible and does not cause bloating or discomfort.
Nutritional Benefits:
- Pure Carbohydrate Source: Tapioca starch is composed mostly of carbohydrates and provides a quick source of energy. However, it’s very low in fat and protein, so it’s best used in combination with other nutrient-dense ingredients.
- Gluten-Free: Tapioca starch is also gluten-free, making it a great choice for people with gluten sensitivity or those who follow gluten-free diets.
- Supports Digestive Health: Being easily digestible, tapioca starch can be helpful for people with digestive issues, as it doesn’t cause irritation in the gut.
How it Works in the Recipe: Tapioca starch contributes to the light, crispy texture of the batter. It acts as a binder, ensuring that the ingredients adhere to the fish properly, while also making the batter more crunchy and airy.
4. Sweet Potatoes (instead of regular potatoes)
Why they’re Lectin-Free: Sweet potatoes are a wonderful lectin-free substitute for traditional white potatoes, which contain lectins that can irritate the gut, especially when not cooked properly. Sweet potatoes are naturally low in lectins and can be consumed without the digestive discomfort associated with white potatoes.
Nutritional Benefits:
- Rich in Antioxidants: Sweet potatoes are packed with beta-carotene (a precursor to vitamin A), which supports eye health and boosts the immune system.
- High in Fiber: The fiber content in sweet potatoes helps regulate digestion and supports a healthy gut microbiome.
- Low Glycemic Index: Sweet potatoes have a relatively low glycemic index compared to regular potatoes, meaning they have a slower, more gradual impact on blood sugar levels.
- Nutrient-Dense: In addition to vitamin A, sweet potatoes are also a great source of vitamin C, potassium, and manganese.
How they Work in the Recipe: Sweet potatoes have a natural sweetness that adds a rich, earthy flavor to the dish. When roasted or air-fried, they become crispy on the outside while remaining soft and tender on the inside, creating a perfect complement to the crispy fish.
5. Avocado Oil
Why it’s Lectin-Free: Avocado oil is a healthy, lectin-free fat source that works wonderfully for frying or baking. Unlike vegetable oils like canola or sunflower oil, which can be highly processed and contain harmful compounds, avocado oil is minimally processed and free from lectins.
Nutritional Benefits:
- Heart-Healthy: Avocado oil is rich in monounsaturated fats, which are beneficial for cardiovascular health.
- Rich in Antioxidants: It contains antioxidants like vitamin E and lutein, which help protect the body from oxidative stress and support eye health.
- Anti-Inflammatory Properties: The oleic acid in avocado oil has anti-inflammatory effects, which can help reduce inflammation in the body.
- Supports Nutrient Absorption: Avocado oil can enhance the absorption of fat-soluble vitamins (A, D, E, K) from other foods, helping you get the most out of your meal.
How it Works in the Recipe: Avocado oil has a high smoke point, which makes it ideal for frying fish at high temperatures without breaking down and releasing harmful compounds. It also provides a neutral flavor that lets the natural taste of the fish and other ingredients shine.
6. Sparkling Water (instead of regular water)
Why it’s Lectin-Free: Sparkling water is a lectin-free liquid option that helps create a light and airy batter. It’s an excellent substitute for regular water, as the carbonation adds to the batter’s crispiness and lightness, giving the fish an extra crunch.
Nutritional Benefits:
- Hydration: Sparkling water is hydrating and can help replenish your fluids without the added sugars and calories found in sodas or other sugary beverages.
- No Calories or Sugar: Sparkling water is naturally free of calories and sugar, making it a healthy addition to your meal.
How it Works in the Recipe: The carbonation in sparkling water helps to create a batter that is airy and crisp, leading to a light and crunchy coating around the fish.
Essential Ingredients for Lectin-Free Fish and Chips
1. Choosing the Right Fish
The first step in creating the perfect lectin-free fish and chips is selecting the right fish. The fish you choose will set the foundation for both the flavor and texture of the dish. Since fish is the star ingredient, it’s important to choose a variety that is mild, flaky, and able to hold up well to the cooking process—whether you’re frying or baking. In this recipe, the focus is on picking fish that offers the best combination of taste, texture, and nutrition while remaining compatible with a lectin-free diet.
Key Considerations When Choosing Fish:
- Mild Flavor: For a classic fish and chips experience, it’s important to use fish with a mild, non-fishy flavor. This makes the dish appealing to a wide range of palates and allows the batter and seasoning to shine.
- Flaky Texture: Flakiness is a hallmark of great fish in a fish and chips dish. A flaky fish is one that falls apart easily when you bite into it, creating a tender and delicate mouthfeel that pairs perfectly with the crispy batter.
- Firm Flesh: While the fish should be flaky, it also needs to be firm enough to withstand frying or baking. Fish that are too soft may break apart during cooking, while firmer fish tend to hold their shape better.
- Freshness: Fresh fish will always yield the best results. Look for fish that has a clean, ocean-fresh smell and firm, moist flesh. If you’re buying frozen fish, make sure it has been properly stored and is of high quality.
- Sustainability and Sourcing: If possible, choose sustainably sourced fish. Many fisheries now offer certifications like MSC (Marine Stewardship Council) to indicate that the fish is responsibly caught. This ensures that you’re making an environmentally conscious choice while enjoying your meal.
Types of Fish Ideal for Fish and Chips:
Several fish varieties work wonderfully in fish and chips, each offering a slightly different flavor profile and texture. Here are the top three options to consider:
- Cod (Gadus morhua)
- Flavor: Cod is one of the most popular choices for fish and chips due to its mild, slightly sweet flavor. It has a neutral taste that allows the crispy batter and seasonings to take center stage.
- Texture: Cod is known for its flaky, tender texture. It breaks apart easily when cooked, creating that light and delicate bite that makes fish and chips so satisfying.
- Why It Works: Cod’s low fat content and subtle flavor make it the ideal base for this dish. It holds up well to frying, and its flakiness adds to the texture contrast between the fish and the crispy batter.
- Haddock (Melanogrammus aeglefinus)
- Flavor: Haddock is another excellent choice for fish and chips. It’s similar to cod but slightly firmer and with a bit more flavor. Haddock has a mild sweetness with a slightly smoky undertone when cooked, which adds complexity to the dish.
- Texture: Haddock is firmer than cod but still flaky. This fish has a smooth, tender texture that holds up well when battered and fried or baked.
- Why It Works: Haddock’s slightly firmer texture makes it a great option for those who prefer a slightly meatier fish in their fish and chips, without compromising on the classic flakiness that makes the dish enjoyable.
- Halibut (Hippoglossus hippoglossus)
- Flavor: Halibut is a premium choice, known for its clean, slightly sweet taste. It has a milder flavor than haddock but more pronounced than cod, making it a great option for those who want a richer taste without overwhelming the dish.
- Texture: Halibut has a firm, meaty texture that can stand up to the frying process. Unlike softer fish, it holds together well during cooking, making it ideal for fish and chips when you want a substantial bite.
- Why It Works: Halibut’s firm texture ensures that it doesn’t fall apart in the batter, while its mild sweetness offers a deeper flavor that complements the crispy batter. It’s perfect for those who want a heartier, more luxurious version of fish and chips.
Other Fish Varieties to Consider:
While cod, haddock, and halibut are the most traditional choices, there are several other fish varieties that can work well in fish and chips. These include:
- Pollock: A mild, white fish often used in fish sticks and fast food fish dishes. It has a similar texture to cod and is a more budget-friendly option.
- Tilapia: A lean fish with a mild flavor, tilapia is another affordable alternative. While it’s not as flaky as cod or haddock, it’s still tender and works well in fish and chips.
- Snapper: For a slightly more flavorful option, snapper offers a mild sweetness and firm texture, making it a great alternative for a more robust fish and chips dish.
Tips for Choosing and Preparing Fish:
- Buy Fresh or Frozen: Always aim for the freshest fish possible. Fresh fish should have clear, bright eyes and moist flesh that bounces back when pressed. If you’re purchasing frozen fish, ensure that it’s properly stored and hasn’t been thawed and refrozen.
- Dry the Fish Before Coating: After cleaning and preparing the fish, pat it dry with paper towels. This removes excess moisture, which ensures the batter adheres well and prevents sogginess during cooking.
- Cut the Fish into Even Portions: For uniform cooking, cut the fish into even-sized fillets or portions. This ensures that each piece cooks at the same rate and gives you perfectly crispy fish every time.
- Consider Skinless Fish: While fish with skin can be delicious, skinless fish works best in fish and chips because it allows for a more even coating of batter and avoids any unwanted texture that might detract from the crispiness of the final dish.
Why Choosing the Right Fish Matters:
Choosing the right fish is essential because it not only influences the flavor and texture of your fish and chips, but it also impacts the overall dining experience. A well-cooked piece of fish should have a light, flaky texture that contrasts beautifully with the crispy, golden batter. Whether you prefer the mildness of cod, the firmness of haddock, or the richness of halibut, selecting the right fish ensures that your fish and chips turn out as intended—delicious, satisfying, and easy to digest.
By making an informed choice about the fish, you ensure that your lectin-free fish and chips will be a standout dish, offering a balance of flavor, texture, and health benefits.
2. Lectin-Free Batter Alternatives
Creating a crispy, golden batter without using ingredients that contain lectins can be a challenge, but it is absolutely possible with the right substitutions. Traditional batter recipes typically rely on wheat flour, which is high in lectins, to create the crispy, crunchy coating that makes fish and chips so irresistible. However, when following a lectin-free diet, it’s crucial to opt for alternatives that are not only free of lectins but also provide that same delicious texture and flavor.
In this section, we’ll explore some of the best lectin-free batter alternatives, which include nut-based flours, coconut products, and starches. These ingredients not only provide a crispier result but also offer a healthier, gut-friendly alternative to the traditional flour-based batters.
Why Opt for Lectin-Free Batters?
Lectins are a group of naturally occurring proteins found in many foods, particularly in beans, grains, and some vegetables. While they serve as a defense mechanism for plants, lectins can be difficult for some people to digest, especially for those with sensitive digestive systems. For individuals who suffer from lectin intolerance or follow a lectin-free diet, avoiding foods with high lectin content, like wheat flour, is essential. Using lectin-free alternatives ensures that you can still enjoy foods like fish and chips without any digestive discomfort or inflammation.
Popular Lectin-Free Batter Ingredients:
- Almond Flour:
- Properties: Almond flour is a popular alternative to wheat flour, especially in low-carb, gluten-free, and lectin-free diets. It is made from finely ground almonds and provides a slightly nutty flavor and a crumbly, crisp texture when fried.
- Why It Works: Almond flour’s high fat content allows it to crisp up beautifully when fried, offering the perfect golden-brown coating for your fish. It’s also a great source of protein, healthy fats, and fiber, making it a nutritious choice for your batter.
- How to Use: Almond flour works well on its own or in combination with other flours to create the ideal batter texture. For a lighter, crispier crust, almond flour can be used as the base flour in the recipe.
- Coconut Flour:
- Properties: Coconut flour is made from dried coconut meat and is another excellent gluten-free, lectin-free option. It has a naturally sweet flavor and a finer texture compared to almond flour, which helps achieve a delicate crisp when used in batter.
- Why It Works: Coconut flour is highly absorbent, so a smaller quantity is needed compared to other flours. It’s perfect for creating a light, crunchy batter without the heaviness often associated with wheat flour. Its natural sweetness also complements the savory fish, adding a subtle depth of flavor to the batter.
- How to Use: Because coconut flour absorbs more liquid than other flours, it’s often used in combination with other ingredients like almond flour or tapioca starch to balance its absorbency and create a smooth batter.
- Tapioca Starch:
- Properties: Tapioca starch, also known as tapioca flour, is a gluten-free, lectin-free powder derived from the root of the cassava plant. It’s known for its ability to create a glossy, light, and crispy texture, making it a perfect addition to batter recipes.
- Why It Works: Tapioca starch helps bind the ingredients together while also adding extra crunch and crispness to the batter. It’s a fantastic option for people looking to achieve a crispy finish without any grain-based flour. Additionally, tapioca is easy to digest and does not contain lectins, making it gut-friendly.
- How to Use: Tapioca starch is best used in combination with other flours (like almond or coconut flour) to create a balanced batter. It can be used in small amounts—just a little goes a long way in achieving that golden, crispy coating.
- Arrowroot Powder:
- Properties: Arrowroot powder is another starch derived from a tropical plant. It’s a gluten-free and lectin-free option with similar properties to tapioca starch, providing a smooth and crisp texture to batters and sauces.
- Why It Works: Arrowroot helps create a light, crisp coating that doesn’t become soggy, which is essential for achieving the ideal fish and chips texture. It’s also an excellent option for individuals with sensitive digestive systems as it’s easy to digest and free from common allergens.
- How to Use: Arrowroot powder can be used in a similar way to tapioca starch—combine it with other flours like almond flour to achieve a light and crispy batter. Use in small amounts for the best results.
- Chickpea Flour (Besan):
- Properties: Chickpea flour, also known as besan, is made from ground dried chickpeas and is a great option for those who need a lectin-free batter. Chickpea flour is slightly denser than almond flour but still provides a lovely crisp when fried.
- Why It Works: Chickpea flour has a subtle nutty flavor and is high in protein and fiber. It works well in batters, giving a slightly heartier, more substantial texture. It’s also highly absorbent and forms a great crust when cooked at the right temperature.
- How to Use: Chickpea flour can be used alone or mixed with other flours to create a more balanced texture. It is particularly useful for recipes that call for a thicker batter.
Batter Recipe Combining These Alternatives:
To create the perfect lectin-free batter, consider combining the ingredients mentioned above. Here’s a simple recipe that incorporates almond flour, coconut flour, and tapioca starch:
- 1/2 cup almond flour
- 1/4 cup coconut flour
- 1/4 cup tapioca starch
- 1 tsp baking powder (optional for fluffiness)
- 1/2 tsp garlic powder
- 1/2 tsp smoked paprika
- 1/2 tsp sea salt
- 1/4 tsp black pepper
- 1/2 cup sparkling water or club soda (for lightness)
Instructions:
- In a mixing bowl, combine the almond flour, coconut flour, tapioca starch, garlic powder, paprika, salt, and pepper.
- Gradually whisk in the sparkling water or club soda until the batter reaches a smooth consistency. It should be thick but pourable.
- Let the batter rest for 5 minutes, then dip your fish fillets into it, ensuring an even coat.
- Fry or bake the fish for a golden, crispy result.
Why These Lectin-Free Alternatives Work:
Each of these lectin-free batter ingredients offers unique properties that make them ideal for creating a crisp, delicious coating for your fish. They allow you to avoid the potential digestive discomfort caused by wheat flour while still achieving the perfect texture and flavor in your fish and chips. By experimenting with these alternatives, you can customize your batter to suit your personal preferences and dietary needs, all while keeping your meal both satisfying and healthy.
Choosing the right combination of these ingredients ensures you’ll enjoy a crispy, golden fish and chips that’s not only lectin-free but also more nutritious and easier on your digestive system.
3. Healthy Oils for Frying
When it comes to frying fish for your lectin-free fish and chips, the choice of oil is incredibly important—not just for flavor, but also for health. Frying involves heating oil to high temperatures, which can alter the oil’s composition, especially when using oils that are not suitable for high heat. The right oil will give your fish a crispy, golden texture while also offering health benefits and preventing the formation of harmful compounds.
In this section, we’ll explore some of the best oils for frying fish that are not only lectin-free but also provide healthier alternatives to traditional frying oils. These oils offer stability at high temperatures, promote good heart health, and support overall well-being.
Why Choose the Right Oil for Frying?
Frying fish requires oils that can withstand high heat without breaking down into harmful compounds like trans fats and free radicals. Oils with a high smoke point are ideal because they can maintain their chemical structure without releasing toxic by-products. Additionally, some oils are rich in healthy fats, such as monounsaturated and polyunsaturated fats, which can support heart health and provide anti-inflammatory benefits.
When selecting an oil for frying, you should also consider the oil’s flavor profile. You want an oil that complements the fish without overpowering its delicate flavor. Additionally, oils that are high in antioxidants and have anti-inflammatory properties can help make your meal even more beneficial for your body.
Here are some of the healthiest oils for frying that will work perfectly with your lectin-free fish and chips recipe:

1. Avocado Oil:
- Smoke Point: 520°F (270°C) – High heat stability
- Flavor Profile: Mild, buttery, with a subtle richness
- Why It’s Great for Frying: Avocado oil is a top choice for frying due to its exceptionally high smoke point, making it perfect for cooking at high temperatures. It is rich in monounsaturated fats, which are heart-healthy and can help reduce inflammation. These healthy fats also support healthy cholesterol levels.
- Health Benefits: In addition to being rich in monounsaturated fats, avocado oil contains lutein, an antioxidant that supports eye health. It also has a variety of anti-inflammatory compounds that can benefit your overall well-being. The mild flavor of avocado oil allows the fish’s taste to shine through without competing with the batter’s crunch.
- How to Use: Use avocado oil to fry your fish to perfection, giving it a golden, crispy exterior. It also works well when baking the fish, as it can be lightly sprayed on the fish or used to coat the baking sheet.
2. Coconut Oil:
- Smoke Point: 350°F (175°C) – Moderate heat stability
- Flavor Profile: Slightly sweet and tropical
- Why It’s Great for Frying: Coconut oil is a fantastic option for frying fish and chips, particularly when you want to add a subtle tropical flavor to the dish. It has a moderate smoke point, so it’s best for shallow frying or pan-frying fish. Coconut oil is composed of medium-chain triglycerides (MCTs), which are a type of fat that is quickly absorbed and used by the body for energy.
- Health Benefits: Coconut oil is known for its antimicrobial and anti-inflammatory properties due to its high lauric acid content. The MCTs in coconut oil are also linked to improved metabolism and weight management. While it has a higher proportion of saturated fats compared to some other oils, these fats are considered beneficial and are easily used for energy.
- How to Use: When frying fish in coconut oil, use it for shallow frying or pan-frying, as its smoke point is lower than that of avocado oil. Its slightly sweet flavor can enhance the overall dish, giving it a unique twist.
3. Ghee (Clarified Butter):
- Smoke Point: 450°F (232°C) – High heat stability
- Flavor Profile: Buttery, rich, and savory
- Why It’s Great for Frying: Ghee is a type of clarified butter that has been heated to remove the milk solids, leaving behind pure butterfat. This process not only increases its shelf life but also raises its smoke point, making it an excellent choice for high-heat cooking. Ghee is known for its rich, buttery flavor, which works wonderfully with fish, adding a savory depth to the dish.
- Health Benefits: Ghee is rich in butyrate, a short-chain fatty acid that has been shown to support gut health and reduce inflammation. It also contains conjugated linoleic acid (CLA), which is associated with fat loss and improved body composition. Ghee is also lactose-free, making it suitable for those who are lactose intolerant.
- How to Use: Use ghee for deep frying or shallow frying your fish. The rich, buttery flavor of ghee enhances the crispiness of the batter, while also providing additional nutritional benefits. It can also be brushed onto the fish before baking for a crispy, golden finish.
4. Olive Oil (Light or Refined):
- Smoke Point: 465°F (240°C) – High heat stability
- Flavor Profile: Light and mildly fruity (in refined olive oil)
- Why It’s Great for Frying: While extra virgin olive oil is best used for dressings and drizzling, refined olive oil (or light olive oil) has a higher smoke point, making it more suitable for frying. Olive oil is well-known for its heart-healthy properties, as it is rich in monounsaturated fats, which have been linked to improved cardiovascular health.
- Health Benefits: Olive oil is rich in antioxidants, particularly vitamin E, which has anti-inflammatory properties. The monounsaturated fats in olive oil are beneficial for heart health and may help reduce the risk of chronic diseases such as heart disease and type 2 diabetes.
- How to Use: Use light or refined olive oil for frying your fish to achieve a crispy, golden result. Its mild flavor won’t overpower the taste of the fish and pairs well with the delicate batter. You can also use it for sautéing or grilling.
5. Macadamia Nut Oil:
- Smoke Point: 410°F (210°C) – High heat stability
- Flavor Profile: Buttery, slightly nutty
- Why It’s Great for Frying: Macadamia nut oil is another excellent oil for high-heat cooking. It’s less commonly used but offers a unique, buttery flavor that complements fish well. This oil is rich in monounsaturated fats, similar to avocado oil, and has a relatively high smoke point, making it suitable for frying.
- Health Benefits: Macadamia nut oil is high in omega-3 fatty acids, which are known to support heart health and reduce inflammation. It is also rich in antioxidants and has a favorable ratio of omega-3 to omega-6 fatty acids, which can promote better overall health.
- How to Use: Use macadamia nut oil for shallow or deep frying. Its rich, nutty flavor pairs well with the light batter and the fish, creating a crispy, flavorful crust.
Conclusion: Why Healthy Oils Matter for Frying Fish
The choice of oil is crucial not just for flavor, but also for the health benefits of your meal. Opting for oils like avocado oil, coconut oil, ghee, olive oil, or macadamia nut oil ensures that you’re not only achieving the desired crispiness and texture for your fish and chips but also adding a range of healthy fats and nutrients to the dish. These oils provide stability at high temperatures, preserve the nutritional integrity of your food, and offer a wealth of heart-healthy and anti-inflammatory benefits.
By carefully selecting the right oils, you can enhance the flavor of your lectin-free fish and chips while supporting your overall health and well-being.
Step-by-Step Guide to Making Lectin-Free Fish and Chips
1. Preparing the Fish
The process of preparing the fish is a crucial step in ensuring that your lectin-free fish and chips turn out perfectly crispy, flavorful, and enjoyable. Properly preparing your fish before frying or baking is essential not just for texture, but also for taste. From selecting the right fish to drying it properly, every step plays a key role in achieving the ideal result.
In this section, we’ll guide you through the steps to properly prepare your fish, focusing on the type of fish to choose, how to handle it, and tips for ensuring the best possible outcome.
Selecting the Right Fish
The foundation of any good fish and chips recipe starts with choosing the right type of fish. For the best results, you want a fish that is mild in flavor, flaky in texture, and able to hold up well to the batter and cooking process. Here are some of the top fish options for your lectin-free fish and chips:
- Cod: A classic choice for fish and chips, cod has a mild flavor and a flaky, tender texture. It’s one of the most popular fish used in traditional fish and chips recipes due to its ability to maintain its texture and not become mushy when fried.
- Haddock: Slightly firmer than cod, haddock has a subtle sweetness that works well with batter. It is often considered the more traditional fish for fish and chips in certain regions, and its firm texture makes it a great option for deep-frying.
- Halibut: For those looking for a heartier, meatier fish, halibut is an excellent option. It has a firm texture and mild flavor, making it ideal for holding up to batter without falling apart. Halibut is slightly more expensive than cod or haddock, but it provides a premium taste and texture.
- Pollock: Another affordable and popular option, pollock is often used in commercial fish and chips recipes. It’s mild, flaky, and budget-friendly, making it a great choice for a home-cooked version of the dish.
When selecting your fish, make sure to look for fresh, high-quality fillets from a reputable source. Fresh fish will have a clean, ocean-like smell, and the fillets should appear firm and moist, with no signs of discoloration or a fishy odor. If possible, opt for wild-caught fish, as it tends to have a firmer texture and better flavor than farmed varieties.
Thawing and Preparing Frozen Fish
If you are using frozen fish, it’s important to thaw it properly to maintain its texture and prevent it from becoming watery or soggy. Here’s how to thaw frozen fish the right way:
- Slow Thawing (Best Method): Place your frozen fish fillets in the refrigerator for several hours or overnight. This slow thawing process ensures that the fish retains its moisture and texture. Avoid thawing fish at room temperature, as this can cause it to lose moisture and become mushy.
- Quick Thawing: If you need to thaw your fish quickly, place the sealed fish fillets in a plastic bag and submerge them in a bowl of cold water for about 30 minutes. This is a safer method than using hot water, which can affect the fish’s texture and flavor.
Once thawed, pat the fish dry with paper towels to remove excess moisture. This step is crucial, as any excess moisture on the surface of the fish will prevent the batter from adhering properly and can lead to a soggy crust when frying.
Cutting the Fish into Portions
Once you have your fresh or thawed fish fillets, it’s time to cut them into portions. This step ensures that each piece of fish cooks evenly and is easy to handle when frying or baking.
- Fillets vs. Steaks: If you’re using whole fish, you’ll need to remove the bones and cut it into fillets or steaks. Fillets are ideal for fish and chips because they cook quickly and evenly. You can either leave the skin on or remove it, depending on your personal preference. Skin-on fillets can add extra crispiness, while skinless fillets are generally more tender.
- Portion Size: Cut the fillets into strips or chunks that are about 2-3 inches wide and 1 inch thick. This size ensures that each piece is easy to coat with batter and cooks evenly in the oil. Try to keep the pieces uniform in size to ensure consistent cooking.
If you prefer larger portions of fish for your fish and chips, you can opt to keep the fillets whole and cook them as large pieces. Just keep in mind that larger pieces may require a slightly longer cooking time to ensure the fish is fully cooked through.
Drying the Fish
One of the most important steps in preparing fish for battering and frying is drying it thoroughly. Excess moisture on the surface of the fish can cause the batter to slide off and make it difficult to achieve a crispy coating.
- Pat Dry with Paper Towels: After cutting the fish into portions, use paper towels to gently pat each piece of fish dry. Press down lightly to absorb any surface moisture but be careful not to break the fillets apart.
- Resting the Fish: After patting the fish dry, let it rest on a clean plate or cutting board for about 5 minutes before coating it in the batter. This step ensures that any remaining moisture evaporates and helps the batter stick better.
Coating the Fish
After preparing the fish and ensuring it is properly dried, it’s time to coat it with the batter. This step is essential for achieving that crispy, golden exterior that is characteristic of the best fish and chips.
- Coat in Flour Before Dipping in Batter (Optional): For an even crispier crust, lightly dust the fish with a small amount of lectin-free flour (such as almond flour or coconut flour) before dipping it into the batter. This flour coating helps the batter stick better and provides an extra layer of crispiness when fried.
- Dip in the Batter: After the flour coating, dip each piece of fish into the lectin-free batter, ensuring that it is evenly coated on all sides. Be careful not to overload the fish with batter, as this can result in a soggy crust.
- Resting the Fish (Optional): For an even crispier crust, let the battered fish rest for a minute or two before frying. This allows the batter to set and adhere better to the fish.
Tips for Maintaining Crispiness:
- Avoid Overcrowding the Frying Pan: If you’re frying the fish, avoid overcrowding the pan, as this can cause the oil temperature to drop and result in soggy fish. Fry in batches if necessary, allowing enough space for each piece to cook evenly and crisp up.
- Use the Right Temperature: Fry the fish at the right temperature (350°F or 175°C). If the oil is too hot, the batter may burn before the fish is cooked through. If the oil is too cool, the fish will absorb too much oil, resulting in a greasy texture.
2. Making the Batter
The batter is what gives fish and chips its signature crispy, golden, and flavorful crust. When following a lectin-free diet, it’s essential to use ingredients that don’t contain lectins—proteins found in certain grains, legumes, and nightshades—that may be harmful to some individuals, especially those with digestive sensitivities. Fortunately, you can create a delicious, crispy batter without using traditional wheat flour.
This section will guide you through the process of making a lectin-free batter that delivers the perfect crunch and flavor, all while being gentle on your gut. We’ll discuss the ingredients, the right technique for making the batter, and a few extra tips to ensure your fish turns out perfectly.
Why Use Lectin-Free Ingredients in the Batter?
Traditional batters rely on wheat flour as the base ingredient, which contains gluten and lectins. For individuals following a lectin-free or gluten-free diet, using wheat flour is not an option. By swapping out lectin-containing flours for alternative flours, such as almond flour, coconut flour, or tapioca starch, you can still achieve that perfect crispy texture without compromising your digestive health.
Choosing the Right Flour Alternatives for the Batter
The secret to achieving a crisp and light batter without lectins lies in choosing the right combination of flour alternatives. Here’s a breakdown of the best flour options to use for making a lectin-free batter:
- Almond Flour: Almond flour is finely ground from blanched almonds, making it a great gluten-free and lectin-free option. It gives the batter a slightly nutty flavor and provides a crispy, golden crust. Almond flour also adds some healthy fats and protein to the batter, making it a nutritious choice.
- Coconut Flour: Made from dried coconut meat, coconut flour is light, absorbent, and works well in combination with other flours like almond flour. Coconut flour helps create a slightly sweet, airy batter that crisps up beautifully. It is also rich in fiber, which supports digestive health.
- Tapioca Starch (or Tapioca Flour): Tapioca starch is derived from the cassava root and is a popular thickening agent in gluten-free recipes. It helps bind the batter together while contributing to a light, crisp texture. Tapioca starch also adds a slight chewiness to the batter, which is especially desirable when coating fish for deep-frying.
When combined, these ingredients create a batter that is light yet sturdy enough to hold onto the fish during frying.
Ingredients for the Batter
To make a balanced lectin-free batter for your fish, you will need the following ingredients:
- 1/2 cup almond flour
- 1/4 cup coconut flour
- 1/4 cup tapioca starch
- 1 tsp baking powder (optional, for extra fluffiness)
- 1/2 tsp garlic powder (for flavor)
- 1/2 tsp paprika (for a hint of smokiness and color)
- 1/2 tsp sea salt (to taste)
- 1/4 tsp black pepper (for a mild kick)
- 1/2 cup sparkling water or club soda (for a light, airy texture)
These ingredients combine to form a smooth, slightly thick batter that will coat the fish evenly and crisp up beautifully when fried.
The Process of Making the Batter
Now that you have your ingredients ready, follow these steps to make the perfect lectin-free batter:
- Combine the Dry Ingredients: Start by mixing the almond flour, coconut flour, tapioca starch, baking powder, garlic powder, paprika, salt, and black pepper in a large mixing bowl. Stir well to combine and ensure the dry ingredients are evenly distributed.
- Add the Liquid: Slowly add the sparkling water or club soda to the dry mixture. The carbonation from the sparkling water helps create a light, airy batter, which contributes to the crispy texture. As you add the liquid, whisk the mixture gently to avoid lumps. Keep adding the sparkling water gradually until the batter reaches a smooth consistency. You want the batter to be thick enough to coat the fish, but not so thick that it becomes clumpy. If it feels too thick, add a little more sparkling water until you reach the desired consistency.
- Let the Batter Rest: Allow the batter to sit for about 5 minutes. Resting the batter helps the flours absorb the liquid more fully, which improves the texture of the batter and makes it easier to coat the fish evenly.
- Consistency Check: Before dipping the fish, check the batter’s consistency. It should be thick enough to coat the fish but still drip off easily without running straight off. If the batter is too thin, add a little more almond flour or coconut flour to thicken it up. If it’s too thick, add a small splash of sparkling water to loosen it.
Tips for Achieving the Perfect Batter Texture
- Use Cold Sparkling Water: For the crispiest batter, use cold sparkling water or club soda. Cold liquids help the batter form a lighter texture and crisp up faster when fried, as the temperature contrast helps the batter puff up beautifully.
- Adjust Seasoning: Feel free to adjust the seasoning to suit your taste. For a bit of extra kick, you can add a pinch of cayenne pepper or a dash of lemon zest. Experimenting with different spices and seasonings will elevate the flavor of your batter and enhance the overall dish.
- Consistency is Key: When making batter, consistency is important. If your batter is too thin, it won’t coat the fish properly and will result in a soggy exterior. On the other hand, if it’s too thick, it may form a heavy crust that lacks the delicate crunch you want. Aim for a batter that’s thick enough to stick to the fish but light enough to create an airy, crisp exterior.
Using the Batter: Coating the Fish
Once your batter is ready, you can start coating the fish. This step is crucial to achieving a crispy, golden crust that enhances the fish’s flavor and texture.
- Prepare the Fish: As we covered earlier, ensure that the fish is properly dried and cut into even portions. Pat the fish dry with paper towels to remove excess moisture, as this will help the batter adhere better.
- Coat the Fish: Take each piece of fish and dip it into the batter, ensuring it’s evenly coated on all sides. Gently shake off any excess batter, as too much batter can lead to a thick, doughy coating instead of the crispiness you want.
- Rest the Fish: For extra crispiness, let the battered fish rest for a minute or two before frying. This allows the batter to firm up slightly and stick better to the fish.
Frying the Fish with the Batter
Now that your fish is coated in the batter, it’s time to fry it. To achieve the perfect crispy finish, be sure to fry the fish at the right temperature (around 350°F or 175°C). Frying at a temperature that’s too low will result in greasy fish, while frying at too high of a temperature can burn the batter before the fish is cooked through.
Fry the fish in small batches, making sure not to overcrowd the pan, which can lower the oil temperature. Fry each piece for about 3-4 minutes per side or until the batter turns golden brown and crispy. Once fried, place the fish on a paper towel-lined plate to drain any excess oil.
3. Cooking the Chips
Cooking the chips (or fries) is a critical part of creating the perfect fish and chips meal. While the fish gets all the attention in the recipe, the chips should not be overlooked. They need to be crispy on the outside, fluffy on the inside, and perfectly seasoned. In this section, we’ll cover the best ways to prepare and cook the chips, ensuring that they complement the lectin-free battered fish and deliver that iconic crunch.
Traditionally, fish and chips use regular potatoes, but since we’re following a lectin-free approach, we’ll explore alternatives that are just as delicious and satisfying. Sweet potatoes and yuca (cassava) are excellent lectin-free options that provide a unique twist on the classic dish. Both options offer great texture and flavor, while being gentle on the digestive system.
Choosing the Right Potato Substitute
The key to making perfect lectin-free chips is choosing the right alternative to regular potatoes. Both sweet potatoes and yuca (cassava) are excellent choices because they provide a similar texture and flavor while being lectin-free and nutrient-dense. Here’s a closer look at each option:
- Sweet Potatoes: Naturally sweet and packed with nutrients, sweet potatoes are a fantastic alternative to regular potatoes. They contain high amounts of fiber, vitamins, and antioxidants, making them a healthier option. Sweet potatoes also crisp up well when baked or fried, providing a golden, crunchy exterior while staying soft and tender on the inside. The natural sweetness of sweet potatoes pairs beautifully with the savory fish and the batter, creating a balance of flavors.
- Yuca (Cassava): Yuca is a starchy root vegetable that’s often used as a potato substitute in many gluten-free and lectin-free recipes. Yuca has a slightly firmer texture compared to sweet potatoes, and when cooked properly, it becomes crispy on the outside while remaining tender on the inside. Yuca fries have a satisfying crunch and a neutral flavor that complements the fish without overpowering it. Yuca is also rich in fiber and provides a good source of carbohydrates, making it an excellent choice for creating hearty chips.
Preparing the Chips
Once you’ve chosen your chip substitute, it’s time to prepare them for cooking. The goal is to cut them into uniform pieces so they cook evenly, and to add seasoning that enhances their flavor.
- Peeling and Cutting:
- Sweet Potatoes: Start by peeling the sweet potatoes with a vegetable peeler or knife. Once peeled, cut them into even-sized strips or wedges, ensuring they are of similar thickness for uniform cooking. Aim for chips that are about 1/4 to 1/2 inch thick—this thickness ensures they cook through while still achieving a crisp exterior.
- Yuca: Yuca has a tough outer skin, so it needs to be peeled carefully. Use a knife to cut off both ends of the root, then slice down the length to remove the skin. After peeling, cut the yuca into even strips or wedges, just like you would with potatoes. Yuca can be a bit tougher than sweet potatoes, so take your time to make sure each piece is the same thickness.
- Soaking (Optional but Recommended): Soaking the cut chips in water for at least 30 minutes (or overnight) helps remove excess starch and results in a crisper texture when cooked. This step is especially important for sweet potatoes, as they contain more natural sugars that can cause them to burn easily. Soaking also helps to improve the overall texture by making them less soggy.After soaking, drain the chips and pat them dry with paper towels. Removing excess moisture ensures that they crisp up during cooking.
Cooking Methods: Baking vs. Frying
Once your chips are prepared, you can choose between baking or frying to cook them. Both methods can produce delicious, crispy chips, but they offer slightly different results in terms of texture and oil content.
Baking the Chips:
Baking is a healthier option that results in less oil while still producing crispy chips. This method is easy and less messy, and it works well for both sweet potatoes and yuca. Here’s how to bake your chips:
- Preheat the Oven: Preheat your oven to 400°F (200°C). A high baking temperature helps the chips achieve a golden, crispy exterior without becoming too soft.
- Season the Chips: In a large mixing bowl, toss the sweet potato or yuca strips with a tablespoon of avocado oil (or another high-heat oil like olive oil) to coat them evenly. Add seasonings like sea salt, smoked paprika, garlic powder, or your favorite spices. The oil helps the seasoning stick and contributes to the crispiness of the chips.
- Arrange on a Baking Sheet: Lay the seasoned chips out in a single layer on a baking sheet lined with parchment paper. Make sure the chips aren’t overcrowded, as this can cause them to steam rather than crisp up.
- Bake and Flip: Bake the chips for 20-25 minutes, flipping them halfway through the cooking time. This ensures they cook evenly on both sides and become perfectly crispy. Keep an eye on them toward the end of the baking time to prevent burning.
- Optional Final Step: For extra crispiness, you can broil the chips for the last 2-3 minutes of cooking. This gives them a beautiful golden-brown color and additional crunch.
Frying the Chips:
Frying the chips results in a crispy, golden exterior and a soft, tender inside. While it uses more oil than baking, frying gives the chips that authentic texture you expect from traditional fish and chips. Here’s how to fry your chips:
- Heat the Oil: In a deep fryer or large frying pan, heat about 2 inches of avocado oil (or another high-heat oil) to 350°F (175°C). Use a thermometer to monitor the temperature and ensure it stays steady.
- Fry in Batches: To avoid overcrowding the pan and lowering the oil temperature, fry the chips in small batches. Place the prepared chips into the hot oil and fry for about 3-4 minutes, or until they turn golden brown and crispy. Stir occasionally to prevent sticking and ensure even cooking.
- Drain the Chips: Once the chips are cooked, remove them from the oil and place them on a plate lined with paper towels to drain any excess oil.
- Season Immediately: While the chips are still hot, season them with sea salt and any other desired spices. This helps the seasoning adhere to the surface of the chips.
Serving the Chips
Once your chips are cooked, whether by baking or frying, they should be served immediately for the best texture. Plate them alongside your crispy fish fillets, and consider adding a few finishing touches like a sprinkle of chopped parsley or a squeeze of fresh lemon juice to brighten the dish.
You can also pair the chips with dipping sauces such as homemade tartar sauce, avocado-based mayo, or a tangy vinegar for added flavor.
4. Frying vs. Baking
When it comes to preparing the perfect fish and chips, one of the most important decisions is whether to fry or bake the fish and chips. Both methods have their benefits, and understanding the differences between them will help you achieve the texture and flavor you’re aiming for. Below, we’ll dive into the pros and cons of each method, the best oils to use, and how to achieve the optimal result for both frying and baking.
Frying: Achieving the Classic Crispy Texture
Frying is the traditional method used to prepare fish and chips. The process involves submerging the battered fish and/or chips in hot oil, which results in a golden, crispy exterior and a tender, juicy interior. Frying is ideal if you’re looking for that crispy, restaurant-style fish and chips experience, with a crunchy crust that perfectly complements the softness of the fish and chips inside.
Benefits of Frying:
- Crispy Texture: Frying delivers the crispiest results, creating that signature golden crust that’s crunchy on the outside and soft and juicy on the inside. The hot oil rapidly seals the batter or chips, preventing the oil from soaking in and keeping the coating light and airy.
- Faster Cooking: Frying cooks the fish and chips more quickly than baking. The high heat of the oil instantly cooks the food, which helps preserve moisture and results in a perfectly cooked fish fillet with a crunchy exterior.
- Better Flavor: The oil imparts flavor to the battered fish and chips, contributing to a richer taste. This is especially true when using high-quality oils that can enhance the overall flavor of the dish.
- Authentic Feel: Frying is the traditional way to make fish and chips, so if you’re craving an authentic experience, this is the way to go. The crispy batter and fried chips are what make this dish a beloved classic.
Tips for Frying Fish and Chips:
- Use the Right Oil: Since frying requires high temperatures, it’s essential to choose oils that have a high smoke point. Oils like avocado oil, grapeseed oil, or coconut oil are great choices. They can withstand the heat needed for frying (around 350°F or 175°C) without breaking down or releasing harmful compounds.
- Maintain the Correct Temperature: To achieve the perfect crispy texture, the oil temperature should be around 350°F (175°C). If the oil is too hot, the batter will burn before the fish is fully cooked. If the oil is too cool, the batter will absorb more oil and become greasy. Use a thermometer to monitor the oil temperature for the best results.
- Fry in Small Batches: Overcrowding the frying pan can lower the oil temperature, which leads to soggy or unevenly cooked fish and chips. Fry in small batches to ensure the food cooks evenly and crisps up properly.
- Drain Excess Oil: Once the fish and chips are fried, place them on a plate lined with paper towels to drain off any excess oil. This ensures that the fried food remains crispy and doesn’t become greasy.
Potential Drawbacks of Frying:
- Higher Oil Content: Frying typically uses more oil, which can increase the calorie count of the dish. While the oil can be absorbed by the food, frying still tends to be higher in fat than baking.
- Messier: Frying can be a bit messier than baking because of the splattering oil. It requires more cleanup and monitoring during the cooking process.
- More Time-Consuming: Although frying is faster than baking, it still requires you to heat the oil, monitor the temperature, and fry in batches. This can be more time-consuming than simply baking everything at once.
Baking: A Healthier, Less Messy Option
Baking is a healthier alternative to frying, and while it may not deliver the same level of crispiness as frying, it still produces delicious, golden-brown fish and chips with less oil. Baking works by surrounding the food with dry, circulating heat, which creates a crispy crust without the need for excessive oil.
Benefits of Baking:
- Lower Oil Content: One of the main benefits of baking is that it requires much less oil than frying. Instead of submerging the fish and chips in oil, you’ll simply toss them in a light coating of oil or spray, resulting in a much lower fat content. This is ideal for those seeking a healthier version of the dish.
- Easier Cleanup: Baking doesn’t require the use of large amounts of oil, which means there’s less mess to clean up afterward. There’s no oil splatter to worry about, making it a more convenient option, especially if you’re cooking in a small kitchen or don’t want to deal with frying.
- More Even Cooking: Baking is a more passive cooking method compared to frying. You can simply place the food in the oven and let it cook without needing to monitor it as closely. If you have the oven set at the right temperature, the heat will distribute evenly, ensuring the fish and chips are cooked uniformly.
- Less Monitoring: Once the food is in the oven, you don’t need to worry about keeping an eye on the temperature or flipping it constantly. It’s a more hands-off cooking method compared to frying.
Tips for Baking Fish and Chips:
- Preheat the Oven: Preheat your oven to a high temperature (around 425°F or 220°C) to ensure the fish and chips cook quickly and crisp up nicely. The high heat helps to achieve a golden crust without drying out the fish.
- Use Parchment Paper or a Baking Sheet: Line a baking sheet with parchment paper or a silicone baking mat to prevent sticking. This also makes cleanup easier and ensures that the chips don’t become soggy.
- Oil the Chips Lightly: Toss the sweet potato or yuca chips in a small amount of oil to help them crisp up in the oven. If you want to reduce the oil even further, you can use a light spray of oil. However, don’t skip this step, as oil helps the chips achieve a golden color and a crunchy texture.
- Flip Halfway Through Cooking: To ensure even crisping, flip the chips halfway through the baking time. This helps both sides achieve that perfect golden-brown color and crispy texture.
Potential Drawbacks of Baking:
- Less Crispy Texture: While baking can still yield crispy results, it doesn’t achieve the same level of crispiness that frying does. The batter on the fish may not be as crispy, and the chips might be less crunchy compared to fried versions.
- Longer Cooking Time: While baking is easier and cleaner, it typically takes longer than frying. The fish and chips need more time to cook through in the oven, and you may need to adjust cooking times depending on the thickness of the fish and the type of chips you’re using.
Which Method Should You Choose?
Ultimately, whether you fry or bake your fish and chips depends on your preferences and priorities. If you’re looking for the classic, crispy texture and don’t mind a little extra oil or cleanup, frying is the way to go. It delivers that golden, crunchy result that many people associate with fish and chips.
However, if you’re looking for a healthier, lower-fat option, or you simply prefer a more hands-off cooking method, baking is an excellent choice. While the texture may not be as crispy as frying, you’ll still enjoy a flavorful and satisfying dish with less oil.
Both methods work beautifully with lectin-free fish and chips, so the choice is yours! Either way, you’ll end up with a delicious, crispy dish that’s perfect for any occasion.
Tips for Perfecting Your Lectin-Free Fish and Chips
1. Getting the Batter Just Right
The batter is one of the defining elements of fish and chips. When it’s done right, it forms a crispy, golden, and airy coating that enhances the flavor of the fish without overpowering it. Achieving the perfect batter, especially in a lectin-free version, requires attention to detail and the right combination of ingredients. Below, we’ll explore how to get the batter just right for your fish, ensuring a crisp, light texture that’s perfectly balanced with the fish’s delicate flavors.
Choosing the Right Flour Alternatives
Traditional fish batter typically uses wheat flour, but since we’re following a lectin-free approach, we must replace wheat flour with healthier, gut-friendly alternatives. Here’s a closer look at some of the best lectin-free flours to use in your batter:
- Almond Flour: Almond flour is a popular choice in lectin-free cooking, as it adds a rich, nutty flavor and creates a crisp, crunchy texture when fried or baked. It’s also packed with healthy fats, fiber, and protein. When used in the batter, almond flour gives it a delicate crumbly texture that’s light and airy, which is perfect for coating fish. However, almond flour is more absorbent than wheat flour, so you may need to adjust the amount of liquid in the batter.
- Coconut Flour: Coconut flour is another excellent option for a lectin-free batter. It has a slightly sweet flavor and helps create a light, crispy texture. Because coconut flour is very absorbent, you may need to use less of it than almond flour and increase the amount of liquid in your batter to achieve the right consistency. Coconut flour is also rich in fiber and adds a subtle coconut flavor to the batter, which pairs well with the mild taste of fish.
- Tapioca Starch: Tapioca starch is often used to improve the texture and binding properties of gluten-free batters. It adds a lightness and crispiness to the batter, helping to form that golden crust we all love. Tapioca starch works particularly well in combination with almond or coconut flour to ensure the batter sticks well to the fish without becoming too thick or heavy.
Getting the Perfect Consistency
The consistency of your batter is crucial to getting it just right. A batter that is too thick can lead to a heavy, doughy crust that overpowers the fish. On the other hand, a batter that is too thin may not adhere well to the fish, resulting in an uneven or soggy coating. The key is to find a happy medium between the two.
- Start with Dry Ingredients: Begin by combining your lectin-free flours (almond flour, coconut flour, and tapioca starch) with seasonings like garlic powder, paprika, sea salt, and black pepper. These ingredients provide the base flavor of the batter and ensure that the fish is well-seasoned.
- Gradually Add Liquid: Slowly incorporate liquid into the dry ingredients while whisking continuously. For the best results, use sparkling water or club soda as your liquid. The bubbles in the sparkling water will help make the batter lighter and airier, resulting in a crispier finish when cooked. Start with about 1/2 cup of sparkling water and add more if needed, depending on the consistency you’re aiming for.
- Check the Thickness: As you whisk the batter, stop occasionally to check the consistency. It should be thick enough to coat the back of a spoon but thin enough to allow the batter to easily drizzle off the fish when dipped. If it’s too thick, add more sparkling water a little at a time until it reaches the desired consistency. If it’s too thin, you can add a little more almond flour or coconut flour to thicken it.
- Rest the Batter: Once you’ve achieved the right consistency, let the batter rest for about 5 minutes. This gives the ingredients time to meld together, and it also helps to thicken the batter slightly. Resting the batter also ensures a more uniform coating on the fish, making it easier to achieve a consistent texture.
The Role of Seasonings in the Batter
While the flour choice is important, the seasonings in the batter play a key role in enhancing the flavor profile of the fish. You want the batter to complement the fish without overpowering it, so balance the seasonings accordingly. Common seasonings include:
- Garlic Powder: Adds a savory, slightly pungent flavor to the batter that pairs well with the fish.
- Paprika: Gives the batter a mild smokiness and contributes to the golden color once cooked.
- Sea Salt: Enhances the overall flavor and helps bring out the natural sweetness of the fish.
- Black Pepper: Adds a slight bite and helps balance the other flavors in the batter.
You can also experiment with other spices, such as onion powder, thyme, or even a hint of cayenne pepper if you prefer a little heat in your batter.
How to Coat the Fish
Coating the fish properly is just as important as getting the batter right. Here’s how to ensure an even, crispy coating every time:
- Pat the Fish Dry: Before dipping the fish into the batter, use paper towels to pat the fish fillets dry. This removes any excess moisture, which helps the batter adhere more evenly to the fish. If the fish is wet, the batter may slide off or become uneven.
- Dredge in Flour First (Optional): Some people like to give the fish a light coating of almond or coconut flour before dipping it into the batter. This step is optional but can help the batter stick more evenly and reduce the risk of it slipping off during cooking.
- Dip and Coat Evenly: Dip the fish fillets into the batter, making sure to coat each piece evenly. You can use tongs or a fork to gently lower the fish into the batter and then lift it out, allowing any excess batter to drip off. If you prefer a thicker coating, you can dip the fish a second time for an extra layer of batter.
- Fry or Bake Immediately: Once your fish is coated in batter, it’s important to cook it right away to prevent the batter from becoming soggy. Heat your oil (if frying) or preheat your oven (if baking), and place the battered fish into the hot oil or onto the prepared baking sheet.
Troubleshooting Common Batter Issues
While getting the batter just right may seem daunting, it’s easy to troubleshoot if things don’t go as planned. Here are a few common issues and how to fix them:
- Batter Doesn’t Stick to the Fish: This can happen if the fish isn’t dry enough or if the batter is too thin. Be sure to pat the fish dry with paper towels and ensure your batter has a thick enough consistency. If the batter is too thin, add a little more almond or coconut flour to thicken it.
- Batter Becomes Soggy After Cooking: If the batter becomes soggy, it may be due to excess moisture in the fish or the oil temperature being too low. Always use paper towels to remove excess moisture from the fish, and ensure the oil is heated to the right temperature (around 350°F or 175°C). If baking, make sure the oven is hot enough to crisp the batter and the fish is not overcrowded on the baking sheet.
- Batter is Too Thick or Too Thin: If the batter is too thick, you can thin it out by adding a little more sparkling water. If it’s too thin, add a bit more flour or starch to thicken it.
2. Avoiding Soggy Chips
One of the most disappointing aspects of making fish and chips at home is ending up with soggy chips. A soggy chip can ruin the entire dish, overshadowing the crispy fish and batter. Achieving perfectly crispy, golden fries requires careful preparation and cooking. Below, we’ll dive into the common causes of soggy chips and provide tips on how to ensure your chips come out crispy, tender, and delicious every time.
Choosing the Right Potatoes or Alternatives
The first step in avoiding soggy chips is selecting the right type of potato or alternative. For a traditional approach, you’d use starchy potatoes like Russets. However, for a lectin-free option, you can use sweet potatoes or yuca. Both are excellent choices, but each has its own characteristics and benefits.
- Sweet Potatoes: Naturally sweeter and packed with nutrients, sweet potatoes make a great alternative for lectin-free chips. They may cook slightly faster than regular potatoes and can crisp up beautifully when prepared correctly. However, they can also be more prone to becoming soggy if not handled carefully.
- Yuca (Cassava): Yuca is another excellent alternative. When fried or baked, it becomes crispy on the outside with a fluffy interior, making it an ideal choice for lectin-free chips. Yuca requires a bit more care to cook properly, but with the right technique, it can achieve a perfectly crispy result.
How to Cut the Chips
The way you cut your potatoes, sweet potatoes, or yuca plays a significant role in their texture and the likelihood of them becoming soggy. Here are some tips for cutting your chips:
- Even Sizing: Whether you’re using sweet potatoes or yuca, make sure to cut them into uniform strips. This ensures that they cook evenly, preventing some chips from being undercooked while others become overly crispy. The goal is to have chips that are roughly the same thickness to ensure uniform crisping.
- Shape: Traditional fish and chips often feature thick, hearty fries, but if you prefer thinner, crispier chips, feel free to cut the fries thinner. Thin fries will crisp up faster, while thicker fries may require a bit more time to cook through while still achieving that crispy exterior.
Soaking the Chips
Soaking your chips before cooking is one of the most effective ways to prevent sogginess. This step helps to remove excess starch from the surface of the chips, which would otherwise contribute to a sticky, soggy texture when frying or baking. Here’s how to soak your chips properly:
- Rinse the Chips: After cutting your chips, rinse them under cold water to remove excess starch. This will help the chips crisp up more effectively when cooked.
- Soak in Water: Place the chips in a bowl of cold water and let them soak for at least 30 minutes. This soaking process helps to draw out excess starch, ensuring the fries crisp up properly. For an extra crispy result, you can soak them for longer (up to an hour), but don’t soak them for too long, as they may lose their structure.
- Dry Thoroughly: After soaking, drain the water and pat the chips dry with a towel. This step is crucial. If there’s any moisture left on the chips, it will steam the fries when cooking, leading to sogginess. Make sure the chips are completely dry before proceeding to the next step.
Coating the Chips for Crispiness
Once the chips are properly prepared, coating them with oil is a crucial step to achieving a crispy texture. While you don’t need to deep-fry your chips to get them crispy, using a small amount of oil will help them crisp up beautifully, whether you’re baking or air-frying them.
- Use a Light Coating of Oil: Toss the chips in a tablespoon or two of avocado oil or olive oil. Be sure to coat them evenly but don’t drown them in oil. You want just enough oil to help them crisp without making them greasy.
- Alternative to Oil: For those who prefer a lighter option, you can use an oil spray to mist the chips before cooking. This helps achieve a crispier result without overloading the chips with oil.
Cooking Methods for Crisp Chips
The cooking method you choose plays a significant role in how crispy your chips become. Both baking and air-frying are excellent methods for achieving crispiness, while frying can offer a more traditional, crunchy result. Below, we’ll cover the best methods for cooking your chips:
- Baking:
- Preheat the oven to 400°F (200°C).
- Spread the soaked and dried chips out evenly on a baking sheet lined with parchment paper or a silicone mat.
- Ensure the chips are spaced out and not overcrowded. Overcrowding the chips can trap steam and prevent them from crisping up. This is a common reason for soggy fries.
- Bake for 20–25 minutes, flipping the chips halfway through to ensure even cooking. If you like extra crispy chips, you can increase the temperature to 425°F (220°C) for the last few minutes of cooking.
- Air Frying:
- Preheat the air fryer to 375°F (190°C).
- Place the chips in the air fryer basket, being careful not to overcrowd them.
- Air-fry for 15–20 minutes, shaking the basket halfway through to ensure even crisping.
- Air frying is particularly effective at creating crispiness without using much oil, and the circulating hot air helps the chips cook evenly without becoming soggy.
- Frying:
- Heat a pot of avocado oil or coconut oil to around 350°F (175°C). Ensure the oil is hot before adding the chips. If the oil is too cool, the chips will absorb excess oil and become greasy and soggy.
- Fry the chips in small batches. Overcrowding the pot can lower the oil temperature and cause sogginess.
- Fry for about 3–5 minutes or until the chips are golden brown and crispy.
- After frying, place the chips on paper towels to drain excess oil and maintain their crispness.
Baking vs. Frying Chips
While frying typically yields the crispiest results, baking or air-frying your chips can still deliver excellent crispiness with a healthier twist. Here’s a comparison:
- Baking: Baking chips in the oven requires less oil and can be just as crispy as frying if the chips are spaced evenly on the baking sheet and flipped halfway through. The oven’s dry heat circulates around the chips, crisping them up from all sides.
- Frying: Frying in hot oil quickly seals the exterior of the chips, creating a crunchy texture. The downside is that fried chips can become greasy if not drained properly, and frying tends to be higher in fat and calories. However, if done right, frying can give you the crispiest, most authentic chips.
Seasoning the Chips for Extra Flavor
After the chips are cooked, it’s important to season them while they’re still hot so the seasoning adheres well. Some classic seasoning options include:
- Sea Salt and Black Pepper: The simplest and most traditional seasoning.
- Smoked Paprika: Adds a smoky, savory flavor that complements the sweetness of the sweet potatoes or yuca.
- Garlic Powder or Onion Powder: These add an aromatic flavor to the chips.
- Herbs: Finely chopped fresh parsley, rosemary, or thyme can add freshness and complexity.
Common Mistakes to Avoid
- Overcrowding the Pan or Baking Sheet: This traps steam and prevents the chips from crisping up properly. Ensure that the chips are spread out evenly with some space between them.
- Not Drying the Chips Properly: After soaking, it’s critical to dry the chips thoroughly. Any excess moisture will cause the chips to steam instead of crisping up.
- Using Too Much Oil: While oil is necessary for crisping, using too much can result in greasy, soggy chips. A light coating is all that’s needed.
By following these tips and techniques, you’ll be able to achieve crispy, golden chips every time, whether you’re using sweet potatoes, yuca, or any other lectin-free alternatives. With the right preparation and cooking methods, you can enjoy a healthier version of fish and chips that’s free from sogginess and full of flavor!
Pairing with Lectin-Free Tartar Sauce or Vinegar
When serving Emmy Squared Pizza Margherita, choosing the right condiments can elevate the flavors and offer a delightful contrast to the richness of the pizza. For those following a lectin-free lifestyle, it’s essential to opt for condiments that complement the dish without including ingredients that are high in lectins. Here, we’ll explore two excellent options: lectin-free tartar sauce and vinegar.
Lectin-Free Tartar Sauce: A Creamy, Flavorful Complement
Traditional tartar sauce is typically made with mayonnaise, pickles, capers, and sometimes mustard or herbs. However, for a lectin-free version, we need to make sure all ingredients used avoid high-lectin components such as certain oils, grains, or legumes. Here’s how to create a simple and delicious lectin-free tartar sauce that pairs perfectly with Pizza Margherita:
Ingredients for Lectin-Free Tartar Sauce:
- Avocado oil mayo: A healthy, lectin-free alternative to regular mayonnaise.
- Dill pickles (homemade or pickles without added sugar or preservatives): The tangy and crunchy pickles bring that signature tartar flavor without lectins.
- Lemon juice: Adds a zesty freshness that complements the richness of the pizza.
- Fresh herbs (dill or parsley): For added brightness and flavor.
How to Make It:
- In a small bowl, mix avocado oil mayo with finely chopped dill pickles.
- Add a dash of lemon juice and finely chopped fresh dill.
- Stir until all ingredients are well-combined, and refrigerate for at least 30 minutes to let the flavors meld together.
This creamy tartar sauce will not overpower the delicate flavors of the Pizza Margherita but will add a touch of richness and brightness that enhances each bite. Plus, the tangy notes from the pickles and lemon balance well with the mozzarella and tomato sauce.
Vinegar: A Sharp and Tangy Contrast
For those who prefer something lighter and more tangy, pairing the pizza with a simple vinegar-based condiment is an excellent choice. Apple cider vinegar or white wine vinegar work wonderfully when drizzled lightly over the pizza or served as a dipping sauce on the side. Here’s why vinegar is an ideal pairing for Pizza Margherita:
- Acidity: The natural acidity of vinegar cuts through the richness of the mozzarella and pizza dough, refreshing your palate between bites.
- Freshness: A splash of apple cider vinegar or white wine vinegar adds a bright, crisp flavor that contrasts beautifully with the savory tomato sauce and slightly sweet notes from the basil.
- Digestive Benefits: Vinegar aids in digestion, which is especially helpful when enjoying a hearty meal like pizza.
How to Serve:
- Simply drizzle a small amount of apple cider vinegar or white wine vinegar over the pizza slices or use it as a dipping sauce.
- If you prefer a little extra flavor, you can infuse the vinegar with herbs like rosemary or oregano to tie it back to the pizza’s flavor profile.
Why These Pairings Work Well Together
Both the lectin-free tartar sauce and vinegar offer distinct contrasts to the flavors in Pizza Margherita:
- Tartar sauce adds creaminess and a mild tang, which works well with the pizza’s rich cheese and the deep flavors of the tomato sauce.
- Vinegar provides a sharp, refreshing bite that complements the pizza’s fresh ingredients, cutting through any heaviness and bringing a nice acidity to balance the cheese.
For those looking to keep their meal lectin-free, these options are both healthy and flavorful choices that enhance the overall dining experience without compromising on taste or nutrition.
Frequently Asked Questions (FAQ)
Can I Use Other Fish Types?
While Emmy Squared Pizza Margherita is a classic pizza recipe known for its Italian roots, pairing it with a variety of ingredients, including fish, can bring a new and exciting twist to this traditional dish. If you’re considering lectin-free fish and chips or a similar pairing with your pizza, you may wonder whether you can substitute the traditional fish types (like cod, haddock, or halibut) with other options. The answer is yes! You can absolutely use other fish types, as long as they align with your texture, flavor, and dietary preferences.
Here’s an in-depth look at different fish options that work well with your lectin-free pizza and why they are suitable:
1. Cod: A Mild and Flaky Option
Cod is the most traditional choice for many recipes like fish and chips. It’s a firm, white fish with a mild flavor that doesn’t overpower the other ingredients. Cod is perfect for achieving a crispy batter when paired with lectin-free batter alternatives like almond or coconut flour. If you like a light, flaky fish to complement the richness of your pizza, cod is a fantastic option.
Best For:
- A delicate, mild flavor that pairs well with strong, tangy flavors like the tomato sauce in Pizza Margherita.
- Light battering or frying as it holds its shape well.
2. Haddock: A Slightly Firmer Fish
Another excellent fish choice is haddock, which is slightly firmer than cod and has a subtle sweetness. Haddock is often used in traditional fish and chips recipes and works well when paired with lectin-free batter. The firmer texture allows it to stand up to frying and offers a richer bite compared to cod, making it a great option for those who prefer a more substantial fish in their dish.
Best For:
- A firmer texture that holds up well in a crispy batter.
- Those who prefer a fish with a slightly sweeter flavor.
- Pairing with lectin-free tartar sauce for added tanginess.
3. Halibut: A Meaty, Premium Fish
Halibut is a premium fish with a dense, meaty texture. It’s thicker and more robust than both cod and haddock, offering a more substantial bite that can serve as a hearty contrast to the lightness of the pizza. Halibut’s rich flavor makes it a great option for anyone looking for a more indulgent, filling fish option to accompany their Pizza Margherita.
Best For:
- Those who enjoy a thicker, meatier fish that holds its shape even when fried.
- Perfect for pairing with crispy fries or lectin-free sides.
4. Sole: A Delicate Fish with a Soft Texture
If you prefer a more delicate fish to balance the Pizza Margherita, sole is an excellent choice. This flatfish is known for its soft, mild flavor and delicate texture. Sole is perfect if you want a lighter option that won’t compete with the richness of the pizza’s cheese and sauce. This is especially useful when making a lectin-free fish and chips meal, as the subtle fish flavor won’t overpower the dish.
Best For:
- A light, melt-in-your-mouth fish option.
- Great for a delicate balance with the flavors of the pizza.
5. Tilapia: A Mild, Affordable Alternative
Tilapia is another mild-flavored fish that works well in lectin-free batter and is widely available and affordable. It has a slightly firmer texture than sole but still remains light and flaky when cooked. Tilapia is versatile and can be used in a variety of ways, whether baked, fried, or grilled. While it’s not as premium as halibut, tilapia is a great, budget-friendly choice for anyone looking to try different fish types.
Best For:
- Those looking for an affordable and easy-to-find fish.
- Great for families or those making a larger batch of lectin-free fish and chips.
How to Choose the Right Fish?
When selecting a fish type for your lectin-free pizza and chips, here are a few considerations:
- Texture: If you prefer a firmer, more substantial fish, go for halibut or haddock. For a lighter, more delicate option, try cod or sole.
- Flavor Profile: Consider how the flavor of the fish will complement the Pizza Margherita. Milder fish like cod and tilapia won’t overwhelm the pizza, while firmer, richer fish like halibut will add a meatier contrast.
- Sustainability: Always try to choose sustainably sourced fish to make your meal more eco-friendly.
Conclusion: A Variety of Fish for Your Perfect Pizza Margherita Pairing
You can certainly use other fish types in your lectin-free fish and chips to complement Pizza Margherita. Whether you choose the delicate sole, the firmer haddock, or the premium halibut, there’s a perfect fish for every preference. Experimenting with different types of fish will allow you to personalize your pizza meal, giving you the flexibility to create a unique and satisfying dish that fits your tastes and dietary needs.
Is This Recipe Gluten-Free?
One of the most common concerns when making or eating pizza, especially a classic Pizza Margherita, is whether the recipe contains gluten. For those following a gluten-free diet, it’s essential to modify the ingredients to ensure the dish remains safe and satisfying without compromising taste and texture.
When it comes to the lectin-free fish and chips paired with your Pizza Margherita, ensuring that it’s gluten-free can be easily achieved by focusing on a few key substitutions. Let’s break it down:
1. Gluten-Free Pizza Dough
Traditional pizza dough is made with wheat flour, which contains gluten. However, there are several excellent gluten-free flour alternatives that can be used to make the dough without sacrificing texture or flavor. Here are some common gluten-free flours you can use:
- Almond Flour: A popular choice for gluten-free pizza dough. It provides a slightly nutty flavor and a denser, richer texture.
- Coconut Flour: While it’s highly absorbent, when mixed with other gluten-free flours, it adds a lightness and subtle sweetness to the dough.
- Tapioca Starch: Often used in combination with other gluten-free flours, tapioca starch helps create a chewy texture and mimics the elasticity that gluten provides.
- Rice Flour: Frequently used in gluten-free pizza dough recipes, rice flour creates a tender, soft crust that’s easy to work with.
To make the dough, you would simply combine these gluten-free flours, along with baking powder (for leavening), water, and a little olive oil or avocado oil. The result is a soft, elastic dough that you can roll out and top with your delicious Pizza Margherita ingredients without worrying about gluten.
2. Gluten-Free Toppings and Sauces
For the pizza toppings, you won’t need to make any adjustments to the traditional ingredients like tomato sauce, mozzarella cheese, or fresh basil, as they are naturally gluten-free. Just be sure to avoid pre-made sauces that may contain hidden gluten in the form of stabilizers or thickeners. Opt for fresh, homemade tomato sauce made with San Marzano tomatoes, garlic, and olive oil, all of which are gluten-free.
Additionally, when making the lectin-free fish and chips to pair with your pizza, you should choose gluten-free flour for the batter. This ensures that even the fish, when battered and fried, remains free of gluten. Almond flour, coconut flour, or tapioca starch are excellent choices for a crispy, gluten-free batter.
3. Gluten-Free Fish and Chips
The fish itself is naturally gluten-free. However, the concern typically lies with the batter or breading used to coat the fish. Traditional fish and chips recipes often use wheat flour in the batter, which contains gluten. For a gluten-free alternative, you can make the batter using:
- Almond Flour: Provides a crispy texture when fried and doesn’t overpower the delicate flavor of the fish.
- Coconut Flour: A great option for creating a light, airy batter that is still crisp after frying.
- Tapioca Starch: Known for its ability to create an extra-crunchy coating on fried foods.
By using these gluten-free alternatives, you can ensure that your lectin-free fish and chips are completely safe for those avoiding gluten.
4. Cross-Contamination Considerations
For individuals with celiac disease or a severe gluten intolerance, cross-contamination can be a concern. To avoid this:
- Use dedicated gluten-free utensils, cutting boards, and pans to prepare the pizza dough and batter.
- Ensure that any pre-made ingredients, such as sauces or cheese, haven’t been exposed to gluten during production or storage.
- If using a shared oven, be cautious to avoid any contact between gluten-containing foods and your gluten-free pizza dough or fish batter.
5. Gluten-Free Side Options
If you’re looking for a gluten-free side to serve alongside your Pizza Margherita, consider making a fresh salad with a simple olive oil and lemon dressing, or roasted vegetables such as zucchini, bell peppers, or mushrooms. These sides naturally pair well with the flavors of the pizza and remain entirely gluten-free.
Conclusion: Yes, This Recipe Can Be Gluten-Free
The answer is yes! With a few key substitutions, this recipe for Pizza Margherita and lectin-free fish and chips can easily be made gluten-free. By using gluten-free flours for the pizza dough and batter, ensuring your sauces and toppings are naturally gluten-free, and being mindful of cross-contamination, you can enjoy a delicious, gluten-free meal that rivals the original without sacrificing flavor or texture.
By following these simple adjustments, you can recreate a restaurant-quality pizza at home while maintaining your gluten-free lifestyle.
What’s the Best Oil to Use?
When making lectin-free fish and chips or any fried dish, selecting the right cooking oil is crucial to ensure not only a great taste but also a healthier result. The type of oil you use can significantly impact both the flavor and the texture of the food, as well as the overall nutritional profile. Here’s an in-depth guide on the best oils to use for frying and cooking, specifically for lectin-free fish and chips paired with your Pizza Margherita.
1. Avocado Oil: A Healthy and Versatile Choice
Avocado oil is widely regarded as one of the best oils for frying, especially for those seeking a healthier alternative. It has a high smoke point of around 520°F (271°C), which makes it perfect for deep frying the fish and ensuring that your batter becomes crispy without breaking down or producing harmful compounds.
Benefits of Avocado Oil:
- High smoke point: The high smoke point means that avocado oil can handle the high temperatures required for frying without burning, ensuring that the fish remains crispy and golden without any bitter aftertaste.
- Rich in monounsaturated fats: These healthy fats are known for their heart-health benefits, and they help keep the dish light and nutritious.
- Mild flavor: The neutral taste of avocado oil allows the flavors of your fish and Pizza Margherita to shine through without being overwhelmed by the oil.
Best For:
- Deep frying fish for crispy results.
- Pairing with lectin-free batter as it provides a clean, mild flavor that doesn’t compete with the taste of the fish.
2. Coconut Oil: A Flavorful Option for Crispy Fish
Another great oil choice is coconut oil. It has a slightly lower smoke point of around 350°F (175°C) compared to avocado oil, so it’s better suited for shallow frying or medium-high heat frying. Despite this, coconut oil is still an excellent option for fish and chips because of its natural sweetness and crispiness when frying.
Benefits of Coconut Oil:
- Adds a subtle flavor: The slight coconut flavor adds a unique twist to your lectin-free fish and can complement the freshness of the pizza’s ingredients. However, if you prefer a neutral taste, opt for refined coconut oil, which has a more subtle flavor than virgin coconut oil.
- Rich in medium-chain triglycerides (MCTs): MCTs are known for their potential health benefits, including supporting brain health and providing a quick energy source.
- Crispy texture: Coconut oil is well known for its ability to produce an extra-crispy texture when frying, which is ideal for achieving that perfect golden crunch on your fish fillets.
Best For:
- Shallow frying or pan-frying fish.
- Those who enjoy a light coconut flavor or want extra crispiness.
3. Ghee (Clarified Butter): Rich and Flavorful
For those who enjoy a more indulgent and flavorful oil, ghee (clarified butter) is an excellent option. While ghee has a lower smoke point than avocado oil, it still holds up well for shallow frying and adds a richness that is hard to beat. Ghee is particularly popular in Indian cuisine but can be used to elevate the flavor of various dishes, including lectin-free fish and chips.
Benefits of Ghee:
- Rich, buttery flavor: Ghee provides a deep, rich flavor that complements fried foods beautifully. It adds a layer of indulgence to your fish and Pizza Margherita pairing.
- Lactose-free: Since the milk solids are removed during the clarification process, ghee is often considered safe for those with lactose sensitivities.
- High in butyrate: Ghee is rich in butyrate, a short-chain fatty acid that has been linked to various health benefits, including supporting gut health.
Best For:
- Pan-frying fish for a rich and flavorful result.
- Pairing with lectin-free batter to add depth to the dish.
4. Olive Oil: A Heart-Healthy Staple
Olive oil is another popular choice for cooking, especially when you’re making lectin-free fish and chips or other healthier dishes. It’s well-known for its heart-healthy monounsaturated fats and antioxidant properties. While extra virgin olive oil has a lower smoke point (around 375°F (190°C)), it’s still suitable for frying at moderate heat or for shallow frying.
Benefits of Olive Oil:
- Rich in antioxidants: Extra virgin olive oil contains polyphenols and other antioxidants that are beneficial for heart health and reducing inflammation.
- Mild flavor: The flavor is mild enough to not overpower the taste of your fish or the Pizza Margherita. However, olive oil does have a stronger taste compared to other neutral oils.
- Versatile and widely available: Olive oil is a pantry staple, making it easy to find and use when cooking various dishes.
Best For:
- Shallow frying at moderate heat.
- Drizzling over pizza or using in the pizza dough for added flavor.
5. Peanut Oil: A High Smoke Point Option
If you’re looking for an oil with an even higher smoke point than avocado oil, peanut oil could be a great choice. It has a smoke point of around 450°F (232°C), which makes it ideal for deep frying. It also has a neutral flavor, so it won’t interfere with the other tastes in your dish.
Benefits of Peanut Oil:
- High smoke point: Peanut oil is well-suited for deep frying, ensuring that the fish remains crispy and golden.
- Neutral flavor: It won’t add any strong or competing flavors to your dish, allowing the lectin-free fish and Pizza Margherita to shine.
- Affordable and easy to find: Peanut oil is widely available and is often less expensive than some other high-heat oils.
Best For:
- Deep frying at high heat.
- Frying in larger quantities if you’re preparing a big batch of lectin-free fish and chips.
6. Safflower Oil: A Light, Neutral Option
Safflower oil is a great option if you’re looking for a neutral-flavored oil with a high smoke point (about 450°F (232°C)). It’s similar to peanut oil in terms of versatility and heat tolerance but doesn’t have the nutty flavor that might interfere with the taste of your Pizza Margherita.
Benefits of Safflower Oil:
- Light and neutral flavor: This oil will not overpower the delicate flavors of your fried fish or pizza.
- High smoke point: Like avocado oil, safflower oil can withstand high frying temperatures without breaking down.
- Rich in monounsaturated fats: Safflower oil is heart-healthy, making it a great option for those looking to cook with healthier fats.
Best For:
- Deep frying fish or chips for a crispy, golden finish.
- Frying in high heat without adding flavor to the dish.
Conclusion: Choose the Right Oil for Your Dish
Choosing the right oil can make all the difference when preparing lectin-free fish and chips paired with your Pizza Margherita. Avocado oil and coconut oil are excellent choices for their high smoke points and health benefits, while ghee adds a rich, indulgent flavor. Olive oil provides a heart-healthy option for shallow frying, and peanut oil and safflower oil are great for high-heat cooking.
Ultimately, the best oil depends on your dietary preferences, desired flavor, and cooking method. By selecting the right oil, you can create a dish that’s not only lectin-free but also healthier and more flavorful.
Can I Make This Recipe Keto-Friendly?
If you’re following a keto diet, you’re likely aware of the need to minimize carbohydrate intake while maximizing fats and proteins. The good news is that you can easily make lectin-free fish and chips and Pizza Margherita keto-friendly with a few simple adjustments. By focusing on low-carb alternatives, you can enjoy a delicious and satisfying meal that fits perfectly within a keto lifestyle.
Here’s how you can adapt the recipe to make it keto-friendly while maintaining great flavor and texture:
1. Keto-Friendly Pizza Dough
Traditional pizza dough is made from wheat flour, which is high in carbohydrates, and isn’t suitable for a keto diet. However, there are many alternatives that can help you achieve the perfect Pizza Margherita crust without the carbs.
Keto Pizza Dough Options:
- Almond Flour: Almond flour is a popular choice for keto pizza dough due to its low carbohydrate content. It provides a slightly nutty flavor and a tender texture. When combined with eggs and mozzarella cheese, it creates a dough that holds together well and can be rolled out into a thin crust.
- Coconut Flour: Coconut flour is another low-carb option, but it’s highly absorbent, so you’ll need to use less of it and more wet ingredients like eggs or olive oil to keep the dough soft. It adds a subtle sweetness to the dough, which can complement the flavors of your Pizza Margherita.
- Flaxseed Meal: For a grain-free option, flaxseed meal can be used to create a thick, dough-like texture. It’s an excellent choice for those looking for a high-fiber, low-carb base.
By substituting wheat flour with one of these keto-friendly flours, you’ll create a crust that is low-carb, gluten-free, and deliciously satisfying.
2. Use Low-Carb Sauces
Traditional pizza sauce is typically made with tomatoes and a variety of seasonings, and it’s usually quite low in carbs. However, if you’re concerned about carbs, especially if you’re on a stricter version of the keto diet, you may want to opt for a homemade pizza sauce or a sugar-free store-bought alternative.
Making Keto-Friendly Pizza Sauce:
- Fresh Tomatoes: Use fresh or canned tomatoes without added sugars or preservatives. San Marzano tomatoes are often a great option for an authentic, low-carb pizza sauce.
- Herbs and Spices: Add fresh or dried herbs like basil, oregano, garlic, and a little olive oil to bring out rich flavor without adding any extra carbs.
Additionally, for those who are strictly watching their carb intake, be cautious with store-bought pizza sauces that might contain added sugars. Always check the ingredient label or make your own to ensure it stays keto-friendly.
3. Keto-Friendly Cheese
Most traditional pizza recipes use mozzarella cheese, which is naturally low-carb and high-fat, making it a perfect choice for a keto diet. If you’re using whole milk mozzarella, ensure that you select a high-quality cheese, as it will have more flavor and fewer added carbs.
For even more healthy fats, you can top your pizza with extra cheese (such as Parmesan, cheddar, or provolone) to make it even more keto-friendly. Just remember that cheese is calorie-dense, so while it’s great for the keto diet, keep portions in mind.
4. Keto-Friendly Fish and Chips
The traditional batter used for fish and chips often includes wheat flour, which is high in carbs and unsuitable for a keto diet. Fortunately, you can easily make a keto-friendly batter for your fish using low-carb flours or binding agents.
Keto-Friendly Fish Batter Options:
- Almond Flour: Almond flour works great as a low-carb substitute for wheat flour in the batter. It gives a crunchy texture and a slightly nutty flavor.
- Coconut Flour: Coconut flour can be used in combination with almond flour to create a light, crispy batter. However, you’ll need to use a bit less coconut flour due to its absorbent nature.
- Psyllium Husk: For extra texture and crispiness, psylium husk powder is an excellent addition. It’s low in carbs and adds a wonderful crispiness to fried dishes.
- Eggs: To bind the batter together and provide that crispy coating when fried, eggs are a necessity. They add no carbs and will help achieve the right consistency.
Additionally, the fish itself, such as cod, haddock, or halibut, is naturally low in carbs and high in protein and omega-3 fatty acids, making it an ideal protein choice for a keto meal.
5. Choose Keto-Friendly Oils for Frying
When frying the fish, you’ll want to use an oil with a high smoke point and a healthy fat profile. The following oils are excellent choices for making keto-friendly fish and chips:
- Avocado Oil: Avocado oil is high in monounsaturated fats and has a high smoke point, making it perfect for frying at high temperatures while retaining a neutral flavor.
- Coconut Oil: Coconut oil is rich in medium-chain triglycerides (MCTs), which are quickly used for energy, making it a great option for a keto-friendly frying oil.
- Ghee (Clarified Butter): Ghee provides a rich, buttery flavor while being lactose-free. It also has a high smoke point, making it ideal for frying.
These oils support keto goals by providing healthy fats and minimizing carb intake.
6. Keto-Friendly Side Dishes
While lectin-free fish and chips can easily be made keto-friendly, you’ll want to be mindful of the sides you serve with it. Instead of traditional potato chips, you can make a keto-friendly alternative using:
- Zucchini Fries: Slice zucchini into strips, coat them with a low-carb flour or seasoning mix, and bake or fry them for a crispy, low-carb alternative to traditional fries.
- Cauliflower Rice: If you’re looking for a light side to pair with the fish, cauliflower rice is a great keto-friendly option.
- Green Salad: A simple salad with mixed greens, avocado, and a low-carb dressing can help balance out the meal.
Conclusion: Yes, You Can Make It Keto-Friendly
The great news is that you can easily transform your lectin-free fish and chips and Pizza Margherita into a keto-friendly meal. By swapping out the high-carb pizza dough and batter with low-carb alternatives like almond flour, coconut flour, and psyllium husk, and choosing the right oils for frying, you can enjoy a delicious and satisfying meal that fits perfectly into a keto diet.
With these modifications, you’ll be able to savor a low-carb, high-fat dish that aligns with your dietary goals without missing out on flavor or texture. Enjoy your keto-friendly Pizza Margherita and lectin-free fish and chips guilt-free!