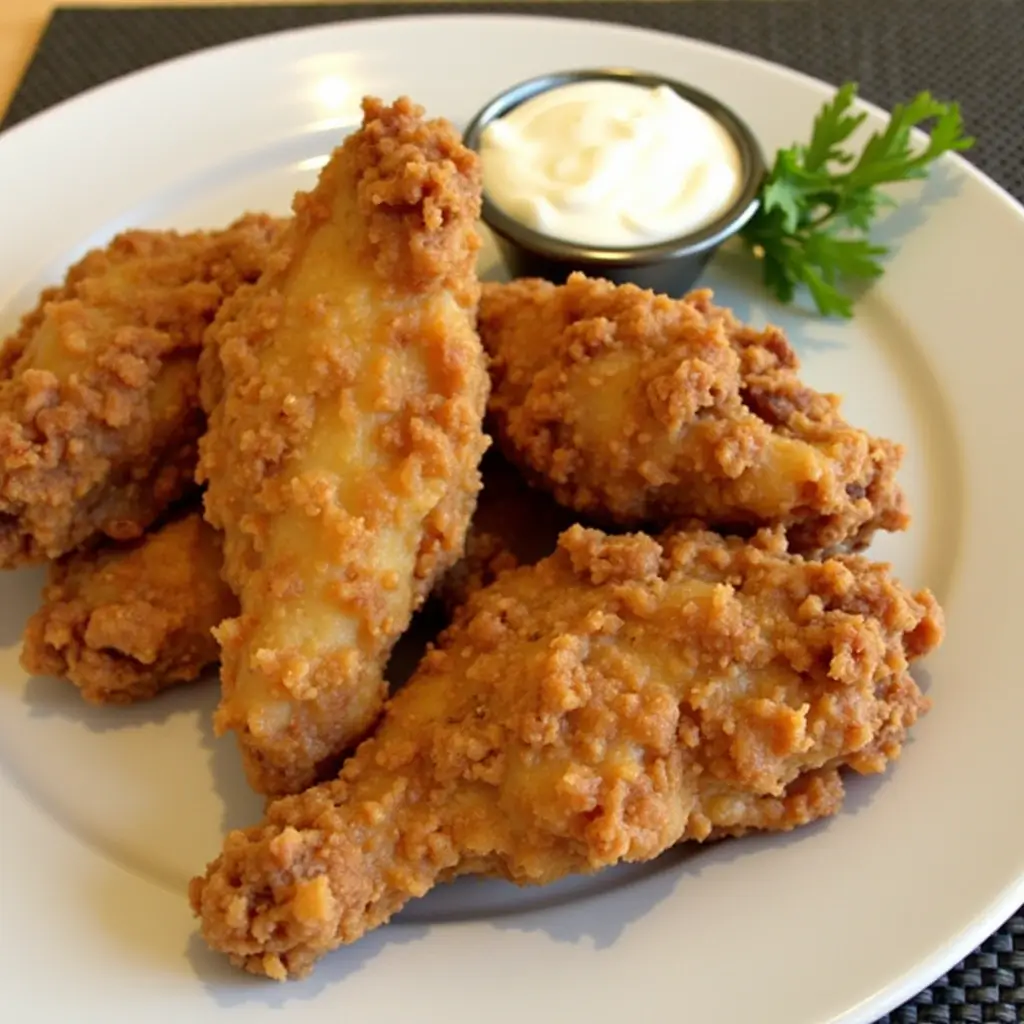
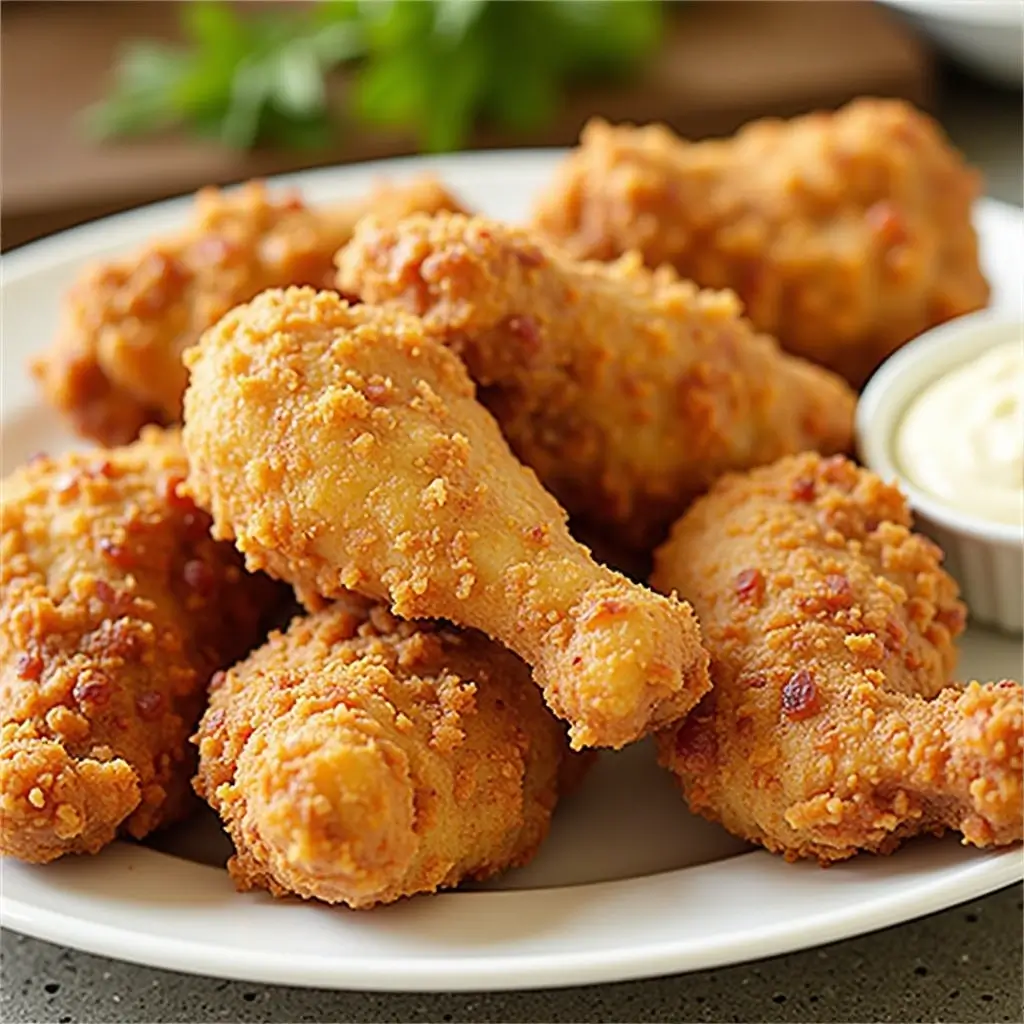
There’s nothing quite like biting into a piece of perfectly fried chicken—golden brown, irresistibly crispy on the outside, and juicy, tender on the inside. Whether you’re craving classic Southern-style fried chicken or looking for a foolproof method to get that crunchy, flavorful coating, this guide will show you how to achieve perfection every time.
In this post, we’ll cover the best ingredients, essential frying techniques, and expert tips to make sure your homemade fried chicken turns out just as good—if not better—than your favorite restaurant’s. From choosing the right chicken cuts to mastering the ideal frying temperature, get ready to cook up the best crispy, juicy fried chicken you’ve ever had!
Choosing the Right Chicken and Ingredients
Choosing the right cut of chicken is essential for making the best fried chicken. While you can technically fry any part of the chicken, some cuts offer better texture, flavor, and juiciness than others. Here’s a breakdown of the most popular cuts and how they affect your fried chicken experience.
1. Chicken Thighs – The Juiciest and Most Flavorful Choice
Chicken thighs are a favorite among fried chicken lovers because they contain more fat and connective tissue, which makes them incredibly juicy and flavorful after frying. Their dark meat is naturally more forgiving, meaning they are less likely to dry out during cooking.
🔹 Pros:
- Rich, deep flavor
- Stays moist and tender, even after frying
- Perfect for longer frying times without drying out
🔹 Cons:
- Can take slightly longer to cook than white meat
- Some people may prefer a leaner option
2. Chicken Drumsticks – Fun to Eat and Packed with Flavor
Drumsticks are another excellent choice because they are easy to hold, fun to eat, and full of flavor. The dark meat, like thighs, remains juicy even after deep-frying. Drumsticks also have more collagen and connective tissue, which makes them extra succulent when cooked properly.
🔹 Pros:
- Great for kids and casual dining
- Juicy, flavorful, and easy to fry
- Typically more affordable than other cuts
🔹 Cons:
- Requires a slightly longer cooking time due to the bone
- Uneven shape can make frying tricky if not cooked properly
3. Chicken Breasts – Lean and Crispy, But Can Be Tricky
Chicken breasts are leaner and contain less fat than thighs or drumsticks, making them a good option for those who prefer white meat. However, because of their lower fat content, they can dry out quickly if overcooked. To ensure juicy fried chicken breasts, consider using a buttermilk marinade or brining them beforehand.
🔹 Pros:
- Leaner and healthier option
- Large surface area for a super crispy crust
- Great for making fried chicken sandwiches
🔹 Cons:
- Can dry out easily if not cooked correctly
- Requires brining or marinating to retain moisture
Which Cut is Best for Fried Chicken?
For the juiciest, most flavorful fried chicken, chicken thighs and drumsticks are the best choices. They hold up well to frying and retain moisture beautifully. If you prefer a leaner option, chicken breasts can still work well, especially when brined or marinated beforehand.
No matter which cut you choose, the key to perfect fried chicken is using a well-seasoned batter, the right frying temperature, and proper cooking techniques to lock in moisture and maximize crispiness! 🍗🔥
Key Ingredients for Flavorful Chicken (Buttermilk, Flour, Cornstarch, Spices)
The secret to perfect fried chicken lies not just in the technique but also in the ingredients you use. A combination of tenderizing, coating, and seasoning creates that signature crispy, juicy, and flavorful bite. Here’s a detailed breakdown of the essential ingredients that will take your fried chicken to the next level.
1. Buttermilk – The Ultimate Tenderizer 🥛
One of the most important ingredients in making flavorful and juicy fried chicken is buttermilk. This tangy, slightly acidic dairy product helps tenderize the meat while adding a subtle richness to the flavor.
Why Buttermilk Works:
✅ Breaks down proteins in the chicken, making it extra tender
✅ Helps lock in moisture, preventing dry chicken
✅ Creates a sticky surface that helps the flour coating adhere better
Pro Tip:
For best results, let the chicken marinate in buttermilk for at least 4 hours, or preferably overnight. Adding a little hot sauce or pickle juice to the buttermilk marinade can enhance the flavor even more!
2. Flour – The Foundation of the Crispy Coating 🌾
Flour is the base ingredient in most fried chicken coatings, as it provides structure and helps create that golden-brown crust we all love.
Why Flour is Essential:
✅ Helps create a thick, crunchy coating
✅ Absorbs moisture, preventing sogginess
✅ Binds well with buttermilk for even breading
Best Type of Flour to Use:
- All-purpose flour is the most common choice as it provides the right balance of crispiness and lightness.
- For extra crunch, you can mix in a little rice flour or cornstarch (more on that below).
3. Cornstarch – The Secret to Extra Crispiness 🌽
Adding cornstarch to your flour mixture is a game-changer. It helps create a lighter, crunchier crust by reducing the gluten in the flour and absorbing excess moisture.
Why Cornstarch Makes a Difference:
✅ Produces an extra-crispy, airy texture
✅ Helps prevent a tough, chewy crust
✅ Works well with double-dredging for a thicker coating
Pro Tip:
Use a 50/50 mix of flour and cornstarch for super crispy fried chicken. If you want an even lighter coating, try using potato starch as an alternative!
4. Spices – The Key to Bold Flavor 🌶️🧄
The right blend of spices can turn a simple fried chicken recipe into an unforgettable dish. Seasoning the flour mixture and the buttermilk marinade ensures that every bite is packed with flavor.
Essential Spices for Fried Chicken:
✔ Salt & Black Pepper – The foundation of any good seasoning blend
✔ Paprika (Smoked or Sweet) – Adds a mild, smoky depth to the crust
✔ Garlic Powder & Onion Powder – Boosts savory umami flavors
✔ Cayenne Pepper or Chili Powder – For a hint of heat (adjust to taste)
✔ Dried Oregano or Thyme – Adds a subtle herby touch
✔ MSG or Chicken Bouillon Powder (Optional) – Enhances umami richness
Pro Tip:
For maximum flavor, season both the flour mixture AND the buttermilk marinade. This ensures that every layer of the chicken is packed with delicious seasoning!
Final Thoughts
The combination of buttermilk for tenderness, flour for structure, cornstarch for crispiness, and spices for bold flavor is what makes truly amazing fried chicken. When these ingredients are used correctly, you’ll get perfectly crispy, golden-brown fried chicken that’s juicy on the inside and packed with flavor in every bite.
Now that you’ve got the ingredient breakdown, let’s move on to the best frying techniques to achieve that restaurant-quality crunch! 🍗🔥
The Role of a Good Marinade (Brining vs. Buttermilk Soak for Juiciness)
A good marinade is the foundation of great fried chicken. It not only enhances flavor but also ensures that the chicken remains moist and juicy after frying. Two of the most effective marinades for fried chicken are brining and buttermilk soaking. While both methods help tenderize the meat and add flavor, they work in slightly different ways. Let’s explore the benefits of each and how to choose the best method for your fried chicken.
1. Brining – Locking in Moisture with a Salt Solution 🧂💦
Brining is a process where chicken is soaked in a saltwater solution (sometimes with added sugar and spices) for several hours before cooking. This method hydrates the meat, seasons it deeply, and prevents it from drying out during frying.
How Brining Works:
- Salt breaks down muscle fibers, making the meat tender and juicier.
- The liquid in the brine penetrates the chicken, adding moisture and preventing dryness.
- Additional seasonings (like garlic, herbs, or peppercorns) can infuse extra flavor.
Types of Brines:
✔ Wet Brine – A mixture of water, salt, sugar, and seasonings that fully submerges the chicken.
✔ Dry Brine – Rubbing the chicken with salt and spices and letting it rest uncovered in the fridge. This enhances flavor and crispiness since there’s no added liquid.
Best For:
- Those who want deep seasoning throughout the chicken
- Getting juicy, tender meat with simple ingredients
- Making extra crispy skin, especially with a dry brine
Brining Tip:
For best results, brine for at least 4 hours, but overnight is ideal. Do not over-brine (more than 24 hours) as the chicken may become too salty or mushy.
2. Buttermilk Soak – The Key to Tender and Flavorful Fried Chicken 🥛🍗
A buttermilk soak is one of the most popular methods for marinating fried chicken. Buttermilk contains natural acids and enzymes that help break down the chicken’s protein structure, making it super tender and flavorful while also enhancing the crust’s texture.
Why Buttermilk Works:
✅ Mild acidity gently tenderizes the meat without making it mushy.
✅ Adds flavor with its tangy richness.
✅ Helps the flour coating stick better, creating a crispier crust.
Best Buttermilk Marinade Additions:
- Hot Sauce or Pickle Juice – Adds tang and spice to balance the richness.
- Garlic Powder, Onion Powder, and Paprika – Infuses extra flavor into the chicken.
- Eggs (Optional) – Enhances the binding power of the buttermilk for an extra crunchy crust.
Best For:
- Those who want extra juicy, tender fried chicken
- Achieving a light, crispy coating that sticks well
- Southern-style fried chicken recipes
Buttermilk Soaking Tip:
For best results, let the chicken soak in buttermilk for at least 4 hours—but overnight is even better. This gives the buttermilk enough time to fully penetrate the meat for the juiciest results.
3. Brining vs. Buttermilk Soak: Which One is Best?
| Feature | Brining (Salt Solution) | Buttermilk Soak |
|---|---|---|
| Tenderizes Meat | ✅ Yes (through salt absorption) | ✅ Yes (through acidity) |
| Adds Moisture | ✅ Yes | ✅ Yes |
| Enhances Flavor | ✅ Yes (especially with spices) | ✅ Yes (rich, tangy flavor) |
| Creates a Crispy Coating | ❌ No (skin stays smooth) | ✅ Yes (coating sticks better) |
| Best For | Deep seasoning, extra juiciness | Crunchy, flavorful crust |
Both methods work well, but if you’re aiming for juicy, crispy fried chicken with a well-adhered crust, the buttermilk soak is the best option. However, if you want deeply seasoned meat without an additional coating, brining (especially dry brining) can be a great alternative.
Final Verdict:
- For traditional Southern-style fried chicken → Buttermilk soak is the way to go.
- For extra juicy, well-seasoned chicken (especially with no batter) → Brining is the better choice.
Now that you know the role of a good marinade, let’s move on to the best frying techniques to achieve the ultimate crispy fried chicken! 🍗🔥
Preparing the Chicken for the Perfect Texture
Marinating for Maximum Juiciness (Overnight Buttermilk Soak)
A key step in making crispy, juicy, and flavorful fried chicken is marinating the meat properly. The overnight buttermilk soak is one of the best techniques for achieving maximum tenderness and flavor. This method ensures the chicken stays moist on the inside while developing a beautifully crispy crust on the outside.
Let’s dive into why buttermilk marination works, how long to marinate, and the best ingredients to enhance the process.
1. Why Buttermilk is the Best Marinade for Fried Chicken 🥛
Buttermilk is a mildly acidic dairy product that plays a crucial role in tenderizing chicken without making it mushy. Unlike harsher acidic marinades (like vinegar or lemon juice), buttermilk gently breaks down proteins, resulting in soft, juicy meat that retains its structure.
How Buttermilk Works:
✅ Breaks down muscle fibers, making the chicken more tender
✅ Adds moisture, preventing dryness during frying
✅ Helps the flour coating adhere, creating a crispy and even crust
✅ Infuses flavor, especially when combined with spices
Many Southern-style fried chicken recipes rely on buttermilk marinades because they enhance the chicken’s natural flavor while ensuring a crisp, golden-brown crust.
2. How Long Should You Marinate in Buttermilk? ⏳
For best results, chicken should be soaked in buttermilk for at least 4 hours, but the ideal marination time is overnight (8-12 hours).
Marination Timeline:
✔ 30 minutes to 2 hours – Minimal impact, but some flavor absorption
✔ 4 to 6 hours – Good level of tenderness and moisture retention
✔ 8 to 12 hours (Overnight) – Best results with maximum juiciness
✔ More than 24 hours – Risk of meat becoming too soft or mushy
Pro Tip:
If you’re short on time, marinating for at least 4 hours will still yield great results. However, for the juiciest fried chicken, an overnight soak is highly recommended.
3. Enhancing the Buttermilk Marinade for Extra Flavor 🌶️
While plain buttermilk does a great job, adding spices and seasonings to the marinade can elevate the flavor of your fried chicken.
Best Ingredients to Add to Buttermilk Marinade:
✔ Salt & Black Pepper – Enhances the natural taste of the chicken
✔ Garlic Powder & Onion Powder – Adds savory depth
✔ Paprika (Smoked or Sweet) – Contributes mild spice and a hint of smokiness
✔ Cayenne Pepper or Hot Sauce – Gives a subtle heat (adjust to preference)
✔ Dried Herbs (Thyme, Oregano, or Rosemary) – Adds an herby aroma
✔ Pickle Juice or Mustard (Optional) – Adds tanginess and a unique depth of flavor
Pro Tip:
- If you like spicy fried chicken, add a few tablespoons of hot sauce to the buttermilk marinade.
- For a subtle tang, mix in a little pickle juice or lemon juice.
- Always season both the marinade and the flour coating for maximum flavor.
4. What Happens After Marination? (Prepping for Frying) 🍗🔥
Once the chicken has marinated overnight, it’s crucial to prepare it properly before frying to get the perfect crispy texture.
Steps After Marination:
- Remove chicken from the buttermilk marinade and let excess liquid drip off.
- Do not rinse the chicken – the marinade helps the coating stick.
- Dredge in seasoned flour or a flour-cornstarch mix to form a crispy crust.
- Let the coated chicken rest for 15-20 minutes before frying to help the coating set.
- Fry in hot oil (350°F/175°C) until golden brown and fully cooked.
Final Thoughts
Marinating your chicken in buttermilk overnight is one of the best ways to ensure a juicy, flavorful, and tender bite. The gentle acidity of buttermilk breaks down the meat just enough to make it succulent without being mushy.
By adding spices to the marinade and allowing enough time for it to penetrate the meat, you’ll create restaurant-quality fried chicken that’s crispy on the outside and incredibly juicy on the inside.
Now that your chicken is marinated to perfection, let’s move on to the best frying techniques to achieve that golden, crispy crunch! 🍗🔥
The Best Flour and Seasoning Mix (Flour, Cornstarch, and Spice Blends)
One of the most critical factors in achieving perfectly crispy and flavorful fried chicken is the coating. The right flour and seasoning mix not only provides a golden, crunchy crust but also enhances the overall taste. A combination of flour, cornstarch, and a well-balanced blend of spices ensures the ultimate texture and flavor in every bite.
Let’s break down the best ingredients to use and how to create the perfect flour coating for your fried chicken.
1. Why Flour is Essential for Fried Chicken 🌾
Flour forms the base of the crispy crust, giving fried chicken its signature crunch. When combined with seasonings and fried at the right temperature, it creates a golden-brown coating that’s crispy on the outside while locking in the chicken’s juiciness.
Best Type of Flour for Fried Chicken:
✔ All-Purpose Flour – The most commonly used flour for fried chicken, providing a sturdy, crispy texture.
✔ Self-Rising Flour – Contains a bit of baking powder, creating a lighter, airier crust with a slight puffiness.
2. The Secret Ingredient: Cornstarch for Extra Crispiness 🌽
Adding cornstarch to the flour mix is a game-changer. Cornstarch has a lower gluten content than flour, which prevents the crust from becoming too dense or chewy. Instead, it creates a light, shatteringly crisp texture similar to Korean fried chicken or tempura.
Best Flour-to-Cornstarch Ratio:
✔ 75% Flour + 25% Cornstarch (e.g., 3 cups flour + 1 cup cornstarch) – This enhances crunchiness while maintaining structure.
✔ 50% Flour + 50% Cornstarch – For an ultra-light and crispy texture, especially for extra-crunchy styles.
3. The Perfect Spice Blend for Flavorful Fried Chicken 🌶️🧂
A well-seasoned flour mix is the difference between bland fried chicken and irresistibly flavorful bites. Seasoning the coating ensures every layer of the chicken is infused with bold, delicious flavors.
Essential Spices for a Perfect Flour Mix:
✔ Salt & Black Pepper – The foundation of any great seasoning blend.
✔ Paprika (Smoked or Sweet) – Adds mild heat and a subtle smokiness.
✔ Garlic Powder & Onion Powder – Brings deep savory notes.
✔ Cayenne Pepper – Adds a spicy kick (adjust based on preference).
✔ Dried Herbs (Oregano, Thyme, or Basil) – Provides aromatic depth.
✔ White Pepper (Optional) – Brings a unique sharp heat.
✔ MSG (Optional) – Enhances umami and richness.
Optional Additions for Extra Flavor:
- Ground Mustard Powder – Adds a tangy depth.
- Celery Salt – Introduces a mild, herby saltiness.
- Brown Sugar – A touch of sweetness to balance flavors.
Pro Tip:
For restaurant-quality fried chicken, season both the flour mix AND the chicken itself before dredging. This ensures every bite is packed with flavor.
4. How to Properly Coat Chicken for the Best Crust 🍗
Achieving the perfect crispy crust depends on the technique you use when coating the chicken. Here’s the best way to do it:
Step-by-Step Coating Process:
- Remove Chicken from Marinade – Let excess buttermilk drip off.
- Dredge in Seasoned Flour Mix – Coat the chicken evenly, pressing the flour onto the surface.
- Double Dredging for Extra Crispiness:
- Dip the floured chicken back into buttermilk (or an egg wash).
- Coat it again in the flour mix for a thicker, crunchier crust.
- Let the Chicken Rest – Allow the coated chicken to sit for 10-15 minutes before frying. This helps the coating adhere better.
5. Pro Tips for the Crispiest Fried Chicken 🏆
✔ Sift the flour and cornstarch together to ensure an even coating.
✔ Use cold flour – Keeping the flour mix in the fridge before dredging can help create a crispier crust.
✔ Shake off excess flour – Too much flour can make the coating fall off in the fryer.
✔ Fry in hot oil (350°F/175°C) – The right temperature prevents soggy or greasy chicken.
Final Thoughts
The secret to perfect fried chicken lies in the right flour, cornstarch, and spice mix. A balanced blend of seasonings, combined with cornstarch for crispiness and proper dredging techniques, ensures that every bite is crunchy, juicy, and packed with flavor.
Now that you have the perfect flour and seasoning mix, let’s move on to the best frying techniques for achieving golden, crispy perfection! 🍗🔥
Double Dredging for Extra Crunch (How to Create a Thick, Crispy Coating)
Double dredging is a critical technique when it comes to making extra-crispy fried chicken. It’s a method that involves coating the chicken twice — once in a seasoned flour mixture, then again in either the same flour or an additional layer of wet batter. This results in a thicker, crunchier crust that locks in juiciness while adding a satisfying crunch with each bite.
Let’s explore why double dredging works so well and how to do it properly to achieve the ultimate crispy fried chicken.
1. Why Double Dredging Works for Extra Crunch 🏆
The process of double dredging essentially gives the chicken two layers of coating: a thinner first layer and a thicker second layer. Each layer of coating provides a different texture, helping to create a crunchier, thicker crust that holds up better during frying and enhances the chicken’s flavor.
How Double Dredging Enhances the Chicken:
✔ Creates a multi-layered, crispy exterior – The first layer sticks to the chicken, and the second layer forms an even thicker crust that crisps up beautifully.
✔ Traps moisture inside – The extra layers help seal in the chicken’s juiciness, making the inside tender and moist.
✔ Improves the visual appeal – Double dredging gives the chicken a uniform, golden-brown appearance, adding to the overall presentation.
2. The Double Dredging Process: Step-by-Step 🔄
Here’s how to properly double dredge chicken to achieve that perfect crispy coating:
Step 1: Prepare Your Dredging Stations
You’ll need two separate bowls or shallow pans for the dredging process:
- First Bowl (Flour Coating): This is where you’ll mix your flour, cornstarch, and seasonings.
- Second Bowl (Buttermilk or Egg Wash): A liquid medium (buttermilk or egg wash) helps the flour stick better.
Step 2: Dredge the Chicken in the Flour Mixture
- Remove the chicken from the marinade (buttermilk soak or brine). Let any excess liquid drip off.
- Coat the chicken in the seasoned flour mixture, pressing lightly to make sure the flour sticks to the surface. Shake off any excess. This is the first layer of coating.
Step 3: Dip the Chicken in Buttermilk or Egg Wash
- Dip the floured chicken into buttermilk or an egg wash (which may be mixed with a little water or milk). The liquid layer helps create a wet surface that will bind more flour to the chicken.
Step 4: Coat the Chicken Again in the Flour Mixture
- After dipping the chicken in the wet mixture, return it to the flour mixture for the second dredge.
- Coat the chicken thoroughly, pressing gently to ensure the flour sticks evenly. This step is key to forming the extra-thick crust.
Step 5: Rest the Chicken Before Frying
- Allow the dredged chicken to rest for about 10-15 minutes. This helps the coating set and adhere better. The rest period also allows the flour to absorb the moisture from the chicken, giving you a thicker, crunchier crust.
3. Double Dredging Tips for Maximum Crispiness 🌟
✔ Use a cold flour mixture – Keeping your flour and cornstarch mixture cold helps create a more crispy texture when fried. You can even chill the flour for a few minutes before dredging.
✔ Press the flour onto the chicken – When coating the chicken, make sure to press the flour into the meat to form a thick, solid layer that will crisp up during frying.
✔ Avoid over-wetting – When dipping in the buttermilk or egg wash, be careful not to make the coating too wet. Excess moisture will cause the coating to slide off during frying, leaving you with a soggy crust.
✔ Rest the chicken after dredging – Letting the dredged chicken rest for 10-15 minutes helps the coating set and prevents it from falling off during frying.
✔ Fry in small batches – Avoid overcrowding the fryer, as this can cause the oil temperature to drop and result in a soggy crust. Fry the chicken in small batches for optimal crispiness.
4. Variations of Double Dredging for Extra Texture 🧂
While the standard double dredging method is perfect for crispy fried chicken, you can get creative by adding extra layers or changing up the ingredients.
Add Cornmeal to the Dredging Mix
For a grittier texture and additional crunch, you can replace part of the flour with cornmeal. This creates a textured, golden crust that’s particularly popular in Southern fried chicken recipes.
Spiced Flour Mixture
In addition to the standard spices (paprika, garlic powder, cayenne), try adding crushed crackers, cornflakes, or potato chips to the flour mixture. These ingredients add an extra crunch and flavor depth.
5. Final Thoughts on Double Dredging for Crunchy Fried Chicken 🍗
Double dredging is a technique that takes a little more time and effort but is well worth it for the extra-thick, crispy coating that you get in the end. The method creates a layered, crunchy exterior that complements the juicy chicken inside, ensuring each bite is packed with flavor and texture.
By following the right steps, adding the perfect seasonings, and using the right frying temperature, you can easily master the art of double dredging and make fried chicken that’s crispy, flavorful, and completely irresistible!
Mastering the Frying Technique
Choosing the Right Oil for Frying (Peanut Oil vs. Vegetable Oil)
When it comes to frying chicken, choosing the right oil can significantly affect the flavor, texture, and overall quality of your fried chicken. Different oils have unique properties, and selecting the right one can help you achieve that crispy, golden crust while maintaining the juicy tenderness inside. Two of the most popular oils for frying chicken are peanut oil and vegetable oil, and each has its advantages and considerations. Let’s break down these two oils and help you decide which one is best for your fried chicken.
1. Peanut Oil: The Golden Standard for Fried Chicken 🥜
Peanut oil has long been favored by professional chefs for deep frying, and it’s widely known for its ability to produce crispy, golden fried chicken. This oil is derived from peanuts and has a high smoke point, making it ideal for high-temperature frying, which is essential for achieving that perfect, crispy exterior without burning the oil.
Benefits of Peanut Oil for Frying:
- High Smoke Point: Peanut oil has a smoke point of around 450°F (232°C), which means it can withstand the high temperatures required for frying chicken without breaking down. High heat ensures a crispier crust and helps seal in the chicken’s moisture.
- Mild Flavor: Peanut oil has a neutral flavor that doesn’t overpower the taste of the chicken or the seasonings, allowing the spices and the natural flavor of the chicken to shine through.
- Crispiness and Texture: The high-fat content in peanut oil contributes to an extra-crispy crust and helps maintain the chicken’s juiciness, giving it that perfect balance of crunch and tenderness.
Considerations When Using Peanut Oil:
- Allergies: Peanut oil is made from peanuts, so it’s essential to be cautious if anyone in your household or guests has a peanut allergy. While most peanut oils are refined and safe for people with peanut allergies, it’s best to confirm the type of peanut oil you’re using.
- Cost: Peanut oil tends to be more expensive than vegetable oil, which can be a consideration if you’re frying large batches.
2. Vegetable Oil: The Budget-Friendly Alternative 🌱
Vegetable oil is one of the most commonly used oils for frying due to its availability, cost-effectiveness, and versatility. It’s typically a blend of oils derived from soybeans, corn, or canola, and it has a relatively high smoke point, making it suitable for deep frying.
Benefits of Vegetable Oil for Frying:
- Moderate Smoke Point: Vegetable oil has a smoke point of around 400°F (204°C), which is high enough for frying chicken. Although it’s not as high as peanut oil, it still allows for crispy chicken without burning the oil.
- Affordable: Vegetable oil is typically less expensive than peanut oil, making it an accessible option if you need to fry large batches of chicken.
- Neutral Flavor: Like peanut oil, vegetable oil has a mild flavor that won’t interfere with the taste of the chicken. This allows the seasoning and natural chicken flavor to stand out.
Considerations When Using Vegetable Oil:
- Lower Smoke Point: While vegetable oil’s smoke point is still suitable for frying, it’s a bit lower than peanut oil’s, so it can start to break down slightly earlier in the frying process if the temperature isn’t closely monitored.
- Refinement Level: Some vegetable oils are highly refined and may lose some of the natural flavor profiles, which is usually not a concern, but it can affect the final product’s taste for those seeking a more robust flavor in their frying oil.
- Health Considerations: Depending on the type of vegetable oil used (e.g., soybean, corn), it can be higher in omega-6 fatty acids. While these are essential fats, consuming them in excess in comparison to omega-3 fatty acids can be less healthy if not balanced with other fats in your diet.
3. Comparison of Peanut Oil vs. Vegetable Oil for Frying Chicken 🥄
| Feature | Peanut Oil | Vegetable Oil |
|---|---|---|
| Smoke Point | 450°F (232°C) | 400°F (204°C) |
| Flavor | Mild, slightly nutty | Neutral |
| Texture | Produces a crisp, golden crust | Crisp crust, but slightly less crispy than peanut oil |
| Price | More expensive | More affordable |
| Health Considerations | Contains healthy monounsaturated fats | Contains omega-6 fatty acids (can be high in some types) |
| Best For | Professional-level frying, extra crispiness | Budget-friendly, home cooking |
| Allergen Warning | Potential for peanut allergies | Typically safe, but always check if blended with other oils |
4. Other Oil Options for Frying Chicken 🍳
While peanut oil and vegetable oil are the most common options, there are a few other oils you can consider based on your preferences:
- Canola Oil: A more affordable option with a moderate smoke point (around 400°F). It’s neutral in flavor and widely available.
- Sunflower Oil: Similar to vegetable oil, sunflower oil has a high smoke point and neutral flavor, making it a great option for frying.
- Avocado Oil: With a high smoke point of 520°F, avocado oil is a healthy option rich in monounsaturated fats. It’s also more expensive than vegetable or peanut oil but can provide a mild flavor with great crispiness.
- Lard or Duck Fat: For a more traditional or indulgent fry, lard or duck fat can provide an exceptionally crispy, rich flavor, although it may not be as neutral as peanut or vegetable oil.
5. Tips for Frying with Peanut Oil or Vegetable Oil 🌟
- Maintain the Right Frying Temperature: Whether you’re using peanut oil or vegetable oil, keep your oil temperature between 350-375°F (175-190°C) for the best results. Too low of a temperature can result in greasy chicken, while too high can cause burning.
- Don’t Overcrowd the Pan: Adding too many pieces of chicken at once can cause the oil temperature to drop, leading to soggy chicken. Fry in small batches to ensure even cooking and a crispy crust.
- Use a Thermometer: To maintain the ideal frying temperature, use a candy or frying thermometer to monitor the oil.
6. Conclusion: Which Oil Is Best for You?
Choosing the right oil for frying chicken ultimately comes down to your preferences and budget. If you’re looking for the ultimate crispy fried chicken with a neutral flavor and professional results, peanut oil is the way to go. However, if you’re frying chicken on a budget or just want a versatile option for everyday cooking, vegetable oil offers a great alternative with excellent results. Either way, both oils will deliver delicious, crispy fried chicken that’s sure to impress! 🍗
Perfect Frying Temperature (How to Maintain 325-350°F)
One of the most critical factors in frying chicken to perfection is maintaining the right frying temperature. Too low of a temperature can result in soggy, greasy chicken, while too high a temperature can burn the exterior before the inside cooks through. The ideal temperature range for frying chicken is between 325°F and 350°F (163°C – 177°C). Let’s explore why this range works, how to achieve and maintain it, and tips for getting that perfect crispy fried chicken every time.
1. Why 325°F to 350°F is the Sweet Spot for Frying Chicken 🕹️
Maintaining a consistent frying temperature within this range ensures that the chicken cooks through while forming a crispy, golden-brown crust. Here’s why it works so well:
Crisp, Golden Exterior:
At temperatures between 325°F and 350°F, the chicken’s breaded or battered coating will fry up to a crispy texture. If the oil is too cool, the chicken will absorb too much oil and become greasy instead of crispy. At higher temperatures (over 375°F), the outer coating will brown too quickly, creating a burnt exterior and leaving the inside undercooked.
Juicy Interior:
Frying at the right temperature helps to seal the moisture inside the chicken. The heat causes the proteins to contract, forming a crispy crust while trapping juices within. This results in tender, juicy chicken with a crispy, flavorful coating.
2. How to Achieve the Right Temperature for Frying 🍳
Maintaining a steady temperature is crucial for consistent results, and there are a few ways you can ensure that your oil stays within the 325°F to 350°F range.
Use a Deep-Frying Thermometer:
A deep-frying thermometer is an essential tool to monitor the temperature of the oil throughout the frying process. It provides accurate readings and helps you make necessary adjustments if the temperature fluctuates. Place the thermometer in the oil before heating it up, ensuring it’s submerged and not touching the bottom of the pan (this can cause inaccurate readings).
Preheat the Oil Slowly:
Start by preheating the oil gradually over medium heat. This allows the oil to heat evenly and reduces the risk of overheating. Once the oil reaches around 325°F, you can begin frying the chicken, and then check the temperature regularly to keep it within the range.
Use a Cast-Iron Skillet or Heavy Pot:
A cast-iron skillet or a heavy-bottomed pot retains heat more effectively and distributes it evenly. This makes it easier to maintain a consistent frying temperature, preventing hot spots that could cause burning or undercooked areas.
3. How to Maintain Consistent Temperature During Frying 🔥
Once you start frying your chicken, it’s important to maintain a consistent temperature throughout the process. Here are a few tips to help you do so:
Don’t Overcrowd the Pan:
Overcrowding the frying pan with too many chicken pieces at once can cause the oil temperature to drop dramatically. The cold chicken releases moisture into the oil, cooling it down. This results in a greasy, soggy coating and uneven cooking. Fry the chicken in small batches (3-4 pieces at a time) to maintain a stable temperature.
Adjust the Heat as Needed:
If you notice the oil temperature is rising above 350°F, reduce the heat to avoid burning the chicken. Conversely, if the temperature drops below 325°F, increase the heat slightly to bring the temperature back up. Keep an eye on the thermometer and adjust the burner to maintain a stable range.
Monitor Cooking Time Carefully:
Larger pieces of chicken, like bone-in thighs or drumsticks, require more time to cook compared to smaller cuts like boneless breasts or wings. As larger pieces cook, they may cause the oil temperature to drop. You may need to fry them for a longer period or cook in smaller batches to maintain the correct temperature. Keep checking the chicken for internal doneness (165°F inside) with a meat thermometer to ensure it’s cooked through.
4. Tips for Preventing Oil Temperature Fluctuations ⚖️
Here are additional tips for avoiding sudden temperature drops that can compromise your frying results:
Use Tongs, Not a Fork, to Flip Chicken:
Using a fork to flip the chicken can puncture the coating and release moisture, which can lower the oil temperature. Instead, use tongs to handle the chicken and avoid unnecessary loss of moisture.
Consider the Size of Your Frying Pan:
Frying in a smaller pan can make it harder to regulate temperature, as there’s less room for the oil to spread and recover heat quickly. Use a larger pot or skillet to give yourself more room and a more stable temperature.
5. What to Do if the Oil Gets Too Hot ⚠️
If the oil exceeds the ideal temperature range of 325°F to 350°F, it can result in burnt chicken with an unpleasant flavor. Here’s how to handle it:
- Remove the pan from the heat: Take the pan off the burner for a few minutes to allow the oil to cool down. You can also adjust the heat on the stove to lower the temperature.
- Turn down the heat: If you notice the oil getting too hot, reduce the heat on the stove. You can also add a little bit of cold oil to help bring the temperature down quickly.
6. Signs the Oil is the Right Temperature 👀
You can also check for visual or physical signs that the oil is ready for frying:
- Frying bubbles: When the chicken hits the oil, you should see a gentle sizzle and bubbles forming around the chicken. If the bubbles are too aggressive or violent, the oil may be too hot.
- Browning test: Drop a small piece of bread or batter into the oil. If it browns in 60 seconds, the oil is at the right temperature.
7. Conclusion: Maintaining the Perfect Frying Temperature for the Best Chicken 🍗
Achieving the perfect fried chicken requires precision and attention to detail, especially when it comes to temperature control. By using a thermometer, monitoring your oil, and avoiding overcrowding the pan, you’ll be able to consistently fry chicken at the perfect temperature range of 325°F to 350°F. This ensures a crispy, golden crust and a juicy interior, making your fried chicken a true masterpiece. With practice, you’ll become an expert at maintaining that ideal frying temperature, and your chicken will always turn out crispy, tender, and absolutely delicious!
Deep-Frying vs. Pan-Frying (Which Method Gives the Best Results?)
When it comes to frying chicken, choosing between deep-frying and pan-frying can make a significant difference in the final texture and flavor of the chicken. Both methods have their pros and cons, and each offers a unique approach to cooking fried chicken. Let’s break down both techniques to help you decide which one gives the best results for your fried chicken.
1. What is Deep-Frying? 🍳
Deep-frying involves immersing the chicken completely in hot oil. The oil should cover the chicken entirely, allowing it to cook evenly on all sides. This method requires a large pot or a deep fryer and typically uses vegetable oil, peanut oil, or canola oil due to their high smoking points.
Pros of Deep-Frying:
- Even Cooking: Deep-frying allows the chicken to cook evenly because it’s surrounded by hot oil. This promotes a uniform crispy crust and tender interior.
- Faster Cooking Time: Because the chicken is fully immersed in oil, it cooks faster than pan-frying. This can be a huge time-saver when preparing larger batches.
- Crispier Coating: The hot oil immediately seals the breading or batter, creating a crispy, golden crust. Deep-frying results in that perfect crunch that many crave in fried chicken.
Cons of Deep-Frying:
- Requires More Oil: Deep-frying requires a significant amount of oil, which can be wasteful if you don’t use it all. Also, the oil can get expensive, especially if you fry large quantities of chicken.
- Oil Temperature Management: Maintaining the correct frying temperature (around 350°F) can be challenging, especially with a large batch. If the oil cools down too much when you add the chicken, it can result in greasy, soggy chicken.
- Mess and Cleanup: Deep-frying can get messy. The oil splatters and the cleanup afterward can be time-consuming, particularly if you’re using a deep fryer.
2. What is Pan-Frying? 🍳
Pan-frying involves cooking the chicken in a smaller amount of hot oil, typically in a skillet or frying pan. The chicken is usually cooked in batches to ensure it doesn’t overcrowd the pan, and the oil is usually heated to about 350°F for optimal frying.
Pros of Pan-Frying:
- Less Oil Needed: Pan-frying uses less oil compared to deep-frying, making it a more cost-effective and less messy option. You only need enough oil to cover the bottom of the pan.
- Control Over Cooking: Since the chicken is not completely submerged in oil, it’s easier to control the browning and crisping of the chicken. You can monitor the chicken’s progress more closely and flip it for even cooking.
- Less Cleanup: Pan-frying is generally less messy than deep-frying because you’re using a smaller amount of oil. The cleanup is also easier, requiring just a skillet and a small amount of oil.
Cons of Pan-Frying:
- Longer Cooking Time: Because the chicken isn’t fully immersed in oil, the cooking time can be longer than deep-frying. You may also need to cook in smaller batches, which increases the overall cooking time.
- Risk of Uneven Cooking: With pan-frying, it’s harder to ensure even cooking on all sides of the chicken, especially for thicker cuts. You’ll need to flip the chicken more often, which can lead to uneven browning.
- Requires Attention: Pan-frying requires more attention and focus throughout the cooking process. You have to constantly monitor the oil temperature and the chicken’s progress, as the oil can cool down quickly when you add the chicken.
3. Which Method Gives the Best Results for Fried Chicken? 🤔
Texture and Crunch:
If you’re after a super crispy crust and a more uniform texture, deep-frying is generally the best choice. Since the chicken is fully submerged in oil, the heat surrounds the chicken evenly, ensuring that the breading or batter crisps up quickly. Pan-frying, on the other hand, can still give you a crispy exterior, but it might not be as consistently crunchy as deep-fried chicken, especially for larger pieces.
Juiciness and Tenderness:
Deep-frying tends to lock in moisture more effectively, ensuring that the chicken stays tender and juicy inside. The hot oil creates a barrier that helps to keep the chicken’s natural juices intact. Pan-frying can also yield juicy chicken, but it might require more attention to avoid overcooking, as it’s easier for the meat to dry out when only partially submerged in oil.
Flavor:
Both methods can result in deliciously flavorful fried chicken, but deep-frying often has an advantage when it comes to flavor absorption. The oil helps to crisp and seal in the flavors from your seasoned flour or batter. However, pan-frying can also impart a slightly richer flavor, especially if you’re using butter or lard, which can add depth to the chicken’s exterior.
Control and Ease:
If you’re looking for more control over the frying process and don’t mind spending extra time on each piece of chicken, pan-frying is a solid choice. You have more control over the cooking process, and there’s less risk of the oil overheating. If you’re cooking for a crowd or want a more hands-off approach, deep-frying is the better method, as it allows you to cook larger batches quickly.
4. Which Method is Better for You? 🏆
Ultimately, the choice between deep-frying and pan-frying comes down to your preferences and cooking needs:
- Choose Deep-Frying if you want a crispier, quicker fry with a more uniform texture. It’s also the preferred method for making large batches of fried chicken.
- Choose Pan-Frying if you prefer a simpler, more cost-effective method with less cleanup. It’s a great option for smaller batches of fried chicken, especially if you’re looking to maintain a bit more control over the cooking process.
Both methods can give you great results, so it’s worth trying each one and experimenting with different techniques to see which one suits your tastes and kitchen setup best.
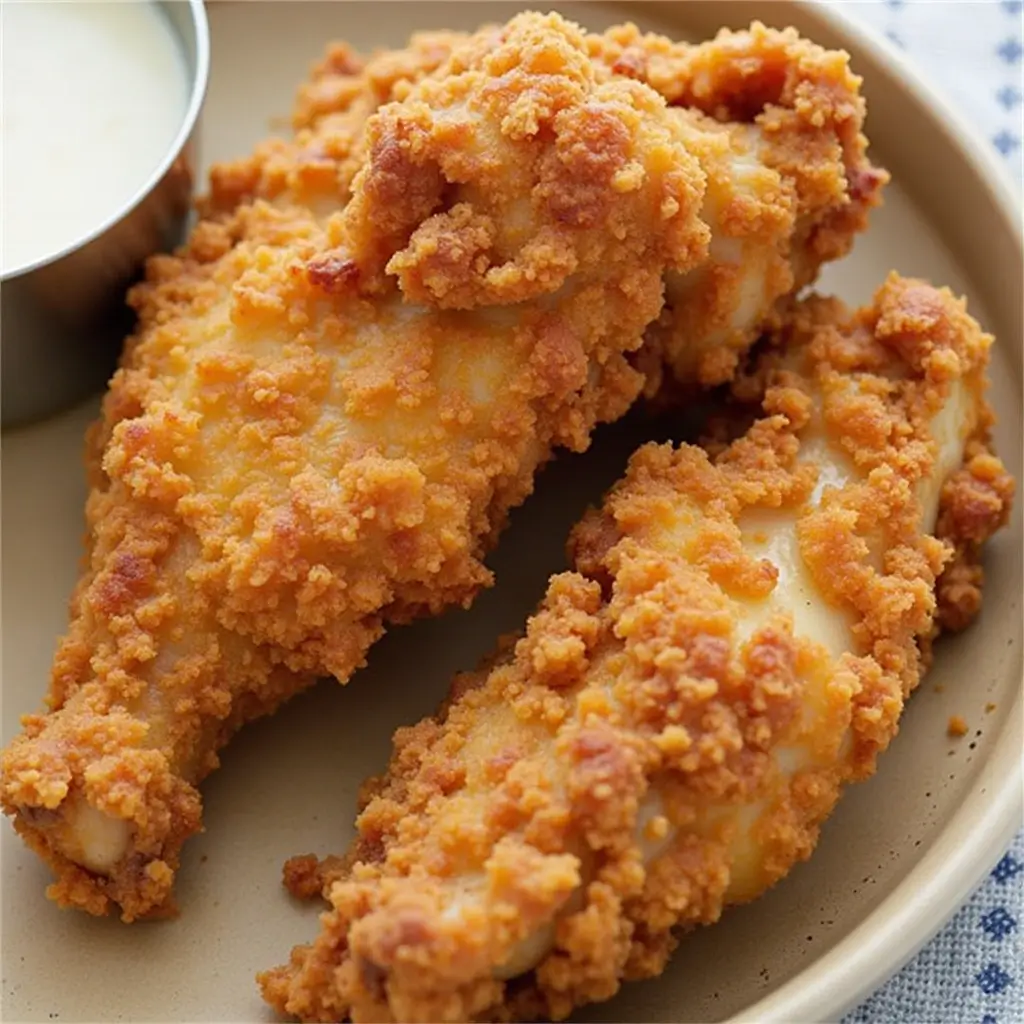
How to Avoid Soggy Fried Chicken (Draining on a Wire Rack, Not Paper Towels)
When you’ve put in the effort to make crispy, juicy fried chicken, the last thing you want is for it to turn soggy before you serve it. The secret to keeping your fried chicken crispy and fresh lies in the way you drain it after frying. Although it may seem tempting to drain your chicken on paper towels, doing so can lead to soggy chicken by trapping moisture in the crust. The best solution is to drain your chicken on a wire rack. Let’s dive deeper into why this method works and how to use it for the crispiest results.
1. Why Draining on Paper Towels Leads to Soggy Chicken
Paper towels may seem like a quick and easy solution to absorb excess oil, but they can actually cause more harm than good when it comes to fried chicken. Here’s why:
- Moisture Trapping: When you place fried chicken on paper towels, the steam and residual oil from the chicken are absorbed by the paper. However, the steam doesn’t have a place to escape, causing the chicken to sweat and moisture to accumulate on the crispy coating.
- Crust Softening: As the fried chicken sits on paper towels, the heat and moisture in the chicken can start to soften the crispy coating. The longer it sits, the soggier the crust becomes.
- Uneven Drainage: Paper towels may absorb oil, but they don’t allow air circulation around the chicken, which means moisture can remain trapped against the coating, preventing it from staying crisp.
2. The Benefits of Draining on a Wire Rack
To avoid soggy fried chicken, the best option is to drain your chicken on a wire rack placed over a baking sheet or a tray. This method allows the chicken to maintain its crispy texture for longer and here’s why:
Air Circulation 🌬️
- A wire rack allows air to circulate around the entire chicken, including the underside. This is crucial because it ensures that moisture doesn’t get trapped against the crust. As the chicken sits on the rack, steam can escape, and the coating remains crispy.
Even Oil Draining 💧
- Unlike paper towels, a wire rack lets the excess oil drip off completely. This prevents the chicken from sitting in its own oil and helps maintain the crispness of the crust. The oil that drips away also helps to avoid the greasy, soggy texture that paper towels can leave behind.
Maintains Texture for Longer ⏳
- Draining on a wire rack allows the chicken to stay crispy for a longer period of time. The crispy exterior stays intact, and the chicken remains hot without becoming mushy or greasy.
3. How to Set Up a Wire Rack for Draining Fried Chicken
Setting up a wire rack for draining is incredibly simple, and the results are worth it. Here’s how to do it:
Materials Needed:
- Wire rack: Choose a cooling rack or any rack that has small openings to let the air circulate. It should be large enough to hold the pieces of fried chicken without overcrowding.
- Baking sheet or tray: A tray or baking sheet should be placed under the wire rack to catch any excess oil that drips off the chicken.
Steps for Draining Fried Chicken on a Wire Rack:
- Preheat the oven (optional): To ensure that your fried chicken stays warm and crispy, you can place the wire rack with chicken in the oven at a low temperature (around 200°F or 90°C) while you continue frying. This will keep the chicken hot without causing it to lose its crispness.
- Place the wire rack over the baking sheet: Set the wire rack over a baking sheet or tray to catch any oil that drips off the chicken.
- Carefully place the fried chicken on the rack: Once your fried chicken is done, gently transfer each piece onto the wire rack. Make sure not to overcrowd the chicken, as air circulation is key for crispness.
- Let the chicken rest: Allow the chicken to rest for a few minutes on the wire rack. This lets the excess oil drip off while the steam escapes, leaving the coating crispy.
4. Additional Tips for Keeping Fried Chicken Crispy
While draining on a wire rack is a great way to prevent sogginess, there are other tips you can use to keep your fried chicken as crispy as possible:
Serve Immediately or Keep Warm: 🍽️
- Fried chicken is best enjoyed hot and fresh. If you’re making a large batch, keep the chicken warm by placing it in the oven on the wire rack at a low temperature. This keeps the chicken at an ideal temperature without sacrificing the crispiness.
Use a Paper Towel on the Bottom (Optional):
- If you still want to absorb a little excess oil from the chicken, you can place paper towels on the tray underneath the wire rack. The towel will absorb some of the oil, but because it’s not in direct contact with the chicken, the crust will stay crispy.
Avoid Overcrowding the Frying Pan:
- Overcrowding the pan during frying can cause the oil temperature to drop, leading to greasy and soggy chicken. Fry the chicken in batches, giving each piece enough space to cook evenly and maintain the crisp coating.
5. Can You Use Paper Towels for Draining?
While it’s best to use a wire rack, there are instances where you might not have one on hand. If you have to use paper towels, here are a few tips to minimize sogginess:
- Only use a small number of paper towels: If you have no choice but to use paper towels, make sure to change them out regularly as they become saturated with oil.
- Don’t stack the chicken: Place each piece of chicken separately, so the steam can escape and the chicken isn’t sitting in its own moisture.
Conclusion: Keep Your Fried Chicken Crispy with a Wire Rack
To avoid soggy fried chicken, the key is allowing the fried pieces to drain properly while keeping air circulation in mind. By using a wire rack instead of paper towels, you give your chicken the best chance to stay crispy and delicious. Not only does this simple technique enhance the texture of your fried chicken, but it also ensures that you get that satisfying crunch with every bite. So next time you fry chicken, remember to skip the paper towels and use a wire rack for the crispiest fried chicken you’ve ever had!
Serving and Pairing Your Fried Chicken
Best Side Dishes for Fried Chicken (Mashed Potatoes, Coleslaw, Biscuits)
Fried chicken is undeniably a meal on its own, with its crispy exterior, juicy interior, and savory flavor. However, to elevate the dining experience, it’s always a good idea to pair it with the right side dishes. The best sides complement the crispy texture and bold flavors of fried chicken while offering contrast in texture and flavor. Here’s a deeper look at some of the best side dishes to serve with fried chicken:
1. Creamy Mashed Potatoes: A Classic Comfort Food
Mashed potatoes are a classic comfort food, making them a perfect side to accompany fried chicken. Their smooth, velvety texture and mild flavor provide a great balance to the crispy, seasoned chicken. Here’s why mashed potatoes make such a great side dish:
Why They Pair Well with Fried Chicken:
- Contrast in Texture: The creamy, soft texture of mashed potatoes is the perfect foil to the crunchy texture of fried chicken. When you take a bite of mashed potatoes, it contrasts nicely with the crispy chicken skin, creating a delightful combination of textures.
- Rich and Comforting Flavor: Mashed potatoes are traditionally made with butter, cream, and sometimes garlic, which add a rich, comforting flavor that complements the savory taste of the chicken. The buttery potatoes also provide a mild flavor that doesn’t overpower the chicken.
- Versatility: Mashed potatoes are versatile enough to pair with a variety of gravy options, from classic chicken gravy to rich, mushroom-based gravies or even white cream gravy, which can further enhance the flavor profile of your meal.
How to Make the Best Mashed Potatoes:
- Use Yukon Gold potatoes for a buttery texture and flavor.
- For extra creaminess, add sour cream or cream cheese to your mashed potatoes.
- Don’t forget to season well with salt and pepper, and finish with fresh chopped herbs like parsley for a burst of color and flavor.
2. Refreshing Coleslaw: A Crunchy and Tangy Contrast
Coleslaw is another essential side dish that pairs perfectly with fried chicken. Its crisp texture and tangy flavor provide an excellent contrast to the richness of fried chicken. Coleslaw adds a refreshing element to the meal, helping to cut through the oiliness of the fried chicken and balancing out the flavors.
Why It Works with Fried Chicken:
- Crunchy Texture: Coleslaw, often made with shredded cabbage and carrots, offers a crunchy, fresh texture that contrasts nicely with the crispy chicken. This crunchy bite helps balance the dense, crispy nature of fried chicken.
- Tangy and Creamy Flavor: Coleslaw is typically dressed in a creamy base made from mayonnaise or sour cream, with a splash of vinegar to add some acidity. This balance of creamy and tangy flavors cuts through the richness of the fried chicken, cleansing your palate between bites.
- Customization: You can experiment with different ingredients in coleslaw to add flavor and flair, such as adding apple slices for sweetness or spicy jalapeños for a kick. This flexibility allows you to tailor the coleslaw to your taste preferences.
How to Make the Best Coleslaw:
- For a crunchy base, shred your own cabbage instead of buying pre-shredded bags for a fresher texture.
- Add a balance of vinegar and sugar to achieve the perfect sweet and tangy balance.
- For extra creaminess, mix in a dollop of Greek yogurt with the mayo.
- Add chopped green onions, parsley, or even a sprinkle of celery seeds for extra flavor.
3. Fluffy Biscuits: A Soft and Buttery Addition
Biscuits are another staple that pairs beautifully with fried chicken, especially in Southern cooking. Their flaky, buttery texture adds a comforting element to the meal while providing a neutral base that complements the rich flavors of fried chicken.
Why Biscuits Are a Great Side:
- Light and Fluffy Texture: The soft, fluffy texture of a biscuit is the perfect contrast to the crunchy fried chicken. It offers a break from the heaviness of the chicken while still being satisfying.
- Buttery Flavor: Biscuits are typically made with plenty of butter, which adds richness and flavor that pairs wonderfully with fried chicken.
- Dips and Sauces: Biscuits are also excellent for soaking up any extra gravy, chicken drippings, or hot sauce from your fried chicken, making them a delicious accompaniment.
How to Make the Best Biscuits:
- Cold butter is key to achieving flaky, tender biscuits. Make sure your butter is cold and cut into small cubes before incorporating it into the flour mixture.
- Buttermilk adds flavor and tenderness, so make sure to use it to create a softer, fluffier texture.
- Don’t overmix the dough—gently fold it together to maintain air pockets that will create the biscuit’s signature fluffiness.
- Serve the biscuits warm, and consider brushing them with a little melted butter or honey for an added touch of indulgence.
4. Creamed Corn: Sweet, Savory, and Creamy
Creamed corn is a Southern favorite that pairs wonderfully with fried chicken. It combines the natural sweetness of corn with a rich, creamy texture, offering a sweet contrast to the savory fried chicken. The creamy sauce also complements the crispy crust, adding a rich, comforting element to the meal.
Why It Complements Fried Chicken:
- Sweetness and Creaminess: The sweetness of the corn contrasts with the salty, savory fried chicken, while the creamy sauce adds richness to balance out the meal.
- Great Texture: The corn kernels retain a bit of bite, providing texture, while the creamy sauce makes every bite indulgent and satisfying.
How to Make the Best Creamed Corn:
- Start with fresh corn kernels or high-quality frozen corn for the best flavor and texture.
- For the creamy base, combine heavy cream with butter and a touch of flour to thicken it up.
- Add salt, pepper, and a pinch of sugar to bring out the natural sweetness of the corn.
5. Collard Greens: A Flavorful and Nutritious Side
For a nutrient-packed and flavorful side, consider adding collard greens to your fried chicken meal. This Southern favorite adds a bit of earthiness and flavor complexity, offering a nice balance to the richness of fried chicken.
Why They Pair Well with Fried Chicken:
- Earthy and Bitter Notes: The slightly bitter and earthy flavor of collard greens adds complexity to the meal, helping to balance out the fried chicken’s richness.
- Nutrient Boost: Collard greens are packed with nutrients, providing a healthy contrast to the indulgent fried chicken.
- Flavor Absorption: Collard greens often absorb the savory flavors of the seasonings and cooking liquids, making them a deliciously flavorful complement to fried chicken.
How to Make the Best Collard Greens:
- Cook your collard greens low and slow in a mixture of chicken broth, onion, and garlic for the best flavor.
- Use a smoked ham hock or bacon to add depth and smokiness to the greens.
- Season with apple cider vinegar for a touch of tanginess, which enhances the flavor of the greens and balances the richness of the chicken.
Conclusion: The Perfect Sides for Fried Chicken
Fried chicken is delicious on its own, but pairing it with the right sides elevates the meal to something truly special. Whether you prefer the creamy comfort of mashed potatoes, the crunch of coleslaw, or the richness of biscuits, the sides you choose can bring out the best in your fried chicken. By adding a variety of textures and flavors—like creamy, tangy, and buttery—you create a well-rounded meal that everyone will enjoy.
Dipping Sauces That Enhance Flavor (Honey Mustard, Spicy Mayo, BBQ Sauce)
One of the best ways to elevate your fried chicken experience is by pairing it with the right dipping sauces. While the crispy, juicy chicken already packs a punch in flavor, dipping sauces offer a new dimension to your meal, providing additional richness, tang, and even heat. Whether you’re hosting a casual meal or looking to add extra flavor variety, here’s a breakdown of some of the most popular and delicious dipping sauces that will enhance your fried chicken.
1. Honey Mustard: A Sweet and Tangy Delight
Honey mustard is a fan-favorite sauce that strikes a perfect balance between sweetness and tanginess. Its smooth, creamy texture and bold flavor make it a versatile dipping sauce for fried chicken.
Why Honey Mustard Works Well:
- Sweet and Tangy Contrast: The honey adds a natural sweetness, while the mustard provides a slight tang and sharpness. This balance cuts through the richness of the fried chicken and complements its crispy, savory coating.
- Versatility: Honey mustard is sweet enough to pair with mild-flavored chicken pieces, but it also works well with spicy seasonings, creating a beautiful contrast between the heat of the chicken and the sweetness of the sauce.
- Texture: The creamy consistency of honey mustard allows it to coat the chicken perfectly, adding a luscious and smooth layer of flavor.
How to Make Honey Mustard Sauce:
- Basic Recipe: Combine equal parts honey and mustard (preferably Dijon or yellow mustard) in a bowl.
- Creamy Touch: Add a spoonful of mayonnaise or Greek yogurt to give the sauce a creamy texture and mellow out the tanginess.
- Customize with Spices: For an added kick, mix in a dash of hot sauce or paprika to spice it up, or use garlic powder for depth of flavor.
2. Spicy Mayo: A Bold and Creamy Option
Spicy mayo has gained popularity as a dipping sauce for fried foods, and it’s easy to see why. With its creamy texture and heat-packed punch, it complements the crispy chicken beautifully, making it a go-to for those who love a little extra spice.
Why Spicy Mayo Works Well:
- Creamy with a Kick: The richness of the mayonnaise forms a creamy base, which is then kicked up with spicy elements like sriracha or hot sauce. The creaminess balances out the heat, creating a sauce that adds both depth and spice without overwhelming your taste buds.
- Flavor Layering: Spicy mayo adds a savory umami quality that enhances the fried chicken’s flavor, while the heat from the chili sauce builds with every bite. This makes it perfect for people who enjoy spicier food.
- Versatile Flavor: This sauce works with a variety of fried chicken preparations, from classic Southern fried chicken to Asian-style fried chicken, giving it a global appeal.
How to Make Spicy Mayo:
- Basic Recipe: In a bowl, mix mayonnaise with sriracha sauce or hot sauce to taste. Adjust the heat level based on your preference.
- Add Depth: For extra depth, you can stir in a bit of garlic powder or lemon juice for acidity.
- Creamy and Spicy: Add a little honey to balance the heat if you prefer a slightly sweet, spicy mayo that adds richness without being overwhelmingly hot.
3. BBQ Sauce: Smoky, Tangy, and Sweet
BBQ sauce is a quintessential dipping option for fried chicken, especially if you want to infuse your meal with a smoky, tangy flavor. Whether you prefer your BBQ sauce sweet, tangy, or spicy, there’s a BBQ sauce to match every taste preference.
Why BBQ Sauce Works Well:
- Smoky Flavor: BBQ sauce is often made with ingredients like smoked paprika, brown sugar, and vinegar, creating a complex flavor profile that enhances the savory fried chicken. The smokiness pairs particularly well with the deep-fried crust, adding an extra layer of flavor.
- Sweet and Tangy: BBQ sauces often have a sweet base from ingredients like molasses or honey, which balances out the acidity of vinegar. This sweetness complements the fried chicken, while the tanginess cuts through the richness of the crispy coating.
- Variety of Flavors: BBQ sauces can range from sweet and mild to tangy or even spicy, so you can choose a sauce that fits the flavor profile you’re going for. For example, a Kansas City-style BBQ sauce will be sweeter and thicker, while a vinegar-based Carolina BBQ sauce will have more acidity and heat.
How to Make BBQ Sauce:
- Basic Recipe: Mix together ketchup, apple cider vinegar, and brown sugar as a base. Add smoked paprika, garlic powder, and onion powder for depth.
- Adjust for Sweetness or Heat: If you like a sweeter BBQ sauce, increase the amount of brown sugar or honey. For heat, add cayenne pepper or chili flakes.
- Smokiness: To get a smoky flavor, add a few drops of liquid smoke or increase the amount of smoked paprika.
4. Ranch Dressing: Creamy and Cool
Ranch dressing is a creamy and mild dipping sauce that’s beloved for its cool, herby flavor. Its creamy texture and subtle tang make it a refreshing choice that pairs especially well with fried chicken.
Why Ranch Dressing Works Well:
- Creamy and Cooling: The creamy, cool texture of ranch dressing provides a refreshing contrast to the hot, crispy chicken. It also has a mild flavor that doesn’t overpower the chicken, making it a great option for those who prefer a lighter, less tangy dipping sauce.
- Herbaceous Flavor: Ranch dressing is often made with fresh herbs like dill, parsley, and chives, which add a savory, fresh element to the fried chicken. This herbiness complements the savory flavor of the chicken, while the creaminess enhances the overall mouthfeel.
- Neutral with a Zing: While mild, ranch dressing has a slight tang from buttermilk and vinegar, which gives it just enough zing to cut through the richness of the fried chicken.
How to Make Ranch Dressing:
- Basic Recipe: Mix mayonnaise, buttermilk, and sour cream for a creamy base. Season with garlic powder, onion powder, and fresh or dried herbs like dill and parsley.
- Adjust Consistency: If the dressing is too thick, thin it out with a little more buttermilk or milk.
- Add a Dash of Spice: To make it more flavorful, add a pinch of black pepper or hot sauce for an extra kick.
5. Garlic Parmesan Sauce: Rich and Savory
For a rich and savory dipping sauce that adds a gourmet touch to your fried chicken, try garlic parmesan sauce. This sauce combines the deep flavors of garlic with the rich, nutty taste of Parmesan cheese, creating a sauce that’s indulgent and irresistible.
Why Garlic Parmesan Sauce Works Well:
- Savory and Rich Flavor: The umami-rich Parmesan cheese pairs beautifully with the crispy fried chicken, while the garlic adds a robust, savory kick. This combination makes for a decadent and savory dipping experience.
- Perfect for Cheese Lovers: If you’re a cheese lover, garlic parmesan sauce is a dream come true. It adds a creamy, cheesy layer of flavor that works exceptionally well with fried chicken.
How to Make Garlic Parmesan Sauce:
- Basic Recipe: Melt butter and mix it with minced garlic and Parmesan cheese. Add cream or milk to make the sauce creamy and smooth.
- Seasoning: Season with black pepper, oregano, and a pinch of crushed red pepper for a subtle kick.
- Balance with Lemon: Add a squeeze of lemon juice to brighten the sauce and balance the richness.
Conclusion: Enhancing Fried Chicken with Dipping Sauces
While fried chicken on its own is a delicious treat, the right dipping sauces can take the flavor to new heights. Whether you prefer the sweet tang of honey mustard, the bold spice of spicy mayo, or the smoky goodness of BBQ sauce, there’s a sauce to suit every taste. These sauces provide a great balance to the crispy, juicy chicken, allowing you to tailor each bite to your own flavor preferences. Experiment with different sauces to find your perfect combination, and enjoy your fried chicken like never before!
Storing and Reheating Fried Chicken (Keeping It Crispy the Next Day)
One of the best things about fried chicken is its ability to provide delicious leftovers. However, maintaining that crispy, juicy texture the next day can be a challenge. If you’ve ever stored fried chicken and found it soggy or limp when reheated, you know how important it is to follow the right techniques. Here’s a detailed guide on how to store and reheat your fried chicken, so it stays just as crispy and flavorful as when it was first cooked.
1. How to Store Fried Chicken Properly
The way you store fried chicken directly affects how well it retains its texture and flavor. To prevent your fried chicken from getting soggy or losing its crispy coating, follow these steps:
Cool It Down Before Storing:
- Before storing your fried chicken, it’s crucial to let it cool to room temperature. If you place hot fried chicken in an airtight container or wrap it while it’s still steaming, the moisture can get trapped, making the crust soggy.
- Tip: Let your fried chicken rest on a wire rack to cool. The rack allows air to circulate around the chicken, preventing moisture from accumulating underneath, which helps preserve the crispiness.
Use Proper Containers:
- Once the fried chicken has cooled, place it in a storage container. It’s best to use a breathable container (like a paper bag or a container with vents) to ensure air circulation, which will help maintain the crispy crust. If you must use a plastic container, don’t seal it too tightly, as trapped moisture can ruin the texture.
- Tip: For short-term storage (up to 2 days), a paper towel-lined container can help absorb any excess moisture and keep the chicken crispier.
Refrigeration:
- Store your fried chicken in the fridge for up to 3 days. It’s essential to refrigerate the chicken as soon as it has cooled to prevent bacterial growth.
- Tip: Avoid freezing fried chicken for long-term storage, as freezing and thawing can cause the breading to become soggy once reheated.
2. How to Reheat Fried Chicken (Keeping It Crispy)
Reheating fried chicken can be tricky, as you want to warm it through without sacrificing the crispiness of the coating. The following methods ensure the best results for crispy, juicy fried chicken:
Oven Method: The Best Option for Crispiness
- Preheat your oven to 375°F (190°C). The oven is the best way to reheat fried chicken because it restores the crispy texture by circulating dry heat around the chicken.
- Place the chicken on a wire rack set on top of a baking sheet. The wire rack allows air to circulate around the chicken, ensuring that the heat reaches all sides without making the breading soggy.
- Bake for 10-15 minutes until the chicken is heated through and the coating is crispy again. If you’re reheating a lot of chicken, it may take a bit longer.
- Tip: For extra crispiness, you can spray a light coat of cooking oil or butter on the chicken before reheating, which will help the coating crisp up even more.
Skillet Method: Quick and Crispy
- If you’re short on time, reheating fried chicken in a skillet can quickly bring back some of its crispy goodness.
- Heat a couple of tablespoons of oil in a skillet over medium heat. Once the oil is hot, place the chicken in the skillet. Don’t overcrowd the pan; fry in batches if necessary.
- Fry for about 2-3 minutes on each side, turning the chicken until it’s heated through and the coating is crispy again.
- Tip: Use a cast-iron skillet if possible, as it retains heat better and helps achieve an even, crispy coating.
Air Fryer Method: Crispy and Quick
- If you have an air fryer, it’s a great tool for reheating fried chicken while keeping it crispy.
- Preheat the air fryer to 375°F (190°C), and place the chicken in a single layer in the basket.
- Air fry for 4-6 minutes, flipping halfway through. The hot circulating air will crisp up the breading while reheating the chicken evenly.
- Tip: Check the chicken every few minutes to ensure it doesn’t overcook. Depending on the size of the pieces, it may take more or less time.
3. Common Mistakes to Avoid When Reheating Fried Chicken
To keep your fried chicken as crispy as possible when reheating, here are some common mistakes you should avoid:
1. Reheating on Paper Towels
- While paper towels are great for absorbing moisture during storage, they’re not ideal for reheating. Placing your fried chicken directly on paper towels or wrapping it in them will trap moisture, making the crust soggy. Always use a wire rack when reheating to prevent this.
2. Microwaving (Avoid if Possible)
- Microwaving fried chicken is a big no-no if you want to retain its crispiness. The microwave heats food quickly by creating steam, which can make the coating soggy. If you must microwave it, wrap the chicken in a paper towel to absorb excess moisture, but be prepared for a less crispy result.
- Tip: If you’re in a hurry and need to use the microwave, try reheating it in short intervals (30 seconds) while checking the texture.
3. Overcrowding the Pan
- When reheating fried chicken in a skillet, avoid overcrowding the pan. If you place too many pieces of chicken in the skillet at once, the heat won’t circulate properly, and the coating may become soggy.
- Tip: Reheat in small batches to ensure that each piece gets its fair share of heat and stays crispy.
4. Freezing Fried Chicken (If Necessary)
If you have a lot of leftover fried chicken and want to keep it for a longer period, freezing it is a viable option. However, freezing can affect the texture, so it’s important to follow the right steps:
How to Freeze Fried Chicken:
- Let the chicken cool completely before freezing it. This prevents excess moisture from forming during freezing.
- Wrap each piece tightly in plastic wrap or foil, and place them in a freezer-safe zip-top bag or airtight container. Be sure to remove as much air as possible to avoid freezer burn.
- Freeze for up to 3 months. While freezing can impact the texture, it’s still a good option if you need to store it long-term.
How to Reheat Frozen Fried Chicken:
- Thaw the chicken overnight in the fridge before reheating. If you’re short on time, you can reheat it straight from the freezer, but it will take a bit longer.
- Use the oven or air fryer methods outlined above, and increase the reheating time by about 5-10 minutes to account for the frozen state.
Conclusion: Enjoying Your Fried Chicken the Next Day
Storing and reheating fried chicken is easy if you follow the right techniques. By allowing the chicken to cool properly before storing it, using the right containers, and choosing the best reheating methods like the oven, skillet, or air fryer, you can keep your fried chicken crispy and juicy. Whether you’re enjoying leftovers the next day or freezing it for a later date, these tips ensure your fried chicken remains just as delicious as the first time you made it.
Common Mistakes to Avoid for Perfect Fried Chicken
Using the Wrong Oil or Temperature (How to Prevent Greasy Chicken)
One of the most common mistakes when frying chicken is using the wrong oil or not maintaining the proper frying temperature. Both of these factors can lead to greasy, soggy chicken that lacks the crispy texture everyone loves. Let’s break down why oil and temperature are so important and how to avoid common mistakes to achieve the perfect fried chicken.
1. Choosing the Right Oil for Frying
Not all oils are created equal when it comes to frying chicken. Some oils have higher smoking points, while others may impart unwanted flavors. Choosing the right oil can make a huge difference in the final texture and flavor of your fried chicken.
Why Oil Type Matters
- High Smoke Point: When frying chicken, you need an oil that can withstand high heat without breaking down or burning. Oils with a high smoke point are ideal because they won’t impart a bitter or burnt flavor to your chicken.
- Flavor Considerations: Some oils, like olive oil, can impart strong flavors that may clash with the natural taste of the chicken. While this can be great for certain dishes, it’s usually not the best choice for classic fried chicken.
Recommended Oils for Frying
- Peanut Oil is widely considered the best option for frying chicken due to its high smoke point (around 450°F/232°C) and neutral flavor. It allows the chicken to cook at the perfect temperature without burning or adding unwanted taste.
- Vegetable Oil is another popular choice because it’s affordable and has a relatively high smoke point (around 400°F/204°C). It’s also flavor-neutral, which allows the seasoning and coating of the chicken to shine through.
- Canola Oil is also a good option, offering a high smoke point and light flavor, making it suitable for frying.
Why You Should Avoid Certain Oils
- Olive Oil has a lower smoke point, typically around 375°F (190°C), which makes it unsuitable for deep frying. Using it at high temperatures can result in a burnt taste and cause the oil to degrade quickly.
- Butter is not ideal for frying due to its low smoke point and tendency to burn. While it may add great flavor in small amounts, it should not be used as the main frying fat.
2. Maintaining the Correct Frying Temperature
One of the most critical factors in preventing greasy fried chicken is ensuring your oil stays at the correct temperature throughout the frying process. If the oil is too hot, the chicken can burn on the outside while remaining raw inside. If it’s too cold, the chicken will absorb too much oil and become greasy.
The Ideal Frying Temperature (325-350°F / 163-177°C)
- Why Temperature Matters: When frying chicken, the oil should be between 325-350°F (163-177°C). This temperature range allows the chicken to cook evenly, ensuring the coating gets crispy without overcooking or absorbing too much oil.
- Too Hot: If the oil is too hot (over 375°F/190°C), the coating may burn before the chicken is cooked through. Additionally, the outside may become too crispy while the inside remains undercooked. This can also result in a bitter taste from the burnt coating.
- Too Cold: If the oil is too cold (under 325°F/163°C), the chicken will absorb more oil, making it greasy and soggy. The breading won’t crisp up properly, and the chicken will become oily and heavy.
How to Monitor Oil Temperature
- Thermometer: The best way to monitor the oil temperature is by using a deep-fry thermometer. This will give you an accurate reading, ensuring you’re within the ideal frying range.
- Without a Thermometer: If you don’t have a thermometer, you can test the oil by dropping a small piece of bread or batter into the oil. If it browns in 60-90 seconds, the oil is at the right temperature. If it browns too quickly, the oil is too hot, and if it sinks to the bottom and takes a long time to brown, the oil is too cold.
3. Preventing Greasy Chicken
To achieve crispy, non-greasy fried chicken, it’s essential to maintain the right oil temperature and avoid certain pitfalls that can lead to sogginess.
Proper Frying Technique:
- Don’t Overcrowd the Pan: Placing too many pieces of chicken in the frying oil at once lowers the oil temperature, which leads to greasy chicken. Fry the chicken in batches, giving each piece enough room to cook properly and crisp up.
- Turn the Chicken Regularly: Flip the chicken pieces every few minutes to ensure they cook evenly and maintain the crispy coating.
- Drain on a Wire Rack: After frying, let the chicken rest on a wire rack, not paper towels. The wire rack allows excess oil to drip off, preventing the chicken from becoming soggy.
Avoiding Grease Absorption:
- Double Dredging: As mentioned earlier, double dredging the chicken in seasoned flour helps to form a thicker, crispier coating, which prevents excessive oil absorption during frying. A thicker crust also helps protect the chicken from soaking up too much oil.
- Use a Paper Towel Liner for Draining: If you don’t have a wire rack, you can use paper towels, but be sure to avoid stacking the chicken on top of each other. Doing so traps the steam, which can soften the coating and make it greasy. Lay each piece flat to help it cool and drain.
4. The Importance of Resting Fried Chicken
After frying, allow your chicken to rest for a few minutes. This step helps redistribute the juices inside the chicken, preventing them from leaking out and making the breading soggy. It also gives the coating time to set, ensuring it remains crispy.
Resting Time:
- Allow the chicken to rest for 5-10 minutes before serving. This will help the chicken retain its juiciness while ensuring the coating remains crisp.
- Tip: If you need to keep the chicken warm while it rests, place it on a wire rack in a preheated oven at 200°F (93°C).
5. Troubleshooting Common Problems
If you end up with greasy fried chicken despite following the steps above, here are a few common issues and solutions to consider:
- Problem: Chicken is greasy but not crispy.
- Solution: The oil was likely too cold. Try adjusting the temperature of the oil or using a thermometer to ensure you stay within the ideal range.
- Problem: The chicken’s crust is too thick and soggy.
- Solution: This could be a result of over-dredging or using too much flour. Try shaking off the excess flour and focusing on a lighter coating for a crispier texture.
- Problem: The chicken is overcooked on the outside but undercooked inside.
- Solution: The oil may have been too hot. Make sure to monitor the temperature closely and adjust as necessary.
Conclusion:
Using the right oil and maintaining the correct frying temperature is essential to achieving the perfect fried chicken. By choosing a high-smoke-point oil like peanut or vegetable oil and keeping the oil temperature between 325°F-350°F (163°C-177°C), you can avoid greasy chicken and achieve a crispy, flavorful result every time. Proper technique, including not overcrowding the pan and draining on a wire rack, will further help you maintain the ideal texture and avoid any sogginess. By mastering these elements, you’ll consistently make fried chicken that’s golden, crispy, and not greasy.
Skipping the Resting Step (Why Letting the Coating Set is Crucial)
One step that many people tend to overlook when making fried chicken is allowing it to rest after frying. While it may be tempting to dig right in, giving the chicken a few minutes to rest is essential for achieving the perfect crispy texture and juicy interior. Let’s dive into why resting is so important and how skipping this step can negatively affect your fried chicken.
1. Resting Helps Maintain Crispy Coating
When fried chicken comes out of the oil, it’s extremely hot, and the coating is still fragile. The outer layer can be too soft or greasy if you serve it immediately. Resting allows the chicken to cool down just enough for the coating to firm up and become truly crispy.
Why It Works:
- Steam and Moisture: During frying, the chicken’s surface is covered in hot oil, creating steam inside the meat. If you cut into the chicken right away, the steam will escape and can cause the coating to soften. By letting the chicken rest, the steam is allowed to escape slowly, which keeps the crispy texture intact.
- Coating Sets: As the chicken rests, the coating solidifies slightly, ensuring it stays intact when you bite into the chicken, rather than falling off in bits.
2. Resting Redistributes Juices
When you fry chicken, the heat causes the juices inside the chicken to move toward the surface. If you serve the chicken immediately after frying, cutting into it will cause the juices to spill out, leaving the meat dry. Resting allows the juices to redistribute evenly throughout the chicken, ensuring each bite is moist and flavorful.
Why It’s Crucial for Juiciness:
- Even Distribution: During the resting period, the hot interior of the chicken allows juices to move back into the meat, making sure it doesn’t dry out. This is especially important for lean cuts like chicken breasts, which can become dry if not properly rested.
- Prevents Juice Loss: If you cut into the chicken too soon, all the moisture that has moved to the surface is lost, leaving you with dry, tough meat. Resting helps retain those juices, providing a tender and flavorful eating experience.
3. Preventing Soggy Coating
One of the worst mistakes you can make when serving fried chicken is skipping the resting step and putting it directly on a plate. Placing the freshly fried chicken directly onto a surface or stacking it on top of itself traps the steam and moisture, causing the coating to soften and become soggy.
How Resting Prevents Sogginess:
- Wire Rack Resting: The ideal way to rest fried chicken is on a wire rack rather than on a plate or paper towels. A wire rack elevates the chicken, allowing air to circulate all around it and preventing the coating from getting soggy.
- Absorbing Excess Oil: During the resting time, excess oil continues to drain off, especially when placed on a rack. This further reduces the chances of soggy chicken and ensures that the fried coating stays crispy.
4. The Perfect Timing for Resting
The resting time doesn’t need to be long, but it’s essential for achieving the best results. Typically, 5-10 minutes of resting is sufficient. During this time, the chicken is still warm but cool enough to allow the coating to set and the juices to redistribute.
Resting Tips:
- Don’t Let It Rest Too Long: While resting is important, don’t leave the chicken to rest for too long, as it can cool down too much. If you’re concerned about keeping it warm, place the chicken on a wire rack in a low oven (around 200°F/93°C) to keep it at the perfect serving temperature while still allowing the coating to firm up.
- Resting for Large Batches: If you’re frying a large batch of chicken, be sure to rest each piece individually. If you stack the chicken, the heat and steam will be trapped, leading to soggy coating and uneven results.
5. Final Thoughts on Resting
Skipping the resting step might seem like a time-saving move, but it’s one of the most crucial parts of making fried chicken. By allowing the chicken to rest, you ensure that the coating becomes crispy, the meat stays juicy, and the flavor is preserved. It’s a simple step that can elevate the quality of your fried chicken and make sure every bite is as satisfying as the first. So, next time you’re frying chicken, remember to show a little patience and let it rest before serving for the ultimate crispy, juicy experience.
Overcrowding the Pan (How It Affects Crispiness and Cooking Time)
One of the most common mistakes when frying chicken (or any food) is overcrowding the pan. It might seem like a good idea to cook multiple pieces of chicken at once to save time, but overcrowding can actually lead to disappointing results, including soggy coating, uneven cooking, and longer cooking times. Let’s dive into why overcrowding the pan is problematic and how to avoid it for the best fried chicken.
1. Increased Cooking Time and Temperature Drop
When you overcrowd the frying pan, the amount of chicken in the oil can cause the temperature to drop significantly. The heat from the oil is absorbed by the chicken, and if there are too many pieces in the pan, the oil temperature can fall below the ideal frying range (325-350°F or 163-177°C). As a result, the chicken will take longer to cook, and the coating will not crisp up properly.
Why It Matters:
- Oil Temperature Drop: The ideal frying temperature is crucial for crispy fried chicken. When the temperature drops, the chicken starts to absorb more oil, making the coating greasy rather than crispy. Additionally, the chicken will cook unevenly because the oil isn’t hot enough to sear the exterior and lock in the juices.
- Longer Cooking Time: As the temperature lowers, the chicken will take longer to cook. This can lead to overcooked or undercooked chicken, and the coating may not reach the desired crispy texture, even if the meat is properly cooked inside.
2. Uneven Cooking and Soggy Coating
Overcrowding the pan also leads to uneven cooking. When there are too many pieces of chicken, they crowd each other, preventing the oil from circulating freely around each piece. This results in some pieces being overcooked while others are undercooked. In addition, the trapped moisture from the chicken can make the coating soggy, preventing it from getting crispy.
How It Affects the Chicken:
- Steam Buildup: When chicken pieces are packed tightly together, the steam released from the chicken can get trapped, making the coating soggy. The oil cannot reach the surface of the chicken evenly, which affects the crispiness of the batter.
- Uneven Heat Distribution: With too many pieces in the pan, the heat from the oil can’t distribute properly, causing the chicken to cook unevenly. You may end up with some pieces underdone and others overdone, affecting both texture and flavor.
3. How to Avoid Overcrowding
The good news is that avoiding overcrowding is simple and can be achieved with a few easy adjustments. Here’s how to ensure your chicken gets fried to perfection:
Tips for Proper Frying:
- Cook in Batches: Fry the chicken in smaller batches, ensuring there’s enough space for each piece to fry properly. You should have enough space in the pan for the chicken to be surrounded by oil on all sides, which helps maintain a consistent frying temperature.
- Use a Large Enough Pan: If you’re making a larger batch of fried chicken, consider using a larger frying pan or even a deep fryer. This allows the oil to maintain a higher temperature and ensures that each piece cooks evenly.
- Maintain the Temperature: Keep an eye on the oil temperature throughout the frying process. After adding the chicken, the temperature will naturally drop, but be sure to monitor and adjust the heat to maintain a consistent frying temperature. If the oil is too cool, raise the heat slightly; if it’s too hot, lower it to prevent burning.
4. The Importance of Patience
It’s tempting to try to cook as much chicken as possible in one go, but it’s important to remember that frying is an art that requires patience. Each batch of chicken should be given enough room to cook properly and become crispy. Rushing the process by overcrowding will only lead to frustration when your chicken doesn’t turn out as expected.
Patience Pays Off:
- Crispy Coating: By frying in smaller batches, you ensure that the chicken’s coating has the opportunity to crisp up properly. It’s worth taking your time to achieve that perfectly crispy, golden exterior that makes fried chicken so irresistible.
- Tender, Juicy Chicken: With enough space for each piece to fry evenly, the chicken will cook at the right temperature, ensuring that the meat stays juicy and tender. Overcrowding the pan could result in dry, overcooked meat, even if the outside appears crispy.
5. Final Thoughts on Overcrowding
Overcrowding the pan is a mistake that can compromise the quality of your fried chicken. It affects the cooking time, temperature, and crispiness, leading to less-than-ideal results. By cooking the chicken in smaller batches, maintaining the proper oil temperature, and giving each piece room to cook evenly, you can ensure that your fried chicken turns out perfectly crispy, juicy, and delicious every time. Remember, patience is key to achieving the best results!