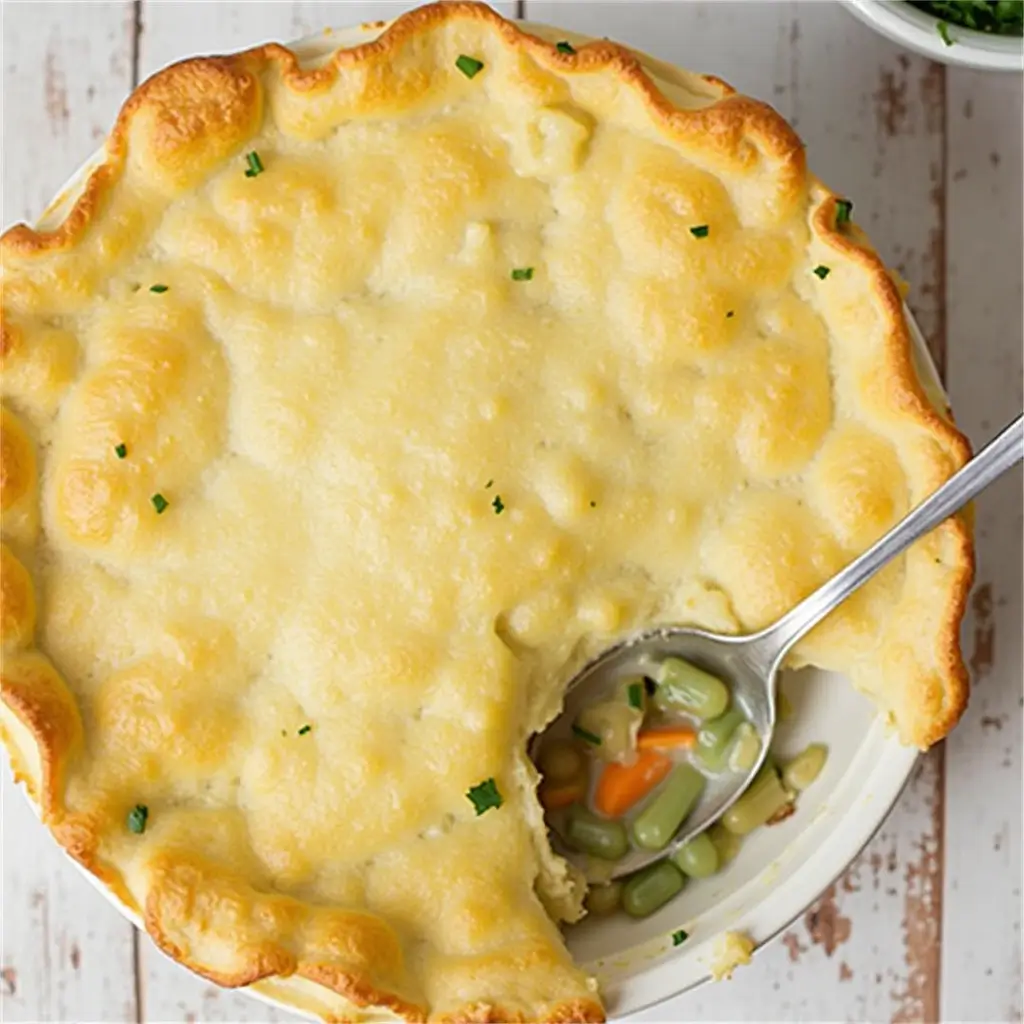
There’s nothing quite as comforting as a homemade chicken pot pie fresh out of the oven. With its flaky, golden crust and creamy, savory filling, this dish has been a staple in kitchens for generations. Whether you’re craving a hearty weeknight dinner or a cozy meal to share with family, this classic comfort food never disappoints.
In this guide, we’ll show you how to make the best chicken pot pie from scratch. Using tender rotisserie chicken, rich chicken broth, and a buttery, flaky crust, you’ll create a dish that’s both easy to prepare and incredibly delicious. Plus, we’ll share expert tips on achieving the perfect thick and creamy filling, shortcuts for busy cooks, and the best ways to store and reheat leftovers.
Get ready to enjoy a warm, homemade meal that’s guaranteed to be a family favorite! 🍽️🔥
Ingredients for the Perfect Chicken Pot Pie
Crust: Homemade Pie Crust vs. Store-Bought Puff Pastry
One of the key factors that sets a great chicken pot pie apart is its crust. The crust provides that satisfying golden, flaky texture that contrasts beautifully with the creamy, savory filling. When making chicken pot pie, you have two main options for the crust: homemade pie crust or store-bought puff pastry. Each has its own benefits, and the choice ultimately depends on your preference and time constraints.
Homemade Pie Crust: The Classic, Buttery Option
A homemade pie crust is the traditional choice for chicken pot pie and is perfect if you prefer a rich, buttery, and slightly crisp texture. Here’s why you might opt for a homemade crust:
- Flavor & Texture: A homemade crust has a buttery, slightly flaky texture that holds up well to the rich filling.
- Customizable: You can adjust ingredients for a more tender or crispier crust by modifying the butter-to-flour ratio.
- More Control Over Ingredients: Making your own crust ensures you avoid preservatives and artificial additives found in some store-bought versions.
- Cost-Effective: Homemade pie dough is typically cheaper than pre-made alternatives, as it uses basic pantry staples like flour, butter, salt, and water.
Pro Tip: For the flakiest crust, chill the dough for at least 30 minutes before rolling it out. This prevents the butter from melting too soon and helps create that irresistible crispy, flaky texture.
Store-Bought Puff Pastry: The Time-Saving Alternative
If you’re short on time but still want a light, airy, and crisp crust, puff pastry is an excellent alternative. It has a delicate, flaky texture that pairs well with the creamy chicken filling. Here’s why you might choose store-bought puff pastry:
- Convenience: No need to mix, roll, or chill the dough—just thaw, roll out, and use.
- Extra Flakiness: Puff pastry contains multiple layers of butter and dough, making it lighter and airier than traditional pie crust.
- Perfect for a Rustic Look: If you enjoy a more free-form, golden-brown crust, puff pastry is ideal. It creates a beautiful, puffy top layer when baked.
Pro Tip: Always bake puff pastry at a high temperature (400°F or above) to ensure the layers rise properly and achieve that signature flaky texture.
Which One Should You Choose?
- If you love a classic, sturdy crust with a rich, buttery flavor, go for a homemade pie crust.
- If you prefer a lighter, flakier, and crispier texture (and need to save time), store-bought puff pastry is the way to go.
Both options will result in a delicious chicken pot pie, so choose the one that best fits your cooking style and schedule. If you’re feeling adventurous, you can even use both—a homemade pie crust for the base and puff pastry for the top!
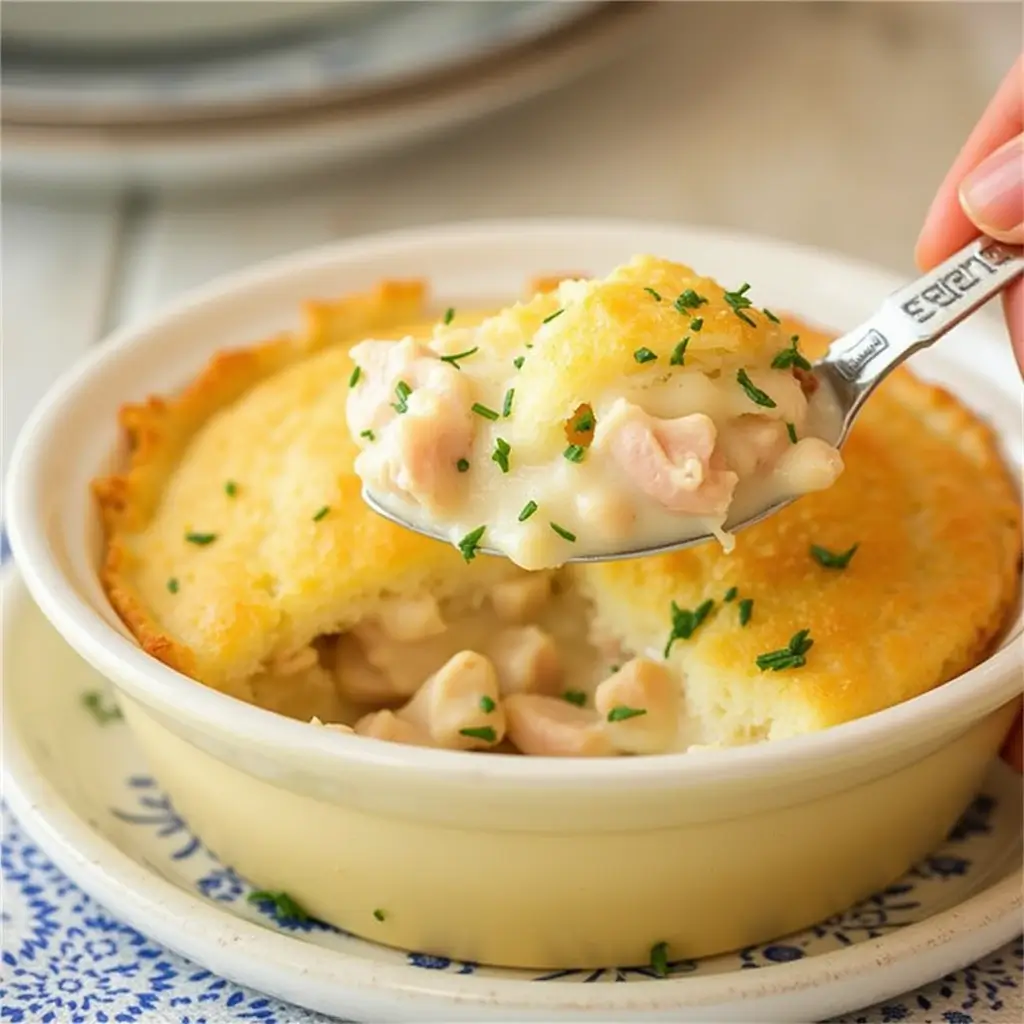
Filling: Rotisserie Chicken, Chicken Broth, Heavy Cream, Frozen Peas, and Carrots
The heart of any great chicken pot pie is its filling. It should be rich, creamy, and packed with flavor, creating the perfect contrast to the flaky crust. The right combination of chicken, vegetables, and a velvety sauce transforms this dish into the ultimate comfort food. Let’s break down the key ingredients for an irresistible filling.
1. Rotisserie Chicken: A Time-Saving, Flavorful Base
Using rotisserie chicken is one of the best shortcuts for making chicken pot pie. It’s already cooked, tender, and packed with flavor, saving you both time and effort.
Why use rotisserie chicken?
- Convenient & Quick – No need to cook and shred chicken from scratch.
- Rich Flavor – Rotisserie chicken is often seasoned, adding depth to the filling.
- Moist & Tender – The slow-roasting process keeps the meat juicy and flavorful.
If you prefer, you can also use leftover roasted chicken or cook boneless, skinless chicken breasts or thighs for a homemade touch. Shred or dice the chicken into bite-sized pieces before adding it to the filling.
2. Chicken Broth: The Foundation of the Sauce
A good chicken broth or stock is essential for creating a savory, well-balanced sauce. It acts as the base of the filling, providing moisture and depth of flavor.
Best options for chicken broth:
- Homemade Chicken Stock – Ideal for a rich, natural flavor.
- Store-Bought Chicken Broth – A quick and easy alternative; opt for low-sodium to control the salt level.
- Chicken Bouillon or Bone Broth – For an extra boost of umami and richness.
To enhance the flavor profile, consider simmering the broth with a bay leaf, thyme, and garlic before adding it to the filling.
3. Heavy Cream: For a Thick, Creamy Texture
A classic chicken pot pie should have a creamy, luxurious sauce that coats every bite without being too runny. Heavy cream is the secret to achieving this perfect texture.
Why use heavy cream?
- Adds Richness & Creaminess – It thickens the sauce and gives it a smooth, velvety texture.
- Balances the Savory Flavors – Cream helps mellow out the saltiness of the broth and enhances the dish’s comforting quality.
If you want a lighter version, you can substitute half-and-half or whole milk, but keep in mind that the filling won’t be as thick and rich.
4. Frozen Peas and Carrots: A Classic Vegetable Mix
No chicken pot pie is complete without a colorful mix of vegetables. Frozen peas and carrots are the go-to choice because they’re easy to use, cook quickly, and add sweetness to balance the savory flavors.
Why use frozen peas and carrots?
- Convenient – No peeling, chopping, or extra prep required.
- Retains Texture – Freezing helps lock in nutrients and prevents the veggies from turning mushy.
- Adds Color & Sweetness – The natural sweetness of peas and carrots enhances the overall flavor of the dish.
If you prefer, you can also use fresh carrots (sautéed until tender) or mix in other vegetables like celery, corn, green beans, or mushrooms for added variety.
How to Bring It All Together
To prepare the filling:
- Sauté aromatics – Start by cooking onions, garlic, and celery in butter until soft and fragrant.
- Make a roux – Stir in flour to create a thickening base for the sauce.
- Add chicken broth & cream – Slowly pour in the broth and heavy cream, stirring continuously to prevent lumps.
- Mix in chicken and vegetables – Add the shredded rotisserie chicken, peas, carrots, and seasonings. Simmer until the mixture thickens.
- Season to perfection – Taste and adjust with salt, pepper, thyme, or a pinch of nutmeg for depth.
Once the filling is ready, pour it into your prepared pie crust, top with the second layer of dough (or puff pastry), and bake until golden brown!
Final Thoughts
The key to the best chicken pot pie filling is balancing flavors and textures. With tender rotisserie chicken, savory broth, creamy sauce, and classic veggies, you’ll have a rich, hearty dish that’s guaranteed to be a crowd-pleaser.
Step-by-Step Instructions for Making Chicken Pot Pie
1. Prepare the Filling – Cook Chicken, Vegetables, and Creamy Sauce in a Dutch Oven
The heart of a perfect chicken pot pie lies in its rich, creamy, and well-seasoned filling. Cooking everything in a Dutch oven ensures even heat distribution, allowing the flavors to meld beautifully while keeping the process simple. Let’s break down each step to create a flavor-packed, velvety filling for your homemade chicken pot pie.
Step 1: Sauté Aromatics for Depth of Flavor
Start by melting butter in a Dutch oven over medium heat. The butter not only adds richness but also helps develop the base flavors.
- Add diced onions, garlic, and celery, and sauté until softened and fragrant (about 3-4 minutes).
- Stir occasionally to prevent burning while allowing the vegetables to become translucent.
- You can also add a pinch of thyme, rosemary, or sage at this stage to infuse the dish with classic comfort food aromas.
Why is this step important?
- The onions and garlic provide a natural sweetness.
- The celery adds an earthy note, making the filling more complex and well-rounded.
Step 2: Add the Chicken – Use Rotisserie or Fresh Cooked Chicken
Next, stir in the shredded chicken. If using rotisserie chicken, it’s already cooked and just needs to be mixed in. However, if using raw chicken, follow these steps:
- Season the chicken with salt, pepper, and a little paprika for extra depth.
- Sear the cubed or shredded chicken breast/thighs in the Dutch oven for about 5-7 minutes until lightly golden.
- Remove the chicken and set it aside while you continue making the sauce.
Pro Tip: Using boneless, skinless chicken thighs adds more flavor and tenderness compared to chicken breasts.
Step 3: Create a Rich and Creamy Sauce
The sauce is what binds all the ingredients together, giving the filling its signature thick, velvety texture.
- Make a roux: Sprinkle ¼ cup of all-purpose flour over the sautéed aromatics and stir constantly for 1-2 minutes to cook out the raw flour taste.
- Gradually add the liquid: Slowly pour in chicken broth (about 2 cups) while stirring continuously to avoid lumps.
- Incorporate heavy cream: Once the sauce begins to thicken, stir in ¾ cup of heavy cream or half-and-half for a smooth, creamy consistency.
- Season to perfection: Add salt, black pepper, a pinch of nutmeg (optional), and a splash of Worcestershire sauce for extra umami flavor.
Alternative Options:
- To make the sauce lighter, swap heavy cream for whole milk or evaporated milk.
- For a gluten-free version, use cornstarch (mixed with a bit of water) instead of flour.
Step 4: Add the Vegetables – Classic Peas and Carrots
Once the sauce is thick and creamy, stir in the vegetables. The classic choice is frozen peas and diced carrots, but you can mix it up with other ingredients like:
- Corn, green beans, mushrooms, or diced potatoes for extra texture.
- Fresh vegetables (if preferred), but they should be lightly steamed or sautéed beforehand.
Let the filling simmer for 3-5 minutes, allowing the vegetables to soften slightly while absorbing the sauce’s flavors.
Step 5: Simmer and Adjust the Consistency
At this stage, the filling should be creamy but not too thick. If needed:
- Thin it out with a bit more chicken broth.
- Thicken it up by simmering for another 2-3 minutes or adding a small cornstarch slurry.
Taste and adjust the seasoning if necessary before removing the pot from the heat. The filling is now ready to be poured into your pie crust!
Final Thoughts
Cooking the filling in a Dutch oven helps develop deep flavors, ensures even cooking, and makes cleanup easier. The combination of aromatic vegetables, tender chicken, and a rich, creamy sauce creates the perfect filling for an irresistible homemade chicken pot pie!
2. Roll Out the Crust – Use Puff Pastry or Homemade Pie Crust for the Best Results
The crust is what gives chicken pot pie its signature flaky, buttery texture. Choosing the right type of crust can make all the difference in achieving a perfectly golden, crisp, and delicious bite. Whether you opt for store-bought puff pastry or homemade pie crust, rolling it out correctly is essential to ensuring an even bake and a professional-looking pie.
Let’s break down the process step by step.
Choosing the Right Crust: Puff Pastry vs. Homemade Pie Dough
Before rolling out the dough, it’s important to understand the differences between puff pastry and traditional pie crust, as each offers a unique texture and baking experience.
Puff Pastry – Light, Flaky, and Crispy
- Best for: A delicate, airy texture with multiple crisp layers.
- Pros:
- Pre-made and easy to work with.
- Bakes up extra flaky and buttery.
- Gives a restaurant-style presentation.
- Cons:
- Can be tricky to handle if it warms up too much.
- Requires thawing before rolling out.
Homemade Pie Crust – Buttery, Tender, and Traditional
- Best for: A classic, buttery flavor with a tender bite.
- Pros:
- Rich, homemade taste with a slight crunch.
- More forgiving when rolling and shaping.
- Can be made ahead of time and frozen.
- Cons:
- Requires more effort and chilling time.
- Less flaky than puff pastry.
Step-by-Step Guide to Rolling Out the Dough
Regardless of which type of dough you choose, the rolling process remains similar. Follow these steps to ensure a smooth and even crust.
Step 1: Prepare Your Work Surface
- Lightly flour a clean surface to prevent sticking.
- Use a cold rolling pin (chilled in the fridge for 10 minutes) for best results.
- If using puff pastry, thaw it in the fridge for at least 30 minutes before rolling.
Step 2: Roll the Dough Evenly
- Start from the center of the dough and roll outward in gentle, even strokes.
- Rotate the dough 90 degrees every few rolls to maintain a round shape.
- Roll the dough out to about ⅛ inch thickness—thin enough to crisp up, but thick enough to hold the filling.
👉 Pro Tip: If using puff pastry, be gentle—overworking it can cause the layers to flatten, reducing its flakiness.
Step 3: Fit the Dough into Your Baking Dish
- Carefully lift the dough using your rolling pin and transfer it to your pie dish or skillet.
- Gently press it into the corners without stretching it (stretching can cause shrinking when baked).
- If using a double-crust pie, leave extra dough hanging over the edges to help seal the top layer later.
Step 4: Trim and Crimp the Edges
- Use a sharp knife or kitchen scissors to trim any excess dough, leaving about ½ inch overhang.
- For a rustic look, crimp the edges using your fingers or a fork.
- For a flakier crust, brush the edges lightly with egg wash (beaten egg + water) to create a golden shine.
Top Crust Options: Sealing and Decorating Your Pot Pie
Once the filling is added, the top crust plays a crucial role in sealing in all the delicious flavors. You have a few options:
1. Classic Full Crust (Traditional Look)
- Roll out a second piece of dough and place it over the filling.
- Seal the edges by pinching them together or crimping with a fork.
- Cut small slits in the center to allow steam to escape.
2. Lattice Crust (Fancy and Elegant)
- Cut the dough into long, thin strips and weave them over the filling.
- This method allows steam to escape naturally, making it less prone to sogginess.
3. Rustic Puff Pastry Topping (Easy & Flaky)
- Lay a sheet of puff pastry over the filling without pressing down—this lets it puff up beautifully.
- Brush with egg wash for an extra golden, crispy finish.
Final Touch: Egg Wash for a Golden, Glossy Finish
Brushing the crust with an egg wash before baking gives it a beautiful golden-brown color and enhances the flakiness.
- For deep golden color: Use a whole egg + 1 tbsp water.
- For extra shine: Use egg yolk only.
- For a lighter crust: Use milk or cream instead of egg wash.
Final Thoughts
The crust is just as important as the filling in making the perfect chicken pot pie. Whether you prefer the delicate crispiness of puff pastry or the classic buttery taste of homemade pie dough, rolling it out evenly and properly ensures a flaky, golden, and delicious result every time!
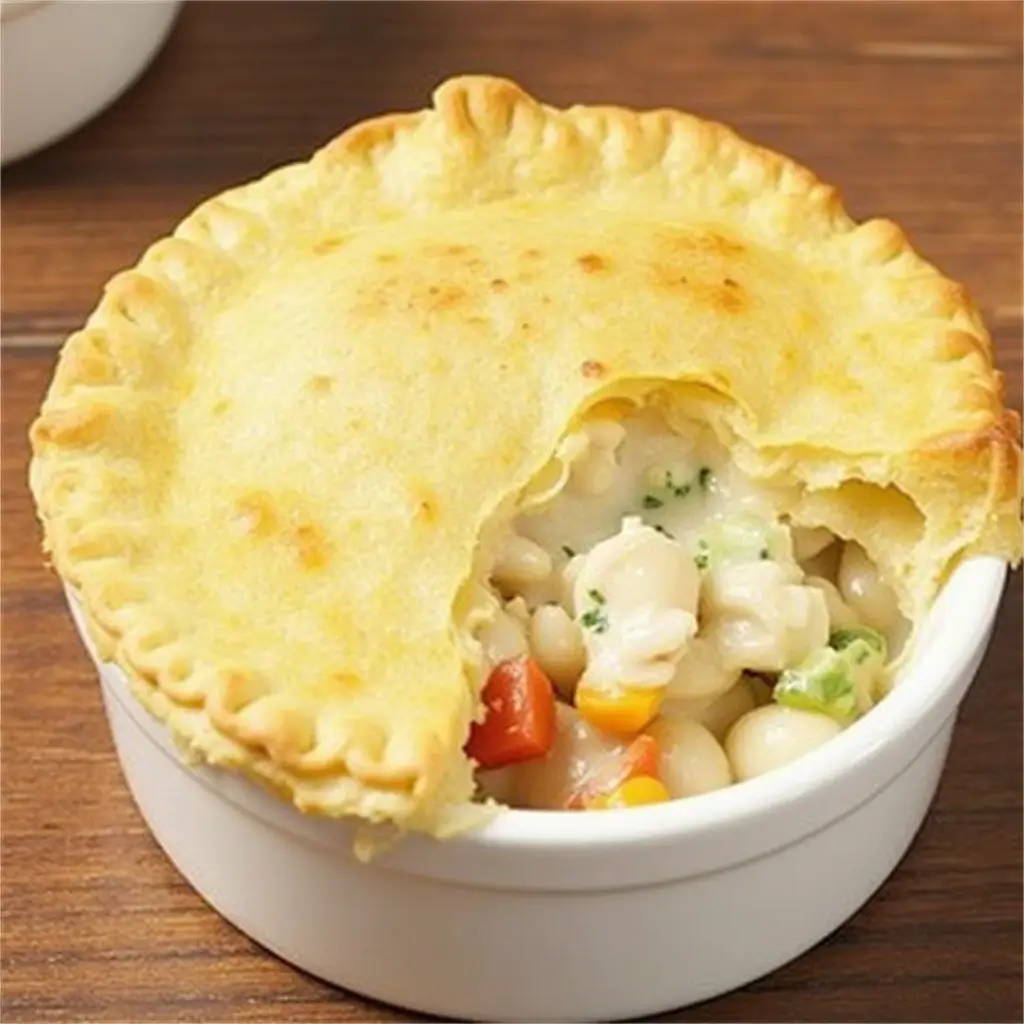
3. Assemble & Bake – Pour Filling into a Baking Dish, Cover with Pie Crust, and Apply Egg Wash for a Golden Color
Now that your filling is rich, creamy, and packed with flavor, and your crust is rolled out and ready, it’s time to bring everything together. Proper assembly ensures your chicken pot pie bakes evenly, with a flaky, golden-brown crust and a perfectly set filling.
Let’s go step by step to assemble and bake the best homemade chicken pot pie.
Step 1: Prepare the Baking Dish
- Use a deep-dish pie pan, cast-iron skillet, or a baking dish that is at least 2 inches deep to prevent overflow.
- Lightly grease the dish with butter or cooking spray to prevent the bottom crust from sticking.
- If using a bottom crust, gently press it into the dish, ensuring there are no air pockets.
👉 Pro Tip: Prebake the bottom crust for 5-7 minutes at 375°F (190°C) to prevent sogginess.
Step 2: Pour in the Chicken Pot Pie Filling
- Once your creamy chicken and vegetable filling has cooled slightly, carefully pour it into the prepared dish.
- Use a spatula or spoon to spread it evenly, ensuring the filling is level.
- Avoid overfilling—leave about ½ inch of space at the top to prevent spills while baking.
Step 3: Cover with the Pie Crust
Now comes the most exciting part—sealing the pie with a flaky, golden crust!
Option 1: Full Pie Crust (Classic and Traditional)
- Roll out your pie dough or puff pastry and carefully place it over the filling.
- Press the edges of the top crust firmly against the edges of the baking dish to seal it completely.
- Trim any excess dough, leaving about ½ inch of overhang for a proper seal.
- Crimp the edges using your fingers or a fork to create a decorative look.
- Cut 3-5 small slits in the center of the crust to allow steam to escape during baking.
Option 2: Lattice Crust (For a Fancy, Bakery-Style Look)
- Cut your rolled-out dough into ½-inch wide strips.
- Lay half the strips horizontally across the pie.
- Weave the remaining strips vertically to create a woven pattern.
- Trim and tuck the edges for a clean finish.
Option 3: Rustic Puff Pastry Topping (For Extra Flakiness)
- Instead of sealing the edges, let the puff pastry rest loosely over the filling.
- As it bakes, the pastry will puff up beautifully, creating a light, airy crust.
👉 Pro Tip: If using puff pastry, avoid stretching it too much, as it can shrink when baking.
Step 4: Apply Egg Wash for a Golden, Crispy Finish
To achieve that picture-perfect, glossy golden crust, an egg wash is essential.
- In a small bowl, whisk one egg with a tablespoon of water or milk.
- Using a pastry brush, lightly brush the entire surface of the pie crust.
- Be sure to coat the edges for an even golden finish.
👉 Egg Wash Variations:
- For a deep golden brown crust: Use egg yolk + milk.
- For a glossy, light golden crust: Use whole egg + water.
- For a matte, soft crust: Use heavy cream or milk instead of egg.
Step 5: Bake to Perfection
Baking Time & Temperature
- Preheat oven to 375°F (190°C).
- Place the assembled pie on the middle rack of the oven.
- Bake for 35-45 minutes, or until the crust is golden brown and the filling is bubbling.
Preventing Over-Browning
- If the edges of the crust start to brown too quickly, cover them with aluminum foil or a pie shield.
- Remove the foil during the last 10 minutes of baking to let the edges crisp up.
👉 Pro Tip: For an extra crispy bottom crust, place the pie dish on a preheated baking sheet before putting it in the oven.
Step 6: Resting & Serving
- Once baked, remove the pie from the oven and let it rest for at least 10-15 minutes before slicing.
- This allows the filling to set properly, preventing it from spilling out when you cut into it.
- Garnish with fresh parsley or thyme for a beautiful finish.
Final Thoughts
By carefully assembling and baking your chicken pot pie, you ensure a flaky crust, creamy filling, and perfectly golden color. Whether you choose a classic pie crust, a puff pastry top, or a lattice design, following these steps guarantees a delicious, homemade comfort food that’s crispy on the outside and rich on the inside.
Pro Tips for the Best Chicken Pot Pie
How to Achieve a Flaky Crust – Use Butter-Based Dough and Chill Before Baking
A flaky, golden-brown crust is the hallmark of a great chicken pot pie. Whether you’re using homemade pie dough or store-bought puff pastry, the key to achieving that perfect crisp and tender texture lies in choosing the right ingredients, handling the dough properly, and chilling it before baking. Let’s break down the essential steps to guarantee a deliciously flaky crust every time.
1. Choose the Right Dough for Maximum Flakiness
The type of dough you use makes a huge difference in texture, flavor, and structure. Here are the two best options for a flaky crust:
Option 1: Classic Butter-Based Pie Dough (Homemade)
- A homemade pie crust made with butter and flour creates layers of flakiness as it bakes.
- Butter melts at a higher temperature than shortening, allowing for crispy edges and a rich, buttery flavor.
- The dough should be lightly kneaded and rolled out evenly to avoid toughness.
Ingredients for a Flaky Butter-Based Pie Dough:
- 2 ½ cups all-purpose flour
- 1 cup cold unsalted butter (cut into cubes)
- 1 tsp salt
- 1 tsp sugar (optional, for a subtle sweetness)
- 6-8 tbsp ice water
👉 Pro Tip: Use European-style butter (higher fat content) for an extra rich and flaky crust.
Option 2: Store-Bought Puff Pastry (For a Light and Crispy Crust)
- Puff pastry is pre-laminated, meaning it already has layers of butter folded into the dough, making it rise and flake as it bakes.
- It’s a faster and easier alternative to homemade pie dough.
- Puff pastry results in a light, airy crust that contrasts beautifully with the rich, creamy chicken pot pie filling.
👉 Pro Tip: If using store-bought frozen puff pastry, thaw it in the refrigerator for a few hours before rolling it out.
2. Keep the Butter Cold for Perfect Flakiness
Cold butter = flakier layers. The reason? When cold butter hits the hot oven, it creates steam pockets, leading to that light, crispy texture in the crust.
How to Keep Butter Cold While Making Dough:
✔️ Use chilled butter – Cut butter into small cubes and refrigerate it until ready to use.
✔️ Use ice water – Adding ice-cold water to the dough prevents the butter from softening.
✔️ Chill the dough before rolling – Letting the dough rest in the fridge for at least 30 minutes allows the gluten to relax, preventing shrinkage.
✔️ Work quickly – Avoid overhandling the dough, as the heat from your hands can melt the butter.
👉 Pro Tip: If the butter starts melting while rolling the dough, place the dough back in the fridge for 10-15 minutes before continuing.
3. Rolling Out the Dough – Maintain the Layers
Once your dough is chilled, it’s time to roll it out without compromising the flaky texture.
Rolling Tips for the Best Crust:
✔️ Flour your surface lightly – Too much flour can make the dough tough.
✔️ Roll gently – Use a light touch to prevent breaking the butter pockets.
✔️ Roll from the center outward – This ensures an even thickness.
✔️ Rotate the dough – Every few rolls, turn the dough 90 degrees to prevent sticking and ensure an even shape.
✔️ Don’t overwork it – Over-kneading the dough develops gluten, making it tough instead of flaky.
👉 Pro Tip: If using puff pastry, roll it out slightly larger than your baking dish to allow for shrinkage.
4. Chill the Dough Again Before Baking
Why Chilling the Dough is Crucial
- Prevents shrinking – Cold dough holds its shape better in the oven.
- Enhances flakiness – Chilled butter stays solid longer, leading to distinct, crispy layers.
- Keeps the crust sturdy – Warm dough can become too soft and break easily when assembling the pie.
👉 How Long to Chill Before Baking:
- Pie dough – At least 30 minutes to 1 hour after rolling it out.
- Puff pastry – At least 15-20 minutes in the fridge before baking.
5. Apply Egg Wash for a Golden, Crispy Finish
Brushing an egg wash over the crust before baking gives it that beautiful golden sheen and helps with crispiness.
Egg Wash Options:
🥚 Whole egg + water → A golden-brown, slightly glossy finish.
🥚 Egg yolk + milk → A deep golden color with more richness.
🥚 Heavy cream or milk only → A matte, softer finish.
👉 Pro Tip: Use a pastry brush to lightly coat the crust—avoid using too much, as it can make the dough soggy.
Final Baking Tips for a Flaky Crust
- Bake at 375°F-400°F (190°C-200°C) for 35-45 minutes, or until golden brown and crispy.
- Use a preheated baking sheet under the pie dish to help the bottom crust crisp up.
- Let it rest for 10-15 minutes before slicing – this allows the filling to set and prevents the crust from becoming soggy.
Conclusion
Achieving the perfect flaky crust for your chicken pot pie is all about using cold butter, rolling gently, chilling before baking, and applying an egg wash. Whether you go for a classic homemade crust or a quick puff pastry option, these steps will ensure your pie turns out crispy, golden, and absolutely delicious.
Thick & Creamy Filling – Balance Chicken Broth, Heavy Cream, and Roux for the Perfect Texture
One of the most important elements of a delicious chicken pot pie is its rich, creamy filling. The perfect filling should be thick enough to hold together when sliced, but not so dense that it feels heavy. Achieving this ideal consistency requires balancing chicken broth, heavy cream, and a well-made roux. Let’s break down how to create a silky, flavorful, and perfectly thickened filling for your chicken pot pie.
1. The Role of a Roux – Creating a Stable Base
A roux is the foundation of a thick and creamy filling. It’s a simple mixture of fat (butter) and flour, which serves as a thickening agent for sauces, soups, and stews.
How to Make a Roux for Chicken Pot Pie:
🥄 Melt butter – Use about 4 tablespoons of unsalted butter in a Dutch oven or large skillet over medium heat.
🥄 Whisk in flour – Add ¼ cup of all-purpose flour, whisking constantly to prevent lumps.
🥄 Cook for 1-2 minutes – This eliminates the raw flour taste while ensuring the roux remains light in color (a dark roux won’t thicken as effectively).
👉 Pro Tip: A blonde roux (cooked until pale golden) works best for a velvety texture without an overpowering flavor.
2. Balancing Chicken Broth & Heavy Cream for Richness
Once the roux is prepared, the next step is to gradually add liquids, starting with chicken broth and then incorporating heavy cream. This balance of broth and cream creates a smooth, luscious texture that coats every bite of chicken and vegetables.
Chicken Broth – The Savory Backbone
🍗 Use 2 cups of quality chicken broth (preferably homemade or low-sodium) to add depth of flavor without making the filling too salty.
🍗 Stir it in slowly to prevent the roux from clumping.
🍗 Simmer for 3-5 minutes, allowing the mixture to slightly thicken before adding cream.
Heavy Cream – The Key to a Luxurious, Creamy Filling
🥛 ½ to 1 cup of heavy cream adds a velvety richness that makes the filling indulgent and smooth.
🥛 For a lighter option, use half-and-half or whole milk, but avoid skim milk as it won’t provide the same creamy consistency.
🥛 Stir it in gradually and continue to simmer until the filling reaches the desired thickness.
👉 Pro Tip: For extra depth, add a splash of white wine before the broth to deglaze the pan and enhance the flavor.
3. Thickening the Filling to the Right Consistency
Even with a roux, the filling may need additional thickening to achieve the perfect creamy-but-not-runny texture. Here’s how to get it just right:
Cornstarch Slurry (Alternative Thickener)
- If your filling is too thin, mix 1 tablespoon of cornstarch with 2 tablespoons of cold water, then stir it into the simmering mixture.
- Allow it to cook for another 2 minutes until thickened.
Reduce & Simmer
- Let the filling simmer uncovered for 5-7 minutes, stirring occasionally, until it reaches the right thickness.
👉 Pro Tip: The filling should be thick enough to coat the back of a spoon, but not so stiff that it doesn’t spread slightly when spooned into the pie crust.
4. Enhancing the Flavor with Seasonings & Aromatics
A great filling isn’t just about texture—it’s about flavor! Here’s how to make it deeply savory and satisfying:
🧄 Aromatics:
- ½ cup diced onions, 2 minced garlic cloves, and 1 chopped celery stalk sautéed in butter create a flavorful base.
- Cook them until soft and fragrant before adding the flour for the roux.
🧂 Seasonings:
- Salt & black pepper – Essential for bringing out all the flavors.
- Thyme, rosemary, and sage – Classic herbs that complement the earthy, comforting flavors of chicken pot pie.
- A dash of nutmeg (optional) – Adds a subtle warmth and enhances the creaminess.
👉 Pro Tip: Stir in ½ teaspoon of Dijon mustard for a mild tang that deepens the flavor profile.
5. Adding the Chicken & Vegetables Without Overcooking
Once the creamy base is thickened and well-seasoned, it’s time to add the chicken and vegetables. The key is to ensure they remain tender and don’t become mushy.
🍗 Chicken:
- Use 3 cups of shredded rotisserie chicken for convenience and extra flavor.
- If cooking from scratch, poach boneless, skinless chicken breasts in broth, then shred.
- Stir in the chicken at the very end so it stays juicy and doesn’t dry out.
🥕 Vegetables:
- Use a classic blend of frozen peas, carrots, and corn—they cook quickly without becoming overdone.
- Stir in 1 ½ cups of mixed vegetables during the last 2-3 minutes of simmering.
- For extra heartiness, add cubed potatoes or mushrooms (sautéed separately to avoid excess moisture).
👉 Pro Tip: If using fresh veggies, parboil them before adding so they stay tender without releasing too much liquid.
Final Checks – Ensuring a Perfectly Thick & Creamy Filling
Before pouring the filling into the pie crust, do a final check for consistency:
✔️ The filling should be thick enough to hold its shape but still flow smoothly when spooned into the dish.
✔️ If too thin, simmer for another 3-5 minutes to reduce excess liquid.
✔️ If too thick, stir in a splash of extra broth or cream to loosen it slightly.
Conclusion
A thick, creamy, and well-balanced filling is the heart of any great chicken pot pie. By starting with a roux, adding chicken broth and heavy cream in the right proportions, and seasoning it with aromatics and herbs, you’ll achieve the perfect texture and flavor every time. Whether you’re using rotisserie chicken and frozen veggies for convenience or making everything from scratch, these steps will ensure your filling is rich, savory, and irresistibly comforting.
Time-Saving Hacks – Use Rotisserie Chicken and Store-Bought Puff Pastry for Quick Prep
Making a delicious chicken pot pie from scratch can be time-consuming, especially if you’re preparing everything—from cooking the chicken to making the pie crust. However, there are a few time-saving hacks that can drastically reduce your prep time without compromising on flavor or quality. By using rotisserie chicken and store-bought puff pastry, you can shave off a significant amount of time while still delivering a mouthwatering meal. Here’s how to make the process quicker without sacrificing the richness and comfort of the dish.
1. Using Rotisserie Chicken – Skip the Cooking and Shredding
One of the biggest time-savers when making chicken pot pie is using a rotisserie chicken. Instead of poaching or roasting chicken from scratch, which can take up to an hour or more, rotisserie chicken provides you with pre-cooked, tender chicken that’s ready to go. Plus, it’s incredibly flavorful, as it’s typically seasoned with herbs and spices during cooking.
How to Use Rotisserie Chicken in Chicken Pot Pie:
- Shred the chicken: Simply remove the skin and bones, and use two forks or your hands to shred the meat into bite-sized pieces. Aim for about 3 cups of shredded chicken, or adjust based on your recipe needs.
- Skip the simmering time: Since the chicken is already cooked, there’s no need to simmer it in the sauce or broth, which can take up precious time. Just stir it in with the vegetables and creamy sauce during the final stages of cooking to heat it through.
👉 Pro Tip: Keep the juices from the rotisserie chicken and add them to your filling mixture for extra flavor. The natural fats and seasonings in the skin and bones contribute to a rich, savory taste that elevates the dish.
2. Using Store-Bought Puff Pastry – Save Time on Pie Crust
Pie crusts are often seen as one of the more labor-intensive parts of a chicken pot pie recipe, especially when it comes to making them from scratch. While homemade pie crust is amazing, using store-bought puff pastry is an incredibly convenient option that can save you a lot of time and effort without sacrificing texture. Puff pastry provides a flaky, golden crust that perfectly complements the creamy filling, giving you a traditional chicken pot pie taste with minimal prep.
Why Puff Pastry Works for Chicken Pot Pie:
- Pre-made and ready to use: Puff pastry is already prepared and frozen, making it a hassle-free option for busy cooks. Simply thaw it according to the package instructions and roll it out over your filling.
- Flaky and buttery texture: Puff pastry has multiple layers that bake up light, crisp, and flaky, giving your chicken pot pie an elegant touch that’s hard to achieve with a traditional pie crust in the same amount of time.
- No need to chill: Unlike traditional pie crust, which requires chilling before rolling out, puff pastry can be rolled directly onto your baking dish after thawing, further reducing prep time.
👉 Pro Tip: If you prefer the look of a traditional double-crust pie, you can easily add a second layer of puff pastry on top of the filling. Just make sure to use a fork to prick holes in the top to allow steam to escape during baking.
3. Pre-chopped Frozen Vegetables – Convenience at Its Best
Instead of chopping fresh vegetables like carrots, peas, and celery, use pre-chopped frozen vegetables. They are available in most grocery stores and provide the same quality, texture, and flavor as fresh veggies, with the added benefit of convenience.
Why Frozen Vegetables Work:
- No chopping or peeling required: All of the hard work of prepping vegetables is already done for you. Frozen vegetables are washed, cut, and ready to go, saving you time on the prep side of the recipe.
- Quick to cook: Since frozen vegetables are already blanched (partially cooked), they cook much faster than fresh vegetables and retain their color and texture when added to the creamy filling.
- Long shelf life: You can store them in your freezer for an extended period, so there’s no need to worry about wasting fresh produce.
👉 Pro Tip: When using frozen vegetables, don’t thaw them before adding them to your filling. Just stir them straight into the filling mixture for better texture and a quicker cook time.
4. Use a Dutch Oven or Large Skillet – Combine Cooking Steps
Instead of dirtying multiple pots and pans, opt for a large Dutch oven or skillet that allows you to cook the filling and assemble the pie in the same vessel. A Dutch oven is perfect for making the creamy filling, as it provides an even, steady heat distribution. By using a single pan for both the cooking and assembling steps, you save time on washing dishes and streamline the process.
How to Simplify the Process with One Pan:
- Cook the filling: Start by sautéing the aromatics and adding the roux, broth, and cream in one pot, then stir in the chicken and vegetables.
- Pour into the dish: Once your filling is complete, you can pour it directly into the baking dish or pie dish you plan to use, skipping the step of transferring it to multiple containers.
👉 Pro Tip: If you’re in a real rush, you can even cook the filling in the same pan you’ll use to bake the pot pie—just let it cool for a few minutes before topping with the puff pastry.
5. Batch Cooking and Freezing for Future Meals
If you enjoy making chicken pot pie and want to save even more time in the future, consider batch cooking. You can prepare and assemble several pies at once, then freeze them to bake later when you’re short on time.
How to Batch Cook Chicken Pot Pies:
- Prepare the filling: Make the filling in large batches, and let it cool completely.
- Assemble and freeze: Once the filling is cooled, spoon it into pie dishes or freezer-safe containers, top with your puff pastry or pie crust, and wrap it tightly.
- Bake from frozen: When you’re ready to bake, you can bake the pie directly from frozen, adding extra time to the cooking time (usually about 20-30 minutes).
👉 Pro Tip: Label and date the frozen pies so you can easily keep track of them for future meals. You can also freeze individual portions if you prefer serving smaller amounts.
Conclusion: Make Delicious Chicken Pot Pie with Minimal Effort
By incorporating rotisserie chicken, store-bought puff pastry, frozen vegetables, and one-pan cooking techniques, you can prepare a chicken pot pie that’s just as delicious as the homemade version but much quicker to make. These time-saving hacks are perfect for busy weekdays, dinner parties, or when you just want a comforting meal without spending hours in the kitchen.
Storing, Reheating, and Serving Suggestions
Best Ways to Store – Refrigerate for Up to 4 Days or Freeze for Long-Term Storage
After spending time making a delicious chicken pot pie, you’ll likely want to enjoy the leftovers later or keep some for future meals. Proper storage is essential to maintain the flavor and texture of your dish. Whether you’re refrigerating it for a few days or freezing it for months, there are specific methods you can use to ensure your chicken pot pie stays fresh and tasty.
1. Storing in the Refrigerator – Keep It Fresh for Up to 4 Days
If you plan to enjoy your chicken pot pie within a few days, refrigeration is the best option. Properly storing your pie in the fridge will ensure that it remains safe to eat and retains its flavor.
How to Refrigerate Chicken Pot Pie:
- Let it cool first: After baking your chicken pot pie, let it cool to room temperature for about 30 minutes to an hour. This step helps to avoid condensation inside the storage container, which could make your crust soggy.
- Cover it tightly: Once cooled, cover the pie with plastic wrap, aluminum foil, or place it in an airtight container. This prevents exposure to air and prevents your pie from drying out.
- Refrigerate promptly: Store the covered pie in the refrigerator as soon as possible. The pie should be consumed within 4 days to ensure it stays fresh and safe to eat.
- Reheating tips: When reheating, cover the pie with foil to prevent the crust from over-browning. You can reheat it in the oven at 350°F (175°C) for about 20-25 minutes until heated through. For a crispier crust, uncover the pie during the last 5 minutes of heating.
2. Freezing for Long-Term Storage – Preserve for Up to 3 Months
If you want to save your chicken pot pie for an extended period, freezing is the perfect solution. Freezing your pie allows you to store it for up to 3 months, making it an excellent option for meal prep or future dinners. However, the process requires a few careful steps to maintain the best possible texture and flavor.
How to Freeze Chicken Pot Pie:
- Prepare the pie for freezing: If your pie has already been baked, let it cool to room temperature before freezing. Alternatively, you can freeze an unbaked pie. Freezing an unbaked pie is ideal because it allows you to bake it fresh later.
- Wrap it well: Once your pie has cooled, tightly wrap it in plastic wrap, followed by a layer of aluminum foil. For extra protection, you can place the wrapped pie in a freezer-safe container or a heavy-duty freezer bag. Make sure to remove as much air as possible to prevent freezer burn.
- Label and date: Label the pie with the date so that you can track how long it’s been in the freezer. This will help you ensure that it’s used within the recommended 3-month window.
- Freezing unbaked pie: If you’re freezing an unbaked pie, there’s no need to thaw it before baking. You can bake it directly from frozen, just be sure to add extra baking time (approximately 60-75 minutes, depending on the size of the pie).👉 Pro Tip: If you freeze individual portions of chicken pot pie in smaller containers, reheating will be even quicker, and you’ll have the perfect serving sizes on hand.
3. Reheating Frozen Chicken Pot Pie – Tips for a Freshly Baked Taste
When you’re ready to enjoy your frozen chicken pot pie, there are specific ways to reheat it to ensure it tastes just like fresh-baked.
How to Reheat Frozen Chicken Pot Pie:
- From frozen (unbaked): If you froze your pie unbaked, bake directly from frozen without thawing. Place it in a preheated oven at 375°F (190°C), and bake for 60-75 minutes, or until the filling is bubbling and the crust is golden brown. If the crust starts to brown too quickly, cover the edges with aluminum foil.
- From frozen (baked): If your pie was already baked, preheat the oven to 350°F (175°C). Place the frozen pie on a baking sheet and bake for about 45-60 minutes, or until heated through. Cover the crust with foil during the reheating process to prevent it from burning, and uncover it during the last 5 minutes to crisp up the top.
- Microwave option: If you’re short on time, you can also reheat individual slices in the microwave. Place the slice on a microwave-safe plate and cover it with a damp paper towel. Heat it in 1-minute increments until warmed through. However, note that the crust may not be as crisp as when baked in the oven.
4. How to Prevent a Soggy Crust When Storing
A common issue with storing and reheating chicken pot pie is the soggy crust. The filling contains moisture, which can soften the crust over time. Here’s how to prevent it:
- Cool before covering: Ensure the pie has cooled properly before covering to avoid condensation buildup inside the storage container.
- Use a pastry shield: When reheating, use a pastry shield or aluminum foil to protect the crust from over-browning. This helps maintain its texture while also ensuring the filling gets reheated without drying out.
Conclusion: Store and Reheat Your Chicken Pot Pie for Maximum Flavor
Storing your chicken pot pie is a simple process that allows you to enjoy this comfort food for days to come. Whether you refrigerate it for up to 4 days or freeze it for long-term storage, following the proper storage and reheating methods will help maintain the flaky crust and creamy filling. By taking the time to properly store your chicken pot pie, you’ll always have a comforting meal on hand for busy days or when you crave a little homemade goodness.
How to Reheat Without Drying Out – Bake at 350°F or Microwave in Small Portions
Reheating a chicken pot pie without losing its flavor or texture can be a challenge, especially if you want to preserve that golden, flaky crust and creamy filling. While it’s tempting to rush through reheating, proper techniques are key to ensuring your leftovers taste just as delicious as when they were freshly baked. Below are some tried-and-true methods to reheat your chicken pot pie without it drying out.
1. Reheat in the Oven – Keep the Texture Intact
The oven is the best option when reheating a whole chicken pot pie or larger portions. This method helps maintain the flaky crust and creamy filling while ensuring that it is heated evenly throughout. While this takes a little longer than using a microwave, the results are worth it.
Steps to Reheat in the Oven:
- Preheat the oven: Begin by preheating your oven to 350°F (175°C). This moderate temperature allows the filling to warm through without overcooking the crust.
- Cover the edges: To prevent the crust from burning or getting too dry, cover the edges of the pie with aluminum foil. If you’ve already sliced the pie into portions, you can wrap the slices in foil as well.
- Bake: Place the pie (or slices) on a baking sheet and bake for about 20-25 minutes for a whole pie, or 10-15 minutes for individual slices. Check halfway through and, if necessary, cover the whole pie loosely with foil to ensure it doesn’t get too brown.
- Uncover at the end: During the last 5-10 minutes, uncover the pie or slice to allow the crust to crisp back up. This helps the crust regain its golden-brown, crunchy texture.
- Check for warmth: Before removing from the oven, check if the filling is bubbling and that the center is hot. You can use a food thermometer to ensure the internal temperature reaches at least 165°F (74°C).
2. Microwave for Quick Reheating – Ideal for Small Portions
The microwave is a fast and convenient way to reheat a single slice of chicken pot pie, but it can lead to a soggy or dried-out crust if not done carefully. If you’re short on time and need a quick fix, here’s how to avoid the pitfalls of microwave reheating.
Steps to Reheat in the Microwave:
- Slice into small portions: For even reheating, slice your chicken pot pie into individual portions. This ensures the filling heats through without the crust becoming too tough or the filling overcooked.
- Use a microwave-safe plate: Place your slice on a microwave-safe plate and cover it loosely with a damp paper towel. The towel helps retain moisture, which keeps the filling creamy and prevents it from drying out.
- Heat in short intervals: Heat your slice for 1-minute intervals at medium power, checking and rotating the slice each time. This prevents overheating any one part and ensures the filling is evenly warmed.
- Avoid overheating: It’s important to not overheat the pie, as this can cause the crust to lose its crispness and the filling to become too thick or dried out. The goal is to warm the pie through rather than cook it again.
3. Steam to Maintain Moisture – A Trick for Even Heating
If you’re looking for a way to reheat a slice of chicken pot pie while keeping the flaky crust intact, try steaming. This method helps prevent the filling from drying out while maintaining the texture of the crust.
Steps to Reheat by Steaming:
- Use a steamer: If you have a steamer basket or a steaming tray, place your slice of chicken pot pie inside. Ensure the slice doesn’t touch the water by placing it on a plate or in a shallow pan that fits inside the steamer.
- Cover with foil: Cover the pie loosely with aluminum foil to keep the moisture in.
- Steam for 5-10 minutes: Allow the pie to steam for about 5 to 10 minutes, or until the filling is thoroughly heated. The steam keeps the crust from getting too dry, while also ensuring the filling stays creamy and smooth.
4. Tips for Avoiding Dryness
Whether you’re reheating in the oven or microwave, here are a few tips to ensure your chicken pot pie doesn’t dry out:
- Add a little moisture: If the filling seems too thick or dry, you can add a small splash of chicken broth or heavy cream before reheating. Stir gently to combine, then proceed with your reheating method.
- Cover it during reheating: Covering your pie with foil or a damp towel traps moisture and prevents the crust from losing its crispness or the filling from becoming overly dry.
- Reheat in small portions: Instead of reheating the entire pie at once, reheat smaller portions so that you don’t have to overheat it in an attempt to warm the whole pie. This method prevents overcooking and keeps the pie fresh.
Conclusion: Reheat Your Chicken Pot Pie Like a Pro
Reheating your chicken pot pie doesn’t have to be tricky. By following the right steps, you can ensure that your leftover chicken pot pie stays flaky, creamy, and full of flavor. Whether you’re using the oven for an even reheat or the microwave for a quick meal, remember to cover it, avoid overcooking, and add a bit of moisture if necessary. With these tips, you’ll enjoy comforting chicken pot pie as if it was freshly baked, every time.
Serving Ideas – Pair with a Fresh Salad, Mashed Potatoes, or Roasted Vegetables
While chicken pot pie is a comforting and complete meal on its own, pairing it with complementary side dishes can elevate the experience and provide a well-rounded meal. Whether you’re looking for something fresh and light to balance the richness of the pie or something hearty to make the meal even more filling, here are some serving ideas that will perfectly complement your classic chicken pot pie.
1. Fresh Salad – Light & Crisp to Balance Richness
A fresh salad is an ideal side dish for chicken pot pie, as it adds a crisp, refreshing contrast to the rich, creamy filling and flaky crust. The lightness of the salad helps balance the hearty nature of the pie, making it the perfect pairing.
Salad Pairing Options:
- Mixed Greens Salad: A simple mixed greens salad with a variety of lettuces such as arugula, spinach, and spring mix can be a delightful contrast to the creamy filling of the pie. Add some cherry tomatoes, cucumbers, and thinly sliced red onions for extra crunch. Dress it with a light vinaigrette (balsamic or lemon vinaigrette) to keep the flavors fresh and bright.
- Caesar Salad: For a richer, more indulgent option, a Caesar salad with crisp romaine lettuce, crunchy croutons, and a creamy dressing pairs wonderfully with the comforting flavors of chicken pot pie. The parmesan cheese and tangy dressing elevate the flavors without overwhelming the pie.
- Apple and Walnut Salad: A sweet and savory apple and walnut salad offers a wonderful contrast. The slight sweetness of sliced apples and the crunch of walnuts blend well with a goat cheese dressing or honey mustard vinaigrette.
Why a Salad Works:
The acidity and crispness of fresh salads help cut through the richness of the chicken pot pie, providing a refreshing bite between the creamy filling and flaky crust. The added vegetables in the salad also contribute valuable nutrients to balance the meal.
2. Mashed Potatoes – Comforting and Hearty
If you want to make your chicken pot pie meal more filling, mashed potatoes are a classic choice. Creamy, buttery mashed potatoes provide a rich, smooth texture that complements the hearty, savory filling of the pie.
Mashed Potato Pairing Options:
- Classic Mashed Potatoes: Creamy mashed potatoes made with butter, heavy cream, and a bit of garlic offer a comforting, indulgent side that pairs well with the flavors of the chicken pot pie.
- Garlic Mashed Potatoes: For a bolder twist, try garlic mashed potatoes. Roasted garlic or sautéed garlic adds a layer of depth that works perfectly alongside the savory chicken filling.
- Cheddar and Chive Mashed Potatoes: Adding sharp cheddar cheese and fresh chives to your mashed potatoes gives the dish an extra savory punch that enhances the comfort-food vibe of your meal.
Why Mashed Potatoes Work:
Mashed potatoes complement the creamy filling of the pot pie, offering a smooth, velvety texture that contrasts with the flaky, crispy crust. The mashed potatoes also soak up the extra filling from the pie, making each bite satisfying.
3. Roasted Vegetables – Nutritious & Flavorful
Roasted vegetables are an excellent choice to pair with chicken pot pie, adding a healthy yet delicious dimension to your meal. The caramelized sweetness of roasted vegetables contrasts beautifully with the savory flavors of the pie.
Roasted Vegetable Pairing Options:
- Roasted Carrots and Parsnips: These root vegetables offer a naturally sweet and earthy flavor that enhances the savory elements of your chicken pot pie. Toss them in olive oil, thyme, and rosemary before roasting for a delightful herbal note.
- Roasted Brussels Sprouts: Crispy roasted Brussels sprouts bring a touch of bitterness that cuts through the richness of the pie, while their crispy edges offer a satisfying crunch.
- Roasted Root Vegetables: A mix of sweet potatoes, beets, and turnips can bring both sweetness and earthiness to your plate. The natural sweetness of roasted root vegetables helps balance the savory flavors of the chicken pot pie.
- Roasted Zucchini and Squash: For a lighter roasted option, try roasting zucchini, yellow squash, and bell peppers with olive oil and garlic. These vegetables add a bright and flavorful contrast.
Why Roasted Vegetables Work:
Roasting vegetables brings out their natural sweetness and depth of flavor, creating a perfect contrast to the creamy, savory chicken filling. Roasted vegetables also add a bit of char and crispiness to the plate, balancing the soft texture of the pie.
4. Side Dishes for Extra Flavor – Try a Savory Soup or Bread
If you’re looking to add even more variety to your meal, consider serving a side dish soup or bread alongside your chicken pot pie. These options can either complement or contrast the flavors of the pie in delightful ways.
Soup Pairing Options:
- Tomato Soup: A classic tomato soup is a perfect pairing with chicken pot pie. The slightly acidic, tangy tomato flavor works well with the creamy filling, and the warmth of the soup makes the meal even more comforting.
- Creamy Butternut Squash Soup: For a richer, slightly sweet soup, try a creamy butternut squash soup. Its smooth texture and subtle sweetness enhance the savory pie while providing an extra layer of comfort.
Bread Pairing Options:
- Crusty French Baguette: A warm, crusty baguette can be perfect for dipping into the filling, adding texture and a little more indulgence to your meal.
- Garlic Bread: If you prefer something more robust, garlic bread with its crispy, buttery goodness will complement the flavors of the pie while adding a garlicky bite to the meal.
Conclusion: Perfectly Pairing Chicken Pot Pie with Side Dishes
The possibilities for pairing chicken pot pie with side dishes are endless. Whether you choose a light, fresh salad to balance the richness, creamy mashed potatoes to enhance the comfort food experience, or flavorful roasted vegetables to add depth and nutrition, your meal will be well-rounded and satisfying. Consider mixing and matching sides to create your ideal meal and enjoy every bite of this beloved classic comfort food.