Imagine waking up to the irresistible aroma of rich, custard-soaked bread caramelizing in the oven. Overnight Crème Brûlée French Toast is the ultimate make-ahead breakfast that combines the creamy, decadent flavors of classic crème brûlée with the comforting texture of French toast. With its crisp, caramelized top and soft, custard-filled center, this dish is perfect for holiday brunches, weekend treats, or special occasions when you want to impress your family and guests effortlessly.
The best part? You can prepare everything the night before! All you have to do in the morning is bake it to perfection, giving you more time to enjoy your coffee while breakfast practically makes itself. Whether you’re a seasoned home cook or a beginner, this step-by-step guide will show you how to create the best overnight Crème Brûlée French Toast with simple ingredients and easy techniques for a truly indulgent start to your day. Let’s get started!
Why You’ll Love This Overnight Crème Brûlée French Toast
Make-Ahead Convenience – Prep It the Night Before for an Easy Morning
One of the biggest advantages of Overnight Crème Brûlée French Toast is the ability to prepare everything in advance, allowing you to enjoy a stress-free morning. Instead of rushing to put together breakfast, you can simply wake up, pop the dish in the oven, and let it bake to perfection while you relax with your coffee.
Here’s why the make-ahead convenience of this dish is a game-changer:
1. Saves Time and Effort in the Morning
Mornings can be hectic, whether you’re preparing for work, getting kids ready for school, or hosting guests. By assembling your Crème Brûlée French Toast the night before, you eliminate the need for last-minute mixing, soaking, and prepping. Everything is done ahead of time, meaning all you have to do is bake and serve—no extra mess or hassle.
2. Enhances Flavor and Texture
Allowing the bread to soak in the custard mixture overnight is key to achieving the perfect consistency. The bread absorbs all the rich flavors of heavy cream, vanilla, cinnamon, and brown sugar, resulting in a silky, custard-like texture inside with a crisp caramelized topping. This slow absorption process ensures that every bite is filled with deep, decadent flavor.
3. Ideal for Hosting and Special Occasions
Hosting a brunch gathering or holiday breakfast? Instead of spending your morning in the kitchen, you can socialize with guests while the dish bakes. Whether it’s a family gathering, a Christmas morning treat, or a Mother’s Day brunch, this low-effort yet impressive recipe makes entertaining easy.
4. Flexible and Customizable
Prepping overnight allows you to make adjustments based on your schedule. If you need to serve breakfast early, simply take the dish out of the fridge while the oven preheats, then bake as usual. Want to enhance the dish? Add extras like fresh berries, nuts, or a sprinkle of cinnamon sugar before baking.
By making Crème Brûlée French Toast ahead of time, you’re setting yourself up for an effortless, gourmet-style breakfast without any morning stress. Just bake, serve, and enjoy the delicious results!
Rich and Decadent Flavor – A Custard-Soaked Brioche with a Crispy Caramelized Topping
What makes Overnight Crème Brûlée French Toast truly exceptional is its luxurious combination of flavors and textures. Each bite delivers a rich, custard-soaked interior that melts in your mouth, balanced by a perfectly crispy caramelized topping that adds the signature brûlée crunch. This contrast of soft and crispy, combined with warm vanilla and buttery caramel notes, makes it a decadent, restaurant-quality dish that you can easily recreate at home.
1. The Magic of Custard-Soaked Brioche
The secret to the rich and velvety texture of this dish lies in its custard base. Made with a luscious blend of:
- Eggs – Provide structure and create the creamy consistency.
- Heavy cream & milk – Add richness, making the toast ultra-soft and moist.
- Vanilla extract – Enhances the warm, aromatic flavor.
- Brown sugar & cinnamon – Infuse a deep sweetness with a touch of spice.
Letting the brioche bread soak overnight allows it to fully absorb these flavors, transforming into a creamy, pudding-like texture when baked. Unlike regular French toast, which can sometimes turn out dry or unevenly soaked, this method ensures every bite is consistently soft, moist, and flavorful.
2. The Signature Crispy Caramelized Topping
A true crème brûlée experience wouldn’t be complete without the crackling caramelized sugar topping. Here’s how it’s achieved:
- A buttery brown sugar base is placed at the bottom of the baking dish, ensuring that when baked, the bottom of the toast develops a golden, caramelized coating.
- For extra crispiness, you can sprinkle granulated sugar on top and broil the dish for a few minutes before serving.
- Want an authentic brûlée crunch? Use a kitchen torch to caramelize a sugar layer on top, just like in a traditional crème brûlée dessert.
3. A Perfect Balance of Sweetness and Warm Spices
While this dish is undeniably sweet and indulgent, it’s not overwhelming. The slight bitterness of caramelized sugar, combined with the warm notes of cinnamon and vanilla, creates a perfectly balanced bite. To cut through the richness, you can serve it with:
- A dusting of powdered sugar for an elegant finish.
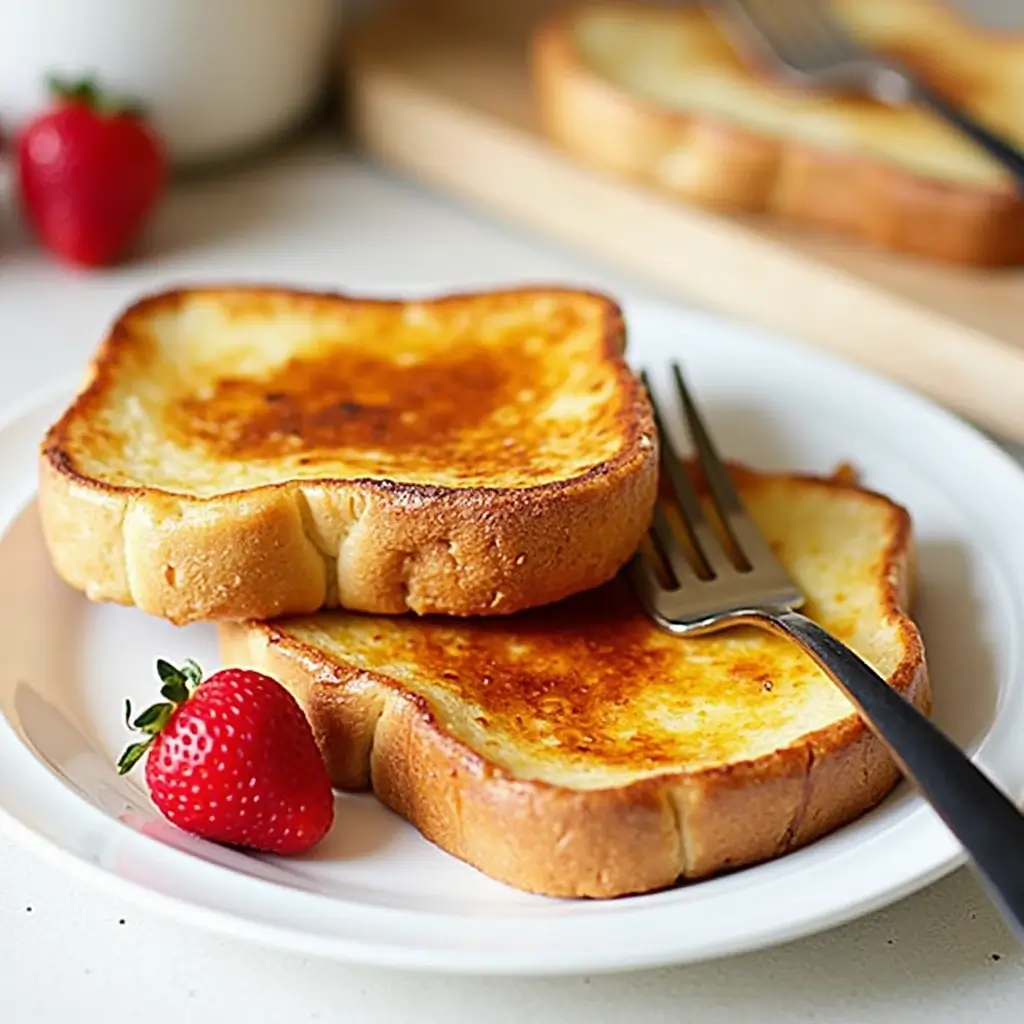
- Fresh berries like raspberries or strawberries for a slight tartness.
- A drizzle of maple syrup or honey for extra depth.
4. The Ultimate Comfort Breakfast
With its creamy, custard-like texture and buttery, caramelized crisp, this dish is not just breakfast—it’s a gourmet experience. It’s the perfect choice for special occasions, weekend brunches, or anytime you crave a touch of indulgence in the morning.
Whether you’re serving it to guests or treating yourself, this rich and decadent French toast will make every morning feel like a special occasion!
Perfect for Brunch – Ideal for Serving a Crowd Without Stress
Brunch is all about enjoying a delicious, leisurely meal with family and friends—but it shouldn’t come with the stress of last-minute cooking. Overnight Crème Brûlée French Toast is the perfect brunch dish because it’s easy to prepare, serves multiple people at once, and delivers a luxurious dining experience with minimal effort. Whether you’re hosting a small family gathering or a larger celebration, this dish allows you to impress your guests without spending the whole morning in the kitchen.
1. Make-Ahead Brunch Solution
One of the biggest challenges of hosting brunch is coordinating multiple dishes while trying to enjoy the company of your guests. The beauty of Overnight Crème Brûlée French Toast is that everything is prepped the night before, so when it’s time to serve, you simply pop it in the oven and let it bake to perfection.
- No standing over the stove flipping individual slices of French toast.
- No mess or extra dishes in the morning.
- The flavors intensify overnight, creating an even richer and more delicious dish.
This hands-off approach allows you to focus on other brunch essentials—brewing coffee, setting the table, or preparing fresh fruit and drinks—while your French toast bakes.
2. Serves a Large Group with Ease
When preparing breakfast for multiple people, individual portions can be a hassle. Unlike traditional French toast, where you cook each slice separately, this baked French toast casserole serves everyone at once.
- A single baking dish can feed 6-8 people, making it an excellent choice for gatherings.
- You don’t have to worry about keeping batches warm or timing everything perfectly.
- Simply slice and serve straight from the baking dish—no flipping, no waiting!
For larger groups, you can easily double the recipe and bake it in two dishes at the same time.
3. Pairs Well with Other Brunch Favorites
Another reason this dish is perfect for brunch is that it complements a wide range of other breakfast and brunch items. You can build a complete brunch spread by serving it with:
- Fresh fruit – Berries, bananas, or citrus slices balance the richness of the dish.
- Savory sides – Crispy bacon, sausage, or a cheese omelet provide a nice contrast.
- Brunch beverages – Freshly brewed coffee, mimosas, or a vanilla latte elevate the experience.
Whether you prefer a sweet or savory balance, this French toast fits effortlessly into any brunch menu.
4. Special Occasion Worthy Yet Easy Enough for Any Weekend
This dish isn’t just great for casual weekend brunches—it’s also an excellent choice for special occasions like:
- Holiday mornings (Christmas, Easter, Thanksgiving brunch).
- Mother’s Day or Father’s Day breakfast-in-bed.
- Birthday brunches or bridal showers.
Since it feels like a restaurant-quality, gourmet dish, it elevates the occasion without requiring complex cooking techniques.
Customizable Options – Swap Ingredients Like Cinnamon, Nutmeg, or Different Bread Types
One of the best things about Overnight Crème Brûlée French Toast is its versatility. While the classic recipe is already rich and indulgent, you can easily customize it to suit your taste preferences, dietary needs, or seasonal flavors. Whether you want to enhance the spice profile, swap out the bread, or add unique toppings, this dish is a blank canvas for creativity.
1. Experiment with Different Breads
The choice of bread significantly affects the texture and flavor of your French toast. While brioche is a popular choice for its soft, buttery consistency, you can use other varieties to change the taste and structure:
- Challah – Slightly denser than brioche but still rich and fluffy, with a subtle sweetness.
- French baguette – Creates a more structured texture, with a slightly chewy and rustic feel.
- Sourdough – Adds a light tangy flavor, balancing the sweetness of the custard.
- Texas toast – Thick-cut and sturdy, perfect for absorbing lots of custard.
- Gluten-free bread – Ideal for those with gluten sensitivities; choose a dense, high-quality loaf for best results.
If you want an extra crispy texture, opt for day-old or slightly stale bread, as it absorbs the custard without becoming too soggy.
2. Adjust the Spice and Flavor Profile
The traditional version of Crème Brûlée French Toast includes vanilla, cinnamon, and brown sugar, but you can modify these flavors to match the season or your personal preferences.
- For a warm, spiced flavor: Add a dash of nutmeg, allspice, or cardamom to complement the cinnamon.
- For a citrusy touch: Mix in orange zest or lemon zest to brighten up the custard.
- For a richer vanilla taste: Use a vanilla bean pod instead of extract for a deeper, more aromatic flavor.
- For a boozy twist: Add a splash of bourbon, rum, or Grand Marnier for a sophisticated depth of flavor.
These small changes can transform the dish, making it unique every time you prepare it.
3. Swap or Enhance the Toppings
The caramelized brûlée topping is what makes this dish irresistible, but you can take it up a notch by experimenting with different textures and flavors:
- Classic Caramelized Sugar: Sprinkle a bit of extra granulated sugar on top before baking for a crackly brûlée finish.
- Crunchy Nut Toppings: Toasted almonds, pecans, or hazelnuts add a delicious crunch.
- Fruit Additions: Fresh or caramelized bananas, berries, or sliced apples enhance the natural sweetness.
- Chocolate Lover’s Twist: Drizzle with melted dark chocolate or sprinkle chocolate chips over the custard before baking.
- Maple or Honey Drizzle: Instead of traditional syrup, try honey, caramel sauce, or maple butter for a gourmet touch.
4. Make It Healthier (or Even More Indulgent!)
Want a lighter version? Swap some of the rich ingredients for healthier alternatives:
- Use half-and-half or almond milk instead of heavy cream.
- Reduce the sugar and use pure maple syrup or coconut sugar instead.
- Add Greek yogurt to the custard for extra protein.
If you want to make it even more indulgent, consider:
- Using sweetened condensed milk for extra richness.
- Adding a layer of mascarpone or cream cheese between the bread slices.
- Serving with whipped cream and a dusting of cocoa powder.
Ingredients You’ll Need
Key Ingredients: Brioche Bread, Eggs, Heavy Cream, Vanilla Extract, and Brown Sugar
The secret to a truly decadent Overnight Crème Brûlée French Toast lies in its simple yet high-quality ingredients. Each component plays a crucial role in creating the perfect balance of richness, texture, and flavor. Here’s a deeper look at the key ingredients and why they’re essential to this indulgent dish.
1. Brioche Bread – The Perfect Base
The choice of bread makes all the difference in French toast, and brioche is the gold standard for this recipe. This buttery, slightly sweet bread is ideal because:
✔ It’s soft and fluffy, allowing it to soak up the custard without falling apart.
✔ The rich egg content in brioche enhances the texture, making the final dish tender on the inside and slightly crispy on the outside.
✔ It has a subtle sweetness that pairs beautifully with the crème brûlée caramel topping.
Other Bread Options:
- Challah – Slightly denser than brioche but still rich and flavorful.
- French baguette – Adds a chewier, rustic texture if you prefer a firmer bite.
- Texas toast – A sturdier alternative that holds up well to the custard.
For best results, use day-old bread—it absorbs the custard more effectively without becoming too soggy.
2. Eggs – The Heart of the Custard
Eggs are a crucial component of the custard mixture. They act as a binding agent, giving the French toast its rich, creamy texture.
- The egg yolks provide a silky smooth consistency.
- The egg whites help set the custard, ensuring it firms up properly during baking.
- Using high-quality, fresh eggs enhances the flavor and richness of the dish.
For a richer custard, you can use more egg yolks instead of whole eggs. If you’re looking for a lighter version, consider reducing the number of eggs or using egg substitutes like just egg yolks with a bit of cornstarch for thickness.
3. Heavy Cream – Luxurious and Creamy
Heavy cream is what makes this dish so luscious and decadent. It contributes to the rich, velvety texture of the custard, ensuring the French toast bakes up soft and indulgent.
- It adds fat and creaminess, making the dish extra luxurious.
- When combined with eggs, it creates a smooth custard that soaks deeply into the bread.
- It helps achieve the signature rich, melt-in-your-mouth consistency.
Alternative Options:
- Half-and-half – A slightly lighter option, still rich but with less fat.
- Whole milk – A good alternative for a lighter version, though the texture won’t be as creamy.
- Dairy-free options – Use full-fat coconut milk, almond milk, or oat milk for a non-dairy variation.
4. Vanilla Extract – The Flavor Enhancer
Vanilla extract is essential for adding depth to the custard. It enhances the natural flavors of the other ingredients, providing a warm, aromatic undertone that complements the caramelized sugar topping.
- Use pure vanilla extract for the best flavor.
- For an even more intense vanilla taste, use vanilla bean paste or fresh vanilla beans.
- If you want to experiment, try bourbon vanilla extract for a slight smoky richness.
5. Brown Sugar – The Caramelized Brûlée Magic
Brown sugar is a game-changer in this recipe, as it adds both sweetness and depth of flavor. When combined with butter, it creates the signature caramel layer that forms at the bottom of the baking dish, infusing the French toast with a rich, buttery toffee-like taste.
- It helps create a caramelized, brûlée-style crust on top when baked.
- The molasses content in brown sugar adds a deep, almost smoky sweetness.
- It pairs beautifully with cinnamon, nutmeg, and other warm spices.
Sugar Variations:
- Dark brown sugar – Adds a richer, more intense caramel flavor.
- Coconut sugar – A healthier alternative with a similar deep, molasses-like taste.
- Maple syrup or honey – Can be used for a natural sweetness alternative.
Sweet Enhancements: Maple Syrup, Powdered Sugar, and Cinnamon for Added Flavor
The magic of Overnight Crème Brûlée French Toast lies not just in the custard-soaked brioche and caramelized crust, but also in the sweet enhancements that take this dish to the next level. These additions introduce a depth of flavor, texture, and even visual appeal, elevating an already indulgent breakfast or brunch to something truly special.
1. Maple Syrup – A Natural, Rich Sweetness
Maple syrup is the classic sweetener for French toast, and for good reason. Its rich, amber sweetness complements the buttery richness of the brioche and the caramelized topping. Here’s why it’s a perfect fit:
- Deep Flavor: Unlike standard syrups, maple syrup has a distinct, complex flavor with notes of caramel and vanilla, which pairs beautifully with the custard.
- Natural Sweetness: It provides a more natural sweetness than processed sugars and offers a slightly earthy undertone that contrasts well with the rich and creamy custard.
- Golden Finish: Drizzling pure maple syrup over the warm French toast creates a beautiful glossy finish that not only enhances the flavor but also adds a bit of indulgence to the presentation.
Tips for Choosing Maple Syrup:
- Always opt for 100% pure maple syrup rather than imitation syrups, which contain added sugars and artificial flavors.
- If you’re feeling adventurous, try flavored maple syrups, such as cinnamon-infused or vanilla maple syrup, to add a unique twist.
2. Powdered Sugar – The Finishing Touch for Sweet Elegance
Powdered sugar is the perfect garnish for Overnight Crème Brûlée French Toast, adding a delicate sweetness without overwhelming the dish. When dusted lightly on top, it transforms the presentation and taste in several ways:
- Visual Appeal: A light dusting of powdered sugar creates a soft, snowy finish, elevating the dish from a simple breakfast to a dessert-like indulgence. It adds an elegant touch that’s perfect for brunch gatherings or special occasions.
- Balance of Sweetness: Powdered sugar dissolves quickly, so it doesn’t compete with the caramelized top of the French toast or maple syrup. Instead, it adds a subtle sweetness that complements the other flavors without overpowering them.
Pro Tip: For an extra touch of elegance, sift the powdered sugar using a fine mesh strainer to create an even and delicate dusting over the French toast. You can even combine powdered sugar with a dash of cinnamon for a slightly spiced, visually appealing topping.
3. Cinnamon – Warm Spice for Extra Depth
Cinnamon is one of those warm spices that instantly transforms the flavor profile of a dish, and it’s a perfect match for Overnight Crème Brûlée French Toast. Its warm, earthy flavor enhances the richness of the egg custard and adds another layer of depth to the already indulgent dish. Here’s how it works its magic:
- Warmth and Comfort: Cinnamon adds a cozy, comforting warmth that balances out the richness of the cream and eggs in the custard. It infuses the dish with an inviting aroma that fills the kitchen, making it even more irresistible.
- Versatility: Cinnamon can be used in several ways:
- In the custard mixture: Add a pinch of cinnamon to the custard itself for an even distribution of spice.
- As a topping: Mix cinnamon with powdered sugar for a slightly spiced sweetness on top of your French toast.
- Sprinkle over maple syrup: For an extra burst of flavor, sprinkle a little cinnamon directly onto the syrup as it’s drizzled over the French toast.
Customizing Cinnamon:
- Brown Sugar Cinnamon: For a richer, more caramelized flavor, mix brown sugar with cinnamon for the topping.
- Cinnamon Variations: Try using cinnamon blends such as pumpkin pie spice or apple pie spice to introduce additional warmth and complexity.
4. Combining Sweet Enhancements for Ultimate Flavor
The beauty of these sweet enhancements—maple syrup, powdered sugar, and cinnamon—lies in how they work together to create a harmonious flavor profile. When combined, these toppings offer a balanced sweetness, depth of flavor, and elegant finish that elevate every bite of the Overnight Crème Brûlée French Toast. Here are a few ideas on how to combine them for the ultimate sweet experience:
- Drizzle warm maple syrup over the French toast and finish with a light dusting of powdered sugar for a visually appealing and subtly sweet contrast.
- Add a sprinkle of cinnamon over the syrup or powdered sugar for an extra layer of spice and warmth.
- For a show-stopping finish, caramelize the powdered sugar with a kitchen torch for a crisp, sugary top that mimics the classic crème brûlée experience.
Equipment Needed: Baking Dish, Brûlée Torch (Optional), and a Refrigerator for Overnight Soaking
Making the Overnight Crème Brûlée French Toast is a breeze if you have the right tools on hand. The essential equipment ensures that the custard-soaked brioche bakes evenly, the caramelized topping is crisp and golden, and the entire dish comes out looking and tasting as delicious as it should. Here’s a breakdown of each piece of key equipment needed to prepare this indulgent dish.
1. Baking Dish – The Perfect Vessel for Soaking and Baking
The baking dish is the cornerstone of this recipe. It serves a critical role in both the soaking process and the baking phase, ensuring that the custard evenly permeates the bread while baking it to a perfect golden finish.
- Size Matters: The baking dish you choose should be large enough to fit the bread slices comfortably in a single layer but should also allow the custard to soak through the bread. A 9×13-inch dish works best for most standard recipes. If you are making a smaller batch, you can opt for an 8×8-inch square dish or a 2-quart baking dish.
- Material: A ceramic or glass baking dish is ideal because it helps retain heat evenly and provides consistent results. Ceramic retains heat well and keeps the dish warm, while glass allows you to see the progress of the baking and helps the top crisp up.
- Height: The sides of the dish should be deep enough to hold the custard-soaked bread. Look for dishes with a depth of at least 2 inches to ensure there’s enough room for the bread to soak and rise while baking.
Tip: If you plan to make a double batch or want to prepare individual portions, ramekins or smaller dishes can also work well.
2. Brûlée Torch (Optional) – For a Perfect Caramelized Finish
While the brûlée torch is an optional piece of equipment, it can elevate your Overnight Crème Brûlée French Toast to another level by giving it the signature caramelized sugar crust you’d expect from crème brûlée. If you want the perfect crunchy topping, a kitchen torch is the way to go. Here’s how:
- The Magic of Caramelization: After the French toast has baked and you’ve added the sugar topping, you use the torch to carefully caramelize the sugar, forming a crispy, glass-like layer on top of the bread. This technique mimics the classic crème brûlée experience, adding a satisfying crunch that contrasts beautifully with the soft, creamy custard beneath.
- How to Use a Brûlée Torch:
- First, sprinkle evenly a thin layer of sugar (preferably brown sugar or turbinado sugar) over the top of the baked French toast.
- Then, ignite the torch and hold it a few inches above the surface of the sugar, moving it in a circular motion to ensure even melting.
- Continue until the sugar is golden brown and bubbly.
- Alternative Methods Without a Torch: If you don’t have a kitchen torch, you can use the broiler in your oven to achieve the same effect. Just set the oven to broil, place the dish under the heat for 1-2 minutes, and watch the sugar melt and caramelize. Be cautious, as this method can burn the sugar quickly if you don’t keep an eye on it.
Note: If you don’t mind a softer finish, you can skip the caramelizing step altogether, and the French toast will still be delicious!
3. Refrigerator – Essential for Overnight Soaking
One of the highlights of this recipe is the overnight soaking process, which is key to achieving that custard-soaked perfection. Having access to a refrigerator is essential for this part of the process. Here’s why:
- Infusion of Flavor: The bread needs time to absorb the custard mixture made with eggs, heavy cream, vanilla, and spices. Letting the bread soak for several hours, or overnight, ensures that the bread becomes fluffy and fully saturated with the rich custard, allowing the flavors to meld together.
- Texture Transformation: By refrigerating the dish overnight, the bread becomes more moist and custard-like, creating that signature soft interior and crispy exterior once it’s baked. The cold temperature slows the soaking process and allows the custard to set on the bread, resulting in a richer, more indulgent flavor when baked.
- Convenience: The refrigerator also allows for the make-ahead convenience, which is perfect for busy mornings or entertaining guests. You can prepare the dish the night before, pop it in the fridge, and bake it the next morning with minimal effort.
Tip: If you’re short on time, letting the French toast soak for at least 4-6 hours in the fridge will still yield a great result, but the overnight soak will give you the best texture and flavor.
4. Additional Optional Tools (For Convenience)
While the three tools above are the main requirements for making Overnight Crème Brûlée French Toast, there are a few optional tools you can use to make the process even more convenient:
- Mixing Bowl: You’ll need a large bowl to combine the egg custard ingredients. This is where you whisk together eggs, cream, sugar, and spices before soaking the bread slices.
- Whisk or Hand Mixer: A whisk is essential for blending the custard ingredients, but a hand mixer can also be used to ensure everything is well incorporated.
- Cutting Board and Knife: If you’re slicing your bread fresh from a loaf, having a sharp knife and cutting board ready will make slicing the bread into the right thickness easy.
- Spatula or Spoon: When you’re soaking the bread, use a spatula or spoon to press it down gently to make sure the bread is fully submerged in the custard.
Step-by-Step Guide to Making Overnight Crème Brûlée French Toast
1. Prepare the Caramel Base – Melt Brown Sugar and Butter for the Bottom of the Baking Dish
The caramel base is an essential step in making the Overnight Crème Brûlée French Toast, as it adds a rich, golden sweetness to the bottom of the dish and forms a delicious caramelized crust once baked. This layer of melted brown sugar and butter provides a sweet foundation that complements the custard-soaked brioche and contributes to the signature crispiness and rich flavor of the dish. Here’s how you can prepare the caramel base to ensure your French toast has the perfect, golden finish.
1.1. The Role of Brown Sugar and Butter in the Caramel Base
The combination of brown sugar and butter creates a rich and flavorful caramel-like sauce that not only enhances the dish’s sweetness but also contributes to the textural contrast that makes Overnight Crème Brûlée French Toast so indulgent. Here’s how they work together:
- Brown Sugar: Brown sugar is key in this caramel base because it has a higher moisture content than white sugar, thanks to the inclusion of molasses. This gives the sugar a richer, deeper flavor with hints of toffee and caramel that pairs perfectly with the soft, creamy custard and brioche. The moisture in the brown sugar helps the caramel base stay smooth and glossy, ensuring it coats the bottom of the dish evenly.
- Butter: Butter adds a rich, velvety texture to the caramel and helps to smooth out the mixture as it melts. It also gives the base a slightly nutty, indulgent flavor that balances the sweetness of the sugar and enhances the dish’s overall richness. The fat in the butter is essential for creating that golden, crispy edge on the bottom of the French toast when baked.
1.2. How to Make the Caramel Base
Creating the caramel base is straightforward, but getting the right consistency and flavor is key to ensuring a perfect final dish. Here’s a step-by-step guide on how to prepare it:
- Melt the Butter: Start by melting unsalted butter (usually about 1/2 cup or 1 stick) in a saucepan over medium heat. Unsalted butter allows you to control the amount of salt in your recipe, which is important for balancing the sweetness of the caramel.
- Add the Brown Sugar: Once the butter has melted, add 1 cup of brown sugar (light or dark depending on your flavor preference). Dark brown sugar will provide a stronger molasses flavor, while light brown sugar will be a bit milder and less intense.
- Stir and Melt Together: Stir the mixture constantly as the butter and sugar begin to melt together. Allow the mixture to bubble gently and let the sugar dissolve completely. You want the mixture to be smooth and syrupy without any granules of sugar remaining.
- Simmer for a Minute: Let the mixture simmer for about 1-2 minutes, which will allow the sugar to fully dissolve and the caramel to thicken slightly. Be sure not to overcook the mixture, as it can become too thick or even burn if left unattended for too long.
- Add a Pinch of Salt (Optional): For extra flavor depth, you can add a small pinch of salt to balance out the sweetness of the caramel. The salt will help highlight the rich, buttery flavors and create a more complex profile in your dish.
- Pour into the Baking Dish: Once the caramel is ready, pour it into the bottom of your prepared baking dish. Use a spoon or spatula to spread the mixture evenly across the bottom, ensuring that it covers the entire surface. The caramel will create a glossy, sticky layer that will provide that perfect golden-brown crust once baked.
1.3. Why the Caramel Base is Essential
The caramel base is more than just a decorative touch – it’s what helps give the dish its signature texture and flavor. Here’s why it’s essential:
- Crispy Bottom: As the French toast bakes, the sugar and butter mixture will caramelize, forming a crispy, golden bottom. This creates a delicious contrast to the soft, custard-soaked top of the French toast and is a hallmark of the crème brûlée-inspired recipe.
- Moisture and Sweetness: The caramel layer ensures that the bread doesn’t dry out during baking. The sweet, syrupy caramel provides extra moisture that helps to keep the French toast soft on the inside, even after soaking overnight. This step also infuses the brioche with sweetness, making every bite decadent and flavorful.
- Flavor Depth: By using brown sugar and butter, the caramel layer provides a richer flavor than regular white sugar would. The molasses in the brown sugar adds a slight depth and warmth to the dish, elevating the overall taste profile and bringing out the subtle flavors of the brioche, custard, and even any spices like cinnamon or nutmeg you may have used.
1.4. Alternative Variations for the Caramel Base
While the classic brown sugar and butter caramel base is perfect for this dish, there are a few variations you can experiment with to make it your own:
- Maple Syrup: Instead of brown sugar, you can use pure maple syrup for a more distinct maple flavor. This will add an extra layer of earthiness and richness, which complements the French toast beautifully.
- Honey: For a lighter, more floral sweetness, honey can be used in place of the brown sugar. It provides a subtle sweetness and adds a unique touch that pairs well with the egg custard.
- Cinnamon or Spices: To further elevate the caramel base, you can add ground cinnamon or nutmeg to the melted butter and sugar mixture. This will infuse the base with a warm, spiced aroma that complements the flavors of the custard-soaked brioche.
2. Assemble the Toast – Layer Thick Slices of Brioche Bread Over the Caramel Mixture
Assembling the toast is a critical step in the process of making Overnight Crème Brûlée French Toast. This stage sets the foundation for the rich custard soak and ensures that the caramel base properly complements the fluffy, buttery brioche as it soaks up the custard. Layering the brioche bread over the caramel mixture also creates that desirable contrast between the crisp, caramelized bottom and the soft, custard-soaked interior. Here’s a detailed breakdown of how to properly assemble the toast to achieve the perfect texture and flavor.
2.1. Why Brioche Bread Works Best for French Toast
The type of bread you choose can make or break your French toast, and for this recipe, brioche bread is the undisputed choice. Here’s why it’s essential to the final dish:
- Buttery Richness: Brioche is a rich, buttery bread that naturally lends itself to custard dishes like French toast. It absorbs the egg mixture beautifully, creating a moist and decadent interior while still holding its shape when baked. Its high butter content helps ensure a soft, tender crumb that contrasts perfectly with the crispy caramelized bottom.
- Soft and Fluffy Texture: The light, airy texture of brioche makes it ideal for soaking up the custard without becoming soggy or falling apart. When baked, it holds a fluffy, melt-in-your-mouth texture that’s perfect for the crème brûlée-inspired French toast.
- Slight Sweetness: Brioche is slightly sweet on its own, which complements the caramel base and enhances the overall flavor of the dish. The slightly sweet and eggy taste of the bread pairs perfectly with the caramelized sugar and custard mixture.
2.2. Cutting the Brioche Bread into the Right Thickness
To ensure that each slice of brioche soaks up just the right amount of custard and cooks to perfection, you need to slice the bread to the ideal thickness:
- Slice the Brioche Thickly: For the best results, aim for 1-inch thick slices of brioche. This thickness is just enough to soak up the egg mixture without becoming too soggy, and it ensures the bread will maintain its structure during baking. Thick slices also allow the French toast to absorb the custard deeply, creating a satisfying contrast between the rich custard and the airy texture of the bread.
- Avoid Too Thin or Too Thick: If your slices are too thin, they may collapse or become overly soggy. If the slices are too thick, they might not soak up enough custard and can end up dry or undercooked in the center. The sweet spot is typically around 1 inch for the perfect balance.
2.3. Layering the Brioche Bread Over the Caramel Mixture
Layering the bread slices over the caramel mixture is a crucial part of the assembly process, as it sets the tone for the rest of the dish. The goal is to make sure the bread is well-distributed so that every slice gets coated with both the caramel and the custard mixture when you pour it over. Here’s how to layer your bread correctly:
- Arrange the Bread in an Overlapping Pattern: Start by placing the first layer of brioche slices directly on top of the caramel base. Place the bread in an overlapping, slightly staggered pattern to create a cohesive layer. Make sure the bread is snug, but there should still be small gaps between the slices to allow the custard to soak in properly.
- Fill in the Gaps: If you have smaller pieces of brioche or need to cut slices to fit, make sure to fill in the gaps where the slices don’t completely cover the caramel mixture. This ensures the bread will be evenly coated with the custard and ensures every bite will have that indulgent caramel bottom.
- Don’t Overcrowd: Be careful not to overcrowd the baking dish with too many slices. The bread should fit snugly, but you don’t want to force it into the dish. You want each slice to have ample room to soak in the custard without becoming overly crowded and compacted. The goal is a balance of soft custard-soaked bread and caramelized, crispy edges.
2.4. Tips for Layering the Brioche Bread for Even Soaking
To ensure that the custard mixture soaks into every slice of brioche bread evenly, there are a few tricks to keep in mind:
- Press the Bread Slightly: After placing the first layer of bread in the dish, you can gently press it down with your hands or a spatula to ensure the slices are in contact with the caramel and that they settle into place. This can help with even soaking. Be careful not to press too hard, though, as you don’t want to squash the bread.
- Layer More Bread for Extra Softness: If you want an even more custardy texture, you can add a second layer of brioche slices over the first one. This double-layering will increase the soaking power and give you a richer custard texture. However, you’ll need to double the custard mixture to ensure that both layers of bread are fully covered and soaked through.
- Use Stale or Day-Old Brioche: For optimal soaking, it’s often best to use slightly stale or day-old brioche. Fresh brioche, while delicious, may not soak up the custard as efficiently. Slightly stale bread absorbs the custard better, creating a richer flavor and preventing the bread from becoming too soggy during the overnight soaking process.
2.5. Layering Variations and Additions
To further enhance the flavor and texture of the dish, you can try layering in a few additional ingredients between the bread slices:
- Fresh Fruit: Adding sliced bananas, strawberries, or blueberries between layers of brioche can add natural sweetness and create a burst of freshness in every bite. Fruit can also balance out the richness of the caramel and custard.
- Nuts: Consider adding a sprinkle of chopped pecans, walnuts, or almonds between layers for a bit of crunch and additional flavor. The nuts will also caramelize slightly as the dish bakes, adding a delicious texture contrast.
- Chocolate: For a decadent twist, you can add small chunks of dark chocolate or chocolate chips between the layers of brioche. The chocolate will melt slightly during baking, creating pockets of gooey goodness.
3. Make the Custard Mixture – Whisk Eggs, Heavy Cream, Vanilla, and Cinnamon, Then Pour Over the Bread
The custard mixture is the heart and soul of your Overnight Crème Brûlée French Toast, providing the dish with its signature creamy, rich, and velvety texture. This step involves combining a few simple yet essential ingredients – eggs, heavy cream, vanilla extract, and cinnamon – to create the custard that will soak into the brioche, transforming it into a decadent treat. Here’s how to craft the perfect custard mixture that brings your French toast to life.
3.1. The Role of Eggs in the Custard Mixture
Eggs are the primary component of your custard mixture, providing both structure and richness. Here’s why they’re so crucial to the final result:
- Binding Agent: The eggs help bind all the other ingredients together, allowing them to form a smooth, unified mixture. Without eggs, the custard would separate, making it difficult for the bread to properly absorb the soaking liquid.
- Texture: Eggs are responsible for creating the creamy, smooth texture that’s a hallmark of crème brûlée-style French toast. They help the custard firm up during the baking process, resulting in a soft and custardy interior, while still allowing the top layer to become slightly crispy.
- Flavor Depth: The natural richness of the egg yolks enhances the flavor of the entire dish, giving it that luxurious mouthfeel. This added richness is key to recreating the indulgent quality of crème brûlée in the French toast.
To achieve the ideal custard texture, ensure that you whisk the eggs thoroughly to break them up evenly, allowing for an even distribution throughout the bread.
3.2. Heavy Cream: The Secret to Richness and Decadence
While whole milk can be used in some French toast recipes, heavy cream is the secret ingredient that elevates this dish to a whole new level of indulgence. Here’s how heavy cream contributes to the custard:
- Richness and Creaminess: Heavy cream is the ingredient that transforms a regular French toast recipe into an extraordinary one. It provides the custard with a velvety smooth texture and a level of richness that you won’t get with milk alone.
- Thicker Consistency: Because of its high-fat content, heavy cream results in a thicker, richer custard that absorbs into the bread more slowly, giving the French toast a dense yet soft texture on the inside while allowing the top to caramelize during baking.
- Flavor Boost: The rich, creamy flavor of heavy cream complements the sweetness of the brioche and caramel, making every bite melt in your mouth. It also helps balance the spices like cinnamon and vanilla, allowing them to shine without overpowering the dish.
3.3. The Essence of Vanilla Extract in the Custard
Vanilla extract is the flavor backbone of this recipe. A good-quality vanilla extract will infuse the custard with an aromatic, sweet depth, bringing out the best in both the custard and the bread. Here’s why it’s essential:
- Classic Sweetness: Vanilla is a classic flavor that pairs beautifully with the buttery brioche and the rich custard. It adds a level of warmth and complexity that complements the sweetness of the caramel and enhances the overall flavor profile of the French toast.
- Balance of Flavors: The sweetness from the vanilla helps to round out the flavors in the custard, providing a harmonious balance with the cinnamon and the rich, fatty notes from the heavy cream and eggs.
- Aromatic Boost: The scent of vanilla wafting through the air as the French toast bakes is just as important as the flavor. It adds to the comforting, indulgent aroma that makes the dish feel like a special occasion breakfast or brunch.
3.4. The Spice of Cinnamon – Adding Warmth and Depth
Cinnamon isn’t just a flavor enhancer; it also brings an element of warmth and depth to the custard. Here’s why you should include it:
- Warm Spice Flavor: Cinnamon adds a comforting spice note that beautifully complements the sweet richness of the custard. It enhances the overall flavor profile of the dish, giving it a subtle but significant depth that draws the palate in.
- Creme Brûlée Inspiration: The cinnamon evokes the spiced undertones commonly found in crème brûlée recipes, making it a perfect addition to your French toast version. It brings a little bit of that classic, caramelized sweetness without overwhelming the delicate flavor balance.
- Aromatic Appeal: Cinnamon also has an aromatic quality that intensifies as the French toast bakes, infusing the kitchen with its delicious fragrance. The added warmth creates an irresistible atmosphere that makes the dish feel even more indulgent.
3.5. Whisking the Custard Mixture to Perfection
Once you’ve added the eggs, heavy cream, vanilla extract, and cinnamon to your bowl, it’s time to whisk everything together. Proper whisking is key to achieving a smooth and uniform custard:
- Uniform Consistency: Make sure to whisk the custard until the mixture is completely smooth and the ingredients are evenly combined. You don’t want any visible streaks of egg or cinnamon, as these will create inconsistencies in the texture and flavor.
- Avoid Overbeating: While it’s important to mix the custard well, avoid overbeating the eggs. Overbeating can introduce air into the mixture, which could cause your custard to be overly foamy. You want a silky, thick custard that gently coats the bread when poured over it.
- Strain the Custard (Optional): If you prefer an ultra-smooth texture, you can strain the custard through a fine mesh sieve before pouring it over the bread. This ensures that there are no egg bits or cinnamon clumps in the custard, resulting in a perfectly silky mixture.
3.6. Pouring the Custard Over the Bread
Once your custard mixture is smooth and ready, it’s time to pour it over the brioche bread in the baking dish. Here’s how to do it right:
- Even Distribution: Pour the custard slowly and evenly over the layers of brioche bread. Try to ensure that every slice of bread gets a fair amount of custard soak. For best results, use a spoon or spatula to gently press down on the bread slices so they absorb the custard mixture evenly.
- Allow for Soaking: After pouring the custard over the bread, let the mixture sit for a few minutes so that the bread has time to absorb the custard. For optimal results, cover the baking dish with plastic wrap and let it soak in the refrigerator overnight. This ensures that the bread fully absorbs the custard, creating a rich, soft interior.
3.7. The Importance of Overnight Soaking
While you could bake the French toast right after pouring the custard, overnight soaking is crucial for the best result. Here’s why:
- Flavor Development: As the bread soaks overnight, it absorbs the custard mixture, allowing the flavors to meld together and develop. This process leads to a deeply flavorful French toast with every bite tasting rich and indulgent.
- Perfect Texture: Overnight soaking also ensures that the bread will absorb the custard evenly, giving you the perfect balance between a soft, custard-filled interior and a golden, caramelized exterior once baked.
- Convenience: Soaking the bread overnight makes the process of preparing this dish hassle-free in the morning. All you need to do is pop the baking dish in the oven, and breakfast is nearly done!
4. Chill Overnight & Bake – Let It Soak Overnight, Then Bake Until Golden and Caramelized
The overnight soaking and baking process is what turns your basic French toast into a rich, decadent, crème brûlée-inspired masterpiece. By letting the bread soak in the custard mixture overnight and then baking it the next day, you ensure the perfect texture—soft on the inside with a golden, caramelized top. Here’s an in-depth look at why these steps are crucial to the success of your Overnight Crème Brûlée French Toast.
4.1. Why Overnight Soaking is Essential
One of the key features of this dish is the overnight soaking period. It allows the bread to fully absorb the custard, which contributes to the rich texture and flavor of the final result. Here’s why it’s necessary:
- Optimal Absorption: Brioche bread, with its light and airy texture, absorbs liquids quite easily. By letting it soak overnight, the bread becomes saturated with the custard mixture, ensuring a creamy, custard-filled interior. Without this soaking time, the bread might not absorb the custard properly, leading to a drier texture.
- Flavor Penetration: As the bread soaks, it not only absorbs the custard but also soaks in the vanilla, cinnamon, and other spices, allowing the flavors to meld and develop. This process enhances the overall richness and depth of flavor, giving each bite the full crème brûlée experience.
- Convenience: Soaking overnight makes this dish perfect for busy mornings, especially when preparing brunch for a crowd. Once the soaking is done, all you have to do is pop it in the oven the next day for a quick bake.
4.2. The Benefits of Chilling Overnight
While you could technically soak the bread for just a couple of hours, overnight chilling is what truly makes this recipe shine. Here’s what overnight chilling does:
- Even Custard Distribution: Chilling the dish overnight gives the custard enough time to evenly soak through every slice of bread. The brioche becomes tender and saturated, so each bite is filled with that creamy, custard-like texture.
- Improved Texture: After sitting in the fridge overnight, the bread firms up slightly, which helps it maintain its structure when baked. The outside crisps up nicely during baking, while the inside remains soft and custardy. The long soak allows the custard to fully penetrate the bread without making it soggy, striking the perfect balance.
- Enhanced Flavor: The chilling process allows the flavors to blend and deepen overnight. The vanilla, cinnamon, and other spices become more pronounced as the bread absorbs the custard. Essentially, you’re allowing the dish to develop even more complex flavors that will come through after baking.
4.3. The Baking Process – Transforming the Dish into a Golden, Caramelized Delight
After the overnight soak, it’s time to bake your French toast. Baking transforms the custard-soaked bread into a golden, crispy masterpiece, with the caramelized sugar on top adding an irresistible crunch. Here’s why the baking process is crucial:
- Golden Top: The baking time allows the top of the bread to turn golden and crisp, creating that signature crispy edge that contrasts beautifully with the soft, custardy interior. The high heat helps create the caramelized crust you expect from a crème brûlée.
- Caramelization: As the sugar in the custard mixture bakes, it caramelizes, creating a rich, golden-brown topping with a slight crunch. This process gives the French toast its characteristic texture—crispy on top, soft and creamy on the inside—just like the crust of a crème brûlée.
- Even Cooking: Baking at a moderate temperature ensures that the custard has time to set while the bread becomes toasted but not overly dry. The result is a perfectly balanced dish, with the bread crisping at the edges while the center remains luxuriously creamy.
4.4. Baking Time and Temperature – The Key to Perfect French Toast
The key to achieving that perfectly baked Overnight Crème Brûlée French Toast lies in the correct baking time and temperature:
- Preheat Your Oven: Ensure that your oven is preheated to around 350°F (175°C). This temperature allows for even baking, ensuring the custard cooks properly without overcooking the bread.
- Bake Until Golden: Bake the French toast for around 30 to 40 minutes, depending on the size of your baking dish and the thickness of the brioche. Keep an eye on it as it bakes—you’re looking for a deep golden-brown color and a crispy texture on top. The custard should be set but not overcooked, so check the dish near the end of the baking time by gently pressing on it to see if it feels firm.
- Optional Broiling for Extra Crispiness: For a little extra caramelization on top, you can broil the dish for the last 1-2 minutes. This step gives the top that extra crunchy, brûléed texture, making it even more like the crème brûlée you’re trying to emulate. Just be sure to watch it closely to avoid burning.
4.5. Checking for Doneness
While baking, you’ll want to check for the right texture and consistency:
- Firm Center: The center should be firm to the touch and no longer liquid. You can test this by inserting a knife or fork into the center of the dish—if it comes out clean, the custard has set.
- Golden Edges: The edges of the bread should be golden-brown and crispy, while the middle should still maintain a soft, custard-like consistency. The contrast between these textures is what makes the dish so special.
4.6. After Baking – Let It Rest for a Few Minutes
Once your Overnight Crème Brûlée French Toast has finished baking, don’t rush to serve it immediately. Let it rest for 5 to 10 minutes to allow the custard to set fully and for the caramelized top to firm up a bit. This resting time also makes it easier to cut and serve, preventing the custard from spilling out too much.
Tips for Achieving the Perfect Caramelized Topping
Use a Brûlée Torch – For an Extra Crisp, Caramelized Crust After Baking
One of the standout features of a Crème Brûlée French Toast is its irresistible caramelized topping. While baking your dish creates a golden-brown crust, using a brûlée torch to finish it off adds an additional level of crispiness and depth of flavor, making it even more decadent. Here’s how using a brûlée torch can elevate your dish and why it’s worth incorporating into your cooking process.
Why Use a Brûlée Torch?
A brûlée torch, also known as a kitchen blowtorch, is a specialized tool designed to achieve a perfect caramelized finish on various dishes, especially desserts like crème brûlée. While the baking process will give your French toast a beautiful golden color, using a torch allows for more control over the caramelization and provides that signature crispy, crunchy texture that’s so coveted in crème brûlée. Here’s why it’s worth using:
- Precision Caramelization: The torch allows you to directly apply intense heat to the sugar topping, caramelizing it quickly without affecting the custard inside. This ensures a perfectly crisp sugar crust without overbaking the dish or making it too dry.
- Uniform Browning: A torch provides even heat distribution over the surface of your French toast, creating a uniform golden-brown layer. This gives the dish a restaurant-quality finish, where the sugar is caramelized evenly, adding an extra layer of texture and flavor.
- Quick and Efficient: Unlike broiling, which can be tricky and take longer, a brûlée torch gives you instant caramelization and control over the process. You can caramelize just the surface of the bread while leaving the custard and the interior soft and creamy.
How to Use a Brûlée Torch for the Perfect Crust
To achieve that perfect crunchy, caramelized crust with a torch, here’s a step-by-step guide on how to use it effectively:
- Ensure Proper Baking First: Before using the torch, make sure your Overnight Crème Brûlée French Toast has been baked and has reached its final golden-brown color. The torch is the finishing touch, not a substitute for baking.
- Sprinkle Sugar on Top: Once your French toast is baked and cooled slightly, sprinkle a thin, even layer of granulated or brown sugar on top. The sugar should cover the surface lightly but evenly to create a smooth, uniform layer.
- Use the Brûlée Torch: Hold the torch about 3 to 4 inches away from the sugar. Turn the torch on and move it slowly across the sugar surface in a circular motion, allowing the flame to evenly melt and caramelize the sugar. The sugar will start to bubble and darken into a rich golden brown.
- Control the Caramelization: Be patient and watch closely as the sugar turns from clear to golden. The torch will caramelize the sugar quickly, so avoid lingering too long in one spot. You want to achieve a crisp, glassy layer, not a burnt one.
- Let It Cool: Once the sugar has been fully caramelized, let the French toast rest for a minute or two to allow the sugar to harden and form that signature crispy shell. This will add texture and a delightful crunch as you slice through the French toast.
The Benefits of Using a Brûlée Torch
Here’s why a brûlée torch is the best tool for this final step:
- Creates the Perfect Crust: The high, direct heat from the torch melts the sugar, turning it into a rich, caramelized crust that’s sweet, crunchy, and adds a satisfying contrast to the soft custard-soaked brioche.
- Avoids Overcooking: Unlike broiling, where the heat can overcook the dish, the torch allows you to apply heat only to the surface, preventing the bread from becoming overly dry or burnt while ensuring the caramelization is spot-on.
- Professional Touch: Using a torch adds a touch of elegance and sophistication to your French toast. It’s the same technique that chefs use to perfect crème brûlée, and it brings a professional finish to your homemade dish.
- Customizable Results: The torch allows you to control the level of caramelization. Whether you prefer a light golden crust or a deep amber layer, the torch gives you the freedom to adjust based on your preference.
Torch Alternatives
If you don’t have a brûlée torch, don’t worry! You can still achieve a caramelized topping, though it may not be as precise or crisp. Here are some alternatives:
- Broiler Method: After sprinkling the sugar, place the dish under a broiler for about 1-2 minutes, watching carefully. While this method can give you some caramelization, it’s not as precise as using a torch, and you may risk overcooking the toast.
- Stovetop Sugar Caramelization: You could also use a pan to melt the sugar and then pour it over the French toast, but this method lacks the same crispy texture and uniformity provided by the torch.
الشواء في الدقائق الأخيرة – يساعد على الحصول على قمة مقرمشة وذهبية اللون
While using a brûlée torch is an excellent method for caramelizing your French toast, broiling is another fantastic option to achieve that signature crisp, golden-brown crust on top. Broiling uses high heat from above to toast the surface of the dish, resulting in a crunchy, slightly caramelized top that contrasts beautifully with the soft, custardy interior. Here’s how broiling works and why it’s an essential step for perfecting your Overnight Crème Brûlée French Toast.
Why Broiling Works
Broiling is a cooking method where heat is applied from above, directly targeting the top of the food. It’s similar to grilling, but the heat source is typically from the oven’s broiler element. Here’s why broiling is ideal for achieving that perfect, crispy top for your French toast:
- Quick, High Heat: Broilers reach high temperatures quickly, which helps to crisp up the top of the French toast without overcooking the inside. The heat caramelizes the sugar, creating that golden, crispy layer that’s characteristic of crème brûlée.
- Enhances Texture: By broiling for just the final few minutes, you allow the sugary topping to melt and form a thin, glass-like crust. The contrast between the soft, custard-soaked brioche and the crispy topping adds incredible texture to each bite.
- No Need for Extra Equipment: Unlike using a brûlée torch, broiling doesn’t require any specialized tools. All you need is your oven’s broiler, which is often a convenient feature built into most ovens, making it an easy and accessible option for caramelization.
How to Broil Your French Toast to Perfection
Broiling may sound simple, but to achieve the ideal golden top, you need to follow a few steps to get the best results:
- Complete the Baking Process First: Before you broil, ensure your Overnight Crème Brûlée French Toast is fully baked. It should have reached a golden-brown color on the edges, and the custard should be set. The broiler will only target the top, so it’s important the dish is already mostly cooked.
- Sprinkle Sugar on Top: Once the French toast is baked, sprinkle a light layer of granulated or brown sugar over the top of the bread. This sugar will melt and caramelize under the broiler, creating a crisp, sweet topping. You can add a bit more sugar if you want a thicker caramelized layer, but be careful not to overdo it.
- Position the Rack: Set the oven rack so that the French toast is about 3 to 4 inches away from the broiler element. If the rack is too close, the sugar may burn before it caramelizes. If it’s too far, the sugar won’t get the direct heat needed to caramelize properly.
- Broil for 2-4 Minutes: Turn your oven’s broiler on to high, and place the dish under the broiler. Keep a close eye on it as the sugar begins to bubble and caramelize. Broiling typically takes 2-4 minutes depending on your oven’s strength and how much sugar is on the surface. You’ll know it’s ready when the sugar has melted into a golden, shiny layer with a slight crispness.
- Watch Closely to Avoid Burning: The broiler can quickly go from perfect to burnt, so don’t walk away during this step! Keep the oven door slightly ajar to watch the progress, and be ready to take the dish out as soon as the sugar has reached the desired golden-brown color.
- Let it Cool: Once you’ve achieved that perfect caramelized crust, remove the French toast from the oven and let it cool for a few minutes. The sugar will harden slightly as it cools, giving you that signature crisp, glassy topping.
The Benefits of Broiling for a Crispy Top
Broiling is a fast and effective way to add that final touch to your Overnight Crème Brûlée French Toast, and it provides several benefits:
- Even Crispiness: Broiling evenly crisps the sugar across the entire top, giving you a uniform caramelization. The result is a beautifully golden and crunchy layer that enhances the texture and flavor.
- Crisp, Not Soggy: Since broiling uses dry heat, it prevents the French toast from becoming soggy. The custard-soaked bread remains moist and soft inside, while the top becomes crispy and crunchy.
- Enhances the Flavor: The sugar caramelizes into a rich, buttery flavor that complements the custard base and adds sweetness to balance the overall dish. It mimics the classic crème brûlée top, where the burnt sugar creates a depth of flavor.
Alternative Broiling Tips
While broiling is an excellent choice for finishing your French toast, here are a few additional tips for getting the best result:
- Use a Mix of Sugars: For an even more complex flavor, try using a combination of granulated sugar for sweetness and brown sugar for a slightly deeper, caramel-like taste. This will give you a richer caramelized top.
- Caramelized Nuts for Extra Crunch: If you’re looking to add even more texture and flavor, consider sprinkling some chopped nuts like pecans or almonds over the sugar before broiling. The nuts will toast under the broiler, adding extra crunch and a bit of nuttiness to your French toast.
- Don’t Overload the Sugar: While it’s tempting to sprinkle a lot of sugar on top for a thicker crust, a light, even layer works best. Too much sugar can cause the crust to become too thick and may result in burning rather than caramelization.
Let It Rest Before Serving – Allows the Custard to Set and Enhances Texture
Patience is key when it comes to making the perfect Overnight Crème Brûlée French Toast. While it might be tempting to dive into the dish as soon as it’s out of the oven, letting the French toast rest for a few minutes after baking is a crucial step that greatly enhances the texture, flavor, and overall experience. Resting allows the custard to finish setting, ensuring the dish holds together beautifully when served. Here’s why this simple step makes a big difference and how it enhances the final product.
Why Resting Is Important
When your Overnight Crème Brûlée French Toast comes out of the oven, the custard inside is still quite soft and delicate. If you cut into it too soon, the custard might spill out, ruining the beautiful structure of the dish and making it harder to serve. Here’s why letting it rest is essential:
- Helps the Custard Set: The custard mixture (eggs, cream, sugar) takes a few minutes to fully set and firm up after being baked. By allowing the dish to rest for around 5 to 10 minutes, the custard has time to solidify just enough, which makes it easier to slice without losing the soft, creamy texture.
- Improves Texture: Resting gives the custard a chance to “settle” and thicken, so it has a silky, smooth consistency when you cut into it. This ensures the French toast maintains a beautiful balance of crispy edges and a rich, creamy interior. The bread, too, becomes more cohesive, absorbing the custard completely and melding together with the sugar topping.
- Enhances Flavor: Like many baked goods, resting helps the flavors to intensify and meld together. In this case, the sweet and rich flavors from the brown sugar caramelization, the vanilla extract, and the eggs and cream in the custard have more time to develop. This resting period enhances the overall depth and complexity of the dish’s flavor, making every bite more indulgent.
How to Rest Your French Toast
To rest your Overnight Crème Brûlée French Toast properly, follow these simple guidelines:
- Remove from the Oven Carefully: Once your French toast has finished baking and you’ve achieved that golden-brown, caramelized top, remove it from the oven. Allow it to cool for a couple of minutes, but don’t rush to cut into it.
- Let it Sit: Place the dish on a cooling rack or a countertop, and allow it to rest for 5 to 10 minutes before serving. This waiting time gives the custard inside a chance to finish setting and ensures the sugar crust won’t crack prematurely.
- Cut Into It Gently: After the resting period, when you’re ready to serve, use a sharp knife to cut the French toast into squares or slices. The custard will have firmed up, allowing you to cut neat pieces without the custard spilling out, ensuring a perfect presentation.
Additional Tips for Perfect Resting
While resting is essential for all the reasons above, here are a few tips for ensuring the process goes smoothly:
- Let It Cool Slightly, but Not Too Long: If you let the French toast cool for too long, it could lose some of its warmth, which will affect the enjoyment of this dish. You want the outside to be slightly cool to the touch, while the inside should still be warm and comforting.
- Rest in the Baking Dish: You can leave the French toast right in the baking dish during the resting period. This way, it stays intact and the caramelized topping remains undisturbed. If you transfer it too early, it could crack or lose its shape.
- Rest Before Serving, Not Before Baking: While the idea of letting the dish rest overnight might sound tempting, you’ll want to make sure the soaking process happens before baking, not after. The resting mentioned here applies after baking, allowing the custard to fully set and enhance texture before serving.
How Resting Enhances the Overall Eating Experience
The extra few minutes of patience pays off in several ways:
- Better Slicing: As mentioned earlier, letting the French toast rest prevents the custard from spilling out when you cut into it. This is especially important if you plan to serve it to guests and want to maintain the presentation of each piece.
- Even Heat Distribution: After the dish rests, the heat distributes evenly throughout, which prevents any part of the dish from being too hot or too cold when you serve it. This ensures that each bite of French toast is consistently warm and comforting, from the first piece to the last.
- Smoother, Richer Texture: The resting period gives the bread and custard time to “set” together. The brioche bread will have fully absorbed the custard, making each bite a perfect combination of softness and structure. The exterior will stay crispy, and the interior will remain creamy and rich, creating a harmonious texture throughout.
Serving and Storage Suggestions
Best Served With: A Dusting of Powdered Sugar, Fresh Berries, and Maple Syrup
While your Overnight Crème Brûlée French Toast is undeniably delicious on its own, the perfect toppings can elevate the dish to a whole new level. By adding a dusting of powdered sugar, a handful of fresh berries, and a generous pour of maple syrup, you can complement the rich, custardy flavor of the French toast and enhance the overall eating experience. These simple additions not only boost the visual appeal but also bring out the different textures and flavors that harmonize beautifully with the dish. Here’s a closer look at why these toppings work so wonderfully and how to use them effectively.
Powdered Sugar: A Light, Sweet Finish
A dusting of powdered sugar is a classic and elegant touch for any French toast dish. This fine, soft sugar adds a light sweetness without overwhelming the other flavors. Here’s how it benefits your French toast:
- Visual Appeal: The delicate white powder contrasts beautifully against the golden-brown crust of the French toast, giving the dish a professional, polished look. It adds an aesthetic quality that makes your breakfast or brunch feel extra special.
- Light Sweetness: The powdered sugar offers a touch of sweetness without being too heavy. It lightly accents the caramelized sugar topping from the oven and blends seamlessly with the custardy interior. This gentle sweetness balances out the richness of the dish, making each bite feel indulgent without being overwhelming.
- Texture Contrast: The soft, fine powder gives a slight, melt-in-your-mouth texture that contrasts with the crispy caramelized crust and soft custard-soaked bread. It creates a delicate texture that enhances the overall mouthfeel of the dish.
To apply, use a sifter or a fine mesh strainer to evenly distribute the powdered sugar over the top of the French toast. This ensures that you get a thin, uniform layer without clumping or uneven patches.
Fresh Berries: A Burst of Freshness and Color
Adding fresh berries to your Overnight Crème Brûlée French Toast is a fantastic way to introduce a burst of color, freshness, and tartness to balance out the sweetness of the dish. Berries such as blueberries, raspberries, strawberries, or blackberries pair wonderfully with the rich custard, bringing several benefits:
- Refreshing Tartness: The natural tartness of fresh berries creates a delicious contrast to the sweetness of the caramelized topping and custard. This tangy component balances the richness and helps cleanse the palate between bites.
- Color and Presentation: The vibrant colors of the berries—deep reds, blues, and purples—add a visual appeal that makes the dish feel fresh and lively. The bright pop of color against the warm, golden French toast enhances the dish’s presentation, making it look just as good as it tastes.
- Antioxidants and Nutrients: Berries are packed with antioxidants, vitamins, and fiber, adding a nutritious element to your indulgent dish. The combination of rich, creamy French toast with nutrient-packed fruit is a balance that makes the dish feel like a more complete and wholesome treat.
To use, arrange a mix of berries on top of your French toast just before serving. You can either scatter them across the dish or place them in a more artistic, decorative pattern for a fancier presentation.
Maple Syrup: A Classic Sweet Drizzle
No French toast is complete without the addition of maple syrup—and Overnight Crème Brûlée French Toast is no exception. The syrup adds not only sweetness but also layers of flavor that pair perfectly with the dish. Here’s why maple syrup is a must-have topping:
- Deep, Rich Sweetness: Maple syrup has a complex flavor profile with woodsy and caramel-like notes that complement the buttery custard and the caramelized sugar topping on the French toast. The slight earthiness of maple syrup adds depth and richness, making it the ideal complement to the dish’s sweetness.
- Texture and Moisture: The syrup brings a smooth, liquid texture that drizzles over the crispy, caramelized top, soaking into the soft brioche bread. This extra layer of moisture enhances the dish, making each bite more indulgent.
- Versatility: Maple syrup can be drizzled generously over the French toast, or served on the side for dipping. You can even warm it up before serving, which creates a comforting and cozy effect. For an extra touch, you could even infuse the syrup with a hint of vanilla extract or a dash of cinnamon to add a deeper, spiced flavor.
For the best results, opt for pure maple syrup rather than imitation syrups, as it offers a richer, more authentic flavor. Warm it gently before drizzling over your French toast to enhance its aromatic qualities.
Optional Add-Ons for Extra Flair
While powdered sugar, fresh berries, and maple syrup are the classic trio, you can also experiment with a few additional toppings to personalize your Overnight Crème Brûlée French Toast:
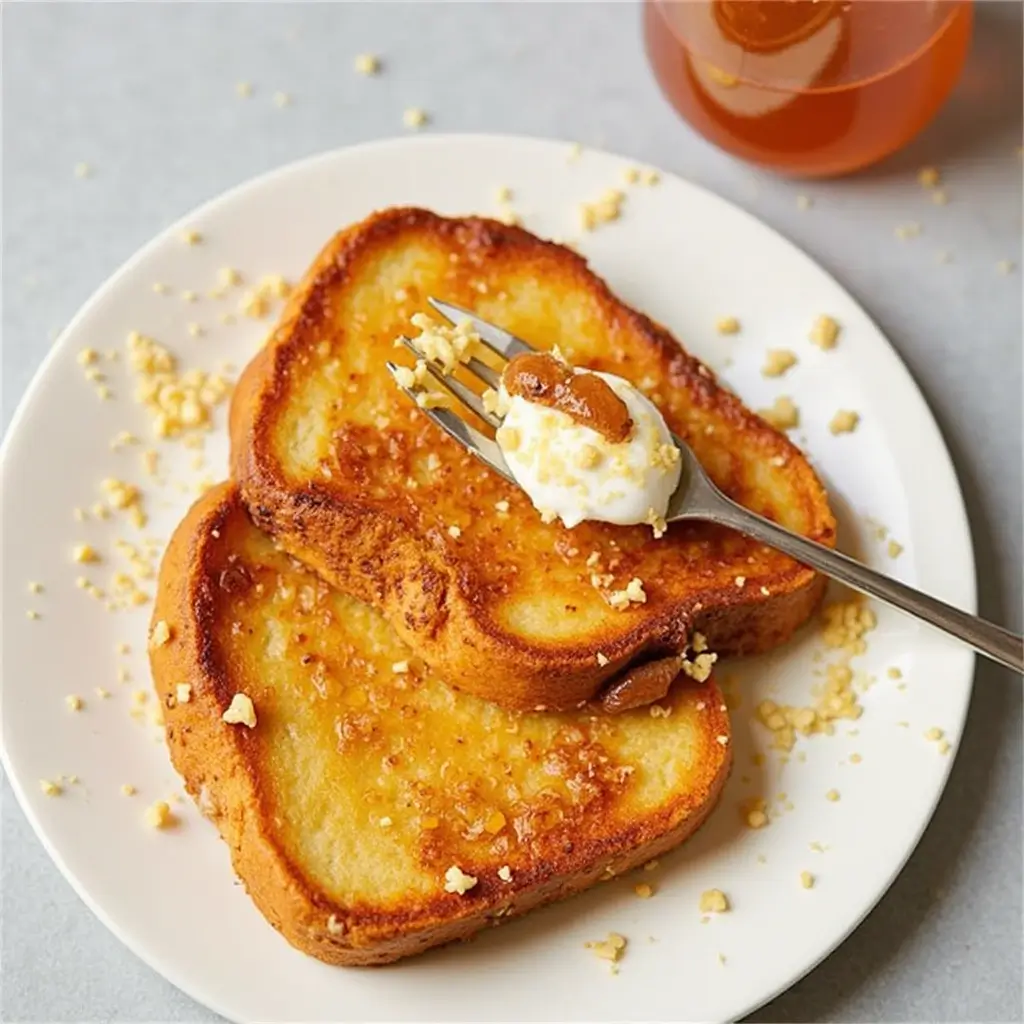
- Whipped Cream: A dollop of freshly whipped cream adds an extra layer of indulgence. The light, airy cream contrasts beautifully with the dense, custard-soaked French toast.
- Chopped Nuts: A sprinkle of chopped toasted nuts, such as pecans, walnuts, or almonds, adds a delightful crunch and richness that balances out the softness of the French toast. The nuts bring in a nutty, toasty flavor that complements the maple syrup and custard base.
- Coconut Flakes: For a tropical twist, top your French toast with some shredded coconut. Its subtle sweetness and chewy texture add an interesting contrast to the dish, making it feel even more decadent.
- Chocolate Chips or Nutella: If you’re craving something extra sweet, drizzle a bit of Nutella or sprinkle mini chocolate chips over the top. The melted chocolate adds a rich, indulgent flavor that pairs wonderfully with the custard.
How to Store Leftovers: Keep in an Airtight Container in the Fridge for Up to 3 Days
If you’re lucky enough to have any Overnight Crème Brûlée French Toast leftovers, it’s essential to store them properly so they stay fresh and maintain their delicious texture. Here’s everything you need to know about storing leftovers and how to enjoy them at their best even after a day or two.
1. Let It Cool Completely Before Storing
Before you store any leftovers, it’s crucial to allow your Overnight Crème Brûlée French Toast to cool to room temperature. If you place hot or warm French toast directly into an airtight container, the moisture trapped inside can cause the bread to become soggy, which will negatively affect its texture. Cooling it down will also prevent condensation, which can lead to a soggy mess. So, allow the French toast to cool for about 15-20 minutes before transferring it into storage.
2. Use an Airtight Container
The key to keeping your Overnight Crème Brûlée French Toast fresh is using an airtight container. This will help maintain the flavor and prevent the bread from drying out or absorbing unwanted odors from the fridge. A glass or plastic container with a secure lid works well, as long as it seals tightly. If you don’t have an airtight container, you can wrap the French toast in plastic wrap or aluminum foil before placing it in a regular storage container or resealable bag.
Here are a few tips to ensure the best storage:
- Layer the Toast Properly: If you have multiple pieces of French toast, layer them with parchment paper or wax paper between each slice. This will prevent them from sticking together, allowing you to easily separate and reheat individual slices later.
- Keep it Moist: For extra precaution, you can cover the French toast loosely with foil before storing it. This helps lock in moisture, so your French toast doesn’t dry out during refrigeration.
3. Store in the Refrigerator
Once cooled and properly wrapped, place your French toast in the refrigerator. Overnight Crème Brûlée French Toast will stay good for up to 3 days. However, after the first day, you may notice a slight change in texture as the bread soaks up any remaining moisture. Despite this, it will still taste delicious!
4. Reheating Leftovers
When you’re ready to enjoy your leftovers, you’ll want to reheat them in a way that brings back their original texture and flavor. Here are a few methods for reheating your Overnight Crème Brûlée French Toast:
- Oven Method (Preferred): Preheat your oven to 350°F (175°C). Place your leftover French toast on a baking sheet lined with parchment paper, and cover it with aluminum foil to keep it moist. Bake for about 10-15 minutes, or until heated through. If you want to add a little crispness to the outside, you can remove the foil during the last 5 minutes of baking.
- Stovetop Method: You can also reheat the French toast on the stovetop. Heat a non-stick skillet over medium heat and add a little butter or oil. Place the slices of French toast in the skillet and cook each side for about 2-3 minutes, until warm and lightly crisped.
- Microwave Method: If you’re in a rush, you can reheat the French toast in the microwave. Place a slice on a microwave-safe plate and cover it with a damp paper towel to prevent it from drying out. Heat on high for 30-second intervals until warm. This method doesn’t provide the same crispy texture but works well for a quick reheat.
5. Freezing for Longer Storage
If you have more leftovers than you can eat within 3 days, you can also freeze your Overnight Crème Brûlée French Toast for longer storage. Freezing is a great way to extend its shelf life for up to 1-2 months. Here’s how to freeze your French toast properly:
- Cool Completely First: Just like with refrigeration, let the French toast cool completely before freezing.
- Wrap Each Slice: Wrap each slice individually in plastic wrap or aluminum foil to prevent freezer burn and to make it easier to reheat individual portions later.
- Place in a Freezer Bag: Put the wrapped slices into a freezer-safe bag or airtight container. Label the bag with the date so you can keep track of how long it’s been frozen.
- Thawing: When you’re ready to eat it, remove the slices from the freezer and allow them to thaw overnight in the fridge, or you can use the microwave or oven to thaw and reheat them directly.
6. Quality Considerations
While storing and reheating can help maintain the quality of your French toast, it’s important to note that, over time, the custard-soaked brioche may lose some of its fluffiness and become slightly denser or chewier. The caramelized topping might also soften after refrigeration, losing its original crispy texture. However, it will still be tasty, especially with your choice of fresh toppings or a warm drizzle of maple syrup.
Reheating Tips: Warm in the Oven at 350°F for the Best Texture
Reheating your Overnight Crème Brûlée French Toast is a critical step to ensuring it retains its delicious, fresh-from-the-oven texture. If done correctly, it can taste nearly as good as the first time it was baked. Here’s a breakdown of why using the oven is the best method and how to do it for optimal results.
1. Why Use the Oven for Reheating?
The oven is the best way to reheat Overnight Crème Brûlée French Toast because it helps maintain the dish’s crispiness on the outside while keeping the custard-filled interior moist and rich. Unlike the microwave, which can cause the bread to become soggy or chewy, the oven gives you a chance to gently warm the dish without sacrificing texture. Reheating in the oven ensures that the caramelized top stays crispy and the bread retains its fluffiness.
2. Preheat Your Oven to 350°F
Start by preheating your oven to 350°F (175°C). This temperature is the sweet spot for warming up Overnight Crème Brûlée French Toast. It’s hot enough to thoroughly heat the bread but not so high that it dries out the custard or burns the caramelized sugar topping. The goal is to warm through without overcooking, ensuring the French toast maintains its creamy, decadent interior.
3. Use a Baking Sheet and Parchment Paper
Once your oven is preheated, place your leftover Overnight Crème Brûlée French Toast on a baking sheet. To ensure easy cleanup and to prevent sticking, line the baking sheet with parchment paper. If you have multiple slices, space them out evenly to allow for uniform heating.
If you have several pieces stacked together, you can also place a piece of aluminum foil loosely over the French toast to help keep moisture in and prevent the bread from drying out while it reheats.
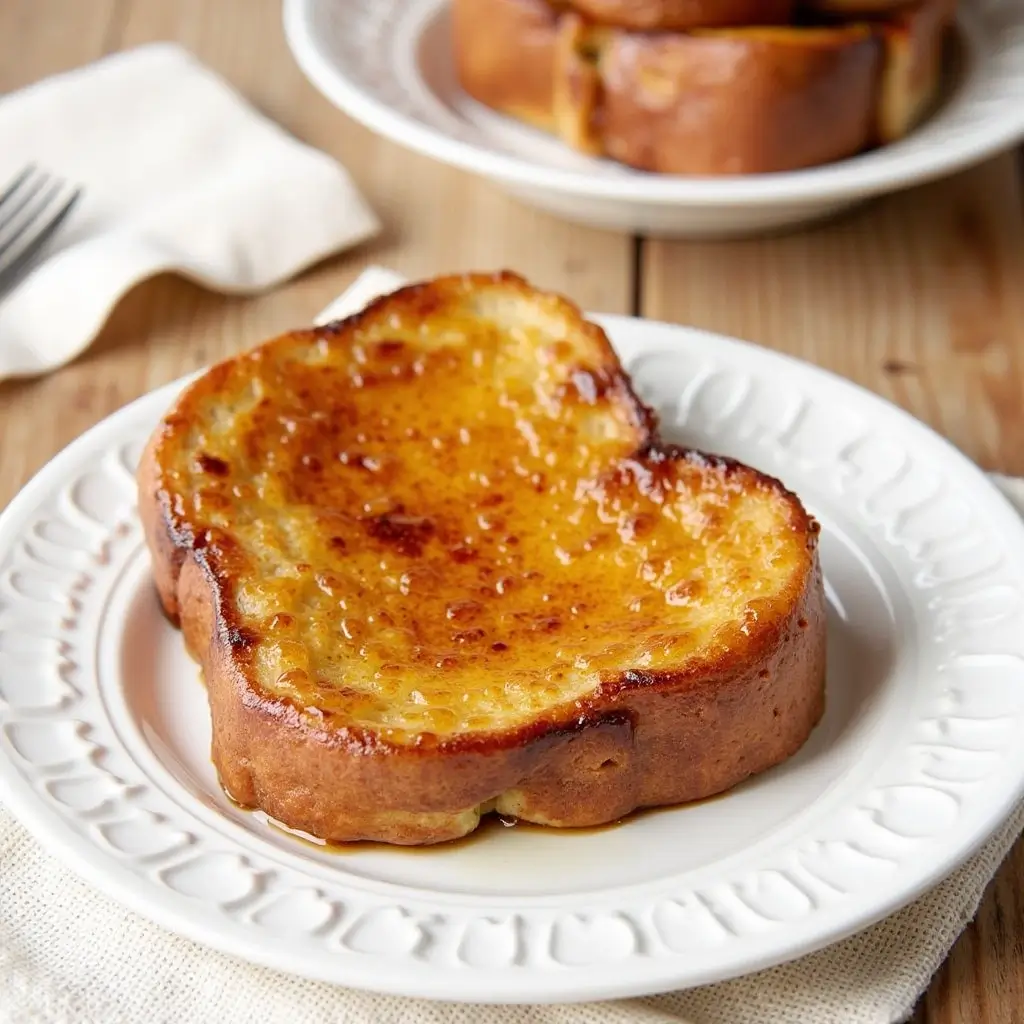
4. Bake for 10-15 Minutes
Place your baking sheet with the French toast in the oven and bake for about 10 to 15 minutes. Depending on the size and thickness of your slices, the exact reheating time may vary. After the first 10 minutes, check the French toast to ensure it’s heating evenly. You should see the edges of the bread begin to crisp up slightly, and the caramel topping should regain its golden color and texture.
5. Optional: Remove Foil for Crispiness
If you used foil to cover the French toast during reheating, consider removing it for the final 3-5 minutes of baking. This will allow the caramelized sugar on top to re-crisp, giving you that signature brûlée crunch. The exposed bread will also become slightly crispier, which contrasts perfectly with the soft, custardy interior. Just keep an eye on it to prevent the top from becoming too dark.
6. Check the Internal Temperature
For best results, use a food thermometer to ensure your Overnight Crème Brûlée French Toast is thoroughly warmed through. The internal temperature should reach at least 165°F (74°C). If you’re reheating a large portion, be sure to check the thickest part of the dish.
7. Serving After Reheating
Once your French toast is hot and golden brown, it’s ready to serve! Consider topping it with a little fresh maple syrup, a dusting of powdered sugar, or even some fresh berries for added flavor and freshness. The gentle heat from the oven will not only warm the French toast but also help the custard firm up just a bit, giving you that perfect balance of soft and crispy textures with every bite.
Alternative Methods for Reheating (If You’re in a Rush)
While the oven is the best method, sometimes you need to reheat your French toast quickly. Here are some alternative methods:
- Microwave: This is the fastest method but may not give you the best texture. Place a slice on a microwave-safe plate and cover it with a damp paper towel. Microwave on high for 30-second intervals until hot. The bread won’t be as crispy, but the custard will still be creamy.
- Stovetop: For a crispier result than the microwave, you can reheat French toast in a skillet. Use a non-stick skillet over medium heat and add a little butter. Heat each side for about 2-3 minutes, until the outside crisps up. This method works especially well if you just have a few slices.
Conclusion: Why the Oven is Best for Reheating
Reheating your Overnight Crème Brûlée French Toast in the oven at 350°F is the optimal method to retain both flavor and texture. The oven provides even heat, helping to crisp up the exterior while maintaining the custard’s creamy interior. Whether you’re reheating a single slice or a whole dish, this method will ensure your French toast is just as delicious as when it was first baked—perfectly warm, crispy, and indulgent with every bite.