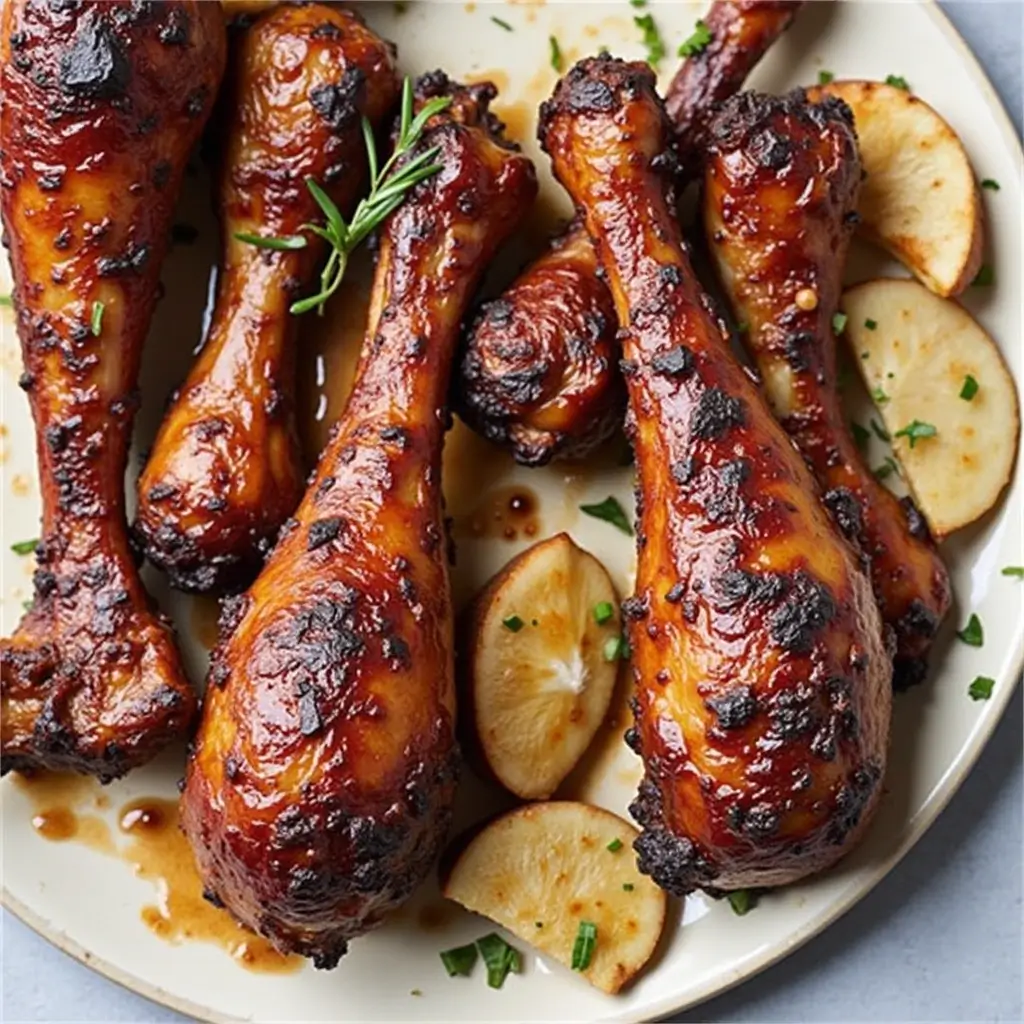
Welcome to your ultimate guide to mastering one of the most impressive dishes on the grill—BBQ turkey legs! Whether you’re a seasoned pitmaster or just starting your journey into outdoor cooking, this step-by-step guide will walk you through every detail to achieve perfectly grilled turkey legs that are crispy on the outside, juicy on the inside, and bursting with flavor.
In this post, we’ll dive into everything you need to know—from choosing the right grill and preparing the ideal marinade, to understanding the nuances of direct versus indirect heat. You’ll discover expert tips for maintaining the perfect temperature and learn how to troubleshoot common issues that can arise during the grilling process. With clear instructions and insider secrets, you’re about to transform your backyard BBQ into an event that will impress family and friends alike.
Get ready to roll up your sleeves and fire up the grill. Your journey to perfecting Ultimate BBQ Turkey Legs starts here!
Essential Tools & Equipment for Perfect Grilling
- Choosing the Right Grill or Smoker
Charcoal Grills - Charcoal grills are beloved by traditionalists for the distinct, smoky flavor they impart to food. The burning of charcoal creates natural smoke, which can enhance the taste of your turkey legs with a robust, wood-fired aroma. While they may require a bit more effort to manage—since you need to monitor and adjust the coals for consistent heat—the process itself is part of the authentic BBQ experience. Charcoal grills allow for precise control over heat zones, making them ideal for techniques like searing and slow cooking. Additionally, many grilling enthusiasts enjoy the hands-on nature of lighting and tending a charcoal fire, which can add to the overall enjoyment of the grilling process.
- Gas Grills
- Gas grills offer a convenient and efficient alternative, especially for those who prioritize ease of use and quick heat-up times. With the simple twist of a knob, gas grills provide consistent, adjustable heat, making temperature control straightforward—this is particularly beneficial when cooking turkey legs evenly. They are generally easier to clean and maintain compared to charcoal grills, as there’s no lingering ash or soot to deal with. While gas grills may not naturally replicate the deep smoky flavor of charcoal or wood, many models include options for adding wood chips to simulate that effect, offering a good balance between convenience and flavor enhancement.
- Dedicated Smokers
- For the true BBQ aficionado, dedicated smokers are the go-to option when aiming for an authentic smoked flavor. Smokers are designed specifically for low-and-slow cooking, which is perfect for breaking down the meat fibers in turkey legs and infusing them with a rich, smoky taste over several hours. They come in various forms—such as electric, charcoal, or wood-fired smokers—each providing different levels of control and flavor. While they require more time and a bit of patience, the end result is a tender, deeply flavorful dish that stands out. The precise control over temperature and smoke concentration in dedicated smokers makes them an excellent choice for those looking to perfect the art of barbecue.
- Each of these options has its own merits, and the choice largely depends on your cooking style, the flavor profile you desire, and how much effort you’re willing to invest in the process. Whether you opt for the traditional charm of a charcoal grill, the convenience of a gas grill, or the nuanced mastery of a dedicated smoker, understanding these tools will help you achieve perfectly grilled turkey legs every time.
- Must-Have Grilling Tools
Tongs - Versatility and Control:
Tongs are a must-have for safely handling hot turkey legs on the grill. Their design allows you to turn, flip, and move the meat without piercing it, which helps preserve the juices and maintain its tenderness. - Material and Length:
Look for tongs made from stainless steel for durability and heat resistance. Long-handled options are preferable as they keep your hands safely away from the heat source while providing ample reach and control. - Gripping Surface:
Many high-quality tongs feature a textured or silicone-coated grip, ensuring a secure hold even when your hands are wet or the meat is slippery with marinade or juices. - Meat Thermometers
- Ensuring Perfect Doneness:
A reliable meat thermometer is crucial for monitoring the internal temperature of your turkey legs, ensuring they are cooked safely and remain juicy. Undercooked poultry can be a health risk while overcooking can lead to dry, tough meat. - Digital vs. Analog:
Digital thermometers typically offer quicker and more accurate readings. Some models even provide instant alerts or have wireless capabilities, allowing you to monitor the temperature without constantly hovering near the grill. - Probe Design:
Look for a thermometer with a long, slender probe that can easily be inserted into the thickest part of the turkey leg. This ensures accurate readings of the meat’s core temperature, so you know exactly when it’s reached the ideal 165°F (74°C). - Basting Brushes
- Even Distribution of Marinade or Sauce:
A basting brush is indispensable for applying marinades, sauces, or glazes evenly over your turkey legs. This ensures that every bite is packed with flavor and that the seasoning forms a delectable crust during grilling. - Material Considerations:
Silicone basting brushes are popular due to their heat resistance, ease of cleaning, and durability. They are less likely to shed bristles compared to traditional natural bristle brushes, making them a safer and more hygienic option. - Ease of Use and Cleaning:
A good basting brush should have a comfortable handle and be easy to clean after use. Some models are even dishwasher safe, which can be a great time-saver after a long day of grilling. - Additional Tools to Consider
- Spatulas and Grill Forks:
While tongs are your primary tool for handling the turkey legs, having a sturdy spatula or grill fork can be useful for other tasks, such as rearranging coals or flipping delicate items on the grill. - Grill Brushes:
Keeping your grill clean is vital for maintaining its performance and preventing flare-ups. A dedicated grill brush will help you remove any residue or burnt-on bits from previous cooking sessions, ensuring a pristine cooking surface for your turkey legs. - Basting Cups or Sprayers:
For those who like to add an extra layer of flavor during cooking, basting cups or even sprayers can provide more control when applying your sauce or marinade, ensuring that every inch of your turkey legs is coated evenly. - By equipping yourself with these essential tools, you’ll not only enhance your grilling experience but also ensure that each step—from searing to basting—is executed with precision. This attention to detail is key to transforming your BBQ turkey legs into a mouth-watering masterpiece that impresses every time.
- Equipment Maintenance and Safety Tips
Regular Cleaning After Each Use - Burn Off Residue:
Immediately after cooking, while the grill is still warm (but not hot enough to burn you), use a grill brush to scrape off food particles and grease from the grates. This helps prevent buildup and makes cleaning easier later on. - Empty the ashtray:
If you’re using a charcoal grill, wait until the coals have completely cooled, then remove and dispose of the ashes. Ashes can retain heat and may cause flare-ups if not cleared out. - Wipe Down Surfaces:
Use a damp cloth or sponge with mild detergent to wipe down the exterior of your grill. Avoid harsh chemicals that can leave residues or affect the flavor of your food during future use. - Deep Cleaning Techniques
- Soak Grates:
Periodically, remove the grates and soak them in warm, soapy water for 15–20 minutes. This loosens stubborn grease and food particles, allowing for a more thorough cleaning when you scrub them again with a grill brush or scouring pad. - Clean the Burner Tubes (Gas Grills):
For gas grills, it’s important to clear any blockages in the burner tubes. Use a soft brush or a thin wire to remove debris that might impede gas flow. Always refer to your grill’s manual for specific cleaning instructions for burner components. - Inspect and Clean the Drip Tray:
Remove any grease or fat that has accumulated in the drip tray. Clean it with warm soapy water to prevent grease fires and unpleasant odors. A clean drip tray also makes your grill safer and easier to use. - Maintenance and Safety Checks
- Inspect for Rust and Damage:
Regularly inspect the grill’s parts for signs of rust, wear, or damage. Replace any parts that are compromised to prevent accidents and ensure the grill performs safely and efficiently. - Lubricate Moving Parts:
Some grills have moving parts, such as hinges or wheels. Applying a food-safe lubricant can keep these components operating smoothly, reducing friction and preventing rust. - Check Fuel Connections (Gas Grills):
If you’re using a gas grill, periodically check the hose and connection points for leaks or wear. A simple test is to apply a soapy water solution to the connections and look for bubbles when the gas is turned on if you detect any leaks, repair or replace the hose immediately to ensure safe operation. - Cover and Store Properly:
When not in use, cover your grill with a weather-resistant cover to protect it from the elements. Storing your grill in a sheltered area can also reduce rust and damage from moisture, extending its lifespan. - By incorporating these cleaning and maintenance practices into your routine, you not only ensure a safer cooking environment but also enhance the performance and longevity of your grill. This proactive approach means every time you fire up your grill, you can focus on creating delicious, perfectly cooked BBQ turkey legs without worry.
Marinades, Rubs, and Preparation Techniques
- Crafting the Perfect Marinade
Garlic - Robust Flavor and Aroma:
Garlic is a cornerstone in many marinades due to its pungent, savory flavor. When grilled, garlic mellows and adds a subtle sweetness, enhancing the overall taste of the turkey legs without overwhelming the natural flavors of the meat. - Health Benefits:
Beyond its taste, garlic is known for its health benefits. It has natural antibacterial and antioxidant properties, which can contribute to a healthier meal while adding a rich, aromatic layer to your BBQ. - Versatility in Preparation:
Whether you choose to mince it, crush it, or roast whole cloves to incorporate into your marinade, garlic adapts well to various cooking methods. Roasted garlic, in particular, can bring a creamy texture and a deeper, caramelized flavor to your BBQ sauce or rub. - Paprika
- Adds Color and Sweetness:
Paprika is prized for its vibrant red hue and subtle sweetness, which not only improves the visual appeal of your turkey legs but also adds a layer of complexity to the flavor profile. Its mild heat can be balanced to suit your taste preferences. - Smoky Variants:
Depending on the type of paprika you use, such as smoked paprika, you can introduce an extra dimension of smoky flavor to your BBQ without needing a dedicated smoker. This is especially useful if you’re using a gas grill or a charcoal grill that isn’t producing enough natural smoke. - Depth and Balance:
As a spice, paprika works harmoniously with other herbs and spices. It helps balance out the acidity from ingredients like vinegar and complements the richness of olive oil, creating a well-rounded marinade that penetrates the turkey legs for a more flavorful experience. - Olive Oil
- Moisture and Tenderization:
Olive oil is an excellent base for marinades, as it helps to lock in moisture during cooking. This not only prevents the turkey legs from drying out but also helps to infuse the meat with the flavors of the accompanying herbs and spices. - Flavor Carrier:
Acting as a natural emulsifier, olive oil binds the other ingredients together, ensuring a smooth, uniform coating on the meat. Its subtle, fruity flavor enhances the overall taste without overpowering the robust flavors of garlic and paprika. - Healthful Qualities:
Known for its heart-healthy benefits, olive oil adds a nutritious element to your dish. Its antioxidants and anti-inflammatory properties contribute to a healthier meal, making your BBQ both delicious and wholesome. - Vinegar
- Acidity for Balance:
Vinegar introduces a bright, tangy acidity that cuts through the richness of the meat and the fat. This balance is crucial, as it prevents the marinade from becoming too heavy, while also helping to tenderize the turkey legs by breaking down muscle fibers. - Flavor Enhancer:
Whether you use apple cider vinegar, white vinegar, or another variety, its sharp, clean flavor lifts the overall taste of the dish. Vinegar can accentuate the other ingredients, making garlic, paprika, and olive oil more pronounced in the final flavor profile. - Preservation and Marinade Efficacy:
The acid in vinegar also acts as a mild preservative, helping the marinade to penetrate the meat more effectively. This not only enhances flavor but also can help in achieving a more consistent, tender result during grilling. - By combining these ingredients thoughtfully, you create a marinade that not only boosts the flavor of your BBQ turkey legs but also improves their texture and overall eating experience. The garlic and paprika deliver robust, layered flavors; olive oil provides moisture and a smooth base; and vinegar brings a balancing acidity that ensures every bite is both rich and refreshing. This well-rounded mix is key to elevating your BBQ to a truly memorable culinary experience.
- Creating Flavorful Spice Rubs
Garlic - Robust Flavor and Aroma:
Garlic is a cornerstone in many marinades due to its pungent, savory flavor. When grilled, garlic mellows and adds a subtle sweetness, enhancing the overall taste of the turkey legs without overwhelming the natural flavors of the meat. - Health Benefits:
Beyond its taste, garlic is known for its health benefits. It has natural antibacterial and antioxidant properties, which can contribute to a healthier meal while adding a rich, aromatic layer to your BBQ. - Versatility in Preparation:
Whether you choose to mince it, crush it, or roast whole cloves to incorporate into your marinade, garlic adapts well to various cooking methods. Roasted garlic, in particular, can bring a creamy texture and a deeper, caramelized flavor to your BBQ sauce or rub. - Paprika
- Adds Color and Sweetness:
Paprika is prized for its vibrant red hue and subtle sweetness, which not only improves the visual appeal of your turkey legs but also adds a layer of complexity to the flavor profile. Its mild heat can be balanced to suit your taste preferences. - Smoky Variants:
Depending on the type of paprika you use, such as smoked paprika, you can introduce an extra dimension of smoky flavor to your BBQ without needing a dedicated smoker. This is especially useful if you’re using a gas grill or a charcoal grill that isn’t producing enough natural smoke. - Depth and Balance:
As a spice, paprika works harmoniously with other herbs and spices. It helps balance out the acidity from ingredients like vinegar and complements the richness of olive oil, creating a well-rounded marinade that penetrates the turkey legs for a more flavorful experience. - Olive Oil
- Moisture and Tenderization:
Olive oil is an excellent base for marinades, as it helps to lock in moisture during cooking. This not only prevents the turkey legs from drying out but also helps to infuse the meat with the flavors of the accompanying herbs and spices. - Flavor Carrier:
Acting as a natural emulsifier, olive oil binds the other ingredients together, ensuring a smooth, uniform coating on the meat. Its subtle, fruity flavor enhances the overall taste without overpowering the robust flavors of garlic and paprika. - Healthful Qualities:
Known for its heart-healthy benefits, olive oil adds a nutritious element to your dish. Its antioxidants and anti-inflammatory properties contribute to a healthier meal, making your BBQ both delicious and wholesome. - Vinegar
- Acidity for Balance:
Vinegar introduces a bright, tangy acidity that cuts through the richness of the meat and the fat. This balance is crucial, as it prevents the marinade from becoming too heavy, while also helping to tenderize the turkey legs by breaking down muscle fibers. - Flavor Enhancer:
Whether you use apple cider vinegar, white vinegar, or another variety, its sharp, clean flavor lifts the overall taste of the dish. Vinegar can accentuate the other ingredients, making garlic, paprika, and olive oil more pronounced in the final flavor profile. - Preservation and Marinade Efficacy:
The acid in vinegar also acts as a mild preservative, helping the marinade to penetrate the meat more effectively. This not only enhances flavor but also can help in achieving a more consistent, tender result during grilling. - By combining these ingredients thoughtfully, you create a marinade that not only boosts the flavor of your BBQ turkey legs but also improves their texture and overall eating experience. The garlic and paprika deliver robust, layered flavors; olive oil provides moisture and a smooth base; and vinegar brings a balancing acidity that ensures every bite is both rich and refreshing. This well-rounded mix is key to elevating your BBQ to a truly memorable culinary experience.
- Proper Preparation of Turkey Legs
How to Prepare Turkey Legs for Perfect BBQ: Trimming, Cleaning, and Scoring the Meat
Proper preparation of turkey legs is crucial to achieving an evenly cooked, flavorful, and juicy result on the grill. By trimming excess fat, thoroughly cleaning the meat, and scoring the surface, you can enhance the texture, seasoning absorption, and overall quality of your BBQ turkey legs. Here’s how to do it step by step:
1. Trimming the Turkey Legs
Trimming is an essential step that helps remove unwanted fat or tough connective tissues, ensuring better flavor and texture during grilling.
Why Trim the Meat?
Reduces excess fat that can cause flare-ups on the grill.
Prevents tough, chewy sections in the final cooked meat.
Helps create a more uniform shape for even cooking.
How to Trim Turkey Legs
Use a Sharp Knife: A boning knife or a sharp chef’s knife is ideal for precise trimming. Dull knives can tear the meat rather than cleanly cut it.
Remove Excess Skin: Turkey legs usually come with skin on, which can be left intact for a crispy texture or trimmed partially for a leaner bite. If you prefer crispy skin, avoid removing it completely.
Trim Large Fat Pockets: Some turkey legs may have thick pockets of fat near the joints. Removing excess fat prevents flare-ups that could burn the outside before the inside is fully cooked.
Cut Away Tough Sinew or Tendons: Turkey legs contain strong tendons, especially near the bone. While grilling softens them, trimming larger, tougher pieces can make for a better texture.
2. Cleaning the Turkey Legs
Cleaning the meat ensures a fresh taste and removes any unwanted residue that could affect the flavor of your BBQ turkey legs.
Steps for Cleaning the Meat:
Rinse with Cold Water: While some chefs prefer to skip this step, rinsing the turkey legs under cold water can help remove any residual blood or bone fragments.
Pat Dry with Paper Towels: Moisture on the surface can interfere with seasoning adhesion and cause steaming rather than grilling. Pat the turkey legs dry to prepare them for seasoning.
Use a Vinegar or Lemon Wash (Optional): Some cooks soak turkey legs in a solution of water, vinegar, or lemon juice for 10–15 minutes to remove any gamey flavors. This step is optional but can enhance the overall taste.
Check for Feather Remnants: Occasionally, small feather pieces may remain on the skin. Use tweezers or scrape with a knife to remove them before grilling.
3. Scoring the Meat for Even Cooking
Scoring—making small cuts in the meat—improves seasoning penetration and ensures the turkey legs cook more evenly.
Benefits of Scoring Turkey Legs:
Allows Marinades and Rubs to Absorb Deeper: By cutting shallow lines into the meat, seasonings penetrate more effectively, infusing flavor throughout the turkey leg rather than just sitting on the surface.
Prevents Skin from Shrinking Too Much: The skin on turkey legs tends to shrink during cooking, which can cause uneven grilling. Light scoring helps prevent excessive shrinkage.
Encourages Even Cooking: Turkey legs are thick, and without proper scoring, the heat may not penetrate uniformly. Small cuts help distribute heat, reducing the risk of undercooked sections.
How to Score Turkey Legs:
Use a Sharp Knife: A sharp blade ensures clean cuts without tearing the meat.
Make Shallow Cuts: Score the surface in a crisscross pattern or parallel slashes, about ¼ inch deep. Avoid cutting too deep, as this can cause the juices to escape too quickly during grilling.
Focus on the Thickest Parts: The thickest sections of the turkey leg benefit the most from scoring, as these areas take longer to cook.
Final Preparation Before Grilling
After trimming, cleaning, and scoring, your turkey legs are now ready for seasoning or marination. To maximize flavor, follow these additional tips:
Season Immediately: Apply your dry rub or marinade right after scoring for the best absorption.
Let the Meat Rest Before Cooking: Allow the turkey legs to sit for at least 30 minutes (or overnight for deeper flavor) before grilling.
Preheat Your Grill: Ensure your grill is at the right temperature before placing the turkey legs on it to achieve an even sear and proper cooking.
By following these essential preparation steps, your BBQ turkey legs will cook more evenly, absorb flavor better, and turn out tender and juicy. Proper trimming, cleaning, and scoring are the foundation of a perfectly grilled dish! - Marinating Methods and Timing
How Long to Marinate Turkey Legs & Best Practices for Maximum Flavor Absorption
Marinating is a crucial step in preparing BBQ turkey legs, as it helps infuse the meat with deep, rich flavors while keeping it tender and juicy. The right marination time and technique can make all the difference in achieving a perfectly seasoned and mouthwatering result. Here’s everything you need to know about marinating turkey legs effectively:
1. How Long Should You Marinate Turkey Legs?
The ideal marination time depends on the ingredients in your marinade and how deeply you want the flavors to penetrate. Here’s a general guideline:
Minimum Time: 2 Hours
If you’re short on time, marinating for at least 2 hours allows some flavor absorption and surface-level seasoning.
Best for lighter marinades with acidic components like vinegar or citrus juice.
Optimal Time: 8-12 Hours (Overnight)
This is the sweet spot for maximum flavor absorption.
Allows the marinade to fully penetrate the thick turkey legs.
Ensures the meat stays moist and tender while grilling.
Maximum Time: 24 Hours
Marinating for more than 24 hours is not recommended, especially for marinades with acidic ingredients (e.g., vinegar, lemon juice, buttermilk).
Prolonged exposure to acids can break down the proteins too much, resulting in a mushy texture.
2. Best Practices for Maximum Flavor Absorption
To ensure your turkey legs are fully infused with bold BBQ flavors, follow these best marination practices:
a) Use the Right Container
Avoid metal bowls: Acids in the marinade can react with metal, altering the taste.
Use glass, ceramic, or BPA-free plastic bags: These materials are non-reactive and help distribute the marinade evenly.
Seal the container tightly: Prevents air exposure, which can dry out the meat.
b) Coat the Turkey Legs Evenly
Place the turkey legs in a zip-top bag or shallow dish.
Pour the marinade over the legs, ensuring every part is coated.
Turn the legs occasionally to allow even distribution of flavors.
c) Refrigerate While Marinating
Always marinate in the refrigerator, not at room temperature.
Keeping the meat chilled prevents bacterial growth and ensures safe food handling.
d) Massage the Meat
For better penetration, massage the marinade into the turkey legs before sealing the bag.
Helps tenderize the meat and distribute flavors more effectively.
e) Consider Injecting the Marinade (Optional)
For extra flavor inside the meat, use a marinade injector to inject seasoning into the thickest parts of the turkey legs.
Works especially well for larger cuts where surface marination alone may not be enough.
f) Let the Meat Rest After Marinating
Before grilling, let the turkey legs sit at room temperature for 20-30 minutes.
This helps them cook more evenly and prevents the exterior from overcooking while the interior is still cold.
3. Dry vs. Wet Marinades: Which One is Best?
Depending on the cooking style and flavor preference, you can choose between wet marinades or dry rubs:
Wet Marinades (Best for Juicy, Flavorful Turkey Legs)
Typically include a mix of oil, vinegar, citrus juice, soy sauce, and spices.
Helps tenderize the meat while infusing deep flavors.
Ideal for grilling, as it keeps the turkey legs from drying out.
Dry Rubs (Best for Crispy, Well-Seasoned Skin)
Made from a blend of dry spices like paprika, garlic powder, cayenne, and brown sugar.
Creates a delicious crust when grilled.
Best when paired with a light oil coating to help the rub adhere.
💡 Pro Tip: You can combine both methods by marinating first and then applying a dry rub before grilling for extra flavor layers!
4. What to Do After Marinating
Pat Dry Before Grilling:
Remove the turkey legs from the marinade and lightly pat them dry with a paper towel.
This helps achieve a better sear and prevents flare-ups caused by excess liquid dripping onto the grill.
Don’t Rinse Off the Marinade:
While patting dry removes excess moisture, avoid rinsing off the seasoning.
You want to keep the flavors intact while reducing excess wetness.
Reserve Some Marinade for Basting:
If your marinade doesn’t contain raw meat juices, set aside a small portion before adding the turkey legs.
Use this for basting while grilling to enhance the flavor.
Final Thoughts
By marinating your BBQ turkey legs for the right amount of time and following best practices, you’ll achieve a bold, smoky, and juicy result. Whether you choose a wet marinade, a dry rub, or a combination of both, proper preparation will ensure your turkey legs are packed with flavor and perfectly grilled. 🔥🍗
Step-by-Step Grilling Guide
- Preheating and Setting Up Your Grill
How to Prepare Your Grill for Direct and Indirect Heat
Properly setting up your grill is key to achieving the perfect BBQ turkey legs. Since turkey legs are thick and require longer cooking times, mastering direct and indirect heat zones will help you get a flavorful, crispy exterior while keeping the inside juicy and fully cooked. Below, we’ll break down the process for setting up your grill based on the type of grill you’re using and how to control heat for the best results.
1. Understanding Direct vs. Indirect Heat
Direct Heat refers to cooking food directly over the heat source (charcoal, gas burners, or wood fire). This method creates a good sear, adds grill marks, and enhances smoky flavor. However, cooking turkey legs entirely over direct heat can lead to burning before the inside is fully cooked.
Indirect Heat involves placing the food away from the heat source, allowing it to cook more slowly and evenly, like an oven. This method is crucial for thicker cuts like turkey legs, as it prevents burning while ensuring the meat reaches the proper internal temperature.
The best approach for BBQ turkey legs is to use a combination of direct and indirect heat—starting with indirect heat for even cooking and finishing over direct heat to develop a crispy, caramelized exterior.
2. How to Set Up Your Grill for Direct and Indirect Heat
For a Charcoal Grill
Light the Charcoal:
Use a chimney starter to evenly light your charcoal. Avoid lighter fluid, as it can leave a chemical taste.
Let the coals burn until they are covered in white ash (about 15–20 minutes).
Create Heat Zones:
Direct Heat Zone: Spread hot coals on one side of the grill. This side will be used for searing and crisping up the turkey legs toward the end of cooking.
Indirect Heat Zone: Leave the other side coal-free. This cooler zone will allow the turkey legs to cook slowly and evenly.
If using a kettle grill, place a disposable aluminum pan filled with water under the indirect heat zone to help regulate temperature and add moisture.
Control the Temperature:
Adjust the air vents: More airflow = hotter fire; less airflow = lower temperature.
For turkey legs, aim for a grill temperature of 300–350°F (150–175°C) in the indirect zone.
For a Gas Grill
Preheat the Grill:
Turn on all burners to high and close the lid for about 10–15 minutes to heat up the grates.
Create Heat Zones:
Direct Heat Zone: Keep one or two burners on medium-high.
Indirect Heat Zone: Turn off one or more burners on the other side of the grill. This is where the turkey legs will cook slowly.
Adjust Temperature for Even Cooking:
Aim for an indirect heat temperature of 300–350°F.
Use a built-in or external grill thermometer to monitor heat levels.
For a Smoker or Pellet Grill
Preheat the Smoker:
Set your smoker or pellet grill to 250–300°F for slow, indirect cooking.
Use wood chips like hickory, applewood, or mesquite for extra smoky flavor.
Set Up for Indirect Cooking:
Since smokers naturally use indirect heat, place the turkey legs on the grill grates away from the main heat source.
If your smoker has a water pan, fill it to help maintain moisture.
Finish with Direct Heat (Optional):
If you want a crispy exterior, move the turkey legs to a hotter grill or turn up the temperature in the final 10–15 minutes of cooking.
3. Managing Heat for Perfectly Grilled Turkey Legs
Start Cooking with Indirect Heat (Low and Slow):
Place the turkey legs in the indirect heat zone and close the lid.
Cook for about 45–60 minutes, turning occasionally.
The goal is to cook the turkey slowly to 165°F internal temperature before searing.
Finish Over Direct Heat (For Crispy Skin):
Once the turkey legs reach 165°F, move them to the direct heat zone for 5–10 minutes.
Turn frequently to prevent burning and create a golden, crispy crust.
Use a Meat Thermometer:
The safe internal temperature for turkey is 175–180°F for tender, fully cooked meat.
Insert the thermometer in the thickest part of the leg without touching the bone.
Final Tips for Grill Preparation
✔ Always preheat your grill before cooking for consistent results.
✔ Use wood chips or chunks (if using charcoal or a smoker) for enhanced smoky flavor.
✔ Monitor grill temperature regularly to prevent burning or undercooking.
✔ Keep a spray bottle of water nearby to control flare-ups.
By properly setting up your grill for direct and indirect heat, you ensure that your BBQ turkey legs cook evenly, remain juicy, and develop the perfect smoky flavor. 🔥 - Grilling Techniques: Direct vs. Indirect Heat
When to Use Direct vs. Indirect Heat & How They Affect the Cooking Process
Grilling BBQ turkey legs requires a balance of direct and indirect heat to achieve the perfect combination of a crispy, flavorful exterior and juicy, fully cooked meat inside. Understanding when and how to use each method is essential to prevent burning and ensure even cooking. Below, we’ll break down the best scenarios for using direct and indirect heat and how each method affects the cooking process.
1. When to Use Direct Heat
What is Direct Heat?
Direct heat means placing the food directly over the heat source (burners on a gas grill, lit charcoal, or wood fire).
It provides intense, high-temperature cooking that creates sear marks, caramelization, and crispy skin.
Ideal for foods that cook quickly, like burgers, hot dogs, shrimp, or thin steaks.
When to Use Direct Heat for Turkey Legs?
At the end of cooking: After slow-cooking the turkey legs using indirect heat, moving them to direct heat for 5–10 minutes crisps up the skin and enhances flavor.
For quick searing: If you want a smoky, charred effect, you can briefly sear the turkey legs over direct heat at the beginning before transferring them to indirect heat.
For smaller turkey parts: If grilling turkey drumsticks or wings (which cook faster than whole legs), direct heat can work, but you must turn them frequently to avoid burning.
How Direct Heat Affects Cooking
✔ Creates grill marks and crispy skin
✔ Enhances smoky, charred flavor
✔ Can cause burning if used too long for thick cuts
✔ Works best for finishing touches rather than slow cooking
💡 Pro Tip: If using direct heat, keep a close eye on the turkey legs and flip them frequently to avoid flare-ups!
2. When to Use Indirect Heat
What is Indirect Heat?
Indirect heat means placing the food away from the direct flame or heat source and letting it cook slowly, similar to an oven.
It ensures even cooking without burning the exterior before the inside is done.
Best for larger or tougher cuts of meat, including turkey legs, whole chickens, roasts, and ribs.
When to Use Indirect Heat for Turkey Legs?
For the majority of the cook time: Since turkey legs are thick and dense, they need to cook slowly to reach the safe internal temperature of 175–180°F without drying out.
When using marinades and rubs: Indirect heat allows the flavors to infuse into the meat without the sugars burning (which can happen over direct heat).
For smoke infusion: If you want a deeper smoky flavor, indirect heat combined with wood chips (hickory, applewood, or mesquite) gives turkey legs that classic BBQ taste.
How Indirect Heat Affects Cooking
✔ Cooks meat slowly and evenly, preventing burnt exteriors
✔ Allows flavors from marinades and rubs to fully absorb
✔ Keeps meat juicy and tender by retaining moisture
✔ Ideal for larger cuts that need time to break down and become tender
💡 Pro Tip: Use a water pan in the grill when cooking with indirect heat to maintain moisture and prevent the turkey legs from drying out!
3. Best Cooking Method for BBQ Turkey Legs: A Combination of Both
Since turkey legs benefit from both cooking techniques, the best approach is to start with indirect heat and finish with direct heat for perfect results.
Step-by-Step Cooking Guide Using Both Methods:
Preheat the grill: Set up a two-zone fire (direct and indirect heat) on your gas or charcoal grill.
Start with Indirect Heat (Low & Slow):Place the turkey legs in the cooler zone (indirect heat side).
Cook for 45–60 minutes at 300–350°F, turning occasionally.
This allows the meat to cook through without burning.
Check the Internal Temperature:Use a meat thermometer to check the thickest part of the leg.
Once it reaches 165°F, it’s time to move to direct heat.
Finish Over Direct Heat for a Crispy Skin:Move the turkey legs to the hotter side of the grill (direct heat).
Sear for 5–10 minutes, flipping frequently to avoid charring.
Brush with BBQ sauce or butter for extra flavor.
Rest Before Serving:Remove from the grill and let the turkey legs rest for 10 minutes.
This helps the juices redistribute for maximum tenderness.
Final Takeaways
🔥 Direct heat is great for creating a crispy, caramelized exterior but can burn thicker cuts if used too long.
🔥 Indirect heat ensures even cooking and keeps turkey legs moist and tender.
🔥 Using both methods together gives you the best of both worlds—juicy, smoky meat with a delicious crispy finish!
By mastering when and how to use direct and indirect heat, you’ll be able to grill perfect BBQ turkey legs every time! 🍗🔥 - Monitoring Temperature & Timing
Using a Meat Thermometer & Ensuring Proper Internal Temperature
Achieving the perfect BBQ turkey legs isn’t just about seasoning and grilling technique—it’s also about ensuring they are cooked to a safe internal temperature while remaining juicy and tender. Using a meat thermometer is the most reliable way to avoid undercooked or dry turkey legs. Below, we’ll cover the importance of temperature control, how to properly use a meat thermometer, and tips for ensuring perfectly cooked meat every time.
1. Why a Meat Thermometer is Essential
Unlike burgers or steaks, turkey legs are a dense cut of meat with a lot of connective tissue, meaning they take longer to cook. Without a thermometer, it’s easy to:
Undercook the meat, which can lead to foodborne illnesses like salmonella.
Overcook the meat, making it tough and dry.
Misjudge doneness by appearance alone, since turkey legs can look browned on the outside but remain undercooked inside.
A meat thermometer removes the guesswork, helping you cook perfectly tender, juicy turkey legs every time.
2. What is the Proper Internal Temperature for Turkey Legs?
USDA Safe Temperature vs. Best Temperature for Tenderness
The USDA recommends cooking turkey to a minimum internal temperature of 165°F (74°C) to kill harmful bacteria.
However, for turkey legs, 175–180°F (79–82°C) is ideal because the extra heat breaks down tough connective tissue, making the meat more tender.
💡 Key takeaway: 165°F is safe, but 175–180°F is better for texture.
3. How to Use a Meat Thermometer Correctly
Choose the Right Thermometer
Instant-read thermometers: Give quick readings within seconds and are great for checking temperature multiple times.
Probe thermometers: Stay inside the meat while cooking, with an external display to monitor the temperature in real-time.
Wireless thermometers: These allow you to check temperatures remotely via a phone app, useful for long cooking sessions.
Insert the Thermometer in the Right Spot
Stick the thermometer into the thickest part of the turkey leg without touching the bone.
Why? The bone conducts heat differently and can give a false high reading.
Check Temperature at Multiple Points
Move the thermometer slightly to ensure the whole leg has reached the proper temperature.
If different parts give different readings, use the lowest one as your guide and keep cooking until it reaches at least 175°F.
4. Best Practices for Temperature Accuracy
✔ Avoid touching bone or fat with the thermometer probe—these heat up differently than muscle tissue.
✔ Check temperature in multiple places to ensure even cooking.
✔ Let turkey legs rest for 5–10 minutes after grilling—the internal temperature will rise by about 5°F as they finish cooking.
✔ Calibrate your thermometer regularly to ensure accuracy (test it in boiling water; it should read 212°F (100°C) at sea level).
5. What to Do If Your Turkey Legs Aren’t Cooked Enough or Overcooked
If the temperature is below 165°F: Continue cooking over indirect heat until it reaches at least 175°F.
If the outside is getting too dark before reaching temperature: Move to cooler indirect heat and cover with foil to prevent burning.
Lower the grill temperature slightly to slow cooking.
If the turkey is overcooked and dry: Brush with melted butter or BBQ sauce for moisture.
Serve with a side of dipping sauce (gravy, honey mustard, or BBQ sauce) to add flavor and juiciness.
Final Takeaways
🔹 Always use a meat thermometer—it’s the only sure way to get juicy, safely cooked turkey legs.
🔹 Aim for 175–180°F for the best texture—this ensures tender, fall-off-the-bone meat.
🔹 Insert the thermometer into the thickest part without touching the bone for an accurate reading.
🔹 Check multiple spots and let the meat rest for the best results.
By following these temperature-checking best practices, you’ll never have to worry about undercooked or dry BBQ turkey legs again! 🍗🔥 - Achieving the Perfect Sear and Smoke
Balancing Searing with a Smoky Flavor for That Signature BBQ Taste
One of the secrets to making perfect BBQ turkey legs is achieving the right balance between searing for a crispy, flavorful crust and infusing smoky flavors for that authentic barbecue taste. Too much direct heat can burn the outside while leaving the inside undercooked, while too much smoke without a good sear can result in chewy skin. Below, we’ll go over the best techniques, timing, and tools to get that signature BBQ taste just right.
1. Understanding the Role of Searing & Smoke in BBQ
✔ Searing: Creates the Maillard reaction, where high heat caramelizes natural sugars and proteins, forming a flavorful crust and crispy skin.
✔ Smoke Infusion: Slow cooking over indirect heat with wood chips or charcoal infuses turkey legs with deep, rich BBQ flavors.
✔ Balance is Key: If you sear too soon, you can burn the skin without allowing time for smoke to penetrate the meat. If you smoke too long, the skin can become rubbery.
2. How to Achieve a Perfect Sear Without Overcooking
To develop deep color and rich flavor without drying out the turkey legs, follow these tips:
Use the Right Heat Zones
Start with indirect heat (low and slow) to allow the turkey legs to cook through while absorbing smoky flavors.
Finish with direct heat (high and fast) to sear the skin and lock in juices.
Temperature Guide:Indirect heat (225–300°F) for smoking and cooking through.
Direct heat (400–450°F) for finishing with a perfect char.
Control the Cooking Time
Smoke the turkey legs for 45–60 minutes at 225–300°F over indirect heat.
Sear over high heat for 5–10 minutes at 400–450°F, flipping frequently to avoid burning.
Use a meat thermometer to ensure the thickest part reaches 175–180°F.
💡 Pro Tip: Let the legs cook low and slow first, then crank up the heat at the end for a golden, crispy crust.
3. How to Infuse the Best Smoky Flavor
To get that signature BBQ taste, use natural smoke sources and the right setup.
Use the Right Wood for Smoky Flavor
Hickory – Classic BBQ flavor, rich and bold.
Applewood – Sweet and mild, pairs well with turkey.
Cherry – Slightly sweet with a hint of tartness.
Mesquite – Strong, earthy, great for bold smoky notes (use sparingly).
Pecan – Sweet and nutty, great for a balanced BBQ taste.
💡 Pro Tip: Soak wood chips in water for 30 minutes before placing them in a smoker box or directly on charcoal for longer-lasting smoke.
Create a Smoky Environment
For charcoal grills: Add wood chunks or soaked wood chips directly to hot coals.
For gas grills: Use a smoker box or wrap soaked wood chips in foil, poking small holes to let smoke escape.
For pellet grills: Choose a blend of hardwood pellets for a steady smoky flavor.
4. The Best Technique for Balancing Sear & Smoke
🔹 Start Indirect for Smoke:
Preheat the grill and set up a two-zone fire (direct & indirect heat).
Place turkey legs on the cooler, indirect side and close the lid.
Cook at 225–300°F for about 45–60 minutes, allowing the smoky flavor to penetrate.
🔹 Finish with a Sear for Crispiness:
Move turkey legs to the hot, direct heat zone (400–450°F).
Sear for 5–10 minutes, flipping frequently to avoid charring.
Brush with butter, oil, or BBQ sauce for an extra layer of flavor.
🔹 Let it Rest:
Remove the turkey legs from the grill and let them rest for 5–10 minutes before serving.
This allows juices to redistribute, keeping the meat moist.
💡 Pro Tip: Baste with melted butter or sauce just before searing to enhance caramelization and flavor!
Final Takeaways
🔥 Start slow over indirect heat for smoke absorption, then finish hot for a flavorful sear.
🔥 Choose the right wood to enhance the turkey’s natural flavors without overpowering.
🔥 Use a two-zone fire to switch between smoking and searing with ease.
🔥 Baste before searing for an extra-crispy, caramelized crust.
By following these steps, you’ll achieve a perfect balance of deep smoky flavor and crispy, caramelized skin, making your BBQ turkey legs unforgettable! 🍗🔥
Expert Tips, Troubleshooting, and Serving Suggestions
- Maintaining Moisture and Juiciness
Tips to Prevent Dryness and Keep BBQ Turkey Legs Succulent
One of the biggest challenges when grilling turkey legs is preventing them from drying out. Turkey is leaner than other meats like pork or beef, meaning it doesn’t have as much natural fat to keep it moist. However, with the right techniques, you can ensure your BBQ turkey legs stay juicy, flavorful, and tender every time. Below are key strategies to lock in moisture and keep your turkey legs succulent.
1. Brining: The Secret to Juicy Turkey Legs
Brining is one of the best ways to prevent dryness. It helps turkey legs absorb extra moisture and flavor, ensuring they remain juicy during grilling.
How to Make a Simple Brine
Basic Brine Ingredients:1 gallon of water
½ cup salt
½ cup brown sugar
1 tablespoon black peppercorns
3–4 cloves garlic (smashed)
2–3 bay leaves
Optional: Herbs like thyme, rosemary, or citrus slices for added flavor
Brining Instructions
Heat half the water in a pot and dissolve the salt and sugar.
Remove from heat, add the remaining cold water, and let cool completely.
Submerge turkey legs in the brine and refrigerate for at least 4 hours, preferably overnight.
Rinse the legs and pat them dry before seasoning and grilling.
💡 Why it Works: Salt changes the muscle proteins, helping turkey retain moisture as it cooks.
2. Marinating for Extra Flavor & Moisture
If you don’t have time for a brine, a flavorful marinade can also help keep turkey legs moist while adding depth of flavor.
Best Ingredients for a Moisturizing Marinade
Acids (like vinegar, lemon juice, or buttermilk) to tenderize
Oils (like olive oil) to coat the meat and prevent moisture loss
Herbs & spices (paprika, garlic, onion powder, cayenne, rosemary) for rich BBQ taste
Sweeteners (honey, brown sugar) to caramelize the skin
Marinating Tips
Coat the turkey legs generously in marinade.
Cover and refrigerate for at least 2 hours, preferably 6–8 hours for deep flavor.
Pat dry before grilling to prevent steaming and help develop a good sear.
💡 Pro Tip: Adding yogurt or buttermilk to your marinade helps break down proteins and keep turkey ultra-tender!
3. Using Indirect Heat to Retain Juiciness
Cooking turkey legs too fast over high heat can cause the outside to dry out before the inside is fully cooked. The solution? Use indirect heat first, then finish with direct heat.
The Best Heat Zones for Moist Turkey Legs
Start with indirect heat at 225–300°F for slow, even cooking.
Finish with direct heat at 400–450°F for a crispy skin and caramelization.
💡 Why It Works: Low and slow cooking prevents moisture loss while breaking down tough connective tissues, making the meat fall-off-the-bone tender.
4. Basting to Keep Turkey Legs Moist
Basting helps seal in moisture and create a rich, flavorful crust.
Best Basting Liquids
Butter or olive oil – Prevents dryness and enhances crispiness.
Apple cider or chicken broth – Adds a hint of sweetness and moisture.
BBQ sauce – Locks in smoky flavor (best added in the last 10 minutes).
How to Baste Effectively
Start basting after the first 30 minutes of cooking.
Use a silicone brush or mop brush to apply basting liquid evenly.
Baste every 15–20 minutes for continuous moisture infusion.
💡 Pro Tip: Melt butter with herbs and garlic and brush it over turkey legs during the last 10 minutes for an incredible final glaze!
5. Letting the Meat Rest Before Serving
Resting is an often-overlooked step, but it’s crucial for juicy turkey legs. When meat comes off the grill, juices are concentrated in the center—if you slice it immediately, they’ll run out, leaving the meat dry.
How to Rest Turkey Legs Properly
Remove turkey legs from the grill and place them on a cutting board or plate.
Tent loosely with foil to trap warmth while allowing steam to escape.
Let them rest for 5–10 minutes before serving.
💡 Why It Works: Resting allows juices to redistribute, ensuring each bite is moist and tender.
Final Takeaways
✔ Brine or marinate before cooking to lock in moisture.
✔ Use indirect heat first, then sear to avoid drying out the meat.
✔ Baste regularly with butter, broth, or BBQ sauce for extra juiciness.
✔ Let turkey legs rest before serving to retain their juices.
By following these moisture-locking techniques, you’ll get succulent, juicy BBQ turkey legs every time—no more dry, tough meat! 🍗🔥 - Troubleshooting Common Grilling Issues
Addressing Potential Problems: Uneven Cooking, Flare-Ups, and How to Fix Them
Grilling BBQ turkey legs to perfection isn’t just about getting the flavors right—it’s also about managing common grilling challenges like uneven cooking, flare-ups, and temperature control. These issues can lead to burnt exteriors, raw interiors, or dried-out meat if not handled properly. Below, we’ll cover the most frequent problems and how to resolve them effectively.
1. Uneven Cooking: Why It Happens & How to Fix It
Problem: The outside is cooking too fast, while the inside remains undercooked.
Causes:
✔ Inconsistent grill temperatures (hot spots in some areas and cooler spots in others).
✔ Turkey legs vary in size, leading to uneven cooking times.
✔ Direct high heat too early causes the exterior to char before the inside reaches a safe temperature.
Solutions:
✔ Use the Two-Zone Cooking Method
Start cooking over indirect heat (225–300°F) on the cooler side of the grill for even cooking.
Finish with direct heat (400–450°F) to crisp up the skin and enhance caramelization.
This method ensures the inside reaches the proper temperature before the outside burns.
✔ Rotate and Rearrange the Turkey Legs
If you notice one side cooking faster, move the turkey legs around every 15–20 minutes to expose them evenly to the heat.
Swap hotter side pieces with cooler side pieces halfway through cooking.
✔ Use a Meat Thermometer to Check Doneness
Insert a meat thermometer into the thickest part of the leg.
The ideal internal temperature is 175–180°F for tender, juicy turkey legs.
💡 Pro Tip: If the outside is browning too quickly, tent the turkey legs loosely with foil to slow down the exterior cooking while allowing the inside to catch up.
2. Flare-Ups: What Causes Them & How to Prevent Them
Problem: Sudden bursts of flame burn the skin and create a bitter taste.
Causes:
✔ Excess fat dripping onto the flames (from skin or marinades).
✔ Sugary BBQ sauces applied too early, causing caramelization to turn into charring.
✔ Grill grates overloaded with grease from previous cookouts.
Solutions:
✔ Trim Excess Fat from the Turkey Legs
Remove any large pieces of excess skin and fat before grilling to reduce dripping grease.
✔ Use a Drip Pan for Indirect Grilling
Place a foil drip pan under the turkey legs when using a charcoal or gas grill.
This prevents fat from reaching the flames and igniting.
✔ Apply BBQ Sauce at the Right Time
If using a sugar-based BBQ sauce, wait until the last 10–15 minutes to apply it.
This prevents the sauce from burning and turning bitter.
✔ Keep a Spray Bottle of Water or Apple Cider Vinegar Handy
If you see small flare-ups, give them a quick spritz to control flames.
Avoid using too much water as it can create steam and ash, which can affect flavor.
💡 Pro Tip: If flare-ups become excessive, move turkey legs to the cooler side of the grill and close the lid to smother flames.
3. Drying Out the Meat: How to Keep Turkey Legs Juicy
Problem: The turkey legs turn out dry, tough, or chewy instead of tender and juicy.
Causes:
✔ Overcooking past 180°F dries out the meat.
✔ Cooking over high heat for too long evaporates natural moisture.
✔ Not resting the meat after grilling causes juices to escape.
Solutions:
✔ Use a Meat Thermometer
Check the internal temperature regularly to ensure the meat reaches 175–180°F but no higher.
Remove turkey legs a few degrees before the target temp (they will continue cooking slightly after removing from the grill).
✔ Baste the Turkey Legs Throughout Cooking
Use butter, olive oil, or a vinegar-based mop sauce every 15–20 minutes to keep them moist.
✔ Let the Turkey Legs Rest Before Serving
After removing from the grill, tent them with foil and let them rest for 5–10 minutes.
This helps redistribute the juices, keeping them tender instead of dry.
💡 Pro Tip: If you accidentally overcook turkey legs, brush them with melted butter or a light BBQ sauce before serving to restore some moisture.
4. Charred or Burnt Skin: How to Avoid Overcooking the Outside
Problem: The turkey legs have blackened, burnt skin while the inside is still cooking.
Causes:
✔ Placing turkey legs directly over high heat too soon.
✔ Using too much sugar in rubs or marinades, which burns easily.
✔ Not flipping the turkey legs frequently enough during high-heat cooking.
Solutions:
✔ Start Low & Slow, Then Sear at the End
Smoke turkey legs over indirect heat at 225–300°F for 45–60 minutes before searing.
Move them to direct heat for just 5–10 minutes at the end to crisp the skin.
✔ Use a Lower-Sugar Dry Rub
Sugary seasonings (like brown sugar and honey) can burn quickly if applied too early.
Apply dry rubs with lower sugar content at the start, then finish with a sauce near the end.
✔ Flip Regularly Over Direct Heat
Once searing, flip the turkey legs every 1–2 minutes to prevent charring on one side.
💡 Pro Tip: If the skin is getting too dark, move the turkey legs to indirect heat and tent with foil until fully cooked.
Final Takeaways: Mastering Turkey Leg Grilling Challenges
✔ Prevent Uneven Cooking → Use indirect heat, rotate turkey legs, and check the internal temp regularly.
✔ Control Flare-Ups → Trim excess fat, use a drip pan, and avoid applying BBQ sauce too early.
✔ Keep Turkey Legs Moist → Brine or marinate, baste while cooking, and let them rest before serving.
✔ Avoid Burnt Skin → Start low and slow, sear at the end, and flip frequently over direct heat.
By mastering these troubleshooting techniques, you’ll achieve perfectly grilled BBQ turkey legs—juicy, flavorful, and evenly cooked every time! 🍗🔥 - Recommended Side Dishes and Sauces
Perfect Side Dishes to Complement BBQ Turkey Legs
BBQ turkey legs are packed with bold, smoky flavors, and the right side dishes can elevate your meal to a whole new level. The best sides should balance the richness of the turkey legs by offering a mix of crunch, sweetness, tanginess, and freshness. Whether you’re going for classic BBQ pairings, hearty comfort foods, or fresh and light options, there’s something for every palate. Below, we explore some of the best sides to serve with BBQ turkey legs.
1. Classic BBQ Sides: Traditional Flavors That Never Fail
If you want to create the ultimate BBQ feast, stick to time-tested favorites that bring out the best in smoky turkey legs.
✔ Coleslaw – A cool, creamy coleslaw with a hint of tanginess cuts through the richness of BBQ turkey legs. Opt for a vinegar-based slaw for a lighter touch or a classic mayo-based slaw for creaminess. You can also try a spicy jalapeño slaw for a little heat.
✔ Baked Beans – Smoky, sweet, and savory baked beans are a staple at any BBQ. Slow-cooked with brown sugar, molasses, and bacon, they add a deep, rich flavor that complements turkey legs beautifully.
✔ Corn on the Cob – Whether grilled, boiled, or roasted, corn on the cob is a perfectly sweet and buttery side that pairs well with BBQ flavors. For an extra punch, try Mexican-style street corn (elote), coated in mayo, cotija cheese, chili powder, and lime juice.
✔ Mac and Cheese – Creamy, cheesy, and indulgent, mac and cheese adds a comforting contrast to the smoky turkey legs. For extra BBQ flair, consider a smoky gouda mac and cheese or one baked with a crispy breadcrumb topping.
💡 Pro Tip: If you’re grilling corn, brush it with garlic butter or BBQ sauce for a flavorful twist!
2. Hearty Comfort Sides: Filling Additions for a Satisfying Meal
If you’re looking for something more substantial, these comforting sides will turn your BBQ turkey legs into a feast.
✔ Garlic Mashed Potatoes – Buttery, creamy, and rich, mashed potatoes are a classic side that balances the smoky and spicy notes of BBQ turkey legs. Add roasted garlic or a hint of smoked paprika for extra depth.
✔ Sweet Potato Fries – A crispy, slightly sweet alternative to regular fries, sweet potato fries provide a delicious contrast to smoky turkey. Serve them with a zesty dipping sauce like chipotle mayo or honey mustard.
✔ Southern-Style Collard Greens – Slow-cooked collard greens with bacon, onion, and apple cider vinegar bring a slightly tangy, smoky, and savory taste that pairs wonderfully with BBQ turkey legs.
✔ Cornbread – A slightly sweet and crumbly addition, cornbread is a classic Southern pairing for BBQ dishes. Try jalapeño cheddar cornbread for a spicy and cheesy twist!
💡 Pro Tip: Make your mashed potatoes extra special by adding a touch of smoked butter or crispy bacon bits!
3. Light and Fresh Sides: A Refreshing Contrast
BBQ turkey legs are rich and hearty, so adding some light, fresh sides can balance the meal and keep it from feeling too heavy.
✔ Grilled Vegetables – A mix of zucchini, bell peppers, asparagus, and mushrooms adds a smoky and slightly charred flavor that pairs well with BBQ turkey. Toss them with olive oil, garlic, and herbs before grilling.
✔ Watermelon and Feta Salad – The sweetness of watermelon and the saltiness of feta cheese make for a refreshing, juicy side that complements the smokiness of turkey legs. Add mint leaves and a balsamic drizzle for extra flavor.
✔ Cucumber and Tomato Salad – A light and tangy salad made with fresh cucumbers, cherry tomatoes, red onions, and a lemon vinaigrette keeps the meal refreshing and bright.
✔ Avocado and Black Bean Salad – A great Tex-Mex-inspired side, this salad includes avocados, black beans, corn, lime juice, and cilantro, offering a creamy, zesty balance to BBQ turkey.
💡 Pro Tip: A splash of citrus (like lime or lemon juice) in your salad enhances freshness and helps cut through the richness of the meat!
4. Fun & Unique Sides: Creative Pairings for a New Twist
Want to try something different? These fun, unique sides add a creative touch to your BBQ spread.
✔ Pineapple Salsa – A sweet and spicy salsa made with diced pineapple, red onions, jalapeños, cilantro, and lime juice. The sweetness enhances the smoky turkey flavor while the spice adds a fun kick.
✔ BBQ Bacon-Wrapped Jalapeño Poppers – Spicy jalapeños stuffed with cream cheese and cheddar, then wrapped in bacon and grilled. These bite-sized flavor bombs bring heat and smokiness to the meal.
✔ Fried Pickles – Crispy, tangy, and slightly salty, fried pickles are a fun snack that pairs well with BBQ turkey legs. Serve with ranch or spicy aioli for dipping.
✔ Spicy Honey Glazed Brussels Sprouts – Roasted Brussels sprouts coated in a spicy honey glaze with a hint of garlic and balsamic vinegar offer a sweet, tangy, and slightly smoky taste that works beautifully with BBQ meats.
💡 Pro Tip: Grill your pineapple salsa for a smoky, caramelized flavor that pairs even better with BBQ turkey!
Final Thoughts: The Perfect Pairing for BBQ Turkey Legs
The best sides for BBQ turkey legs depend on your preferred flavor balance:
🔥 Classic BBQ Sides → Coleslaw, baked beans, mac and cheese, corn on the cob.
🥔 Hearty Comfort Foods → Mashed potatoes, sweet potato fries, cornbread, collard greens.
🥗 Light & Fresh Options → Watermelon feta salad, cucumber tomato salad, grilled veggies.
🍍 Creative & Unique Sides → Pineapple salsa, fried pickles, bacon-wrapped jalapeños.
By pairing your smoky, juicy turkey legs with the right combination of sides, you’ll create a well-rounded, flavorful meal that satisfies every craving. 🎉🔥🍗
Presentation and Serving Ideas
Creative Garnishing Tips: Elevate Your BBQ Turkey Leg Presentation
A perfectly grilled BBQ turkey leg isn’t just about flavor—it’s also about presentation. The right garnishes can enhance visual appeal, add texture, and complement the smoky, savory flavors of your dish. Whether you’re plating for a backyard BBQ, a holiday feast, or a social media-worthy spread, here are some creative garnishing tips to make your BBQ turkey legs stand out.
1. Fresh Herb Garnishes: Adding Color and Freshness 🌿
Herbs not only add a pop of color but also bring aromatic freshness that contrasts beautifully with the smoky, rich flavors of BBQ turkey legs.
✔ Chopped Parsley or Cilantro – A light sprinkle adds a bright green contrast to deep, caramelized BBQ sauce.
✔ Rosemary or Thyme Sprigs – Whole sprigs placed on the side or tied around the bone with twine give a rustic, elegant touch.
✔ Basil Ribbons – Thinly sliced fresh basil provides a sweet, peppery aroma that pairs well with smoky flavors.
💡 Pro Tip: Lightly char some rosemary sprigs on the grill and place them next to your turkey legs for an extra smoky aroma!
2. Citrus Slices and Zests: Bright and Zesty Accents 🍋🍊
Citrus brings a burst of freshness, acidity, and visual contrast that complements BBQ flavors.
✔ Lemon or Lime Wedges – Serve them on the side for a fresh squeeze over the turkey legs before eating.
✔ Orange or Blood Orange Slices – A visually striking garnish that adds a mild, sweet citrus note.
✔ Lemon or Lime Zest – A light sprinkle of zest before serving enhances the dish with bright, aromatic oils.
💡 Pro Tip: Grill your citrus slices for a slightly smoky, caramelized touch that intensifies their natural sweetness!
3. BBQ Sauce Drizzles and Artistic Brush Strokes 🍯🔥
Instead of just slathering BBQ sauce on top, get creative with how you apply it for a restaurant-style presentation.
✔ Drizzle Patterns – Use a squeeze bottle to create zig-zags or abstract drizzles across the plate.
✔ Sauce Brush Strokes – Before placing the turkey legs on the plate, drag a brush dipped in BBQ sauce across the surface for a chef-style effect.
✔ Dipping Cups – Serve extra sauce in small ramekins or mini mason jars for a stylish touch.
💡 Pro Tip: Mix your BBQ sauce with a little honey or balsamic glaze to create a glossy, thick drizzle that looks even better on the plate!
4. Smoky and Crispy Textural Elements 🔥🍗
Adding crunchy textures creates contrast and excitement in every bite while also making the dish look more appealing.
✔ Crispy Fried Onions or Garlic Chips – Sprinkle on top for extra crunch and savory depth.
✔ Toasted Sesame Seeds – White or black sesame seeds add a nutty flavor and a visually striking contrast.
✔ Chopped Nuts (Pecans, Almonds, or Walnuts) – A light dusting adds a crunchy texture and an earthy balance to the smoky turkey.
💡 Pro Tip: Toast your sesame seeds or nuts lightly before sprinkling to bring out their natural oils and flavors!
5. Charred and Grilled Vegetables for a Vibrant Plate 🌽🥒
Pairing grilled vegetables with BBQ turkey legs adds color, depth, and extra smokiness to the presentation.
✔ Grilled Bell Pepper Strips – Bright red, yellow, and green peppers bring a vibrant color contrast.
✔ Charred Corn Kernels – A sprinkle of grilled corn adds sweetness and a rustic feel.
✔ Roasted Cherry Tomatoes – Their bursting juices balance out the smoky turkey flavors.
💡 Pro Tip: Grill vegetables in different shapes and colors to create a dynamic and eye-catching plate!
6. Edible Flowers and Microgreens for a Gourmet Touch 🌸🌱
For an elevated, fine-dining look, edible flowers and microgreens add delicate beauty and a hint of flavor.
✔ Edible Flowers (Nasturtiums, Marigolds, or Pansies) – These add pops of color and a slightly peppery taste.
✔ Microgreens (Radish Sprouts, Baby Cilantro, or Watercress) – Small, delicate greens that bring a fresh, earthy contrast.
💡 Pro Tip: Lightly mist edible flowers with water and lemon juice to keep them fresh and vibrant longer!
7. Creative Plating Techniques: Making Your Dish Stand Out 🍽️
Presentation is everything, and how you arrange your BBQ turkey legs can make a huge difference in their visual appeal.
✔ Stacking & Layering – Stack turkey legs slightly over one another to create height and depth.
✔ Bone-Up Presentation – Arrange the turkey legs with the bone sticking up slightly for a dramatic effect.
✔ Serving on a Wooden Board or Cast-Iron Skillet – This adds a rustic, BBQ-restaurant feel.
💡 Pro Tip: Scatter coarse salt, cracked pepper, and fresh herbs around the plate for an effortlessly gourmet look!
Final Thoughts: Make Your BBQ Turkey Legs Shine!
By using fresh herbs, bright citrus, artistic sauce techniques, crunchy textures, colorful veggies, and creative plating, you can turn a simple BBQ turkey leg into a stunning dish that impresses both in flavor and presentation.
🔥 Key Takeaways for the Best BBQ Presentation:
✅ Use fresh herbs and citrus for a fresh pop of color and brightness.
✅ Get creative with BBQ sauce drizzles and artistic plating.
✅ Add crunch with crispy onions, nuts, or toasted sesame seeds.
✅ Use grilled vegetables and edible flowers for vibrant contrast.
✅ Serve on rustic wooden boards or cast-iron skillets for an authentic BBQ feel.
With these tips, your BBQ turkey legs won’t just taste incredible—they’ll look picture-perfect too! 🎉🔥🍗