There’s something timeless and comforting about a well-cooked steak paired with perfectly prepared potatoes. Whether it’s for a special occasion, a family dinner, or just a craving for a hearty meal, steak and potatoes are the ultimate go-to duo. The combination offers rich flavors, satisfying textures, and the kind of meal that feels like a treat, no matter the day of the week.
But cooking steak and potatoes to perfection can be intimidating, especially if you’re aiming to impress guests or simply want to enjoy a restaurant-quality dish at home. The good news? It doesn’t have to be complicated. In this ultimate guide, we’ll walk you through every step of the process—from selecting the perfect steak cut and preparing the right kind of potatoes, to mastering techniques like pan-searing, grilling, and roasting.
By the end of this guide, you’ll have all the knowledge you need to cook steak and potatoes like a pro, ensuring that every bite is as tender, juicy, and flavorful as you’ve always dreamed. Ready to elevate your cooking game? Let’s dive in!
Choosing the Perfect Steak for Your Meal
Ribeye, Filet Mignon, and Sirloin: Which Steak to Pick?
When it comes to cooking steak, choosing the right cut is essential to achieving the best flavor and tenderness. Ribeye, filet mignon, and sirloin are some of the most popular steak cuts, each offering a unique experience. Here’s a breakdown of each cut to help you choose the perfect steak for your meal:
Ribeye: The Flavor King
Ribeye is known for its rich, beefy flavor and juicy tenderness, making it one of the most beloved cuts for steak lovers. This cut comes from the rib section of the cow and is well-marbled, meaning it has fat running through the meat, which enhances the flavor and moisture. The fat melts as the steak cooks, resulting in a tender, juicy piece of meat with a deep, satisfying taste.
Ribeye is perfect for those who enjoy a flavorful, hearty steak. Whether you’re grilling or pan-searing, the marbling ensures that the steak remains moist, even if cooked to a higher doneness. If you’re looking for a steak that’s all about flavor, ribeye is a top choice.
Filet Mignon: The Tender Option
Filet mignon is the most tender cut of steak, coming from the smaller, leaner portion of the tenderloin. While it doesn’t have the same amount of marbling as a ribeye, filet mignon is prized for its buttery texture and mild, subtle flavor. Because it’s so lean, it’s less fatty and has a finer, melt-in-your-mouth feel when cooked properly.
If you prefer a steak that’s incredibly tender, with a smooth and delicate texture, filet mignon is the cut to choose. It’s especially popular for special occasions and fine dining experiences. While it may lack the intense flavor of a ribeye, its melt-in-your-mouth quality makes it a favorite for many steak enthusiasts. Filet mignon can be grilled, pan-seared, or even cooked sous-vide for an elevated dining experience.
Sirloin: A Balanced Option
Sirloin steak is a leaner cut compared to ribeye and filet mignon, but it still offers great flavor and tenderness. It comes from the rear section of the cow, near the hip, and is often considered a more affordable steak without sacrificing quality. While it’s not as fatty as ribeye or as tender as filet mignon, sirloin offers a good balance of flavor, texture, and cost, making it an excellent choice for weeknight dinners or feeding a crowd.
Sirloin steaks are versatile and can be cooked on the grill, in a cast-iron skillet, or even broiled. They tend to be a bit chewier than ribeye or filet mignon, but when cooked correctly, they deliver a satisfying, flavorful steak. If you’re looking for a steak that’s both affordable and flavorful, sirloin is a solid pick.
Which One to Choose?
- For maximum flavor and juiciness: Go with a ribeye. Its marbling ensures a juicy, flavorful steak every time, making it ideal for those who prioritize taste.
- For the most tender steak: Choose filet mignon. It’s perfect for those who prefer a melt-in-your-mouth experience, especially when tenderness is the top priority.
- For a balance of flavor and value: Opt for sirloin. It’s an affordable cut that still offers great flavor, making it an excellent choice for everyday meals.
Ultimately, the right choice comes down to your personal preferences—whether you prioritize tenderness, flavor, or price. No matter which cut you pick, understanding how to cook it to perfection will ensure a steak dinner you can be proud of.
Understanding Steak Cuts and Their Cooking Methods
Choosing the right steak cut is just the beginning of creating the perfect steak dinner. Each cut of beef has its own unique texture, flavor profile, and optimal cooking method. Understanding these cuts and how to cook them properly can make all the difference in the final result. Here’s an overview of some of the most popular steak cuts, their characteristics, and the best methods to cook them to perfection.
1. Ribeye: The Flavorful Cut
Characteristics: Ribeye steaks are cut from the rib section of the cow, and they’re known for their abundant marbling—small streaks of fat throughout the meat. This fat is key to the flavor and juiciness of the steak, as it melts during cooking, infusing the meat with rich, beefy goodness.
Best Cooking Methods:
- Grilling: Ribeye is a fantastic steak for grilling. The high heat of the grill helps sear the outside while keeping the inside juicy and tender. Due to its marbling, ribeye is forgiving, even if cooked to a higher doneness like medium or well-done.
- Pan-searing: Pan-searing in a cast iron skillet with a bit of butter and herbs (like rosemary and thyme) helps to create a beautifully browned crust while locking in the juices.
- Broiling: Broiling ribeye is another great option, as the intense heat from above helps cook the steak evenly while enhancing the flavor from the fat.
2. Filet Mignon: The Tenderest Steak
Characteristics: Filet mignon comes from the tenderloin, a muscle that doesn’t do much work, which makes it the most tender steak cut. It’s also leaner, with less marbling compared to ribeye, and has a delicate flavor. This cut is prized for its buttery texture and is often the go-to choice for a luxurious steak experience.
Best Cooking Methods:
- Grilling: While grilling filet mignon can be done, it’s best to be cautious with the cooking time. The lean nature of this cut means it can easily overcook, so be sure to use a meat thermometer and aim for a medium-rare finish for optimal tenderness.
- Pan-searing: Filet mignon benefits from a quick sear in a hot pan, followed by finishing in the oven if needed. This allows the outside to get a nice crust while preserving the tender, juicy interior.
- Sous-vide: For the ultimate control over doneness, filet mignon can be cooked sous-vide, which involves cooking the steak in a vacuum-sealed bag in a water bath at a precise temperature. Afterward, you can sear it in a pan for a perfect finish.
3. Sirloin: The Lean, Flavorful Steak
Characteristics: Sirloin steaks come from the rear section of the cow, and they offer a good balance between flavor and tenderness. While not as fatty as ribeye or as tender as filet mignon, sirloin is a lean cut with a slightly firmer texture. It’s often considered a versatile and affordable option for everyday meals.
Best Cooking Methods:
- Grilling: Sirloin is great for grilling, as it allows the meat’s natural beef flavor to shine. It should be cooked over medium-high heat to achieve a nice sear while keeping the inside juicy.
- Pan-searing: Pan-searing works well with sirloin as well, especially if you’re looking for a quick meal. For a restaurant-style finish, add garlic, butter, and herbs to the pan during the last few minutes of cooking.
- Broiling: Sirloin can also be broiled for a steakhouse-like experience. Just make sure to watch the steak closely, as it can cook quickly under the high heat.
4. New York Strip: A Balanced Choice
Characteristics: New York strip steaks come from the short loin section of the cow, located just behind the ribeye. They offer a perfect balance of tenderness and flavor, with moderate marbling and a beefy taste. The texture is firmer than ribeye but still tender, making it a great choice for steak lovers who want a bit of chew without sacrificing flavor.
Best Cooking Methods:
- Grilling: New York strip is a popular choice for grilling. The marbling ensures it stays juicy, and the grill marks provide a delicious char. Aim for medium-rare to medium doneness to preserve the cut’s texture and flavor.
- Pan-searing: Like ribeye, New York strip is ideal for pan-searing. Searing it in a hot skillet creates a crisp, flavorful crust while retaining moisture inside. For a great finish, let the steak rest with a dollop of herb butter on top.
- Broiling: New York strip can be broiled in the oven, which provides high, even heat to cook the steak while caramelizing the exterior. It’s important to keep an eye on the steak to ensure it doesn’t overcook.
5. T-Bone and Porterhouse: The Best of Both Worlds
Characteristics: T-bone and porterhouse steaks are essentially the same cut but differ in the size of the tenderloin portion. The T-bone has a smaller tenderloin section, while the porterhouse has a larger piece. Both cuts offer a combination of tenderloin and strip steak in one, making them a great choice for those who want the best of both worlds.
Best Cooking Methods:
- Grilling: T-bone and porterhouse steaks are perfect for grilling, as the bone helps to retain moisture and flavor during cooking. Be sure to cook them over medium-high heat and flip only once for a nice sear on both sides.
- Pan-searing: These steaks also do well in a pan, though it’s important to sear both sides to develop a good crust. You can then finish them in the oven to ensure they cook evenly.
- Broiling: Broiling T-bone and porterhouse steaks in the oven is another great option. The bone helps the steak retain moisture, and broiling under high heat gives it a deliciously browned exterior.
6. Flank Steak and Skirt Steak: Thin Cuts with Bold Flavor
Characteristics: Both flank steak and skirt steak are thin cuts that come from the abdominal area. They have great flavor but can be tougher than other cuts, so they’re best cooked quickly at high heat and sliced against the grain to tenderize.
Best Cooking Methods:
- Grilling: Flank and skirt steaks are perfect for grilling. Marinate them first to enhance the flavor, and cook quickly over high heat to achieve a flavorful char.
- Pan-searing: If grilling isn’t an option, pan-searing these cuts is a great alternative. Be sure to cook them quickly and slice them thinly against the grain to ensure tenderness.
The Right Method for Every Cut
Knowing the right cooking method for each steak cut ensures that you’ll get the best flavor, texture, and juiciness from your meat. Whether you’re grilling, pan-searing, or broiling, understanding the unique qualities of each cut and how to cook it is the key to mastering steak like a pro. The right technique can transform even the most affordable cuts into a mouthwatering, restaurant-quality meal.
How to Check for Steak Tenderness and Marbling
When it comes to selecting a steak, two of the most important factors to consider are tenderness and marbling. These elements play a significant role in the flavor, texture, and overall quality of your steak. Understanding how to check for both tenderness and marbling will help you choose the best cut and ensure a delicious, melt-in-your-mouth dining experience. Here’s how to evaluate these key characteristics:
1. Understanding Marbling: What It Is and Why It Matters
Marbling refers to the streaks of fat interspersed throughout the muscle fibers of the steak. This fat not only adds flavor but also helps keep the meat juicy and tender as it cooks. The more marbling a steak has, the more flavor it tends to offer, especially when cooked over high heat.
- How to Check for Marbling: Look at the surface of the steak to examine the visible fat streaks. Higher quality steaks, like ribeye or New York strip, tend to have more prominent marbling. Marbling is often scored on a scale from 1 to 5, with 5 being the most marbled and offering the richest flavor.
- Why It Matters: Marbling is essential because it melts during cooking, infusing the steak with moisture and flavor. The fat also helps to tenderize the meat, especially in cuts like ribeye, which have a higher fat content. A steak with good marbling is more likely to stay juicy and tender during cooking.
2. Checking for Tenderness: The Feel and Texture
Tenderness refers to how easily the steak will break apart when chewed. A tender steak should feel soft and easy to cut through, with little resistance. Factors that influence tenderness include the cut of meat (some cuts are naturally more tender than others) and the age and diet of the cow.
- How to Check for Tenderness:
- Touch Test: You can gently press your finger into the steak to get an idea of its tenderness. A tender steak should give slightly to the touch and have a soft, smooth feel. If it’s firm or tough to the touch, it may require more attention during cooking to achieve the desired tenderness.
- The “Feel” of the Cut: Tender cuts like filet mignon and ribeye should feel more pliable compared to tougher cuts like flank or skirt steak. Flank and skirt steaks, while flavorful, tend to be chewier and require careful cooking to avoid becoming tough.
- Visual Clues: While marbling is a good indicator of flavor, it’s not always a direct indicator of tenderness. Tenderness is also influenced by the muscle fibers in the cut. For example, cuts from muscles that do less work (like filet mignon or ribeye) tend to be more tender, while cuts from more active muscles (like sirloin or round) may require more cooking techniques to tenderize them.
3. The Best Cuts for Marbling and Tenderness
Some cuts of steak are naturally more tender and marbled than others. Understanding which cuts offer the best balance of both can help guide your choice. Here are a few examples:
- Ribeye: Ribeye is one of the most marbled cuts, offering a rich, beefy flavor and a high level of tenderness due to its fat content. This makes it perfect for grilling or pan-searing.
- Filet Mignon: Known for its extreme tenderness, filet mignon is the leanest of the premium cuts, with very little marbling. While it may not be as flavorful as a ribeye, it makes up for it with its butter-soft texture.
- New York Strip: This cut has a moderate level of marbling, offering both tenderness and flavor. It’s less tender than filet mignon but still a great option for a well-balanced steak.
- Sirloin: Sirloin is leaner and has less marbling compared to cuts like ribeye or New York strip, making it a less tender option, but it’s still flavorful and great for grilling. Sirloin tends to be tougher but can be made tender with the right cooking techniques, such as marinating.
- Flank and Skirt Steak: These cuts are lean and have little marbling, making them tougher than other cuts. They require specific techniques (like marinating and slicing against the grain) to make them more tender and flavorful.
4. Cooking Methods to Enhance Tenderness and Marbling
Even if a steak has minimal marbling or is a tougher cut, certain cooking methods can help break down the muscle fibers and tenderize the meat. For example:
- Marinating: Marinating tougher cuts like flank or skirt steak can help break down the fibers and enhance tenderness. Acids like vinegar, citrus, or yogurt help to tenderize the meat by dissolving collagen.
- Sous-vide: Cooking steak sous-vide at a low and consistent temperature ensures that the steak remains tender while achieving the perfect level of doneness. This method is especially helpful for tougher cuts, as the slow cooking process helps break down connective tissue.
- Resting the Meat: After cooking, let your steak rest for a few minutes. This allows the juices to redistribute throughout the meat, which helps maintain tenderness and moisture. Cutting into a steak right away can cause the juices to spill out, leaving it drier and tougher.
- Slow Cooking: For tougher cuts like chuck or round steaks, slow cooking methods like braising or using a pressure cooker can help break down the connective tissue, making the steak more tender. These methods are perfect for stews, roasts, and other dishes where tenderness is key.
5. Other Factors Affecting Tenderness
- Age of the Meat: Beef that is aged (dry-aged or wet-aged) tends to be more tender and flavorful. Dry-aging, in particular, allows enzymes to break down muscle tissue, which results in a more tender steak.
- Cooking Time and Temperature: Overcooking can result in a tough steak, especially in lean cuts. Using a meat thermometer to monitor the internal temperature and ensuring that you cook your steak to your desired doneness is essential for achieving the best tenderness.
Conclusion: How to Choose the Best Tender and Well-Marbled Steak
When choosing a steak, marbling and tenderness are two of the most important factors to consider. A steak with good marbling will have enhanced flavor and moisture, while a tender steak will be easy to cut and chew. By understanding how to check for both, you’ll be able to select the right cut and employ the best cooking methods to create a steak that’s both flavorful and tender. Whether you’re grilling a ribeye, searing a filet mignon, or slow-cooking a tougher cut, understanding marbling and tenderness ensures that you’ll cook a steak worthy of being called a pro.
Steak Doneness Chart: Rare, Medium, Well-Done—What’s Your Preference?
One of the key factors that defines a steak’s appeal is its doneness. The way a steak is cooked can drastically alter its texture, flavor, and juiciness. While personal preferences for doneness vary widely, understanding the different levels—from rare to well-done—will help you achieve the perfect steak every time. Here’s a detailed guide to steak doneness, how to determine it, and what each level of doneness means for the final result.
1. Understanding Steak Doneness Levels
The doneness of a steak is determined by its internal temperature, which is a direct reflection of how much heat has been applied to the meat. The USDA provides guidelines on the recommended internal temperatures for steaks, but the perfect doneness is ultimately up to individual taste. Here’s an overview of the most common doneness levels:
- Rare (120–125°F / 49–52°C): A rare steak is very red in the center and is lightly seared on the outside. It is cool to warm in the middle and has a soft, tender texture. The juices in a rare steak are still somewhat raw, and the meat is mostly uncooked in the center.
- Characteristics: Bright red center, soft texture, slightly chewy.
- Ideal for: Lovers of very tender, juicy meat who don’t mind a more raw experience.
- Medium Rare (130–135°F / 54–57°C): Medium-rare is often considered the ideal steak doneness by chefs and steak enthusiasts. The steak is seared on the outside with a warm red center. It offers a perfect balance of tenderness, juiciness, and flavor, with the fat and juices just beginning to melt.
- Characteristics: Warm red center, tender, juicy, slightly chewy.
- Ideal for: Those who enjoy a steak that is flavorful, tender, and retains moisture.
- Medium (140–145°F / 60–63°C): A medium steak has a slightly pink center with more brown on the outside. While it is still juicy, it has less tenderness than medium-rare. The steak will have a firmer texture, but it still retains a good amount of flavor and moisture.
- Characteristics: Pinkish center, slightly firmer texture, still juicy but less so than medium-rare.
- Ideal for: Those who want a bit more doneness but still enjoy a moist steak without it becoming too dry.
- Medium Well (150–155°F / 66–68°C): Medium-well steaks have a faint pinkish center, but most of the meat is brown. The texture is firm, and the steak will have significantly less juice than medium-rare or medium. It is often considered a compromise for people who want more cooked meat without going fully well-done.
- Characteristics: Very slight pink center, firmer texture, less juicy.
- Ideal for: Those who prefer less pink meat and a firmer texture.
- Well Done (160°F / 71°C and above): A well-done steak is fully cooked through, with no pink remaining. It is browned throughout and has little to no juice. The texture is very firm, and the steak can be quite dry, as all the moisture has been cooked out.
- Characteristics: No pink, firm and dry texture, brown throughout.
- Ideal for: Those who prefer their steak thoroughly cooked with minimal juiciness.
2. How to Achieve the Perfect Doneness
The key to achieving your preferred doneness is monitoring the internal temperature of the steak as it cooks. Here are a few techniques and tips to help you get your steak just right:
- Use a Meat Thermometer: The most accurate way to ensure the steak reaches your desired doneness is by using a meat thermometer. Insert it into the thickest part of the steak (avoiding the bone if you’re cooking a bone-in cut) and check the temperature against the doneness chart.
- The Touch Test: While a thermometer is the best tool, you can also use the touch test to gauge doneness. Lightly press on the steak with your tongs or fingers:
- Rare: Soft and squishy, similar to the feeling of touching the flesh of your cheek.
- Medium Rare: Slightly firmer but still yielding, like the feeling of the fleshy part of your palm.
- Medium: Firmer still, with a slight spring back when pressed.
- Medium Well: Firm with little to no give.
- Well Done: Very firm, with little or no spring back.
- Resting the Steak: After cooking your steak to the desired doneness, let it rest for at least 5 minutes. Resting allows the juices to redistribute within the meat, making it more flavorful and tender. If you cut into the steak immediately after cooking, the juices will escape, leaving the steak dry.
3. The Pros and Cons of Each Doneness Level
Choosing the right doneness comes down to personal preference, but each level has its advantages and drawbacks:
- Rare:
- Pros: Maximum tenderness and juiciness; retains the pure flavor of the beef.
- Cons: Some people may find rare steaks too raw or unpleasant due to the texture and less cooked surface area.
- Medium Rare:
- Pros: Often considered the optimal balance between tenderness, juiciness, and flavor; ideal for those who enjoy steak with a nice sear and a juicy center.
- Cons: May still be considered too rare for some individuals who prefer their steak more cooked.
- Medium:
- Pros: A happy medium for those who prefer more cooked meat but still want to retain some tenderness and juiciness.
- Cons: Can be a bit firmer and less juicy than medium-rare or rare cuts.
- Medium Well:
- Pros: Provides a firmer texture with less pink, often preferred by those who are more sensitive to undercooked meat.
- Cons: It can start to lose tenderness and flavor, with a noticeable decrease in juiciness.
- Well Done:
- Pros: Fully cooked meat, ideal for individuals who dislike any pinkness in their steak.
- Cons: Likely to be dry and overcooked, with a tough texture and less flavor due to the loss of juices.
4. Choosing the Right Steak for Your Desired Doneness
Not all steaks are created equal, and the best steak for your preferred doneness can vary. For example:
- Best Steaks for Rare or Medium Rare: Cuts with more marbling, such as ribeye, New York strip, and filet mignon, are ideal for these doneness levels, as they stay tender and juicy with minimal cooking.
- Best Steaks for Medium and Well-Done: Leaner cuts, like sirloin or flank steak, tend to hold up better when cooked to medium-well or well-done, as they are naturally firmer and won’t dry out as quickly as fattier cuts.
5. Tips for Customizing Steak Doneness to Your Liking
- Experiment with Seasoning: The flavor profile of your steak can enhance your experience at any level of doneness. A simple seasoning of salt and pepper is classic, but feel free to experiment with garlic, rosemary, thyme, or even a dry rub for added complexity.
- Cooking Method: The method you choose—grilling, pan-searing, broiling, or sous-vide—can impact the doneness of your steak. Cooking times may vary based on the thickness of the steak, so adjust accordingly to achieve your preferred level.
Conclusion: Finding Your Perfect Steak Doneness
Ultimately, the perfect steak doneness is a matter of personal preference. Whether you like it rare, medium, or well-done, knowing how to cook your steak to the right internal temperature and understanding how each level of doneness affects texture and flavor will allow you to craft the ideal steak every time. From the juicy, tender rare steak to the firmer well-done cut, there’s a perfect steak waiting for you—it’s just a matter of finding the right balance that suits your taste buds.
Preparing Your Potatoes for the Best Taste and Texture
Selecting the Right Potatoes: Yukon Gold vs. Russet
When it comes to pairing potatoes with steak, the type of potato you choose can make a big difference in flavor, texture, and overall meal satisfaction. While there are many varieties of potatoes available, Yukon Gold and Russet potatoes are two of the most popular options. Understanding the unique characteristics of these two types of potatoes will help you choose the best one for your steak dish, whether you’re roasting, mashing, or frying.
1. Yukon Gold Potatoes: The All-Purpose, Creamy Choice
Yukon Gold potatoes are known for their rich, buttery flavor and creamy texture. With their smooth, golden skin and yellow flesh, they have a naturally sweet taste that pairs wonderfully with steak. These potatoes are a versatile choice for a variety of cooking methods, and their unique characteristics make them a top contender for dishes like mashed potatoes or roasted potatoes.
- Texture and Flavor: Yukon Gold potatoes have a waxy texture, meaning they hold their shape well when cooked. Their flesh is moist and creamy, which makes them perfect for mashing. They have a naturally sweet, buttery flavor that complements steak without overpowering it. The golden color also adds a visual appeal to your dish.
- Best Cooking Methods for Yukon Gold:
- Mashing: Yukon Gold potatoes make an excellent base for creamy mashed potatoes. Their natural creaminess means you don’t need much butter or cream to achieve a smooth, velvety texture.
- Roasting: Roasting Yukon Gold potatoes brings out their natural sweetness and creates a crispy, golden exterior with a soft interior. You can simply season them with olive oil, salt, and pepper, or get creative with herbs like rosemary and thyme for extra flavor.
- Grilling: If you want to create grilled potato slices or wedges, Yukon Gold potatoes hold their shape well, and their slightly waxy texture allows them to develop a nice char without falling apart.
- Why Choose Yukon Gold with Steak: The creamy, buttery flavor of Yukon Gold potatoes complements the savory, meaty taste of steak perfectly. Whether mashed, roasted, or baked, Yukon Golds provide a rich, smooth contrast to a juicy steak. Their tender flesh also means they cook quickly, so you can enjoy them alongside your steak without a lengthy wait.
2. Russet Potatoes: The Classic, Starchy Choice
Russet potatoes are perhaps the most common type of potato and are known for their high starch content. They have rough, dark brown skin and white flesh that becomes light and fluffy when cooked. Russets are often the go-to potato for baked potatoes and fries, making them an ideal choice for those looking for a traditional potato side that pairs well with steak.
- Texture and Flavor: The high starch content of Russet potatoes gives them a fluffy, airy texture once cooked, making them perfect for baked potatoes or French fries. The flavor of Russets is more neutral compared to Yukon Golds, with a slightly earthy taste that’s less sweet but still satisfying. Their fluffy interior works well when you’re aiming for a light and airy texture to contrast with the richness of a steak.
- Best Cooking Methods for Russet Potatoes:
- Baking: Russets are the ultimate choice for baked potatoes. Their fluffy interior and thick skin provide the perfect vessel for adding toppings like sour cream, chives, butter, or cheese, making them a classic steakhouse side dish.
- French Fries: Russets are a popular choice for making crispy French fries due to their starchy content, which helps create a crunchy exterior while maintaining a soft, pillowy interior.
- Mashed Potatoes: While Yukon Gold potatoes are often preferred for mashed potatoes because of their creaminess, Russets can also make great mashed potatoes if you’re looking for a lighter, fluffier texture. Russet mashed potatoes are less creamy but offer a cloud-like fluffiness when whipped.
- Why Choose Russet Potatoes with Steak: Russet potatoes provide a light, fluffy texture that balances the rich, dense texture of a steak. The neutral flavor of Russets allows the steak’s taste to shine while still offering a satisfying potato side. Whether you’re preparing a classic baked potato or crispy fries, Russets are a reliable option that complements the robust flavor of steak.
3. Which Potato Is Right for Your Steak Dish?
Choosing between Yukon Gold and Russet potatoes ultimately comes down to the type of dish you’re preparing and your personal preferences. Here’s a breakdown of which potato works best with different steak preparations:
- For Mashed Potatoes:
- Yukon Gold is the top choice for a creamy, buttery mashed potato that enhances the richness of your steak. Their natural creaminess means they require less added butter or cream, resulting in a lighter, smoother mashed potato.
- Russet can also be used for mashed potatoes if you prefer a fluffier texture. If you’re looking for a lighter, airier mashed potato, Russets will deliver just that, but be prepared to use more butter or cream to achieve a creamy texture.
- For Roasted Potatoes:
- Yukon Gold is perfect for roasting. Their creamy texture and golden color enhance the visual appeal of your dish, and their slightly waxy texture ensures they hold up well when roasted. They develop a crispy exterior while remaining soft and tender inside.
- Russet can also be roasted, but their higher starch content means they may not hold their shape as well as Yukon Golds. They may become a bit drier or fall apart more easily.
- For Baked Potatoes:
- Russet potatoes are the classic choice for baked potatoes, with their thick skin and fluffy interior making them ideal for baking. They also provide a sturdy base for toppings like butter, sour cream, and chives, which are a staple alongside steak.
- Yukon Gold can be baked, but their smaller size and waxy texture make them less ideal for this application. They don’t get as fluffy as Russets and tend to hold their shape more.
- For French Fries:
- Russet is the potato of choice for crispy French fries. Their high starch content helps create a perfect fry with a crunchy exterior and soft interior.
- Yukon Gold can be used for fries, but they are less starchy and tend to have a creamier texture, which means they may not be as crisp as Russets when fried.
4. The Final Verdict: Choosing the Best Potato for Your Meal
- Go with Yukon Gold if: You prefer a creamy, buttery texture that enhances the richness of your steak. Yukon Gold potatoes are excellent for mashed potatoes, roasted potatoes, and other side dishes where you want a smooth, rich texture and natural sweetness.
- Go with Russet if: You’re looking for a classic, fluffy baked potato or crispy French fries that complement the bold flavors of your steak. Russets are perfect when you want a more neutral flavor that lets the steak take center stage, or if you prefer a fluffy, airy potato side.
Ultimately, both Yukon Gold and Russet potatoes have their own unique qualities that make them great choices for pairing with steak. Whether you opt for the creamy texture of Yukon Golds or the fluffy, versatile Russets, each type of potato brings its own delicious appeal to the table, ensuring a satisfying and well-rounded meal.
Roasting, Mashing, or Frying: The Best Cooking Methods for Potatoes
When it comes to preparing potatoes to serve alongside your steak, the method of cooking plays a significant role in enhancing both flavor and texture. Potatoes are incredibly versatile, and depending on how they’re prepared, they can either complement the steak’s richness or provide a contrasting texture. Roasting, mashing, and frying are three of the most popular cooking methods, each offering unique characteristics. Let’s dive into how to make the most out of each method and why they work so well as side dishes for steak.
1. Roasting: Crispy, Flavorful Potatoes with a Tender Center
Roasting is one of the best ways to prepare potatoes when you want to achieve a crisp, golden exterior while maintaining a soft, fluffy interior. This method caramelizes the natural sugars in the potatoes, bringing out their sweetness and intensifying their flavor. Roasted potatoes are a perfect side for steak because they offer a satisfying contrast in texture to the juicy, tender steak.
- Best Potatoes for Roasting:
- Yukon Gold potatoes are an excellent choice for roasting due to their waxy texture, which holds up well under heat. They develop a crisp, golden exterior and a creamy interior, making them a perfect match for steak.
- Russet potatoes can also be roasted, though they tend to become a bit fluffier on the inside compared to Yukon Golds. Their higher starch content allows them to crisp up beautifully when roasted at a high temperature.
- How to Roast Potatoes:
- Preparation: Start by washing and peeling (optional) your potatoes. Cut them into uniform chunks or wedges to ensure even cooking.
- Seasoning: Toss the potatoes with olive oil, salt, and pepper. Add herbs like rosemary, thyme, or garlic to enhance flavor.
- Roasting: Spread the potatoes out in a single layer on a baking sheet and roast at 400°F (200°C) for 30–45 minutes, flipping halfway through. The potatoes are done when they’re golden brown and crispy on the outside and tender inside.
- Why Roasting Works with Steak: The crispy exterior and soft interior of roasted potatoes make them a fantastic contrast to the juicy, tender steak. The caramelization process also enhances the natural sweetness of the potatoes, complementing the savory flavors of the steak. Roasted potatoes are easy to prepare in large batches, making them an ideal side dish for dinner parties or gatherings.
2. Mashing: Creamy, Buttery Potatoes to Balance Rich Steak Flavors
Mashed potatoes are a classic, comforting side dish that pairs perfectly with steak. The creaminess of mashed potatoes can balance out the richness of the meat, offering a smooth and velvety texture that contrasts nicely with a juicy steak. The key to making perfect mashed potatoes lies in the type of potatoes you use, the technique, and the flavoring.
- Best Potatoes for Mashing:
- Yukon Gold potatoes are a top choice for mashed potatoes due to their naturally creamy texture. They have just the right amount of starch to create smooth, buttery mashed potatoes with a slight texture that isn’t too dense or too runny.
- Russet potatoes can also be used for mashed potatoes, though they tend to be fluffier and lighter. While not as creamy as Yukon Golds, they make excellent mashed potatoes when you’re looking for a lighter, airier texture.
- How to Make Mashed Potatoes:
- Preparation: Peel (optional) and cut your potatoes into evenly sized chunks. Boil them in salted water for about 15–20 minutes until they are fork-tender.
- Mashing: Once the potatoes are cooked, drain them and return them to the pot. Use a potato masher or a ricer for the smoothest results. Add butter, heavy cream, or milk to achieve the desired consistency. Season with salt, pepper, and any additional flavors like garlic, chives, or cheese.
- Tip: For extra richness, you can infuse the butter or cream with garlic or herbs before adding it to the potatoes.
- Why Mashed Potatoes Work with Steak: Mashed potatoes have a rich, creamy texture that complements the savory taste of steak, making them a classic side dish. The buttery flavor enhances the overall richness of the meal without competing with the steak’s flavors. Whether you opt for a simple mashed potato or one with additional flavorings like garlic or cheese, this dish will round out your steak dinner beautifully.
3. Frying: Crispy, Golden Potatoes with a Delicious Crunch
Frying potatoes creates a crispy exterior while keeping the interior soft and fluffy, making them a popular choice for French fries or other fried potato dishes. Whether you’re making traditional French fries, potato chips, or even crispy potato wedges, frying adds a satisfying crunch that contrasts wonderfully with the tender texture of steak. Fried potatoes also absorb less oil than people often think, and when done right, they provide a rich, flavorful side dish.
- Best Potatoes for Frying:
- Russet potatoes are the best for frying, especially when making French fries or potato chips. Their high starch content ensures that they crisp up nicely while maintaining a light, fluffy interior.
- Yukon Gold potatoes can also be fried, though their waxy texture means they will be a bit denser and may not crisp up as perfectly as Russets. However, their creamy flavor adds a unique twist to fried potato dishes.
- How to Fry Potatoes:
- Preparation: Start by peeling (optional) and cutting the potatoes into thin slices, wedges, or fries. If making fries, soak the cut potatoes in water for at least 30 minutes to remove excess starch. This will help the fries crisp up better.
- Frying: Heat oil in a deep fryer or large pan to around 350°F (175°C). Fry the potatoes in batches, being careful not to overcrowd the pan. Cook them for 3–5 minutes, or until golden brown and crispy. Drain the fries on paper towels and season immediately with salt.
- Double Frying Tip: For extra crispiness, consider double frying your potatoes. Fry them once until they are cooked through, then remove them and let them rest. After 5–10 minutes, fry them again for a final 2–3 minutes until golden brown and extra crispy.
- Why Frying Works with Steak: The crispy, crunchy texture of fried potatoes provides a satisfying contrast to the tender, juicy steak. Whether you’re serving French fries, crispy potato wedges, or homemade chips, frying adds a fun, indulgent touch to your meal. The high heat of frying creates a golden crust that seals in flavor, making each bite a deliciously crispy experience.
4. Choosing the Right Method for Your Meal
Each of these potato cooking methods—roasting, mashing, and frying—has its own advantages, and the best method for your steak dinner depends on the experience you want to create. Here’s a quick guide to help you choose:
- Go with Roasting if: You want crispy, caramelized potatoes with a rich, deep flavor that’s both sweet and savory. Roasted potatoes offer a wonderful contrast in texture to a juicy steak and are easy to prepare in large batches.
- Go with Mashing if: You’re looking for a creamy, buttery side that complements the rich, savory flavor of steak. Mashed potatoes offer a smooth texture and can be customized with flavors like garlic or cheese.
- Go with Frying if: You want a crispy, crunchy side dish that provides a satisfying contrast to the tenderness of steak. Fried potatoes, whether as fries, chips, or wedges, bring a fun, indulgent element to your meal.
No matter which method you choose, the key to making the best potatoes for your steak lies in selecting the right type of potato and preparing them with care. Each method offers its own unique benefits, ensuring that no matter what, your steak dinner will be complemented by a delicious potato side.
Seasoning and Marinating Potatoes for Extra Flavor
While potatoes are delicious on their own, seasoning and marinating them before cooking can elevate their flavor and make them the perfect companion for your steak. Whether you’re roasting, mashing, or frying, adding the right blend of herbs, spices, and liquids can enhance the natural flavors of the potatoes and bring out a rich depth of taste that complements your steak. Let’s explore how to properly season and marinate potatoes for maximum flavor.
1. Seasoning for Roasted and Fried Potatoes: Boosting Flavor with Herbs and Spices
When it comes to roasting or frying potatoes, seasoning is key to creating a dish that is bursting with flavor. The right combination of spices and herbs can transform simple potatoes into a savory side that’s packed with complexity. Here’s how to season potatoes for the best results.
- Basic Seasoning for Roasted Potatoes: The foundation for roasted potatoes is simple yet effective. A generous coating of olive oil, salt, and freshly cracked black pepper will enhance the natural sweetness of the potatoes and give them a crispy, golden exterior. However, to really elevate the flavor, you can experiment with additional seasonings.
- Herbs and Spices to Use:
- Garlic: Fresh garlic (minced or whole cloves) adds a rich, aromatic flavor to roasted potatoes. Roasting the garlic along with the potatoes will infuse the oil and potatoes with a deep, savory taste.
- Rosemary and Thyme: These classic herbs are perfect for roasted potatoes, especially when combined with garlic. The piney, earthy flavors of rosemary and thyme complement the rich taste of the potatoes and pair beautifully with steak.
- Paprika: A dash of paprika, whether smoked or sweet, can add a subtle smokiness and depth to the potatoes, perfect for balancing out the steak’s rich flavors.
- Parmesan: A sprinkle of grated Parmesan cheese on top of roasted potatoes just before serving adds a salty, nutty layer of flavor that pairs beautifully with steak. It also creates a crispy, golden crust.
- Chili Flakes: If you enjoy a bit of heat, sprinkle some red chili flakes over your roasted or fried potatoes. The heat adds contrast and vibrancy that can offset the rich flavors of steak.
- How to Season:
- Toss your cut potatoes in olive oil, salt, and pepper first. Then, sprinkle your chosen herbs and spices evenly over the potatoes. For roasted potatoes, be sure to coat them well and spread them out on a baking sheet to ensure even seasoning. For fried potatoes, season them immediately after frying to help the seasoning stick to the hot surface.
- Why Seasoning Works: Potatoes have a mild, neutral flavor, making them a perfect canvas for a variety of seasonings. The roasting or frying process helps to concentrate the flavors, creating a crispy exterior and a tender interior. The combination of fresh herbs and spices infuses the potatoes, making them a flavorful complement to the savory richness of your steak.
2. Marinating Potatoes: Infusing Deep Flavors Before Cooking
Marinating potatoes before cooking is an excellent way to infuse them with bold, rich flavors. The marinating process allows the potatoes to absorb the seasoning, resulting in more flavor in every bite. This method works especially well for roasted and grilled potatoes, as it imparts a deeper taste and can even help with caramelization.
- Why Marinate Potatoes?:
- Flavor Absorption: Potatoes are naturally porous, so they readily absorb liquids and spices. Marinating them in an oil-based or vinegar-based mixture before cooking can give the potatoes a delicious burst of flavor that enhances their natural taste.
- Tenderization: Some marinades, especially those with acid (like vinegar or citrus juice), can help tenderize the potatoes, making them even softer after cooking.
- Crispiness: Marinating potatoes in oil not only adds flavor but also helps to achieve a crispier exterior when roasted or fried, as the oil aids in browning and caramelization.
- How to Marinate Potatoes:
- Basic Marinade: Combine olive oil, lemon juice (or vinegar), minced garlic, salt, and pepper. This basic marinade adds a tangy flavor and depth while helping the potatoes achieve a crispy, golden finish.
- Herb and Spice Marinades: Add fresh herbs like rosemary, thyme, or parsley to your marinade for an earthy, aromatic flavor. You can also include spices like paprika, cumin, or mustard powder for an added punch of flavor.
- Zesty Marinades: For a bit of kick, add Dijon mustard, hot sauce, or chili flakes to your marinade. These spicy ingredients will infuse the potatoes with a zesty, fiery flavor that pairs well with the savory richness of steak.
- Sweet and Smoky Marinade: For a unique twist, marinate your potatoes in a combination of olive oil, maple syrup or honey, smoked paprika, and a touch of cayenne. This will create a balance of sweetness and smokiness that enhances the potatoes’ natural sweetness and creates a delicious contrast with the steak.
- Marination Time:
- For the best results, marinate potatoes for at least 30 minutes, though you can marinate them for up to 2 hours if you want a deeper infusion of flavor. If you marinate the potatoes for too long, they can become soggy, so it’s best to err on the side of caution.
- How to Cook After Marinating:
- After marinating, roast or fry your potatoes as usual. If you’re roasting them, spread them out evenly on a baking sheet to ensure the potatoes cook evenly and get crispy. For frying, ensure the oil is hot enough to create a golden, crispy exterior.
- Why Marinating Works: Marinating potatoes helps the flavor penetrate deeply into the flesh, making every bite taste more intense and savory. The oil in the marinade also aids in creating a crispy, golden crust during roasting or frying. Marinating also allows you to customize the flavor profile based on the seasonings you love, whether you prefer a tangy, herby, smoky, or spicy twist.
3. Additional Flavor Enhancements for Potatoes
While herbs and marinades are the primary ways to enhance the flavor of your potatoes, there are several additional ways to amp up the taste.
- Infused Butter or Oil: Before roasting or frying, consider brushing your potatoes with herb-infused butter or oil. For example, garlic butter, truffle oil, or chili-infused oil can add a luxurious layer of flavor that enhances the potatoes.
- Cheese: Adding cheese to your potatoes can take them to the next level. After roasting, sprinkle grated Parmesan, sharp cheddar, or crumbled blue cheese over the top for an extra burst of flavor. The cheese will melt and form a delicious, savory crust that pairs wonderfully with the steak.
- Vinegar or Lemon: A splash of vinegar or fresh lemon juice just before serving can brighten the flavor of the potatoes. A small drizzle of balsamic vinegar or apple cider vinegar can add tang and acidity, which cuts through the richness of the steak and adds balance to the meal.
- Seasoning Blends: To simplify the process, you can use pre-made seasoning blends designed specifically for potatoes. Blends like “steakhouse seasoning,” “garlic and herb,” or “smoky barbecue” can save time and offer a well-rounded flavor profile that pairs perfectly with steak.
4. The Key to Perfectly Seasoned and Marinated Potatoes
Whether you choose to roast, mash, or fry your potatoes, the key to enhancing their flavor lies in careful seasoning and marinating. By experimenting with different herbs, spices, and liquids, you can create a flavor profile that complements your steak perfectly. Don’t be afraid to get creative with your marinades and seasonings—potatoes are an incredibly versatile side dish that can be tailored to suit any flavor preference. With the right seasoning and marination techniques, your potatoes will be the perfect complement to your steak, offering a burst of flavor and a satisfying texture that will make your meal truly memorable.
Mastering the Art of Cooking Steak to Perfection
How to Achieve Crispy Potatoes with Steak
Crispy potatoes are the perfect counterpart to a juicy steak, adding texture, flavor, and a satisfying crunch that complements the tender steak. Whether you’re roasting, frying, or pan-searing your potatoes, achieving that golden, crispy exterior while maintaining a soft and fluffy interior can elevate your meal. Here are the best methods and tips for getting your potatoes crispy and delicious alongside your steak.
1. Choose the Right Potato Variety for Crispiness
The first step to achieving crispy potatoes is selecting the right variety. Not all potatoes are created equal when it comes to crispiness. Some types of potatoes are better suited for crisping, while others may turn mushy or too soft. The key is to choose potatoes with a high starch content, as they crisp up better during cooking.
- Russet Potatoes: Russets are the most popular choice for achieving crispy potatoes. They have a high starch content, which allows them to develop a fluffy interior while crisping up perfectly on the outside. These potatoes are great for roasting, frying, or even making homemade fries.
- Yukon Gold Potatoes: Yukon Golds are another excellent choice for crispy potatoes. They have a slightly lower starch content than Russets but still achieve a crispy exterior when cooked properly. They also have a creamy texture that balances the crunch.
- Red Potatoes: While red potatoes are not as starchy as Russets or Yukon Golds, they can still be used for crispy potatoes if prepared properly. Their waxy texture makes them less likely to fall apart, so they’re ideal for pan-searing or roasting in small pieces.
2. Cut Potatoes Evenly for Consistent Crispiness
To ensure that your potatoes cook evenly and achieve a uniform crispiness, it’s essential to cut them into consistent pieces. Whether you’re roasting, frying, or pan-searing, uniformity is key.
- Uniform Slices or Cubes: For roasted or fried potatoes, try to cut them into evenly sized pieces, whether they’re wedges, cubes, or slices. This ensures that all the potatoes cook at the same rate, so you won’t have some pieces undercooked while others burn.
- Thin Cuts for More Crispiness: If you want extra crispy edges, consider cutting your potatoes into thinner slices or wedges. Thin potatoes will crisp up faster and get a more pronounced crunch, especially when fried.
3. Pre-Cooking Techniques to Improve Crispiness
There are a few pre-cooking techniques you can use to help achieve that golden, crispy finish on your potatoes. These techniques help release excess moisture from the potatoes, making them more likely to crisp up during cooking.
- Parboiling (Blanching) Potatoes: Parboiling is one of the best ways to get potatoes crispy. Start by boiling your potatoes in salted water for a few minutes until they’re just tender but not fully cooked. Parboiling helps soften the potatoes while releasing excess starch, which makes it easier for them to crisp up during roasting or frying.
- How to Parboil Potatoes: Peel or leave the skin on (depending on your preference) and cut the potatoes into the desired shape. Bring a pot of salted water to a boil, add the potatoes, and cook them for about 5-8 minutes (depending on the size of the pieces). Once they’re slightly tender, drain the water, and let the potatoes dry out for a few minutes. This will remove excess moisture and help the potatoes crisp up better.
- Rinsing and Drying Potatoes: After cutting your potatoes, it’s essential to rinse them in cold water to remove excess surface starch. This is especially important if you’re frying or roasting them. After rinsing, pat the potatoes dry with a paper towel or clean cloth to remove as much moisture as possible. Moisture on the surface of the potatoes will prevent them from getting crispy, so drying them thoroughly is crucial.
- Coating with Cornstarch or Flour: To further enhance the crispiness, you can toss the potatoes in a light coating of cornstarch or flour before roasting or frying. This creates a barrier that helps lock in moisture and ensures the potatoes develop a crispy crust. Just toss the parboiled or raw potatoes in a small amount of cornstarch, seasoned salt, or flour and shake off any excess before cooking.
4. The Best Cooking Methods for Crispy Potatoes
The method you choose for cooking your potatoes plays a significant role in achieving that crispy texture. Below are some of the best ways to cook potatoes for a golden, crispy finish.
- Roasting Potatoes: Roasting is one of the best methods for achieving crispy potatoes. The high heat of the oven crisps up the exterior while keeping the inside soft and fluffy.
- How to Roast Potatoes for Crispiness: After parboiling and drying your potatoes, toss them in olive oil, salt, pepper, and any desired seasonings (such as garlic, rosemary, or paprika). Spread them in a single layer on a baking sheet, ensuring the potatoes aren’t overcrowded—this allows air to circulate around them and helps them crisp up evenly. Roast at 425°F (220°C) for about 30-40 minutes, flipping the potatoes halfway through to ensure they crisp up evenly on both sides.
- Frying Potatoes: Frying potatoes is another great way to get them crispy. Whether you deep fry or pan fry, the hot oil helps create a golden, crispy exterior while keeping the inside soft.
- How to Fry Potatoes for Crispiness: Heat a generous amount of oil in a deep fryer or large skillet to 375°F (190°C). Add the potatoes in small batches to prevent overcrowding, which can lead to sogginess. Fry until golden brown and crispy (usually around 5-7 minutes). Drain the fried potatoes on paper towels to absorb any excess oil before serving.
- Double Frying for Extra Crispiness: For even crispier potatoes, try double frying. This technique involves frying the potatoes once at a lower temperature (around 325°F/165°C) until they are cooked through but not yet crispy. Remove them from the oil and let them rest for a few minutes, then fry them again at a higher temperature (375°F/190°C) until they achieve a crispy, golden crust.
- Pan-Seared Potatoes: For a quicker method, you can pan-sear your potatoes to achieve a crispy finish. This method works well for smaller, diced potatoes or thin slices.
- How to Pan-Sear Potatoes for Crispiness: Heat some oil or butter in a large skillet over medium-high heat. Add the potatoes (parboiled or raw) and cook for about 10-12 minutes, stirring occasionally, until they develop a crispy, golden crust. You can also cover the skillet with a lid for the first few minutes of cooking to help soften the potatoes before crisping them up.
5. Seasoning for Crispy Potatoes
Seasoning plays a crucial role in flavoring crispy potatoes, and it’s best to season them immediately after cooking, while they’re still hot. This allows the seasoning to adhere to the crispy surface and enhances the overall flavor.
- Seasoning Immediately After Cooking: Once your potatoes are roasted, fried, or pan-seared to perfection, sprinkle them with salt, pepper, and any additional spices while they’re still hot. This helps the seasoning stick to the crispy surface, ensuring every bite is packed with flavor.
- Herbs and Garlic for Extra Flavor: For added depth of flavor, toss your crispy potatoes in minced garlic, fresh herbs (like rosemary, thyme, or parsley), or grated cheese (like Parmesan or cheddar). The heat of the potatoes will release the fragrance of the herbs and allow the flavors to meld together.
6. Pairing Crispy Potatoes with Steak
Crispy potatoes are the perfect side to a juicy steak, as their texture and flavor complement the tenderness of the meat. Whether you’re roasting crispy wedges or frying golden fries, pairing them with a flavorful steak like ribeye, filet mignon, or sirloin enhances the entire dining experience. Consider serving your crispy potatoes with a simple steak sauce or a dollop of herb butter to elevate the flavor even further.
Conclusion
Achieving crispy potatoes to pair with your steak is all about using the right potato variety, employing pre-cooking techniques like parboiling and drying, choosing the best cooking methods (roasting, frying, or pan-searing), and seasoning them well. When done correctly, crispy potatoes will provide the perfect balance of crunch and tenderness, making your steak dinner even more satisfying. Whether you’re serving crispy roasted potatoes, golden fries, or crunchy pan-seared bites, your steak and potatoes will be a match made in culinary heaven.
How to Pan-Sear a Steak Using a Cast Iron Skillet
Pan-searing a steak in a cast iron skillet is a time-tested method that delivers a rich, flavorful crust while keeping the inside juicy and tender. The cast iron skillet’s ability to retain and evenly distribute heat makes it one of the best tools for achieving that perfect sear. Whether you’re cooking a ribeye, filet mignon, or sirloin, here’s a step-by-step guide to pan-searing a steak like a pro.
1. Choosing the Right Steak Cut
Before you start, it’s important to select the right steak for pan-searing. While many cuts of steak can be seared, certain types are better suited for the pan-searing method due to their fat content and thickness.
- Best Cuts for Pan-Searing: Ribeye, New York Strip, filet mignon, and sirloin are all excellent choices for pan-searing. These cuts are well-marbled with fat, which helps produce a flavorful crust when seared in the pan.
- Thickness of the Steak: Aim for a steak that is at least 1 to 1.5 inches thick. Thin steaks tend to cook too quickly and may not develop the desired sear.
2. Preparing the Steak
Before searing, preparation is key to getting that perfect crust. Here’s how to prepare your steak for the pan:
- Bring the Steak to Room Temperature: Take the steak out of the refrigerator about 30 minutes to 1 hour before cooking. Cooking a steak straight from the fridge can result in uneven cooking, so bringing it to room temperature ensures more even heat penetration and better overall cooking.
- Pat the Steak Dry: Moisture is the enemy of a good sear. Use paper towels to thoroughly pat the steak dry on both sides. Excess moisture on the surface of the steak will cause it to steam instead of sear.
- Season Generously: Season your steak with salt and pepper on both sides, pressing the seasoning into the meat to ensure it adheres well. You can also add garlic powder, onion powder, or other seasonings at this stage, depending on your preference. If you like, you can also marinate the steak ahead of time, but dry seasoning is usually sufficient for a pan-sear.
3. Preheating the Cast Iron Skillet
The key to a good sear is heat, and a cast iron skillet is perfect for retaining that high heat. Here’s how to preheat the skillet properly:
- Preheat on Medium-High Heat: Place your cast iron skillet on the stove and set the heat to medium-high. Allow the skillet to heat up for about 5 minutes. You’ll know it’s ready when it’s hot enough to make a drop of water sizzle immediately upon contact. A hot pan is essential for getting that perfect crust on your steak.
- Add Oil: Once the skillet is hot, add a small amount of high-smoke-point oil like vegetable oil, canola oil, or grapeseed oil. These oils can withstand the high heat necessary for searing. Swirl the oil around to coat the bottom of the pan.
4. Searing the Steak
Now that your steak and skillet are prepared, it’s time to sear. Here’s how to do it properly:
- Place the Steak in the Pan: Carefully lay the steak in the skillet, laying it away from you to avoid splashing hot oil. Once the steak hits the pan, avoid moving it around. Let it sit undisturbed to form a crust. You should hear a satisfying sizzle when the steak makes contact with the hot pan. This is the sound of the Maillard reaction, which is responsible for the beautiful brown crust.
- Sear the First Side: Allow the steak to cook undisturbed on the first side for about 2-4 minutes, depending on the thickness of the steak. Resist the urge to check or flip the steak too early. You want to give it enough time to form a deep, golden-brown crust. You can gently lift the steak with tongs to check the color of the sear, but avoid flipping it prematurely.
- Flip the Steak: Once the first side is nicely seared, use tongs to flip the steak to the other side. You should see a beautifully brown crust. If the crust is not as dark as you like, you can cook it a little longer on the first side.
5. Searing the Other Side and the Sides
- Sear the Other Side: Allow the second side to sear for another 2-4 minutes. This is usually enough time to develop a good crust, but the exact time will depend on the thickness of your steak and the level of doneness you desire.
- Sear the Sides (Optional): For an even crust and added flavor, you can also sear the edges of the steak. To do this, use tongs to hold the steak on its side, turning it to sear the fat and edges of the steak. This usually takes about 30-60 seconds per side.
6. Adding Butter and Aromatics (Optional)
For an extra layer of flavor, many chefs like to finish the steak with a buttery, aromatic basting. Here’s how you can do it:
- Add Butter, Garlic, and Herbs: Once both sides of the steak are seared, add a couple of tablespoons of butter to the pan. As the butter melts, add a few cloves of crushed garlic and fresh herbs such as rosemary, thyme, or sage.
- Baste the Steak: Tilt the skillet slightly so that the butter pools on one side. Use a spoon to continuously baste the steak with the melted butter, garlic, and herbs for about 1-2 minutes. This adds richness and enhances the flavor of the steak.
- Be Careful Not to Burn the Butter: Keep an eye on the butter to make sure it doesn’t burn. If it begins to brown too quickly, turn down the heat slightly to avoid burning the butter while still getting the benefit of the basting.
7. Checking for Doneness
The next step is to check your steak’s doneness. There are a few ways to do this:
- Touch Test: The best way to check doneness is with the “touch test,” which involves comparing the firmness of the steak to different parts of your hand. A rare steak will feel soft, while a well-done steak will feel firm.
- Using a Meat Thermometer: If you want a more accurate way to check doneness, use a meat thermometer. Insert the thermometer into the thickest part of the steak without touching the bone. Here are the general internal temperature guidelines:
- Rare: 120-125°F (49-52°C)
- Medium-rare: 130-135°F (54-57°C)
- Medium: 140-145°F (60-63°C)
- Medium-well: 150-155°F (66-68°C)
- Well-done: 160°F (71°C) and above
8. Resting the Steak
Once your steak has reached the desired doneness, it’s essential to let it rest for 5-10 minutes before cutting into it. This resting period allows the juices to redistribute throughout the meat, making it more tender and flavorful. If you cut into the steak immediately, the juices will escape, leaving the steak dry.
- Cover with Foil: Tent the steak loosely with aluminum foil while it rests to keep it warm.
9. Slicing and Serving
After the steak has rested, slice it against the grain for the most tender pieces. Serve your perfectly pan-seared steak with your choice of side dishes, such as crispy potatoes, roasted vegetables, or a fresh salad.
Conclusion
Pan-searing a steak using a cast iron skillet is a simple yet effective method to create a restaurant-quality meal at home. By carefully selecting your steak, preheating your skillet, and following the proper searing techniques, you can achieve a deliciously crispy, golden-brown crust while keeping the inside tender and juicy. With just a few extra steps like basting with butter and allowing the steak to rest, you’ll have a perfect pan-seared steak every time.
Grilling Techniques for Juicy, Tender Steak
Grilling is one of the most popular and flavorful ways to cook steak. The combination of high heat and smoky flavor can elevate any cut of beef, resulting in a juicy, tender steak with a satisfying char. Whether you’re using a charcoal grill, a gas grill, or even a pellet grill, there are several key techniques that can help you achieve the perfect steak every time. Here’s a breakdown of the best grilling techniques to ensure your steak turns out juicy, tender, and packed with flavor.
1. Choosing the Right Steak for Grilling
Not all steaks are created equal when it comes to grilling. Some cuts are better suited for high-heat grilling than others. For grilling, you’ll want to choose steaks that are tender and can withstand direct heat.
- Best Cuts for Grilling: Ribeye, New York strip, T-bone, porterhouse, and flank steak are ideal for grilling due to their tenderness and flavor. These cuts typically have a good amount of marbling (fat within the meat), which helps keep the steak juicy during the grilling process.
- Thickness Matters: For optimal grilling results, choose steaks that are at least 1 inch thick. Thin steaks can overcook quickly, leading to a dry, tough texture. Thicker cuts give you more control over cooking times, allowing the inside to remain juicy while developing a beautifully seared exterior.
2. Preparing the Steak
Proper preparation is essential for a successful grilling experience. The right seasonings, marinades, and resting time can make a big difference in flavor and tenderness.
- Bring the Steak to Room Temperature: Before grilling, remove your steak from the refrigerator and let it come to room temperature for about 30-60 minutes. This helps ensure even cooking, as a cold steak will cook unevenly on the grill.
- Pat the Steak Dry: Moisture on the surface of the steak can hinder the formation of a proper sear. Use paper towels to pat the steak dry on both sides before seasoning.
- Seasoning and Marinating: Season your steak generously with kosher salt and freshly ground black pepper. For added flavor, you can marinate your steak ahead of time. A simple marinade of olive oil, garlic, herbs (like rosemary or thyme), and a bit of acid (lemon juice or vinegar) will infuse the steak with rich flavors. For cuts like flank steak or skirt steak, marinating is especially beneficial to tenderize the meat.
3. Preheating the Grill
Preheating the grill properly is crucial to getting a nice sear and preventing your steak from sticking to the grates. Different grill types require different preheating techniques:
- Charcoal Grill: Light the charcoal and allow it to burn until it is covered with a layer of white ash, which indicates it is ready. You want to create two zones on the grill: one with high direct heat (for searing) and another with lower, indirect heat (for finishing the steak to your desired doneness).
- Gas Grill: Turn on the gas and preheat the grill to medium-high heat (about 450°F or 232°C). Gas grills can maintain a consistent heat level, making them easier to control than charcoal.
- Pellet Grill: Preheat your pellet grill to a temperature of 450°F (232°C). Pellet grills are great for maintaining consistent heat and adding a bit of smoky flavor to your steak.
4. Searing the Steak
Searing is the process of cooking the steak over high heat to create a delicious, caramelized crust. It’s essential for locking in juices and flavor. Here’s how to get that perfect sear:
- Place the Steak on the Grill: Once your grill is preheated, place the steak directly over the high heat zone (direct heat) of the grill. Let it cook undisturbed for 2-4 minutes, depending on the thickness of the steak. Don’t move the steak around on the grill, as this can prevent a proper sear from forming.
- Use the “X” Method for Grill Marks: For those beautiful crisscross grill marks, rotate the steak 45 degrees halfway through searing on each side. This will give the steak a professional-looking finish.
- Flip the Steak: After the first side has developed a nice sear, flip the steak and sear the other side for another 2-4 minutes. At this point, you should have a rich, golden-brown crust on both sides of the steak.
5. Indirect Grilling: Cooking to Your Desired Doneness
Once the steak has been seared, you can move it to the indirect heat zone to finish cooking to your preferred level of doneness. This method ensures that the steak cooks evenly throughout without burning the outside.
- Using a Meat Thermometer: A meat thermometer is your best friend when grilling steak. It allows you to monitor the internal temperature without having to cut into the steak and lose juices. Insert the thermometer into the thickest part of the steak for an accurate reading.
- Rare: 120-125°F (49-52°C)
- Medium-rare: 130-135°F (54-57°C)
- Medium: 140-145°F (60-63°C)
- Medium-well: 150-155°F (66-68°C)
- Well-done: 160°F (71°C) and above
- Resting the Steak: Once your steak reaches the desired doneness, remove it from the grill and allow it to rest for about 5-10 minutes. This step is crucial, as it lets the juices redistribute throughout the meat, making the steak more tender and juicy.
6. Using the Two-Zone Grill Method
The two-zone grill method is ideal for thicker steaks that require both searing and finishing over indirect heat. Here’s how to do it:
- Set Up Two Zones on the Grill: On a charcoal grill, move the coals to one side of the grill to create a hot zone and a cooler zone. On a gas grill, simply turn off one or two burners to create a direct and indirect heat zone.
- Sear Over Direct Heat: Start by searing the steak over the hot zone for 2-4 minutes per side, ensuring a great sear and crispy crust.
- Finish Over Indirect Heat: After searing, move the steak to the cooler side of the grill and close the lid. Let the steak cook to your desired doneness without direct exposure to the flame.
7. Basting for Extra Flavor
For an added burst of flavor, you can baste your steak with a rich butter sauce while it’s grilling. Here’s how:
- Make a Compound Butter: In a small bowl, mix softened butter with garlic, herbs (such as thyme or rosemary), and a bit of olive oil or Worcestershire sauce.
- Baste While Grilling: During the last few minutes of grilling, use a basting brush to coat the steak with the compound butter. This will add flavor and moisture to the steak as it finishes cooking.
8. Final Touches: Garnishing and Serving
Once your steak is perfectly grilled, don’t forget the final touches that can elevate the dish:
- Rest and Slice Against the Grain: After resting, slice your steak against the grain for the most tender bites. This is especially important for cuts like flank steak or skirt steak, which have a pronounced grain.
- Garnish: Consider garnishing with freshly chopped herbs like parsley, thyme, or chives for a pop of color and additional flavor.
Conclusion
Grilling steak to perfection requires attention to detail, from choosing the right cut and seasoning it properly to mastering the techniques of searing and indirect cooking. By following these grilling methods, you can ensure that your steak turns out juicy, tender, and bursting with flavor every time. Whether you’re using a charcoal, gas, or pellet grill, these tips will help you achieve steakhouse-quality results right in your backyard.
Using Sous-Vide for the Perfect Steak
Sous-vide, a French cooking method meaning “under vacuum,” involves cooking food slowly and precisely in a water bath at a constant temperature. This technique has gained popularity in both professional kitchens and home cooking because of its ability to create perfectly cooked steaks with incredible tenderness, juiciness, and flavor. Here’s how you can use sous-vide to achieve a steak that’s perfectly cooked from edge to edge, every time.
1. What is Sous-Vide?
Sous-vide is a method where food is vacuum-sealed in a plastic bag and then cooked in a water bath at a precisely controlled temperature. Unlike traditional methods where the temperature fluctuates, sous-vide ensures that your steak is cooked evenly, retaining all the natural juices and flavors. It allows for a perfect level of doneness throughout the steak, no matter how thick the cut is.
2. Why Use Sous-Vide for Steak?
- Precise Temperature Control: The key benefit of sous-vide is its precise control over cooking temperature. This means you can set the temperature to your exact preference (e.g., medium-rare, medium, etc.) and achieve that level of doneness throughout the entire steak. The steak cooks evenly from edge to edge, eliminating any risk of overcooking or undercooking.
- Juiciness and Tenderness: Because sous-vide cooking occurs in a water bath at a low temperature over a long period of time (usually between 120°F and 140°F), it allows the steak to retain all of its juices. The low heat breaks down tough collagen in the muscle fibers without causing the meat to lose moisture, resulting in an incredibly tender steak with a juicy interior.
- Consistency: Sous-vide guarantees consistency. No more worrying about uneven cooking or overcooking one side of the steak. Every time you use sous-vide, you’ll get the same results.
3. The Equipment You’ll Need
To cook sous-vide, you’ll need a few essential tools:
- Sous-Vide Precision Cooker: This is the heart of sous-vide cooking. The precision cooker heats the water to your desired temperature and circulates it to ensure an even cook. Many models come with apps that allow you to control the cooker remotely.
- Vacuum Sealer and Bags: You’ll need a vacuum sealer to remove air from the bag and seal the steak tightly. This is crucial to prevent water from getting into the bag and affecting the cooking process. Alternatively, you can use the water displacement method with resealable plastic bags, but vacuum sealing is more reliable.
- Large Pot or Container for the Water Bath: A large pot or container is necessary to hold the water for the sous-vide process. The size of the container will depend on how many steaks you’re cooking at once. Some sous-vide cookers come with a built-in container, but any large, deep pot will do.
4. Preparing the Steak for Sous-Vide
Before you cook your steak sous-vide, there are a few steps to ensure the best results:
- Seasoning: Season your steak with salt and pepper or your favorite seasoning blend. You can also add aromatics such as garlic, herbs (rosemary, thyme), or butter to enhance the flavor. Since sous-vide cooking doesn’t allow for evaporation, the flavors will infuse into the steak as it cooks.
- Vacuum-Sealing the Steak: Place the seasoned steak into a vacuum-seal bag. If you’re using the water displacement method, place the steak in a resealable bag and submerge it in water (the water will push the air out of the bag). Seal the bag tightly to ensure no air is left inside.
- Add Extra Flavor: For an even more indulgent result, you can add a pat of butter, a sprig of rosemary, or a crushed garlic clove to the bag before sealing. These flavors will infuse into the steak as it cooks in the water bath.
5. Cooking the Steak Sous-Vide
- Set the Sous-Vide Precision Cooker: Attach the sous-vide precision cooker to your pot or container and set the temperature according to your desired doneness. The general temperature guide for steaks is:
- Rare: 120°F (49°C)
- Medium-rare: 130°F (54°C)
- Medium: 140°F (60°C)
- Medium-well: 150°F (66°C)
- Well-done: 160°F (71°C)
- Cooking Time: The beauty of sous-vide is that cooking time is very forgiving. Since the steak is cooking at a low temperature, there’s no rush. You can leave it in the water bath for a few hours without worrying about overcooking. However, cooking for too long can make the steak overly soft, so aim for 1-2 hours for thinner cuts and 3-4 hours for thicker cuts.
6. Finishing the Steak: Searing
After the steak has cooked in the sous-vide bath, it’s important to finish it with a quick sear to create a flavorful crust on the outside. This step adds texture and flavor, complementing the perfectly tender interior.
- Remove the Steak from the Bag: Once your steak has finished cooking, carefully remove it from the vacuum-seal bag. Pat it dry with paper towels to remove any excess moisture, which can hinder the searing process.
- Heat a Skillet: Preheat a cast-iron skillet or stainless-steel pan over high heat. You want the pan to be very hot so that the steak sears quickly without overcooking. Add a small amount of oil (vegetable or canola oil works best, as they have a high smoke point).
- Sear the Steak: Once the pan is hot, place the steak in the skillet and sear it for 1-2 minutes on each side. You want a deep brown crust to form on the exterior without cooking the steak any further. You can also sear the edges of the steak to ensure a uniformly crisp outer layer.
- Optional: Baste with Butter: For an extra touch of flavor, you can add butter, garlic, and herbs to the skillet during the searing process. Tilt the pan slightly to pool the melted butter and spoon it over the steak for added richness.
7. Rest the Steak
While sous-vide steaks are typically already perfectly cooked, resting for 5 minutes after searing is a good practice. This allows the juices to redistribute throughout the meat, ensuring every bite is tender and juicy.
8. Enjoy Your Perfect Steak
After resting, your steak is ready to serve. Whether you’re enjoying it with a simple side like roasted vegetables or a more elaborate dish like a creamy mashed potato, sous-vide ensures a perfectly cooked steak every time.
Conclusion
Sous-vide cooking is a game-changer for steak lovers who crave consistent, perfect results with minimal effort. By using precise temperature control, you can ensure your steak is cooked evenly and retains all its natural juices. Plus, with the quick sear at the end, you get that delicious, flavorful crust that makes every steak experience a memorable one. Whether you’re a novice home cook or an experienced chef, sous-vide is an excellent tool for cooking the perfect steak every time.
The Role of Garlic Butter and Herb Butter in Flavoring Steak
Butter has long been a classic companion to steak, enhancing its natural flavors with richness and depth. When paired with garlic and herbs, butter transforms from a simple addition to a luxurious, aromatic sauce that elevates the taste of any cut of steak. Here’s how garlic butter and herb butter contribute to flavoring steak, and how you can use them to take your steak experience to the next level.
1. The Allure of Butter on Steak
Butter’s role in cooking steak is not just about adding richness; it’s about creating a smooth, velvety coating that helps carry the flavors of other ingredients. When butter is melted and drizzled over steak, it creates a luscious sauce that complements the meat’s natural juices, making each bite more tender and flavorful. Whether you’re adding a dollop of garlic butter on top of a freshly seared steak or finishing it off with a sprinkle of fresh herbs, butter serves as a medium that brings out the steak’s best qualities.
2. Garlic Butter: A Classic Favorite
Garlic butter is a tried-and-true favorite that pairs perfectly with steak. Its depth of flavor and aromatic qualities come from the combination of two key ingredients: butter and garlic.
- Flavor Profile: Garlic butter adds a savory, slightly sweet, and rich flavor to steak. The garlic infuses the butter with an aromatic essence that complements the meat’s savory profile. When the garlic is gently sautéed in the butter, it releases a fragrant, nutty aroma, further enhancing the steak’s taste.
- How to Make Garlic Butter: To make garlic butter for steak, simply melt butter in a pan over low to medium heat. Add minced garlic and sauté until fragrant, but be careful not to burn the garlic. You can also add a touch of salt and pepper, or even some crushed red pepper flakes for a spicy kick. Once the butter is infused with the garlic’s flavor, spoon it over the cooked steak, allowing it to pool in the crevices of the meat and create a flavorful, garlicky sauce.
- Why Garlic Butter Works: Garlic butter complements the natural umami flavors of the steak, making it taste richer without overpowering the meat. The butter helps smooth out the strong, meaty flavors of the steak, balancing the bite of garlic with a creamy texture. It’s a timeless combination that works with almost any steak cut, from ribeye to filet mignon.
3. Herb Butter: Adding Freshness and Complexity
Herb butter, which combines fresh herbs with butter, adds an entirely different dimension of flavor to your steak. The freshness of the herbs creates a balanced, fragrant topping that contrasts beautifully with the richness of the meat and butter.
- Flavor Profile: Herb butter brings layers of flavor—earthy, fragrant, and slightly peppery notes that add a burst of freshness to a rich steak. Common herbs used in herb butter for steak include rosemary, thyme, parsley, tarragon, and chives. Each herb brings its own unique twist to the dish, with rosemary offering a piney flavor, thyme providing subtle citrusy tones, and parsley contributing a clean, refreshing note.
- How to Make Herb Butter: To make herb butter, soften butter and mix in finely chopped fresh herbs of your choice. You can also add a touch of garlic, lemon zest, salt, and pepper to elevate the flavor even further. For an extra touch of richness, a squeeze of lemon juice or a splash of white wine can brighten the butter and balance its heaviness.
- Why Herb Butter Works: Herb butter acts as a counterpoint to the savory richness of the steak, providing a refreshing contrast. The herbs complement the steak’s natural flavors, adding aromatic complexity that enhances the overall dining experience. Herb butter is particularly excellent with leaner cuts of steak, like filet mignon, where the butter provides richness and the herbs bring out the subtle flavors of the meat.
4. The Technique: Adding Butter to Your Steak
While simply spooning garlic or herb butter over steak is delicious, there are a few techniques you can use to really maximize its flavor:
- Finish with Butter: The best way to add garlic or herb butter to your steak is to finish it off just before serving. After your steak has rested and the juices have redistributed, add a generous dollop of garlic or herb butter on top. As the butter melts over the hot steak, it will infuse the meat with flavor, creating a beautifully decadent finish.
- Basting the Steak in Butter: For a more intense flavor, you can baste the steak in butter while it’s cooking. As the steak sears in the pan or on the grill, add a few tablespoons of garlic or herb butter to the pan. Tilt the pan so the butter pools at the bottom, then use a spoon to baste the steak with the hot butter. This method ensures that the steak is infused with the buttery garlic or herb essence as it cooks, allowing the flavors to permeate the meat.
- Compound Butter: You can prepare a compound butter by mixing together softened butter with garlic, herbs, and spices ahead of time. Once the butter has been thoroughly mixed, roll it into a log and refrigerate it. This method allows the flavors to meld together and makes it easy to slice off individual portions to place on top of the steak when serving. It’s a convenient way to have a batch of flavorful butter ready for steak nights.
5. When to Use Garlic Butter vs. Herb Butter
- Garlic Butter: Best for steaks that are rich and flavorful on their own, such as ribeye, porterhouse, or New York strip. The garlic butter adds an aromatic depth without overwhelming the steak’s inherent flavor. It’s also great for steaks cooked with a charred crust, as the garlic flavor enhances the smoky notes.
- Herb Butter: Ideal for leaner cuts of steak, like filet mignon or flank steak, where the butter and herbs can provide richness and balance. Herb butter is also a great option when serving steak with sides like roasted vegetables, mashed potatoes, or a fresh salad, as the herbs tie in well with these lighter elements.
6. Combining Garlic Butter and Herb Butter
For a truly indulgent experience, you can combine garlic and herb butter for a double layer of flavor. Mixing garlic’s savory depth with fresh, fragrant herbs creates a balanced and multidimensional butter that works on a variety of steak cuts. You can blend the two butters together before using, or serve them separately, allowing each guest to choose which butter they’d prefer on their steak.
Conclusion
Garlic butter and herb butter are powerful tools in the kitchen when it comes to flavoring steak. They enhance the steak’s natural flavors, adding richness, depth, and aromatic complexity. Whether you prefer the savory punch of garlic or the fresh, fragrant notes of herbs, butter serves as a delicious finishing touch to your steak that transforms it into a mouthwatering masterpiece. So next time you’re cooking a steak, don’t overlook the magic of garlic and herb butter—it’s a simple yet luxurious way to take your steak to the next level.
Perfect Pairings: Sides and Sauces for Steak and Potatoes
Classic Sides: Green Beans, Steamed Veggies, or a Salad
When preparing the perfect steak, selecting the right sides can elevate the entire meal. Classic sides like green beans, steamed vegetables, and salads provide a fresh, vibrant contrast to the rich and hearty flavors of a perfectly cooked steak. These sides not only add texture, color, and nutritional balance to the plate but also complement the savory, meaty qualities of steak, creating a well-rounded dining experience. Let’s take a closer look at each of these classic sides and how they can enhance your steak dinner.
1. Green Beans: A Timeless Side
Green beans are a staple side dish that pairs wonderfully with steak. Their crisp texture and slightly grassy flavor provide a refreshing contrast to the richness of the meat. Green beans also offer a touch of earthiness that balances the indulgent flavors of steak, making them a perfect choice for a simple yet satisfying accompaniment.
- Flavor Profile: Green beans have a mild, fresh flavor with a hint of sweetness and a crisp texture when cooked properly. This makes them an excellent foil for the bold, savory taste of steak. Whether you prepare them steamed, sautéed, or roasted, green beans maintain their lightness, ensuring the meal doesn’t feel too heavy.
- How to Prepare Green Beans:
- Steamed: Steaming green beans is one of the healthiest ways to cook them while preserving their vibrant color and nutrients. Simply steam them for about 4-5 minutes until tender but still crisp. Add a squeeze of lemon juice, a pinch of salt, and a drizzle of olive oil for flavor.
- Sautéed: For a more robust flavor, sauté green beans in butter or olive oil with garlic, shallots, or red pepper flakes. This method enhances the green beans’ natural sweetness and adds savory richness, complementing the steak.
- Roasted: Roasting green beans in the oven with a bit of olive oil, salt, and pepper creates caramelized edges, adding a slightly smoky flavor. You can even toss in a sprinkle of parmesan cheese or fresh herbs like thyme or rosemary to enhance the taste.
- Why Green Beans Work: Green beans’ crisp texture offers a satisfying contrast to the tender, juicy steak. Their subtle flavor doesn’t compete with the meat but rather enhances its richness, making them a perfect balance of lightness and depth.
2. Steamed Vegetables: Simple, Fresh, and Nutritious
Steamed vegetables, including options like carrots, broccoli, cauliflower, and asparagus, are another classic side that works beautifully with steak. The steaming process preserves the vegetables’ natural flavors and nutrients, offering a clean, fresh addition to the meal. Their mild, earthy flavors act as a neutral counterpoint to the bold steak, providing a balance of textures and nutrients on the plate.
- Flavor Profile: Steamed vegetables retain their fresh, natural flavors, which are often light and slightly sweet. The steaming process also enhances their natural color, making them visually appealing on the plate. Vegetables like broccoli and cauliflower bring a slightly nutty flavor, while carrots offer a natural sweetness.
- How to Prepare Steamed Vegetables:
- Carrots: Steamed carrots are sweet and tender. Simply peel and cut them into bite-sized pieces, then steam until soft but still slightly firm. You can toss them in a bit of honey or butter for extra flavor.
- Broccoli and Cauliflower: These vegetables steam well and hold their shape, making them perfect for a simple, quick side. After steaming, drizzle with a little olive oil or sprinkle with some grated parmesan cheese.
- Asparagus: Steamed asparagus is tender and slightly grassy in flavor. A quick steam for 3-4 minutes is enough to retain its bright color and delicate flavor. You can finish it with a squeeze of lemon and a light seasoning of salt and pepper.
- Why Steamed Vegetables Work: Steamed vegetables provide a burst of freshness, balancing out the richness of the steak. Their light and delicate nature ensures they complement rather than overpower the meat, making them an excellent choice for a health-conscious, vibrant side dish.
3. Salad: A Refreshing and Light Side
A fresh salad is a perfect contrast to the dense, savory flavors of steak. Whether you opt for a simple green salad or a more elaborate option, salad offers a refreshing, crunchy texture that lightens up the meal. The acidic bite from a vinaigrette or citrus dressing also cuts through the richness of the steak, providing a balance of flavors and helping to cleanse the palate between bites of meat.
- Flavor Profile: The crisp, cool texture of fresh greens like arugula, spinach, or mixed lettuce adds a lightness to the meal. A well-balanced dressing—whether tangy, creamy, or zesty—can add depth and complexity to the salad, making it a flavorful counterpart to the steak.
- How to Prepare a Salad:
- Basic Green Salad: Combine fresh leafy greens such as arugula, spinach, and baby kale with ingredients like cucumber, tomatoes, and red onion. Toss with a simple olive oil and balsamic vinegar dressing or a zesty lemon vinaigrette.
- Add Nuts and Cheese: For added texture and richness, incorporate nuts such as walnuts or almonds, and cheeses like feta, goat cheese, or shaved parmesan. These ingredients add a nutty crunch and creamy texture that complements the steak’s juiciness.
- Citrus and Avocado Salad: For a vibrant twist, mix avocado slices, orange or grapefruit segments, and a light dressing made with olive oil, lemon, and fresh herbs. This salad adds a citrusy freshness that pairs beautifully with steak.
- Why Salad Works: A salad’s crisp texture and refreshing flavor offer a light contrast to the dense, savory steak. The freshness of the vegetables and the acidity of the dressing act as a palate cleanser, ensuring that each bite of steak tastes as fresh and flavorful as the last.
4. Pairing Ideas for Classic Sides with Steak
The key to creating a perfect steak dinner lies in balancing flavors and textures. When pairing classic sides like green beans, steamed vegetables, and salad with steak, keep the following in mind:
- Flavor Balance: If your steak is heavily seasoned with garlic and butter, consider pairing it with a simple green bean dish or a light salad to balance out the richness.
- Textural Contrast: A perfectly seared steak has a crispy exterior, so pairing it with a crunchy salad or roasted vegetables creates a satisfying contrast in texture.
- Nutritional Balance: Steak is high in protein and fat, so pairing it with nutrient-dense sides like steamed vegetables or a fiber-rich salad helps round out the meal and makes it feel lighter.
5. Making Sides Your Own
While green beans, steamed vegetables, and salads are classic choices, feel free to get creative and add your personal twist. You can experiment with different herbs, dressings, and cooking methods to customize these sides to your tastes. Roasting vegetables with a bit of olive oil and rosemary can add a depth of flavor that steams can’t match. Adding fresh citrus or exotic fruits to a salad can give it a unique flair. Don’t hesitate to make these classic sides your own to perfectly complement your steak.
Conclusion
Classic sides like green beans, steamed vegetables, and salad are essential accompaniments that bring freshness, balance, and nutritional value to a steak dinner. These sides not only enhance the flavors and textures of the steak but also ensure that your meal is well-rounded and satisfying. Whether you keep it simple with steamed veggies or add complexity with a flavorful salad or sautéed green beans, these classic side dishes will always complement a perfectly cooked steak, ensuring an unforgettable dining experience.
Making Garlic Butter Sauce for Steak
Garlic butter sauce is one of the most indulgent and flavorful ways to elevate your steak. This rich, aromatic sauce is a perfect balance of creamy butter, savory garlic, and complementary herbs, all of which work together to enhance the natural flavors of your steak. Whether you’re pan-searing, grilling, or roasting your steak, garlic butter can be used as a finishing touch to create a luxurious, mouthwatering experience. Here’s an in-depth look at how to make garlic butter sauce for steak and the different ways you can use it to make your steak dinner even more special.
1. The Essential Ingredients for Garlic Butter Sauce
To make garlic butter sauce for steak, you only need a handful of ingredients, but the quality of each one matters. Here’s what you’ll need:
- Butter: The star of the sauce. Use unsalted butter for more control over the seasoning. The butter should be high quality, as it will take center stage in the flavor profile. European-style butter with a higher fat content is a great choice for richness and creaminess.
- Garlic: Fresh garlic is a must for the best flavor. It provides that irresistible savory, slightly sweet aroma and taste that pairs perfectly with steak. Minced or finely chopped garlic works best to ensure it infuses the butter evenly.
- Herbs: Fresh herbs like parsley, thyme, and rosemary complement the garlic and add a fragrant, earthy layer of flavor. Fresh parsley is a classic choice for garnish, while thyme and rosemary bring a savory depth to the sauce.
- Seasonings: Salt and freshly cracked black pepper are essential for balancing the richness of the butter and bringing out the garlic’s aromatic qualities. A pinch of red pepper flakes can also add a subtle heat, if desired.
- Optional Add-ins: For extra flavor, you can add a squeeze of lemon juice, a splash of white wine, or a dash of soy sauce to give your garlic butter sauce a unique twist.
2. How to Make Garlic Butter Sauce for Steak: Step-by-Step
Making garlic butter sauce for steak is a simple and quick process that requires minimal preparation but delivers maximum flavor. Follow these easy steps to create your own perfect garlic butter sauce:
- Step 1: Prepare the Ingredients
Begin by mincing 3-4 cloves of fresh garlic (depending on your desired garlic intensity). Chop your herbs finely, ensuring they are ready to mix into the butter. If using, have your seasonings and optional add-ins like lemon juice or white wine ready. - Step 2: Melt the Butter
In a saucepan or skillet, melt 1/2 cup (1 stick) of unsalted butter over medium-low heat. Be careful not to burn the butter; you want it to melt slowly to preserve its creamy texture. - Step 3: Add the Garlic
Once the butter is fully melted, add the minced garlic to the pan. Sauté the garlic for 1-2 minutes until it becomes fragrant and slightly golden brown. Be careful not to let the garlic burn, as it can turn bitter. You want to allow it to infuse the butter with its aromatic flavors. - Step 4: Add the Herbs and Seasonings
Add your finely chopped herbs to the pan (parsley, thyme, and rosemary work beautifully). Stir them in to release their oils and allow the butter to absorb their flavors. Season with salt, pepper, and a pinch of red pepper flakes for a subtle kick. - Step 5: Optional Add-ins
If you’re using optional ingredients like a squeeze of lemon juice or a splash of white wine, add them to the butter mixture now. The acidity from the lemon or wine brightens the richness of the butter and adds complexity to the flavor profile. - Step 6: Simmer and Combine
Let the sauce simmer on low heat for another minute or so, allowing all the flavors to meld together. If you want a thicker sauce, you can let it cook down slightly, but be mindful of not over-reducing it. The butter should remain silky and smooth. - Step 7: Serve
Once the garlic butter sauce is ready, drizzle it generously over your freshly cooked steak. Alternatively, you can spoon it over the steak while it rests or serve it on the side as a dipping sauce. If desired, garnish the steak with extra fresh herbs for a vibrant, aromatic finish.
3. Different Ways to Use Garlic Butter Sauce with Steak
Garlic butter sauce is incredibly versatile and can be used in several ways to enhance the flavor of your steak:
- As a Finishing Sauce: After your steak has been cooked to perfection, spoon the garlic butter sauce directly over the top to let the heat of the steak melt the butter and release its fragrant flavors. This method creates a delicious, juicy steak with the perfect balance of garlic, butter, and herbs.
- As a Basting Sauce: If you’re cooking your steak in a pan or on the grill, you can baste it with garlic butter as it cooks. As the steak sears, add a few tablespoons of garlic butter to the pan, allowing it to melt and coat the steak. This technique infuses the meat with flavor while creating a beautiful, crispy crust.
- Garlic Butter for Dipping: Serve garlic butter as a dipping sauce on the side. This is a great way for guests to enjoy an extra burst of flavor with each bite. It also works well with sides like bread, roasted potatoes, or vegetables.
- Compound Garlic Butter: For a more advanced option, you can make a compound garlic butter by blending fresh garlic and herbs directly into softened butter. This version can be rolled into a log and refrigerated, allowing the flavors to meld. Slice off portions of the compound butter and place them on top of your steak just before serving.
4. Tips for Perfect Garlic Butter Sauce
- Balance the Flavor: Garlic butter should have a well-balanced flavor. The garlic shouldn’t overwhelm the butter but should be fragrant and savory. Adjust the amount of garlic depending on your taste preference—more garlic for a bold flavor, less for a subtler note.
- Use Fresh Ingredients: Fresh garlic and herbs will make a noticeable difference in the flavor. Avoid using pre-minced garlic from a jar, as it lacks the bright, fresh taste of freshly chopped garlic.
- Serve Immediately: Garlic butter sauce is best served fresh and hot, so be sure to drizzle it over your steak right away. If you let it sit for too long, the butter may solidify, losing its silky texture.
- Adjust to Your Preference: Don’t be afraid to customize your garlic butter sauce by adding other ingredients such as Parmesan cheese, truffle oil, or even a dash of balsamic vinegar. These variations can add extra depth and richness to the sauce.
5. Pairing Garlic Butter Sauce with Steak Cuts
Certain steak cuts lend themselves particularly well to garlic butter sauce. Here are some ideas for pairing:
- Ribeye: The rich marbling and hearty flavor of ribeye steak make it an ideal candidate for garlic butter. The butter enhances its juiciness while complementing its bold flavor.
- Filet Mignon: For a lean, tender cut like filet mignon, garlic butter adds richness and flavor without overpowering the delicate texture of the meat.
- New York Strip: The firm texture and pronounced beefy flavor of New York strip steaks benefit from the buttery, aromatic qualities of garlic butter.
- T-Bone or Porterhouse: These cuts, which combine tender filet and flavorful strip, are perfect for a generous drizzle of garlic butter. It adds moisture and balances the contrasting textures.
Conclusion
Garlic butter sauce for steak is a simple yet incredibly flavorful addition that can elevate any steak dinner. By carefully sautéing garlic in butter and infusing it with fresh herbs, you create a luscious sauce that enhances the savory richness of the steak. Whether you use it as a finishing sauce, a basting liquid, or a dipping sauce, garlic butter makes your steak dinner feel indulgent and special. So next time you cook up a steak, don’t forget to finish it with the magic of garlic butter—you’ll be amazed at how much it transforms the meal!
Herb-Infused Butter: A Game Changer for Flavor
Herb-infused butter is one of the most versatile and flavorful additions you can make to any steak dish. It takes the already rich, creamy nature of butter and amplifies its flavor profile by infusing it with aromatic herbs and spices. This adds a layer of complexity and sophistication to your steak that is sure to impress. Whether used as a finishing touch, basting agent, or dipping sauce, herb-infused butter can elevate your steak dinner to new heights. Here’s an in-depth look at how herb-infused butter works and why it’s such a game changer for flavor.
1. What is Herb-Infused Butter?
Herb-infused butter is simply butter that has been blended with fresh or dried herbs, garlic, spices, and sometimes other flavorings like citrus zest or vinegar. The infusion process helps release the aromatic oils from the herbs, allowing them to meld with the rich, creamy texture of the butter. The result is a luxurious, flavorful spread that adds depth to your steak. It’s essentially a compound butter, but with an emphasis on fresh herbs.
2. Why Herb-Infused Butter Works So Well with Steak
- Flavor Enhancement: Steak, especially cuts like ribeye, filet mignon, and sirloin, benefits greatly from the addition of herb-infused butter. The richness of the butter complements the savory beefy flavors of the steak, while the herbs bring in a fresh, fragrant element that adds complexity and contrast to the richness of the meat. Herbs like thyme, rosemary, and parsley lend earthy, aromatic notes that make the steak taste more refined and balanced.
- Versatility: Herb-infused butter isn’t just for steak. It can also be used on roasted vegetables, mashed potatoes, and bread. You can tailor the butter to pair perfectly with any dish you’re preparing, making it a universal condiment in your kitchen.
- Aromatics and Visual Appeal: When you melt herb-infused butter over a freshly cooked steak, the herbs and spices float on top, creating a beautiful, aromatic presentation. The sight and scent of the melted butter, combined with the fresh herbs, adds an extra sensory element to your meal.
3. How to Make Herb-Infused Butter for Steak
Making herb-infused butter is a simple process that involves only a few ingredients. Here’s how you can prepare it at home:
- Step 1: Select Your Herbs
The key to a great herb-infused butter is using fresh, high-quality herbs. Some of the best herbs to pair with steak include:- Thyme: Adds an earthy, woody flavor that pairs wonderfully with the richness of steak.
- Rosemary: A bold herb with a fragrant, pine-like flavor that brings a rustic touch to your butter.
- Parsley: Lends a bright, fresh flavor that balances the heaviness of butter and beef.
- Chives: Adds a mild, onion-like flavor with a slight peppery kick.
- Tarragon: A slightly sweet herb with an anise-like flavor that works well with richer meats.
- Step 2: Prepare the Butter
Start with 1/2 cup (1 stick) of unsalted butter. Let it soften at room temperature so it’s easy to mix with the herbs. If you want to make a large batch, you can double or triple the recipe accordingly. - Step 3: Mince the Herbs
Finely chop your chosen herbs. A rough chop will do, but the finer the herbs, the more evenly they will distribute throughout the butter. If you’re using garlic, this is the perfect time to mince a few cloves to add extra depth of flavor. - Step 4: Mix the Ingredients
In a small bowl, combine the softened butter with your minced herbs and garlic. Use a spoon or fork to mash and mix them together until everything is well incorporated. You can also add a pinch of salt and pepper to taste. For extra flavor, consider adding a squeeze of lemon juice or zest, or a teaspoon of Dijon mustard for a tangy kick. - Step 5: Roll and Refrigerate
After mixing, you can either serve the butter right away or roll it into a log using wax paper or plastic wrap. Refrigerate the log of herb butter for at least an hour to allow the flavors to meld together. If you want to store it longer, you can freeze the butter for up to three months. - Step 6: Serve
When your steak is ready, slice the herb-infused butter into discs and place them on top of the steak while it rests. The butter will melt into the steak, imparting its aromatic flavors. Alternatively, you can serve it as a side for dipping or use it as a basting sauce during cooking.
4. Popular Herb-Infused Butter Variations
While thyme, rosemary, and parsley are classic options, there are endless variations to explore when making herb-infused butter. Here are some fun twists to try:
- Garlic and Herb Butter: Combine garlic with your favorite herbs for an even more flavorful butter. Garlic provides a bold, savory note that complements the freshness of the herbs.
- Lemon Herb Butter: Add a squeeze of fresh lemon juice or lemon zest to the herb butter for a citrusy, bright twist that pairs especially well with steaks like filet mignon or sirloin.
- Truffle Herb Butter: Add a dash of truffle oil or finely grated truffle to your herb butter for an indulgent, earthy flavor that complements rich cuts of steak.
- Cajun Herb Butter: If you like heat, add some Cajun seasoning or red pepper flakes to the butter for a spicy kick that contrasts beautifully with the juicy steak.
- Chimichurri Butter: Inspired by the Argentine sauce, this butter combines parsley, garlic, vinegar, and oil for a tangy, herbaceous butter that’s a great match for grilled steaks.
5. Tips for Perfect Herb-Infused Butter
- Use Fresh Herbs: Fresh herbs have a more intense, vibrant flavor than dried herbs, and they provide a better infusion into the butter. However, if you only have dried herbs, use them sparingly as their flavor can be more concentrated.
- Adjust Consistency: If the butter feels too firm, you can slightly soften it with a splash of olive oil or a bit of warm water to adjust the consistency. If it’s too soft, let it chill in the fridge for a bit before using.
- Add Heat Carefully: Some herbs, like rosemary, can become quite bitter when cooked for too long. When making herb-infused butter, be sure to only mix in the herbs at the end or after the butter has melted to avoid overcooking them.
- Allow Time for Infusion: While you can use herb-infused butter immediately, the flavor develops even further after resting for a few hours or overnight in the fridge. For the most flavorful butter, allow it to sit for a while before using.
- Serve in Small Portions: Herb-infused butter is rich and flavorful, so a little goes a long way. Serve it in small discs or spoonfuls and let the guests add as much as they want to their steak.
6. Pairing Herb-Infused Butter with Steak
- Ribeye Steak: The rich marbling of ribeye pairs beautifully with the aromatic freshness of herb-infused butter. The butter complements the beefiness of the ribeye while enhancing its tenderness and flavor.
- Filet Mignon: Filet mignon is a lean cut, and the herb-infused butter adds the necessary richness and depth without overwhelming the delicate flavor and tenderness of the steak.
- T-Bone Steak: The combination of the tender filet and flavorful strip in a T-bone steak benefits greatly from herb-infused butter. The richness of the butter enhances both parts of the steak.
- Flank or Skirt Steak: These cuts, known for their intense beefy flavor, shine when paired with a herb-infused butter that adds a layer of savory depth to the meat.
Conclusion
Herb-infused butter is a simple yet transformative way to add flavor and sophistication to your steak. It’s easy to make, incredibly versatile, and works with a variety of steak cuts. Whether you use it to finish your steak, baste it while cooking, or serve it on the side, herb-infused butter will make your steak taste more decadent and flavorful. So, next time you’re cooking steak, consider making a batch of herb-infused butter to take your meal to the next level.
Pairing Sauces: Béarnaise, Peppercorn, or Chimichurri
Sauces are a fantastic way to elevate the flavor of your steak. Whether you’re aiming for a rich, creamy experience or a bright, tangy contrast, choosing the right sauce can make all the difference. Three of the most popular sauces for steak are béarnaise, peppercorn, and chimichurri—each bringing its own unique flavor profile to the table. Let’s dive into these three classic sauces and explore how they pair perfectly with steak.
1. Béarnaise Sauce: Rich and Velvety
What It Is: Béarnaise is a French sauce made from clarified butter, egg yolks, shallots, tarragon, and vinegar, giving it a creamy and tangy texture. It’s essentially a variation of hollandaise sauce, with the addition of tarragon and vinegar bringing an aromatic, herbal flavor to the mix.
Why It Works with Steak:
- Richness: The creamy texture of béarnaise complements the rich, meaty flavor of a well-cooked steak. The richness of the butter-based sauce pairs perfectly with fattier cuts like ribeye or porterhouse, where the sauce enhances the steak’s indulgent, juicy qualities.
- Herbaceous Notes: The tarragon and shallots in béarnaise offer subtle herbaceous notes that elevate the flavor of the steak without overwhelming it. This makes it an excellent choice for more delicate steaks like filet mignon, where you want to enhance the meat’s natural tenderness and flavor without masking it.
- Balance of Acidity: The vinegar in béarnaise provides a nice balance to the richness, cutting through the fat and helping to cleanse the palate. This makes it a good match for steaks cooked with high-fat content, like ribeye or strip steak.
How to Serve: Béarnaise sauce is often served on top of the steak or on the side for dipping. It’s best paired with classic steakhouse cuts, such as ribeye, filet mignon, or a T-bone, and works especially well when the steak is cooked medium-rare to medium.
2. Peppercorn Sauce: Bold and Spicy
What It Is: Peppercorn sauce, also known as “steak au poivre,” is a French-inspired sauce made with crushed black peppercorns, heavy cream, brandy (or cognac), and a bit of beef stock. The result is a creamy, spicy, and savory sauce with a sharp peppery kick.
Why It Works with Steak:
- Spicy Kick: The boldness of the cracked black pepper is a perfect pairing for the savory umami of steak. It adds a bit of heat and a layer of spiciness that enhances the steak without overpowering it. The sauce’s spice level can be adjusted to suit your preference, from mild to intensely peppery.
- Creamy Texture: The addition of cream in the sauce brings a velvety smoothness that balances the heat from the pepper, creating a rich and luxurious contrast to the savory beef. This makes peppercorn sauce a great match for steaks like ribeye, strip steak, or skirt steak, where you want a sauce that complements the richness without overshadowing the meat.
- Bold Flavor: Peppercorn sauce is ideal for steaks with more pronounced flavors. It pairs wonderfully with steaks that have been cooked with a good sear on the outside, allowing the peppercorns to meld with the caramelized exterior of the steak.
How to Serve: Peppercorn sauce is traditionally served poured over the steak, but you can also serve it on the side as a dipping sauce. It pairs well with steaks like ribeye, T-bone, and strip steak, as well as other grilled or pan-seared cuts. For a classic “steak au poivre” experience, it can also be paired with a side of French fries or mashed potatoes.
3. Chimichurri Sauce: Fresh and Tangy
What It Is: Chimichurri is an Argentine sauce made from a mix of fresh parsley, garlic, red wine vinegar, olive oil, oregano, and chili flakes. It’s vibrant, tangy, and packed with fresh herbal and spicy flavors. There are two variations of chimichurri: the classic green version (which uses parsley as the base) and a red version (which incorporates tomatoes and red peppers).
Why It Works with Steak:
- Freshness: The fresh herbs and bright vinegar in chimichurri provide a burst of freshness that contrasts beautifully with the richness of grilled or roasted steak. Its tangy and slightly spicy notes help to cut through the fattiness of steaks like flank steak or skirt steak, which are often grilled to enhance their natural beefy flavors.
- Herbal Kick: The parsley and oregano bring an herbal element that enhances the savory qualities of the meat. The garlic adds an aromatic punch, and the chili flakes give it a gentle heat that works perfectly with grilled cuts like ribeye, flank, or hanger steak.
- Versatility: Chimichurri isn’t as creamy as béarnaise or peppercorn sauce, making it a lighter, more versatile option for those who prefer a fresher, less rich accompaniment to their steak. Its acidity and herbs make it perfect for balancing out the richness of fattier steaks, and it pairs beautifully with any cut that’s cooked on the grill.
How to Serve: Chimichurri is typically served on the side or drizzled on top of grilled steak. It’s especially common in Argentine and Uruguayan cuisine, where it’s used to accompany grilled meats like asado. Chimichurri can be paired with a variety of steaks, particularly grilled cuts like skirt steak, flank steak, or any type of steak that benefits from a tangy, herbal topping.
4. Choosing the Right Sauce for Your Steak
Each of these sauces has its own unique flavor profile, so selecting the right one will depend on the type of steak you’re preparing and your personal taste preferences:
- For Rich, Fatty Steaks (Ribeye, Porterhouse): Opt for béarnaise sauce or peppercorn sauce. These sauces bring richness and complement the beefy, marbled texture of the steak without overwhelming it. Béarnaise provides a creamy, herbal contrast, while peppercorn sauce adds bold heat and creaminess.
- For Leaner Steaks (Filet Mignon, Sirloin): Béarnaise is an excellent choice for leaner cuts like filet mignon, where its creamy texture enhances the tenderness of the steak, and the herbaceous flavors elevate the delicate taste.
- For Grilled Steaks (Flank, Skirt, or T-Bone): Chimichurri is ideal for grilled steaks. Its fresh, tangy flavors cut through the smoky richness of the grilled meat, adding a burst of brightness that complements the boldness of the charred exterior.
- For a Classic Steakhouse Experience: Peppercorn sauce is a classic steakhouse favorite, making it a safe choice for most cuts. The combination of cream and pepper works especially well on steaks with a robust flavor, like strip steaks and T-bones.
5. Tips for Making These Sauces at Home
- For Béarnaise Sauce: Béarnaise can be a bit tricky because it involves emulsifying egg yolks and butter. The key is to whisk continuously and keep the temperature low to prevent the sauce from breaking. It’s worth the effort, though, and once mastered, it’s a luxurious addition to any steak.
- For Peppercorn Sauce: The quality of the pepper you use can make a big difference. Freshly cracked black pepper will give the sauce a more intense flavor compared to pre-ground pepper. Be sure to simmer the sauce long enough for the alcohol to cook off but not too long that it becomes too thick.
- For Chimichurri: Chimichurri is incredibly easy to make and can be prepared in advance. It actually gets better as it sits, allowing the flavors to meld. Just be sure to use fresh herbs, and feel free to adjust the level of heat by varying the amount of chili flakes.
Conclusion
Pairing sauces like béarnaise, peppercorn, and chimichurri with steak is a surefire way to enhance your meal. Whether you’re after the richness of béarnaise, the spicy kick of peppercorn sauce, or the freshness of chimichurri, each sauce brings something unique to the table. Experiment with different sauces to find your perfect match and take your steak dishes to new levels of flavor and sophistication.
Tips for Serving and Enjoying Your Steak and Potatoes
Plating Tips for an Elevated Steak Dinner
The presentation of a steak dinner can transform an everyday meal into a fine-dining experience. Thoughtful plating not only enhances the visual appeal of your dish but also elevates the dining experience, making each bite feel even more indulgent. Here are some essential tips and techniques for plating your steak dinner like a pro.
1. Use a Warm Plate
A key aspect of plating any dish is to ensure that the plate is warm before serving. A cold plate can cause the food to cool too quickly, which can impact both the taste and texture of your steak. By using a warm plate, you help maintain the ideal temperature of the steak and its accompaniments longer, providing a more enjoyable experience. Simply warm your plates in the oven for a few minutes at a low temperature or briefly heat them in the microwave before plating.
2. Choose the Right Plate Size and Shape
The size and shape of your plate play a crucial role in how the food is presented. For a steak dinner, a larger plate provides more space to arrange the steak and its sides artfully, without overcrowding. Typically, a round or square plate works well for steak, as it allows you to place the steak at the center and leave space for sides, sauces, and garnishes. Make sure that the plate size fits the portion—too large a plate can make the steak look small, while too small a plate can make the meal feel cramped.
3. Presentation of the Steak: Position and Angle
The way the steak is placed on the plate is important for visual appeal. Position your steak at an angle, rather than flat, so that the natural grill marks or searing lines are visible. If you’re serving a steak with a bone, such as a T-bone or ribeye, place it with the bone facing up to highlight the cut. This can help add visual interest and create a sense of rustic elegance. Avoid placing the steak directly in the center; positioning it slightly off-center often creates a more dynamic presentation.
4. Sauce Placement: Drizzle, Don’t Drown
When using sauces like béarnaise, peppercorn, or chimichurri, less is often more. A common mistake when plating steak is drowning the meat in sauce. Instead, drizzle a small amount of sauce around the edge of the steak or across the plate in an elegant swoosh or swirl. This allows the sauce to complement the steak without overpowering it, and it ensures the focus remains on the meat itself. You can also serve the sauce in a small dish on the side for dipping, which allows guests to control how much they use.
For chimichurri or any herb-based sauce, consider spooning a bit on top of the steak for a vibrant pop of color, and be sure to avoid making it look too messy. If you’re using a more viscous sauce like béarnaise, a gentle drizzle from the side of the plate works best.
5. Garnish with Fresh Herbs or Microgreens
Garnishes are an easy way to add a final touch of color and freshness to your steak dinner. Fresh herbs like rosemary, thyme, or parsley pair beautifully with steak, especially when they’ve been lightly charred or brushed with a bit of olive oil. A sprig of rosemary on top of your steak can bring an aromatic element that’s both visually appealing and delicious. Microgreens, edible flowers, or thinly sliced vegetables can also be used to add sophistication and a fresh, contemporary look.
Just be careful not to over-garnish; a small sprig or a few leaves of herbs is usually all that’s needed to bring elegance without cluttering the plate.
6. Consider the Side Dishes: Arranging with Purpose
When plating your steak dinner, think about how you arrange your sides. The sides should complement the steak both in flavor and presentation. Common side dishes like mashed potatoes, roasted vegetables, and salads should be plated thoughtfully to ensure they don’t overwhelm the main course. Place sides in smaller portions to the side of the steak or in a separate area of the plate.
- Mashed Potatoes: A scoop of mashed potatoes or mashed cauliflower can be shaped into a neat mound using a ring mold or spoon. For added flair, you can use a piping bag to create a more elegant swirl or a small heap on the side.
- Vegetables: For roasted or grilled vegetables, consider fanning them out on the plate or arranging them in a compact stack to create height. This adds visual interest and makes the plate look more artfully arranged.
- Salads: For fresh salads, use small, crisp greens to create a contrast in texture with the rich steak. A simple arugula or mixed greens salad, drizzled with a light vinaigrette, can provide a bright and fresh element that helps balance the richness of the steak.
7. Create Height and Dimension
One of the hallmarks of elevated plating is the use of height and dimension. Instead of laying everything flat on the plate, try to create some height with your sides or garnishes. For example, stack a few roasted vegetables vertically, or use a spoonful of mashed potatoes or risotto in a mound to give the plate some depth. When done correctly, this adds an element of sophistication and makes the dish feel more like a work of art.
8. Use a Clean Plate and Avoid Overcrowding
Simplicity is key when it comes to elegant plating. After placing your steak and sides, take a moment to look at the plate and ensure it’s clean. Wipe any smudges or drips from the edge of the plate for a neat, polished look. Overcrowding the plate can make it look messy, so be selective with the sides and garnishes you use, aiming for a balanced composition that doesn’t feel too busy.
9. Final Touch: A Drizzle of Olive Oil or Finishing Salt
For that professional touch, consider finishing your steak with a drizzle of high-quality extra virgin olive oil or a sprinkle of finishing salt. A few flakes of sea salt, such as Maldon or fleur de sel, can add a delicate crunch and enhance the flavor of the steak. Additionally, a drizzle of balsamic glaze or a light citrus zest can bring a bright, tangy contrast to the rich beef, providing that extra finishing touch.
10. Think About the Whole Dining Experience
Plating your steak dinner goes beyond the food itself. The dining experience includes the entire atmosphere, from the quality of the table settings to the lighting. Use elegant utensils, a good wine glass, and a cloth napkin to enhance the feel of the meal. Consider the mood you’re setting—whether it’s a casual dinner with friends or a more formal celebration—and adjust your plating style accordingly.
Conclusion
Plating your steak dinner like a pro is all about combining the right elements to create a visually stunning and appetizing meal. From choosing the right plate and positioning the steak to selecting complementary sides and garnishes, each detail adds to the overall experience. With a few thoughtful touches, you can elevate your steak dinner into something extraordinary, making it a memorable meal for both you and your guests. Whether you’re entertaining or simply indulging in a special treat, beautiful plating will ensure your steak shines as the star of the show.
How to Rest Your Steak for the Best Results
Resting your steak after cooking is one of the most crucial steps to achieving a perfectly juicy, tender, and flavorful steak. While it may seem like a simple, often overlooked step, it plays a significant role in the texture and taste of the meat. Here’s a detailed guide on why resting is essential and how to do it the right way for optimal results.
1. Why Resting Your Steak Is Important
When a steak is cooked, the muscle fibers contract, pushing the juices toward the center of the meat. If you cut into the steak immediately after cooking, these juices will spill out, leaving you with a dry, less flavorful piece of meat. Allowing the steak to rest gives the muscle fibers time to relax, which allows the juices to redistribute evenly throughout the steak. As a result, the steak becomes more flavorful and tender, and it retains its moisture.
The rest period also allows the steak to finish cooking through residual heat, ensuring the perfect level of doneness without overcooking the outer layers.
2. The Ideal Resting Time
The general rule of thumb is to rest your steak for about 5 to 10 minutes after cooking, depending on the size of the cut. Larger cuts of steak, such as ribeye, porterhouse, or T-bone, benefit from a longer resting period—closer to 10 minutes—because they retain more heat and need additional time to redistribute the juices. For smaller cuts, such as filet mignon or flank steak, a 5-minute rest will suffice.
While resting, the steak will continue to cook slightly from the residual heat, known as carryover cooking. This is especially important if you like your steak cooked to a specific temperature, such as medium-rare. Resting helps ensure that the steak reaches the desired level of doneness without overcooking.
3. How to Rest Your Steak: The Right Technique
The technique of resting your steak is just as important as the timing. Here’s how to rest your steak properly for the best results:
- Remove from Heat: Once your steak is cooked to the desired level of doneness, take it off the grill, pan, or oven. Let it rest on a cutting board or plate, away from the heat source. This will prevent it from continuing to cook in the pan and ensures it doesn’t dry out.
- Cover Loosely with Foil: While resting, it’s important to cover your steak loosely with aluminum foil to keep it warm. Be careful not to wrap the steak too tightly, as this can trap steam and create moisture on the surface of the steak, which can affect its crust. A loose covering will allow the steak to retain warmth while still allowing excess moisture to escape.
- Avoid Cutting During Resting: Don’t be tempted to cut into your steak immediately after removing it from the heat. Cutting prematurely will result in all those flavorful juices running out, leaving your steak dry. It’s best to wait the recommended resting time before slicing.
- Rest on a Warm Plate or Cutting Board: Placing the steak on a warm surface helps maintain its temperature during the resting period. If you’re serving the steak immediately, you can rest it on a warm plate or cutting board. If you’re preparing a meal for several guests, a larger cutting board allows you to rest multiple steaks at once.
4. How Resting Affects the Steak’s Flavor and Texture
Resting the steak not only helps redistribute the juices but also enhances the texture and tenderness. When you allow the steak to rest, the muscle fibers contract and relax, which creates a more even texture throughout the meat. The result is a steak that is tender, juicy, and satisfying with every bite.
Moreover, resting allows the flavors to settle and develop. When a steak is cooked, the heat can cause the proteins and fats to break down and release intense flavors. As the steak rests, these flavors mingle, resulting in a richer, more balanced taste.
5. Special Considerations for Thick Cuts of Steak
For thicker cuts of steak, resting becomes even more essential. Cuts like ribeye, porterhouse, and T-bone have more internal mass, which means they continue to cook for a longer period after being removed from heat. A proper resting period gives these cuts time to finish cooking evenly from edge to center. This prevents the outside from being overdone while waiting for the center to reach the desired doneness.
If you’re cooking steaks that are particularly thick (over 1.5 inches), you may want to consider resting them for a bit longer, up to 12 minutes or so. Some chefs recommend even tenting the steak with foil and resting it in a warm oven for an extended time to allow for further tenderization.
6. Resting for Different Steak Types and Doneness Levels
- Rare or Medium-Rare Steaks: These steaks typically have less carryover cooking than medium or well-done steaks. A shorter resting time of 5 to 7 minutes is usually sufficient to allow the juices to redistribute and achieve optimal tenderness.
- Medium to Well-Done Steaks: Steaks cooked to medium or well-done levels often experience more carryover cooking, so they will benefit from the longer resting time of about 8 to 10 minutes. This ensures that the juices are retained in the meat and the steak remains moist and flavorful.
- Bone-In Steaks: Bone-in steaks require a little extra time to rest because the bone acts as a heat conductor, prolonging the carryover cooking process. For bone-in cuts, such as T-bone or ribeye with bone, it’s ideal to rest the steak for 10 minutes.
7. How to Serve After Resting
Once your steak has rested, you can slice and serve it to your guests. If you’ve cooked it to a specific doneness, be sure to cut against the grain to maximize tenderness. When plating, keep the steak juices in mind—avoid wiping the cutting board clean, as these juices can be drizzled back over the steak for added flavor.
For a special touch, you can also top your steak with freshly made garlic butter, herb-infused butter, or a drizzle of your favorite sauce before serving.
Conclusion
Resting your steak is a small but vital step in achieving a perfectly juicy, flavorful, and tender steak every time. By allowing the meat to rest for the right amount of time, you ensure that the steak retains its moisture and delivers a rich, satisfying eating experience. Whether you’re cooking a thick ribeye or a delicate filet mignon, don’t skip the rest period—it’s the secret to the perfect steak.
Pairing Wine or Drinks with Steak and Potatoes
The right beverage can elevate your steak and potatoes meal, bringing out the flavors of the meat and complementing the richness of the dish. Whether you’re enjoying a classic red wine, a refreshing beer, or a creative cocktail, pairing your drink with steak and potatoes is an art that enhances your dining experience. Here’s a guide to help you choose the best drinks for your next steak dinner.
1. Classic Wine Pairings for Steak
Wine is often the go-to drink when serving steak, as it complements the flavors of beef and enhances the overall dining experience. The key is to match the wine’s characteristics with the cut of steak and its preparation. Here are some classic wine options:
- Red Wines: Red wines are the ideal choice for steak, especially those with bold flavors and tannins that can balance the richness of beef.
- Cabernet Sauvignon: Known for its full-bodied structure, bold tannins, and deep flavors, Cabernet Sauvignon is the quintessential wine pairing for steak. It’s especially good with fattier cuts like ribeye, as the tannins cut through the fat and the deep, dark fruit flavors complement the charred exterior of the steak.
- Malbec: Malbec is a great choice for grilled steaks, particularly cuts like flank steak or skirt steak. Its smooth tannins and fruity notes of blackberry and plum enhance the smoky flavor of grilled meat.
- Merlot: If you prefer something a bit softer than Cabernet Sauvignon, Merlot is a great alternative. It’s medium to full-bodied with softer tannins and flavors of dark fruit like cherries and blackberries. Merlot pairs well with tender cuts like filet mignon or sirloin.
- Zinfandel: Zinfandel is a versatile wine that pairs wonderfully with barbecued or spicy steaks. Its bold flavors of ripe berries and spice work well with steaks that have a bit of char or those cooked with peppercorns or a spicy rub.
- White Wines: While red wine is typically the go-to for steak, there are some cases where a white wine can also work, particularly for lighter steaks or if you’re pairing a leaner cut with potatoes. Look for wines with good acidity to balance the richness of the meat.
- Chardonnay: If you’re serving a steak with a buttery sauce (like garlic butter) or pairing it with mashed potatoes, a full-bodied Chardonnay with a touch of oak can complement the richness of both the steak and the sides.
2. Beer Pairings for Steak and Potatoes
Beer is another excellent choice for pairing with steak, as it brings its own unique flavors to the table. The key is to match the beer’s profile with the intensity of the steak and the preparation of the potatoes. Here are some beer pairings to consider:
- Stouts and Porters: Dark beers, like stouts and porters, have roasted, coffee-like flavors that work well with the charred, grilled exterior of a steak. The richness of a stout also complements hearty sides like mashed potatoes or potato wedges. Try pairing a steak with a robust porter, such as Guinness, for a classic, full-bodied combination.
- India Pale Ale (IPA): IPAs are known for their bold hops and bitter flavors, which can help cut through the richness of a fatty steak like ribeye or a marbled cut. The hoppy bitterness also pairs well with spicy or peppery steaks, especially when grilled or cooked with spices.
- Amber Ale or Brown Ale: These medium-bodied beers offer a balance of malt sweetness and hop bitterness. They work particularly well with steaks that have a slightly smoky flavor or those served with roasted potatoes, offering a complementary depth of flavor.
- Wheat Beers: Lighter wheat beers, like Hefeweizen or Witbier, are great for pairing with leaner cuts of steak or steaks with citrus or herb-based marinades. These beers are refreshing and can cut through the richness of potatoes without overwhelming the meat’s flavor.
3. Creative Cocktails to Pair with Steak and Potatoes
If you’re looking for a more unique or sophisticated pairing, consider crafting a cocktail to go with your steak and potatoes. Cocktails can enhance the flavors of your meal, especially when made with ingredients that complement the savory notes of the beef.
- Old Fashioned: This classic cocktail, with its combination of bourbon, sugar, bitters, and orange peel, has the perfect balance of sweet, bitter, and citrus flavors. The richness of bourbon pairs wonderfully with the hearty flavors of steak, and the slight sweetness balances the savory potatoes. The Old Fashioned is an excellent choice for cuts like ribeye or T-bone.
- Whiskey Sour: If you’re a fan of citrus-forward cocktails, a whiskey sour could be the perfect pairing. The tartness of the lemon juice cuts through the richness of steak, especially with cuts that are grilled or charred. It’s particularly good with steaks served with tangy sides like roasted potatoes with mustard or vinegar.
- Moscow Mule: A refreshing cocktail made with vodka, ginger beer, and lime, the Moscow Mule works well with steaks that are grilled or served with spicy potato dishes. The spiciness of ginger beer balances out the richness of the beef, and the citrusy lime adds a refreshing twist.
- Manhattan: For a more sophisticated touch, consider a Manhattan, made with rye whiskey, sweet vermouth, and a maraschino cherry. The smoky, spicy flavors of rye whiskey pair well with the deep umami flavors of a steak, particularly cuts like sirloin or flank steak. The sweetness of the vermouth complements the starchy richness of potatoes.
4. Non-Alcoholic Drinks to Pair with Steak and Potatoes
Not everyone wants alcohol with their meal, and fortunately, there are several non-alcoholic options that pair beautifully with steak and potatoes.
- Sparkling Water: The effervescence of sparkling water is an excellent way to cleanse the palate between bites of steak. It enhances the flavors of the steak while keeping the overall meal light and refreshing. Add a slice of lemon or lime for a bit of zest and extra flavor.
- Iced Tea (Unsweetened or Lightly Sweetened): Iced tea, especially varieties like black tea or green tea, offers a refreshing contrast to the richness of steak and potatoes. The slight bitterness of the tea complements the savory meat, while the cool temperature provides a pleasant contrast to the warmth of the meal.
- Citrusy Lemonade: If you want something more flavorful, a light, tangy lemonade is a great non-alcoholic pairing. The citrusy notes help cut through the richness of the steak and the potatoes, providing balance without overpowering the dish.
5. Serving Your Pairing: Consider the Side Dishes
When choosing your drink pairings, keep in mind the side dishes you are serving with your steak and potatoes. For example, if your potatoes are mashed and buttery, you may want to opt for a wine with higher acidity to balance the richness. If you’re serving roasted potatoes with herbs or garlic, consider a lighter beer or cocktail that complements those flavors without overwhelming the steak.
Additionally, if your side salad includes ingredients like balsamic vinegar or tangy dressings, opt for a wine that can stand up to those bold flavors, such as a Zinfandel or Malbec.
Conclusion
Pairing wine, beer, or a cocktail with your steak and potatoes can turn a delicious meal into a memorable experience. Whether you choose a bold red wine, a refreshing beer, or a unique cocktail, the right drink will enhance the flavors of the steak and complement the richness of the potatoes. Don’t be afraid to experiment with different pairings, and consider your preparation methods and side dishes to ensure a harmonious balance of flavors. With the right drink, your steak and potatoes dinner will truly shine.
Common Mistakes to Avoid When Cooking Steak and Potatoes
Cooking steak and potatoes seems simple, but many home cooks make avoidable mistakes that result in tough, dry steak or soggy, underwhelming potatoes. By recognizing these common pitfalls, you can elevate your cooking game and serve up a meal that’s restaurant-quality every time. Here are the most frequent mistakes and how to avoid them.
1. Cooking Steak Straight from the Fridge
The Mistake:
Many people take a steak straight from the refrigerator and throw it onto a hot pan or grill. This leads to uneven cooking—where the outside gets seared while the inside remains cold, often resulting in an overcooked exterior and an undercooked center.
The Fix:
Let your steak sit at room temperature for 30 to 45 minutes before cooking. This allows the meat to cook more evenly, ensuring that the inside reaches the desired doneness without overcooking the outside.
2. Not Seasoning the Steak Properly
The Mistake:
Under-seasoning is one of the biggest errors when cooking steak. A lack of salt and pepper (or waiting too long to season) results in a bland, less flavorful steak.
The Fix:
Generously season both sides of the steak with kosher salt and freshly ground black pepper at least 30 to 60 minutes before cooking. This helps the salt penetrate the meat, enhancing the flavor. If you don’t have time, season just before placing it in the pan or on the grill—never in between.
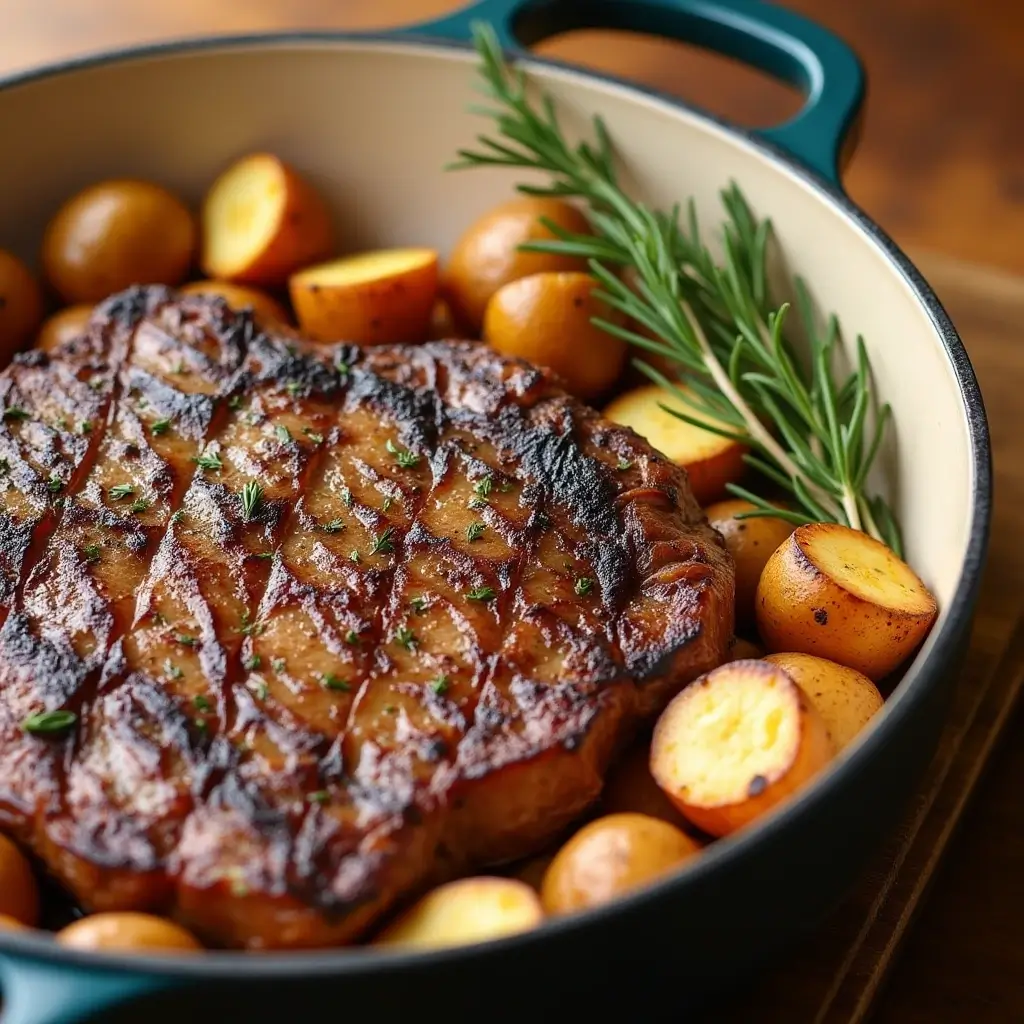
3. Using the Wrong Cooking Temperature
The Mistake:
Many people cook steak over heat that’s either too low or too high. Low heat leads to a gray, unappealing crust and makes the steak tough, while excessively high heat can burn the outside before the inside cooks properly.
The Fix:
- For pan-searing, preheat your skillet over medium-high to high heat for a proper sear. A hot pan ensures a crispy, flavorful crust.
- For grilling, preheat to 450–500°F (232–260°C) for direct heat cooking. This gives you a perfect sear while keeping the inside juicy.
- For sous-vide cooking, maintain precise temperature control based on your preferred doneness before finishing with a quick sear.
4. Flipping the Steak Too Often
The Mistake:
Flipping the steak too frequently prevents a good sear and crust from forming. This also leads to uneven cooking.
The Fix:
Let your steak cook undisturbed for 2-4 minutes per side before flipping. Use tongs to turn it once or twice for an even sear, but don’t keep poking or flipping unnecessarily.
5. Not Letting the Steak Rest After Cooking
The Mistake:
Cutting into a steak immediately after cooking releases all the flavorful juices, leaving you with a dry steak.
The Fix:
Always let your steak rest for at least 5-10 minutes after cooking. This allows the juices to redistribute, keeping the meat moist and flavorful. Cover the steak loosely with foil to keep it warm.
6. Using a Dull Knife for Slicing Steak
The Mistake:
Slicing steak with a dull knife or cutting it with the grain results in tough, chewy bites.
The Fix:
Use a sharp knife and always cut against the grain (perpendicular to the muscle fibers) for a more tender bite.
Common Mistakes When Cooking Potatoes
7. Not Choosing the Right Type of Potato
The Mistake:
Using the wrong potato variety can result in mashed potatoes that are gluey, roasted potatoes that don’t crisp up, or fries that turn out limp.
The Fix:
- For mashed potatoes: Use Russet or Yukon Gold potatoes for a creamy, smooth texture.
- For roasted potatoes: Choose Yukon Gold or red potatoes since they hold their shape well.
- For fries or crispy potatoes: Russet potatoes are the best option because they have a high starch content, creating crispier edges.
8. Skipping the Soak for Crispy Potatoes
The Mistake:
When making fries or crispy roasted potatoes, skipping the soaking step leads to potatoes that are limp or soggy.
The Fix:
If you’re making fries or crispy roasted potatoes, soak the cut potatoes in cold water for 30 minutes to an hour. This removes excess starch, helping them crisp up better when cooking.
9. Not Drying Potatoes Properly Before Cooking
The Mistake:
After soaking or washing potatoes, many people forget to dry them, leading to excess moisture that prevents crispiness.
The Fix:
Pat potatoes completely dry with a paper towel or clean cloth before roasting or frying. This ensures they crisp up properly.
10. Crowding the Pan When Roasting or Frying Potatoes
The Mistake:
Overcrowding the pan traps steam, preventing potatoes from developing a crispy exterior. Instead of roasting or frying properly, they steam and turn mushy.
The Fix:
Spread potatoes in a single layer on a baking sheet or frying pan. For extra crispiness, make sure there’s space between each piece. If necessary, cook in batches.
11. Using Too Little Oil for Roasting or Frying
The Mistake:
Skimping on oil results in dry, unevenly cooked potatoes without that golden, crispy exterior.
The Fix:
- For roasting: Toss potatoes in a generous amount of olive oil or melted butter before baking at 425°F (218°C) for crispy edges.
- For frying: Use enough oil to fully submerge the potatoes or ensure they are evenly coated in a hot skillet.
12. Not Seasoning Potatoes at the Right Time
The Mistake:
Seasoning potatoes too early (before roasting or frying) can cause the seasoning to burn or not stick properly.
The Fix:
- For roasted or fried potatoes: Add salt after cooking for the best adherence.
- For mashed potatoes: Season while mashing to ensure an even distribution of flavors.
Final Thoughts
By avoiding these common mistakes, you can master the art of cooking perfect steak and potatoes every time. Paying attention to details like choosing the right ingredients, using proper techniques, and seasoning at the right time will ensure that your dish is juicy, flavorful, and crispy where it matters most. Now that you know what NOT to do, you’re on your way to making a steak and potatoes meal that rivals any high-end steakhouse.