Roast beef is a timeless classic, beloved in kitchens around the world for its rich flavors, tender texture, and ability to elevate any dining experience. But mastering the perfect roast isn’t just about tossing a cut of beef into the oven—it’s about understanding the art of preparation, the science of cooking temperatures, and the magic of seasoning.
In this guide, we’ll explore the secrets behind the perfect roast beef recette. Whether you’re looking to recreate a traditional French-inspired roast or simply want to impress at your next Sunday dinner, this step-by-step guide has you covered. From choosing the best cut to mastering the cooking process and serving it with finesse, get ready to transform your roast beef game and create a meal to remember.
Let’s dive into the essentials and unlock the secrets to roast beef perfection!
Choosing the Best Cut for Roast Beef
Popular Cuts for Roasting: Ribeye, Sirloin, and Tenderloin
Choosing the perfect cut of beef for roasting is the first step in creating a mouthwatering roast beef dish. Each cut has its own characteristics in terms of flavor, texture, and cooking style. Here’s a closer look at three of the most popular cuts for roasting—ribeye, sirloin, and tenderloin—and why they’re perfect for different types of meals.
1. Ribeye: Rich and Flavorful
Ribeye is one of the most sought-after cuts for roasting, thanks to its excellent marbling (the white streaks of fat within the meat). This marbling not only adds flavor but also keeps the meat juicy as the fat melts during cooking. Ribeye is cut from the rib section of the cow, which gives it a rich, beefy taste.
- Key Characteristics: Rich flavor, juicy texture, and a well-balanced fat-to-meat ratio.
- Best for: Special occasions or when you want an indulgent, luxurious roast.
- Cooking Tips: Ribeye is best roasted slowly at moderate temperatures to ensure the fat renders properly and enhances the flavor. A good crust can be achieved with a quick sear before roasting. Pair it with bold seasonings like garlic, rosemary, and black pepper.
2. Sirloin: Lean and Versatile
Sirloin is a versatile and affordable cut that offers a balance between tenderness and flavor. It comes from the lower back of the cow, an area that produces meat with less fat than ribeye. Sirloin is leaner but still has enough marbling to keep the meat moist and flavorful when cooked properly.
- Key Characteristics: Lean, slightly firm texture with a robust beef flavor.
- Best for: Weeknight dinners, family gatherings, or when a less fatty roast is preferred.
- Cooking Tips: Sirloin is ideal for roasting at medium heat. Avoid overcooking to keep it tender, and rest the meat before slicing to allow the juices to redistribute. It pairs beautifully with classic seasonings like thyme, oregano, and mustard.
3. Tenderloin: The Most Tender Cut
Tenderloin is prized for its unparalleled tenderness. This cut comes from the loin section of the cow, where the muscles are minimally worked, resulting in an exceptionally soft texture. While it’s the most tender cut, tenderloin is leaner than ribeye and sirloin, which means it has a more subtle flavor profile.
- Key Characteristics: Velvety texture, mild flavor, and very low fat content.
- Best for: Elegant dinner parties, celebrations, or when tenderness is the top priority.
- Cooking Tips: Tenderloin benefits from high-temperature roasting to achieve a golden-brown crust while maintaining its juicy interior. Be cautious not to overcook this delicate cut—medium-rare to medium is ideal. To enhance its mild flavor, wrap it in bacon or season generously with herbs like sage and parsley.
Choosing the Right Cut for Your Needs
- If you’re looking for bold flavors, go for ribeye.
- For a leaner option with balanced taste, choose sirloin.
- When you want an elegant and tender roast, tenderloin is the star.
By understanding the differences among these cuts, you can choose the one that fits your occasion and flavor preferences. With proper preparation and cooking techniques, each of these cuts can help you achieve a roast beef recipe that impresses every time!
How to Pick the Right Cut: Consider Fat Content, Marbling, and Size
Selecting the perfect cut of beef for roasting isn’t just about what looks good on the butcher’s shelf—it’s about understanding key factors like fat content, marbling, and size. These elements significantly impact the flavor, texture, and overall quality of your roast. Here’s how to evaluate these factors to pick the right cut for your needs.
1. Fat Content: Flavor and Juiciness
Fat is one of the key contributors to flavor and juiciness in roast beef. As the fat renders during cooking, it bastes the meat, keeping it moist and enhancing its taste. Cuts with higher fat content are generally more flavorful but may also be richer, so the choice depends on your personal preference.
- Cuts with Higher Fat Content: Ribeye and chuck roasts are excellent for those who love a rich, indulgent roast.
- Leaner Options: Tenderloin and sirloin are great for those seeking a lighter roast with a more subtle flavor.
- Cooking Tips: When working with leaner cuts, consider marinating the meat or adding fat externally (e.g., wrapping in bacon or adding a butter baste) to ensure it stays moist.
2. Marbling: The Key to Tenderness
Marbling refers to the thin streaks of fat dispersed throughout the meat. The more marbling a cut has, the more tender and flavorful it will be. During cooking, the fat melts and infuses the meat with richness.
- Why It Matters: Marbled cuts are less likely to dry out, making them ideal for roasting.
- What to Look For: Cuts like ribeye and striploin often have excellent marbling, while tenderloin tends to have very little. Look for evenly distributed marbling throughout the cut, as this ensures consistent flavor and juiciness.
- Pro Tip: Choose “prime” or “choice” grade beef, as these grades typically have better marbling compared to “select” grade beef.
3. Size: Cooking Evenly and Serving Your Guests
The size of your roast plays a crucial role in ensuring even cooking and determining how many people you can serve. A larger roast requires a longer cooking time but is perfect for serving a crowd, while smaller roasts cook faster and are ideal for intimate dinners.
- Serving Suggestions: Plan for about 1/2 pound per person for boneless cuts and slightly more for bone-in roasts.
- Cooking Tips: Larger roasts benefit from slow roasting at a lower temperature to ensure even doneness, while smaller cuts are perfect for high-heat roasting to achieve a crisp crust.
- Shape Matters Too: Uniformly shaped cuts cook more evenly than those with irregular shapes. If your cut has thinner or thicker sections, consider trussing it with kitchen twine to create a consistent shape.
Bonus Factors to Consider
- Bone-In vs. Boneless: Bone-in cuts, such as prime rib, add flavor and can help retain moisture, while boneless cuts are easier to carve and cook faster.
- Fresh vs. Frozen: Fresh cuts are generally preferable for optimal flavor and texture, but if using frozen meat, ensure it is fully thawed before roasting.
- Price Point: Cuts like tenderloin are more expensive due to their tenderness, while sirloin and chuck roasts offer a more budget-friendly option without sacrificing quality.
How to Make the Right Choice
- If you prefer bold flavor and juiciness, go for a highly marbled cut like ribeye.
- For a leaner and tender roast, choose tenderloin.
- If you’re hosting a large group, select a larger cut with good marbling, like sirloin or a bone-in rib roast, to ensure everyone is served.
By carefully considering fat content, marbling, and size, you’ll set yourself up for success in creating a roast beef recipe that’s both delicious and perfectly tailored to your taste and occasion!
Where to Source High-Quality Beef: Tips for Finding Fresh, Premium Cuts
Finding the right source for high-quality beef is just as important as choosing the right cut. The quality of the beef directly affects the flavor, tenderness, and overall outcome of your roast. Here are some tips for sourcing premium, fresh cuts of beef that will take your roast beef recipe to the next level.
1. Local Butchers: The Expert’s Choice
Local butchers are often the best resource for finding high-quality, fresh beef. They usually have a curated selection of cuts that are sourced from reputable farms and offer personalized advice based on your needs.
- Why Choose a Local Butcher? Local butchers often take pride in sourcing meat from small, high-quality farms, and they typically have better control over the freshness and treatment of the meat.
- What to Ask Your Butcher: Inquire about where the meat is sourced from, the grading (Prime, Choice, Select), and the age of the beef. A good butcher will also be able to provide custom cuts or prepare the meat the way you prefer.
- Tip: Establish a relationship with your butcher to receive recommendations or even special orders for premium cuts, such as Wagyu or grass-fed beef.
2. Specialty Meat Markets: Premium Selections
Specialty meat markets often carry top-tier beef, including organic, grass-fed, and even heritage breeds that aren’t commonly found in your standard supermarket. These markets cater to a more discerning customer base and often feature beef that is hand-selected for its quality.
- What You’ll Find: You may come across premium options such as Wagyu beef, grass-fed beef, or dry-aged beef, all of which are known for their superior taste and tenderness.
- Benefits: Specialty markets focus on sourcing meats that are carefully raised and well cared for. For instance, grass-fed beef is leaner and has a slightly different flavor profile compared to conventionally raised beef.
- Tip: Visit markets that offer a variety of beef options so you can compare quality and pricing before committing to a cut.
3. Farmers’ Markets: Local and Sustainable Choices
Farmers’ markets are another great option for sourcing fresh, high-quality beef directly from local farms. Many farmers’ markets feature small-scale producers who raise cattle in more sustainable and humane ways.
- Why Buy at Farmers’ Markets? Many of the vendors sell pasture-raised, antibiotic-free, and hormone-free beef, which often results in better flavor and more ethical farming practices.
- What to Look For: Ask if the beef is grass-fed or grain-fed and whether it’s organic. Many farmers’ markets will have certified labels that guarantee certain standards.
- Tip: Farmers’ markets offer the benefit of meeting the farmers directly, so you can ask detailed questions about how the beef is raised, handled, and processed.
4. High-End Grocery Stores: Convenient and Reliable
Premium grocery stores like Whole Foods, Trader Joe’s, or other upscale chains often offer a wide selection of high-quality beef. These stores frequently carry organic, grass-fed, or pasture-raised beef and are a convenient option for sourcing premium cuts.
- What to Expect: These stores generally have a meat counter where you can find both fresh cuts and pre-packaged premium beef. Look for labels like “Certified Angus Beef” or “grass-fed” for top-tier quality.
- Why It Works: While these stores may not always offer the same level of personalization as a butcher or specialty market, they offer the convenience of easy access to high-quality beef without needing to visit multiple stores.
- Tip: If you’re looking for specific cuts like a bone-in ribeye or Wagyu, check online or call ahead to ensure availability, as these premium options may not be stocked regularly.
5. Online Meat Delivery Services: The Convenience Factor
Online meat delivery services have gained popularity for offering premium beef options delivered straight to your door. These services typically work directly with farmers or ranchers to offer the highest-quality beef without the middleman.
- What to Expect: Brands like Omaha Steaks, Snake River Farms, and Crowd Cow offer a wide range of premium cuts like Wagyu, grass-fed, and organic beef, delivered to your doorstep.
- Why It Works: Online services often provide more specialized options that may not be readily available in local markets or grocery stores, and they allow you to order large quantities if needed.
- Tip: Before purchasing, check customer reviews and ratings to ensure the service is reliable and consistently provides high-quality cuts.
6. Consider the Beef Grading System
Regardless of where you source your beef, understanding the USDA beef grading system will help you choose the best cuts. Beef is graded based on factors like marbling, tenderness, and fat content.
- USDA Prime: This is the highest grade, known for its exceptional marbling and tenderness, and is typically found at high-end butcher shops and specialty markets.
- USDA Choice: This grade has slightly less marbling than Prime but still provides excellent flavor and tenderness.
- USDA Select: This grade is leaner, with less marbling, and may not be as tender as Prime or Choice. It’s often more affordable but might not give the same rich flavor.
Summary of Tips for Sourcing High-Quality Beef
- Ask for recommendations from your local butcher or specialty market for the best cuts.
- Look for certifications such as grass-fed, organic, or Certified Angus Beef to ensure premium quality.
- Consider your needs: Online delivery services are great for convenience, while local markets offer a more personal touch.
- Know the beef grade: Look for Prime or Choice if you want the best marbling and tenderness.
By following these tips, you’ll be able to source the freshest, most flavorful beef for your roast, ensuring your meal is nothing short of perfection!
French-Inspired Beef Cuts for Authentic Flavor
French cuisine is renowned for its rich, flavorful dishes, and when it comes to beef, the French know how to elevate a simple roast into a sophisticated and mouthwatering meal. For an authentic French-inspired roast beef, it’s essential to select cuts that reflect the culinary traditions of France, focusing on tenderness, flavor, and how the meat interacts with French herbs and seasonings. Here’s an exploration of some classic French beef cuts and how they contribute to achieving that authentic French flavor.
1. Côte de Boeuf (Bone-In Ribeye)
Côte de Boeuf is the French term for bone-in ribeye, and it’s a cut that’s beloved in French kitchens for its depth of flavor and juiciness. This cut includes the rib bone, which imparts additional flavor while the marbling within the meat keeps it moist and tender.
- French Cooking Style: In French cuisine, Côte de Boeuf is often seared in a hot pan and then roasted in the oven to achieve a perfect balance of crispy outside and tender, juicy inside. It’s typically served with a simple drizzle of herb butter, such as a classic beurre maître d’hôtel, made with parsley, lemon juice, and garlic.
- Why It Works: The rich marbling in this cut makes it perfect for French-style cooking, where the flavor is brought out by slow-roasting and resting, allowing the juices to redistribute within the meat.
- Serving Tip: This cut is often shared family-style, making it ideal for a more rustic, French-inspired dining experience.
2. Filet de Boeuf (Beef Tenderloin)
Filet de Boeuf is the French name for beef tenderloin, considered one of the most luxurious and tender cuts of beef. This cut is prized for its melt-in-your-mouth texture and subtle, delicate flavor. While it’s leaner than other cuts like ribeye, it offers a softness that is unmatched in tenderness.
- French Cooking Style: In France, beef tenderloin is often cooked in a method called en croûte, where the meat is wrapped in puff pastry along with a layer of mushroom duxelles or pâté. This preparation, known as Boeuf Wellington in English, combines the delicate flavor of the tenderloin with a rich, savory crust that enhances the meat.
- Why It Works: The tenderloin is ideal for classic French dishes because its subtle flavor allows other ingredients, such as herbs, truffles, or rich sauces like béarnaise or bordelaise, to shine through.
- Serving Tip: Because tenderloin is so tender, it is often served medium-rare to medium, showcasing its soft texture.
3. Entrecôte (Ribeye Steak)
Entrecôte is the French term for ribeye steak, one of the most popular cuts for an authentic French roast or steak dinner. The cut is rich in flavor due to its marbling, and when roasted or grilled, it retains a deliciously juicy quality.
- French Cooking Style: Entrecôte is typically grilled or pan-seared, then finished in the oven. It’s often served with a classic French sauce, such as sauce béarnaise (a buttery, herby sauce with tarragon) or sauce au poivre (a creamy peppercorn sauce).
- Why It Works: The marbling in the entrecôte provides a lot of flavor and helps to create a tender, juicy steak when cooked properly. This cut is also frequently paired with French side dishes like pommes frites (French fries) or gratin dauphinois (potato gratin).
- Serving Tip: French tradition calls for the meat to be rested before serving, allowing the juices to redistribute for a more flavorful and tender bite.
4. Bavette (Flank Steak)
Bavette is a cut from the flank area and is a favorite in French cuisine, particularly in the region of Burgundy. It’s known for its loose texture and ability to absorb marinades, making it an excellent choice for flavorful, French-style dishes.
- French Cooking Style: In France, bavette is often prepared as a bavette à l’échalote—a flank steak served with a shallot-based sauce. The beef is typically grilled or pan-fried quickly and served with a flavorful, tangy sauce made from shallots, wine, and butter.
- Why It Works: Although it’s a leaner cut, bavette’s unique texture allows it to take on the bold flavors of the marinade or sauce. It’s often sliced thinly against the grain to ensure it remains tender.
- Serving Tip: This cut is often served with classic French accompaniments such as a side of roasted vegetables or a fresh green salad, allowing the beef to shine as the star of the dish.
5. Chateaubriand (Center Cut of Tenderloin)
Chateaubriand is a French cut that refers to the thick center portion of the tenderloin, usually prepared as a roast. This is a luxurious, premium cut of beef that’s often associated with romantic dinners or celebratory meals.
- French Cooking Style: In classic French cuisine, Chateaubriand is often roasted whole and served with a rich, buttery sauce such as sauce béarnaise or sauce demi-glace. It’s known for being served for two, as it’s typically a large roast.
- Why It Works: The tenderness and delicacy of Chateaubriand make it perfect for slow roasting, and the flavors are intensified with classic French sauces that complement the meat’s subtle taste.
- Serving Tip: Chateaubriand is often carved tableside and served with sides such as French onion soup, pommes dauphine (fried mashed potatoes), or steamed asparagus.
Incorporating French Cuts for Authentic Flavor
To achieve authentic French flavor in your roast beef, it’s important to not only select the right cut but also to embrace the classic French cooking methods and accompanying sauces. Each of these cuts is a reflection of French culinary traditions, where the focus is on enhancing the natural flavor of the beef with minimal yet impactful seasoning, rich but simple sauces, and expert preparation.
Whether you choose the rich and flavorful Côte de Boeuf, the tender elegance of Filet de Boeuf, or the rustic charm of Bavette, these French-inspired cuts will bring an authentic touch to your roast beef recipe that is sure to impress any guest!
Essential Tools and Ingredients for Perfect Roast Beef
Must-Have Tools: Roasting Pan, Meat Thermometer, and Sharp Knives
The key to making the perfect roast beef lies not just in choosing the right cut and seasoning, but also in having the right tools for the job. The right equipment ensures your roast is cooked to perfection, sliced beautifully, and served with ease. Here are the essential tools every home cook should have in their kitchen to make the best roast beef every time.
1. Roasting Pan: A Solid Foundation for Even Cooking
A good roasting pan is the cornerstone of a successful roast beef. It provides the proper foundation for even heat distribution and ensures your roast cooks evenly on all sides, which is essential for achieving that perfect doneness.
- Why It’s Important:
A sturdy roasting pan allows heat to circulate around the roast, helping to develop a crispy outer layer while keeping the inside moist and tender. The pan also captures the drippings, which can be used to make rich, flavorful gravies or sauces. - Features to Look For:
- Size and Depth: Choose a roasting pan that’s large enough to comfortably fit your roast with some space around it for airflow. It should also have high sides to catch juices and fat that render out of the meat.
- Material: Roasting pans come in a variety of materials, each offering different benefits.
- Stainless Steel: Durable and easy to clean, it provides even heat distribution.
- Enamel-Coated Cast Iron: Excellent for retaining and distributing heat evenly. It also adds a touch of rustic charm to your roast.
- Nonstick Coating: While nonstick pans are easy to clean, they don’t always allow the meat to develop a crispy, flavorful crust.
- Rack: Some roasting pans come with a built-in rack, which is ideal for lifting the meat off the bottom of the pan, allowing heat to circulate more evenly. This also prevents the meat from sitting in its own juices, ensuring a crispier exterior.
- Pro Tip: If your roasting pan doesn’t come with a rack, you can easily improvise with a wire rack or use vegetables (like carrots or onions) as a natural bed to elevate the meat.
2. Meat Thermometer: Precision for Perfectly Cooked Beef
The meat thermometer is the single most important tool to ensure your roast beef is cooked to the perfect level of doneness. Without it, you’re left guessing, which can lead to overcooking or undercooking your precious cut of beef.
- Why It’s Important:
A meat thermometer takes the guesswork out of roasting, giving you precise control over the internal temperature of your beef. Different cuts of meat require different cooking times, and temperatures can vary depending on your desired level of doneness. Whether you like your roast medium-rare, medium, or well-done, a meat thermometer will help you achieve that goal with consistency. - Types of Meat Thermometers:
- Instant-Read Thermometer: Provides quick and accurate readings, ideal for checking the temperature at various stages of cooking. Insert it into the thickest part of the meat (avoiding bone or fat) for the best results.
- Probe Thermometer: Stays inserted in the meat during cooking, providing real-time updates on the internal temperature. Some models even come with alarms that notify you when the roast reaches your desired temperature, which is perfect for hands-off cooking.
- Smart Thermometer: Some advanced models are Bluetooth-enabled, allowing you to monitor the temperature remotely via your smartphone. These are especially useful if you’re juggling multiple tasks or if you’re cooking larger cuts that require long cooking times.
- Doneness Temperatures (for Roast Beef):
- Rare: 120-125°F (49-52°C)
- Medium-Rare: 130-135°F (54-57°C)
- Medium: 140-145°F (60-63°C)
- Medium-Well: 150-155°F (66-68°C)
- Well-Done: 160°F (71°C) or above
- Tip: Always remove the roast from the oven when it’s about 5°F (2-3°C) below your target temperature, as the meat will continue to cook while resting.
3. Sharp Knives: Precision for Slicing and Carving
A sharp, high-quality knife is crucial for slicing your roast beef cleanly and evenly. When it comes to presentation, a beautifully sliced roast can make all the difference, so using the right knives ensures your roast beef looks as good as it tastes.
- Why It’s Important:
A sharp knife cuts through the meat cleanly, allowing you to make even, precise slices that are easy to serve. Dull knives, on the other hand, can tear and shred the meat, resulting in uneven slices that don’t look as appealing. - Types of Knives You’ll Need:
- Carving Knife: This is the essential tool for slicing your roast beef. Carving knives have a long, narrow blade that’s designed to slice through meat cleanly without shredding it. The blade should be thin, flexible, and able to glide smoothly through the roast.
- Serrated Knife: For crustier cuts or meats with a tougher exterior, like a roast with a crusty, well-browned exterior, a serrated knife is ideal. It helps cut through the crust without crushing the meat.
- Boning Knife (Optional): If you’re working with cuts that include bones, like rib roasts, a boning knife can help you trim and remove the bones with precision.
- Knife Maintenance:
A sharp knife is only effective if it’s well-maintained. Regularly hone your knives with a honing steel to keep the blade aligned, and sharpen them with a sharpening stone or professional service when needed.- Tip: After carving, always clean your knives thoroughly and dry them immediately to prevent rust or corrosion.
Conclusion: Tools That Make All the Difference
Having the right tools—roasting pan, meat thermometer, and sharp knives—elevates the process of preparing roast beef from ordinary to exceptional. With the roasting pan providing an even cooking surface, the meat thermometer ensuring precision in temperature, and the sharp knives helping you carve the perfect slices, your roast beef will be both delicious and visually stunning. Invest in these essential tools, and you’ll find yourself cooking with greater confidence and ease every time you roast beef!
Key Ingredients: Salt, Pepper, Garlic, Thyme, and Olive Oil
The right seasoning and ingredients can transform a simple roast beef into a mouthwatering dish full of depth and flavor. While the cut of beef is crucial, the accompanying seasonings and oils elevate the natural flavors of the meat. In French and other culinary traditions, certain ingredients are staples in creating the perfect roast beef. Let’s break down the role of each of these key ingredients and why they’re so essential for achieving the perfect roast.
1. Salt: The Essential Flavor Enhancer
Salt is the most fundamental seasoning for any roast, as it helps bring out the natural flavors of the meat. It enhances the taste, balances other seasonings, and aids in the Maillard reaction, which is responsible for that delicious, golden-brown crust on the outside of the roast.
- Why It’s Important:
Salt helps to extract moisture from the beef initially, which then mixes with the meat’s own juices and helps form a flavorful crust during roasting. It also draws out the natural flavors in the meat, allowing it to taste richer and more intense. - How to Use:
For a perfectly seasoned roast, generously season the beef with salt at least 30 minutes before cooking. This allows the salt to penetrate the meat, improving both texture and flavor. Some chefs even recommend salting the beef a few hours in advance, or even overnight, to help break down muscle fibers and ensure maximum flavor. - Pro Tip:
Use kosher salt or sea salt for seasoning roast beef, as these salts have a coarse texture that makes it easier to distribute evenly across the meat and allows for better control over seasoning.
2. Pepper: The Spice That Adds Depth
Freshly cracked black pepper adds a sharp, aromatic bite to roast beef that complements the richness of the meat. While salt enhances the savory aspects, pepper adds a zesty, slightly spicy kick that cuts through the fattiness and provides balance.
- Why It’s Important:
Pepper brings a layer of complexity to the flavor profile of your roast. Its slight heat and earthiness brighten up the meat and make each bite more vibrant. Pepper also complements other ingredients like garlic and herbs, creating a harmonious blend of flavors. - How to Use:
Just like salt, pepper should be applied liberally. Freshly cracked pepper is far superior to pre-ground pepper, as it’s more aromatic and provides a more intense flavor. Season the beef evenly with freshly cracked pepper before roasting to infuse the meat with its bold flavors.- Pro Tip: If you like a bit of heat, you can experiment with white pepper or even mix in a touch of ground peppercorn medley for added complexity.
3. Garlic: Aromatic and Bold
Garlic is a classic ingredient in many beef dishes and for good reason—it imparts a rich, savory flavor that enhances the natural taste of the beef. Roasting garlic with the beef allows the bulb to mellow out, transforming from sharp and pungent to sweet, rich, and fragrant.
- Why It’s Important:
Garlic has the power to infuse meat with an unmistakable depth of flavor. The aroma of roasted garlic fills the kitchen, while the flavor seeps into the beef as it cooks, adding layers of complexity. Roasted garlic also becomes sweet and nutty, making it a perfect match for beef. - How to Use:
Crush several garlic cloves and rub them over the surface of the beef before roasting. You can also insert whole cloves into slits made in the roast, which will release their aromatic oils as the meat cooks. For added flavor, you can roast garlic whole in the pan along with the beef, allowing the garlic to soften and caramelize. - Pro Tip: For a more intense garlic flavor, consider making a garlic paste by combining minced garlic with a little olive oil and salt, then rub it over the roast before cooking.
4. Thyme: Fragrant and Herbaceous
Thyme is one of the most commonly used herbs in French cooking and pairs beautifully with beef. Its earthy, slightly lemony flavor elevates the taste of the meat and helps balance the richness of the roast.
- Why It’s Important:
Thyme adds a woody, herbaceous note to the beef, which enhances its savory qualities and complements the richness of the meat without overpowering it. As it cooks, thyme releases its oils and infuses the meat with its fragrance, contributing to the roast’s overall complexity. - How to Use:
Fresh thyme is best for a roast, but dried thyme can also be used in a pinch. Simply strip the leaves from the stems and sprinkle them over the meat, or place sprigs under or around the roast in the pan to subtly flavor the drippings. You can also create a thyme-infused oil by combining fresh thyme leaves with olive oil, then brushing it onto the roast before cooking. - Pro Tip: For an extra burst of flavor, add thyme to your roasting pan to infuse the meat with its herbal aroma, or use it in a marinade with garlic and olive oil to tenderize and flavor the beef further.
5. Olive Oil: A Key Ingredient for Moisture and Flavor
Olive oil is a versatile and essential fat for roasting. It helps to create a golden, crispy crust on the beef, while also keeping the meat moist and tender during the cooking process. It carries the flavors of the garlic, thyme, and pepper, helping them adhere to the surface of the meat.
- Why It’s Important:
Olive oil acts as a medium that helps distribute heat evenly, ensuring the surface of the meat browns while locking in moisture. It also enhances the flavors of other ingredients, like garlic and thyme, which are carried through the oil and infused into the beef. - How to Use:
Rub olive oil generously over the surface of the roast before seasoning it with salt, pepper, and other spices. The oil helps the seasoning stick to the beef and creates a protective layer during roasting. You can also baste the roast with olive oil periodically as it cooks to keep the exterior moist and tender.- Pro Tip: Use extra virgin olive oil for the best flavor and quality, as it’s the least processed and retains the most robust taste.
Conclusion: The Perfect Flavor Combination
The combination of salt, pepper, garlic, thyme, and olive oil is the secret to a delicious, well-seasoned roast beef. Each ingredient plays a specific role in enhancing the natural flavors of the meat, creating a balanced and mouthwatering result. Salt and pepper bring out the savory essence, garlic adds aromatic depth, thyme infuses the roast with herbal notes, and olive oil ensures the roast stays moist and tender while developing a crispy, flavorful crust. Together, they form a perfect symphony of flavors that transform a simple roast beef into a truly memorable dish.
The Role of Seasoning in Roast Beef Recipes: Balancing Flavors for Optimal Taste
Seasoning is the heart of any great roast beef recipe, and it plays a critical role in unlocking the natural flavors of the meat while balancing richness and depth. The right blend of seasonings not only enhances the flavor of the beef itself but also helps create a flavorful crust, tenderizing the meat and ensuring it’s both juicy and aromatic. Let’s dive into how seasoning contributes to a perfect roast beef and how you can balance flavors for optimal taste.
1. Enhancing Natural Meat Flavors: A Subtle Art
Roast beef, particularly high-quality cuts, has a rich, beefy flavor that is the star of the dish. Seasoning isn’t meant to overpower the meat but to amplify its natural taste. The right combination of ingredients will bring out the best in the beef, creating a harmonious balance where the meat shines while still being complemented by the seasonings.
- Why It’s Important:
Seasoning enhances the flavor without masking the quality of the meat. For example, a simple rub of salt, pepper, and garlic allows the natural umami and savory notes of the beef to come through. The addition of herbs like thyme and rosemary elevates the flavor profile, bringing freshness and depth without overwhelming the delicate taste of the beef. - How to Balance:
Focus on layering seasonings—start with a light touch of salt and pepper to draw out the meat’s natural juices, and then build complexity with garlic, fresh herbs, and subtle spices. The goal is to complement the beef’s natural flavor, not overpower it.
2. Creating a Flavorful Crust: The Maillard Reaction
A key element of roast beef is the creation of a flavorful, crispy crust that develops during the roasting process. The Maillard reaction, a chemical process that occurs when meat is exposed to high heat, is responsible for creating this golden-brown crust that adds complexity, texture, and savory flavor to the beef.
- Why It’s Important:
The Maillard reaction occurs when the natural sugars in the meat react with amino acids to form new compounds that provide rich, roasted flavors. Seasonings such as salt, pepper, and olive oil not only help facilitate this reaction but also create a seasoning crust that locks in moisture and enhances the depth of the roast. - How to Balance:
Applying seasonings early—like rubbing the beef with oil, salt, and pepper before roasting—helps achieve that ideal crust while still ensuring the interior remains juicy. You can experiment by adding a little brown sugar or paprika to the seasoning mix to help develop a deeper, caramelized crust.
3. Balancing Salt: The Secret to Tasty Roast Beef
Salt is a foundational seasoning for roast beef, but it needs to be used thoughtfully to avoid over-salting or under-seasoning the roast. Properly balanced salt enhances the natural flavor of the beef and helps retain moisture during the roasting process.
- Why It’s Important:
Salt plays a crucial role in drawing out moisture from the beef initially, which then mixes with the natural juices and helps form the roast’s delicious crust. It also has the power to bring out the beef’s savory umami, making the roast taste richer and more intense. - How to Balance:
When seasoning, use kosher salt or sea salt, which have larger crystals that are easier to distribute evenly. Don’t forget to season the beef early—30 minutes to an hour before roasting—to allow the salt to penetrate the meat. For optimal flavor, use 2% of the meat’s weight in salt, which is considered the perfect amount for seasoning beef. After the roast is cooked, taste it before adding additional salt. Sometimes, just the seasoning on the surface is enough.
4. Adding Complexity with Herbs and Spices
Herbs and spices are an essential element in developing the flavor complexity of roast beef. Fresh herbs like rosemary, thyme, sage, and bay leaves offer an earthy, fragrant quality that complements the richness of the beef. In addition, spices such as garlic, black pepper, and even a touch of paprika can contribute both depth and heat to the flavor profile.
- Why It’s Important:
Herbs and spices infuse the meat with aromatic notes that contrast with the beef’s savory flavor. The earthiness of thyme, the sweetness of garlic, and the warmth of black pepper provide a multi-layered flavor experience. Herbs also help balance the richness of the beef and add a fresh contrast to its heavy, umami notes. - How to Balance:
Use fresh herbs for a vibrant flavor and dried herbs for a more concentrated, robust taste. A typical herb rub for roast beef includes rosemary, thyme, and garlic. Consider adding a pinch of smoked paprika or ground cumin for a smoky, spiced undertone. Be mindful of how much you use; a little goes a long way with spices, especially if you’re cooking a large roast. - Pro Tip: Consider making a herb paste by blending olive oil, garlic, thyme, rosemary, and other spices. Rub this mixture onto the beef a few hours before roasting to allow the flavors to penetrate the meat more deeply.
5. The Role of Acidic Ingredients: Balancing Richness and Tenderizing
While acids are not typically the main flavor in roast beef, ingredients like vinegar, lemon juice, or mustard can provide a bright, tangy note that cuts through the richness of the meat, enhancing the overall flavor profile. They also help tenderize the beef by breaking down muscle fibers, ensuring a more tender and juicy roast.
- Why It’s Important:
The richness of beef can sometimes feel overwhelming, but a touch of acid balances out the heaviness, making each bite more refreshing and flavorful. Acids also help to tenderize the meat by breaking down connective tissue, which improves the texture of tougher cuts. - How to Balance:
A splash of red wine vinegar or a tablespoon of Dijon mustard can add brightness to your seasoning mix. If you’re marinating the roast, consider adding a small amount of vinegar or lemon juice to the marinade to tenderize the meat and provide a subtle tang. Just be careful not to overdo it; too much acid can overwhelm the flavor of the beef. - Pro Tip: If you’re looking for a deeper flavor, consider marinating the roast beef with acidic ingredients like vinegar or lemon juice, along with garlic and herbs, for several hours before roasting. This helps to break down the muscle fibers and infuse the meat with even more flavor.
Conclusion: Perfecting the Seasoning Balance
The role of seasoning in roast beef recipes is to balance, enhance, and complement the natural flavors of the beef while creating a flavorful and aromatic crust. Salt, pepper, and garlic form the foundation of seasoning, while thyme and other herbs provide depth and freshness. Adding a touch of acid, along with spices like paprika and cumin, introduces complexity and helps balance the richness of the meat. By thoughtfully selecting and balancing your seasonings, you’ll elevate your roast beef to a new level of flavor, ensuring that each bite is rich, tender, and unforgettable.
Optional Additions for Flavor Boost: Wine, Mustard, or Marinades
While the classic seasoning ingredients like salt, pepper, and herbs are essential for creating a great roast beef, there are several optional additions that can elevate the flavor profile even further. These ingredients, such as wine, mustard, and marinades, add complexity and layers of flavor that complement the beef in unique ways. Let’s explore how each of these optional ingredients can boost the flavor of your roast beef and enhance the overall cooking experience.
1. Wine: Adding Richness and Depth
Wine is an exceptional ingredient when it comes to both marinating and deglazing your roast beef. Red wine, in particular, pairs beautifully with beef, adding both depth of flavor and richness. The natural acidity of wine helps balance the meat’s richness while its complex flavors infuse into the beef as it cooks.
- Why It’s Important:
Wine, especially red wine, is a traditional choice in many French and European roast beef recipes. It contains tannins that interact with the fat and proteins in the meat, helping to tenderize it. Moreover, it has an inherent acidity that contrasts with the savory richness of the beef, providing balance. Wine also imparts a subtle, earthy complexity that enhances the beef’s flavor without overpowering it. - How to Use:
For marinating, mix red wine with garlic, herbs, and a bit of olive oil, then let the beef sit in this mixture for several hours (or overnight) before roasting. For basting, use wine to periodically spoon over the meat during roasting, which not only adds flavor but also helps maintain moisture. Lastly, after roasting, you can deglaze the pan with a splash of wine to make a rich wine sauce or gravy.- Pro Tip: If you want a more robust, caramelized flavor, choose a bold red wine like Cabernet Sauvignon, Merlot, or Syrah. If you prefer a lighter touch, Pinot Noir works well without overpowering the beef’s natural flavor.
2. Mustard: A Zesty, Tangy Twist
Mustard might not immediately come to mind when thinking about roast beef, but this tangy condiment can offer a wonderful flavor contrast. Whether you’re using Dijon mustard, yellow mustard, or whole grain mustard, it brings a mild spiciness and tang that cuts through the richness of the beef and adds a fresh, zesty note to every bite.
- Why It’s Important:
Mustard has a bright, slightly sharp flavor that provides a nice contrast to the beef’s savory richness. It also adds a mild heat that helps to cut through the fattiness of the meat without overpowering it. Mustard is particularly effective when paired with the crust of the roast, as it caramelizes during the roasting process and creates a flavorful outer layer that enhances the overall taste. - How to Use:
To incorporate mustard into your roast beef, consider coating the roast with a thin layer of mustard before seasoning with salt, pepper, and herbs. This helps the seasoning adhere and provides an additional layer of flavor. Dijon mustard works well for a more subtle tang, while whole grain mustard offers a bit more texture and sharpness. You can also mix mustard into marinades or sauces for added depth.- Pro Tip: If you prefer a spicy edge, use spicy brown mustard for a more intense kick, or mix mustard with honey or brown sugar for a sweet-and-sour flavor combination.
3. Marinades: Infusing the Meat with Flavor
Marinating roast beef is a great way to infuse it with flavor before cooking. A good marinade not only adds depth and complexity but also helps tenderize the meat, ensuring it is juicy and flavorful from the inside out. The combination of acids, oils, herbs, and spices in the marinade works together to enhance the flavor profile and improve the texture.
- Why It’s Important:
Marinades contain acids (like vinegar, wine, or citrus) that break down muscle fibers in the beef, making it more tender. They also include flavorings like garlic, herbs, and spices that infuse the meat with additional flavor, which is especially important for tougher cuts. Marinades can also help seal in moisture during roasting, keeping the roast juicy and flavorful. - How to Use:
Combine oil, vinegar or wine, garlic, and fresh herbs (like thyme, rosemary, or parsley) to create a marinade. Let the beef marinate for at least a few hours, but ideally overnight for maximum flavor infusion. After marinating, remove the roast from the marinade, pat it dry, and proceed with your seasoning and roasting.- Pro Tip: For extra richness, add a little soy sauce or Worcestershire sauce to the marinade to provide an umami boost. You can also mix in a small amount of honey or brown sugar to caramelize the roast’s crust during cooking.
4. Additional Flavor Boosters: Garlic, Herbs, and Spices
In addition to wine, mustard, and marinades, there are other optional ingredients that can add even more layers of flavor to your roast beef. Garlic, herbs, and spices like paprika, cumin, or even chili powder can give your roast a unique twist that makes it stand out.
- Why It’s Important:
Garlic adds aromatic, savory depth to the roast, while herbs like rosemary, thyme, and bay leaves bring an earthy, fresh note that complements the beef’s richness. Spices like paprika and cumin can give your roast a subtle smoky or slightly spicy kick, transforming the flavor profile into something special. - How to Use:
Rub fresh garlic or garlic paste onto the roast before cooking to infuse it with flavor. If you prefer a more subtle taste, you can add crushed garlic cloves to the roasting pan to cook along with the beef. Fresh herbs can be placed under the roast or added to the pan for extra flavor. For spices, a sprinkle of paprika, cumin, or even a touch of coriander can create an exotic twist.- Pro Tip: Experiment with a herb crust by combining fresh herbs, garlic, mustard, and olive oil to create a flavorful paste that you can rub onto the roast before cooking.
Conclusion: Amplifying Your Roast Beef with Optional Additions
While the basics of seasoning—salt, pepper, and herbs—are essential to any roast beef recipe, adding ingredients like wine, mustard, and marinades can dramatically enhance the overall flavor. These optional additions provide complexity, richness, and balance, transforming a simple roast into a standout dish. Whether you’re using wine for a deeper, earthy flavor, mustard for tangy zest, or marinades to tenderize and infuse the meat, these ingredients will help elevate your roast beef to new heights of flavor. So, don’t hesitate to experiment with these flavor-boosting ingredients for a roast that’s not only perfectly cooked but also bursting with delicious, layered tastes.
Step-by-Step Guide to Cooking Roast Beef
Prepping the Meat: Trimming, Seasoning, and Marinating Techniques
The process of preparing the meat is one of the most important steps in creating a perfect roast beef. Proper prep ensures that your roast is both tender and flavorful, setting the foundation for the best possible outcome. This section will focus on trimming, seasoning, and marinating techniques that will bring out the natural flavors of the beef while enhancing its texture. Let’s dive into each of these elements to make sure your roast beef is prepared to perfection.
1. Trimming the Meat: Removing Excess Fat and Silver Skin
Before you start seasoning or marinating, it’s essential to trim the roast properly. Trimming helps achieve a balanced roast by removing any excess fat or silver skin (a tough connective tissue) that could affect the texture and overall flavor. Trimming also ensures even cooking and a beautiful presentation.
- Why It’s Important:
While a certain amount of fat is desirable for flavor and tenderness, excess fat can cause flare-ups during cooking and may result in a greasy or unpleasant texture. Silver skin, which is the thin, silvery membrane covering some cuts of beef, is tough and chewy and can prevent the seasoning from penetrating the meat. - How to Trim:
Start by removing large fat cap (about 1/4 inch thick) from the roast. Be sure not to remove all fat, as a thin layer can help with flavor and moisture. Next, carefully remove the silver skin by sliding a sharp knife just beneath it and cutting it away in long, smooth strokes. Always work against the grain of the muscle to ensure you’re not damaging the meat.- Pro Tip: Leave a thin layer of fat on the roast for extra flavor and moisture during cooking. This will baste the meat as it cooks, keeping it juicy and tender.
2. Seasoning the Meat: The Basics and Beyond
Once your roast is properly trimmed, it’s time to season it. Proper seasoning is crucial to creating a flavorful roast beef. The goal is to enhance the natural beefy taste while ensuring that the seasoning penetrates deeply into the meat to create a flavorful crust.
- Why It’s Important:
Seasoning is not just about adding flavor to the surface of the meat; it’s about creating a crust that will caramelize and lock in moisture, providing both texture and flavor. A well-seasoned roast beef will have an even, flavorful crust that complements the tender interior. - How to Season:
Start by generously seasoning the roast with kosher salt and freshly cracked black pepper on all sides. These two basic seasonings will form the foundation of the flavor profile. For more complex flavors, you can add garlic powder, onion powder, paprika, and dried thyme.- For a more rustic crust, rub the beef with mustard before seasoning. The mustard acts as a binder and adds a subtle tang to the flavor.
- Herb Crust: To create a more aromatic crust, rub the roast with a mixture of fresh rosemary, thyme, and garlic. These herbs infuse the meat with their fragrant oils and flavors as the roast cooks.
- Pro Tip: For a uniform coating, season the roast evenly and let it sit for 30 minutes to 1 hour before cooking. This allows the salt to penetrate the meat and bring out its natural flavors.
3. Marinating for Extra Flavor and Tenderness
Marinating your roast beef is an optional step that can significantly enhance both the flavor and tenderness of the meat. A marinade is a liquid mixture that typically contains acidic ingredients (like vinegar, wine, or citrus), oil, herbs, and spices. This technique is especially beneficial for tougher cuts of beef, as it helps break down the muscle fibers and infuse the meat with flavors.
- Why It’s Important:
The acid in the marinade helps to break down tough muscle fibers, making the roast more tender while allowing the flavors to deeply penetrate the meat. Additionally, marinades create a protective layer around the meat, helping it retain moisture during roasting. - How to Marinate:
For best results, prepare your marinade a few hours or even a day ahead of time. A basic marinade might include olive oil, red wine vinegar, garlic, rosemary, and thyme. The oil helps distribute the flavors evenly while the acid helps tenderize the meat.- Marinating Time: Depending on the size of the roast and the cut, marinate the beef for at least 4 hours, but ideally overnight to allow the flavors to penetrate the meat. For larger roasts, a longer marination period (up to 24 hours) is ideal.
- Pro Tip: If you want to introduce a deeper flavor profile, consider adding a small amount of soy sauce or Worcestershire sauce to the marinade. These umami-rich ingredients provide a savory, almost caramelized flavor that enhances the beef’s natural taste.
4. Dry Brining: The Secret to Moisture and Flavor
An alternative to marinating, dry brining is another technique that can improve the flavor and texture of your roast beef. Dry brining involves seasoning the meat with salt and allowing it to rest for several hours (or overnight) before cooking. This process helps the meat retain moisture and develop a flavorful, savory crust.
- Why It’s Important:
Dry brining helps the salt draw out moisture from the beef, which is then reabsorbed along with the seasoning, enhancing flavor and ensuring the meat stays juicy. It also helps the beef develop a beautiful, flavorful crust during roasting. - How to Dry Brine:
To dry brine, generously coat the surface of the roast with kosher salt and place it on a wire rack in the refrigerator. Allow the meat to rest uncovered for at least 1 hour, or preferably overnight.- Pro Tip: Once the roast has rested and the salt has penetrated the meat, you can season it further with pepper, garlic, and herbs, if desired, before roasting. The salt will already have done most of the work in terms of flavor.
Conclusion: Perfect Prep for a Perfect Roast
Properly preparing your roast beef is a crucial step in achieving a flavorful, tender, and juicy roast. Trimming the fat and silver skin ensures that the meat cooks evenly and has a tender texture. Seasoning forms the foundation of the roast’s flavor, while marinating or dry brining allows the meat to absorb even more flavors and become extra tender. By following these steps and taking your time with the prep, you’ll set yourself up for success, ensuring that your roast beef is nothing short of perfect every time.
Cooking Methods: Roasting, Searing, and Oven Tips
Cooking a perfect roast beef involves more than just selecting the right cut and seasoning it well. The cooking method plays a pivotal role in achieving a tender, juicy roast with the ideal level of doneness. While roasting is the most common method, techniques like searing before roasting and understanding the oven tips can take your roast beef to the next level. This section will break down each cooking method and offer practical tips to help you master your roast beef.
1. Roasting: The Heart of the Process
Roasting is the classic method for cooking roast beef, allowing the meat to cook evenly while developing a beautifully caramelized exterior. Roasting works particularly well with larger cuts of beef, ensuring that the flavors and juices are sealed inside, creating a moist and flavorful roast.
- Why It’s Important:
Roasting at a consistent temperature helps to cook the beef evenly, ensuring that it is tender throughout without drying out. The high, dry heat in the oven allows the exterior of the roast to develop a golden-brown crust while keeping the inside moist and flavorful. - How to Roast:
Start by preheating your oven to 325°F (163°C). Place the roast on a wire rack set inside a roasting pan to allow air to circulate around the meat, ensuring even cooking. For a medium-rare roast, roast the beef for 20 minutes per pound. However, the exact roasting time will depend on the cut, size, and your preferred level of doneness.- Pro Tip: Use a meat thermometer to check the internal temperature of your roast. For a medium-rare roast beef, the target temperature is 125°F (52°C) before removing it from the oven. Keep in mind that the meat will continue to cook for a few minutes as it rests, so it’s okay to remove it a bit earlier than your desired temperature.
2. Searing: Enhancing Flavor with a Perfect Crust
Searing is an essential technique that adds a crispy, caramelized crust to your roast beef, improving both the flavor and texture. While it’s not strictly necessary, searing the beef before roasting can help lock in juices and elevate the overall flavor profile of the roast.
- Why It’s Important:
Searing the meat in a hot pan before roasting helps to create the Maillard reaction, a chemical process that produces a rich, brown crust packed with intense flavor. This crust not only adds an attractive texture but also seals in the beef’s juices, ensuring a moist and tender roast. - How to Sear:
To sear, heat a small amount of oil (such as vegetable or canola oil) in a large skillet over medium-high heat. Once the oil is hot, add the seasoned beef and sear it on all sides for 2-3 minutes per side or until a deep golden-brown crust forms. This process should only take about 10-12 minutes, depending on the size of the roast. Once seared, transfer the beef to the preheated oven to finish cooking.- Pro Tip: Searing is particularly effective for smaller cuts of beef like tenderloin or ribeye, where the roast will cook relatively quickly. For larger cuts, such as brisket or chuck, searing will add flavor, but the primary cooking will happen in the oven.
3. Oven Tips: Optimizing Heat for a Perfect Roast
The oven is where most of the magic happens when cooking roast beef. However, understanding the nuances of how your oven works and optimizing its heat settings can make a big difference in achieving a perfectly roasted beef.
- Why It’s Important:
Proper oven settings ensure that the roast cooks evenly and reaches the ideal level of doneness. Understanding your oven’s heat distribution and how to adjust its temperature is key to avoiding overcooking or undercooking the meat. Additionally, using the right temperature settings will help achieve the perfect crust while maintaining juiciness inside. - How to Use the Oven Effectively:
- Conventional Oven vs. Convection Oven: If your oven has a convection setting, use it for more even cooking. The fan circulates hot air around the meat, ensuring that it cooks quickly and evenly. However, if you’re using a conventional oven, the heat will radiate from the top and bottom, so be sure to rotate the roast halfway through cooking to ensure even roasting.
- Roasting Temperature: Generally, roast beef is cooked at a low to medium temperature, around 325°F (163°C). Cooking at a lower temperature allows the meat to cook slowly, making it more tender and juicy. If you prefer a more charred, crispy crust, you can increase the heat to 425°F (220°C) for the last 10-15 minutes of roasting to get a beautiful caramelized exterior.
- Resting Period: Once the roast is done, always allow it to rest for at least 10-15 minutes before slicing. This resting period allows the juices to redistribute, making the meat more tender and juicy when you cut into it.
- Pro Tip: If you’re using a meat thermometer, insert it into the thickest part of the roast before placing it in the oven. This helps ensure that you can monitor the temperature without opening the oven door, which can cause fluctuations in heat.
4. Additional Tips for Roast Beef Perfection:
- Use a Meat Thermometer:
A meat thermometer is your best friend when it comes to achieving the perfect level of doneness. For medium-rare roast beef, the internal temperature should reach 125°F (52°C). For medium, aim for 140°F (60°C), and for well-done, 160°F (71°C). Insert the thermometer into the thickest part of the meat for the most accurate reading. - Baste Occasionally:
If desired, you can periodically baste the roast with its own juices or with a flavored liquid (like wine or broth) to enhance moisture. Be cautious, however, not to open the oven too often, as this will disrupt the cooking process. - Resting is Key:
After removing the roast from the oven, let it rest covered with aluminum foil for about 15 minutes. This resting period allows the internal juices to redistribute and settle, resulting in a more flavorful and tender roast.
Conclusion: Mastering Cooking Methods for a Perfect Roast Beef
Mastering the art of cooking roast beef requires understanding the key cooking methods: roasting, searing, and oven management. By searing the roast to develop a flavorful crust, roasting at the right temperature for even cooking, and knowing your oven’s settings for optimal results, you’ll achieve a roast that’s tender, juicy, and bursting with flavor. Armed with the right techniques, your roast beef will be a culinary masterpiece every time!
Temperature Guidelines: Internal Temps for Rare, Medium-Rare, and Well-Done Beef
One of the most important aspects of cooking a perfect roast beef is knowing the ideal internal temperature for the level of doneness you desire. Whether you prefer your roast beef rare, medium-rare, or well-done, achieving the right temperature ensures your beef is cooked to perfection, with the desired texture and flavor. This section will guide you through the temperature guidelines for each doneness level and explain how to use a meat thermometer to monitor the roast’s progress.
1. Rare: A Cool, Red Center
Rare roast beef is cooked until it’s just warmed through, with a cool, red center and a very tender texture. This level of doneness is ideal for those who prefer their beef on the juicier side, with the least amount of cooking. Achieving rare roast beef requires careful attention to the internal temperature, as overcooking it will quickly result in a loss of moisture and tenderness.
- Target Internal Temperature:
The ideal internal temperature for rare roast beef is 120°F to 125°F (49°C to 52°C). Once this temperature is reached, the beef will be warm on the outside with a cool red center. - How to Achieve Rare Roast Beef:
- Cooking Time: Roast the beef at 325°F (163°C) and monitor it closely. For a 3-pound roast, it will take approximately 45-60 minutes to reach the desired internal temperature.
- Resting: After you remove the roast from the oven, let it rest for about 10-15 minutes. This allows the internal juices to redistribute, and the temperature will rise by about 5°F during resting, bringing the roast to a final temperature of around 125°F (52°C).
2. Medium-Rare: A Warm, Pink Center with Juicy Tenderness
Medium-rare roast beef is one of the most popular doneness levels, offering the perfect balance of tenderness, juiciness, and flavor. The meat will have a warm, pink center with just enough firmness to maintain a satisfying texture. This level of doneness ensures a slightly crisp, flavorful exterior while keeping the interior moist and tender.
- Target Internal Temperature:
For medium-rare roast beef, the target temperature is between 130°F and 135°F (54°C to 57°C). This will yield a warm, pink center with slightly more firmness compared to rare beef. - How to Achieve Medium-Rare Roast Beef:
- Cooking Time: Roast the beef at 325°F (163°C) and cook for around 20 minutes per pound. For a 3-pound roast, this will take about 1 hour to 1 hour 15 minutes.
- Resting: Allow the roast to rest for 10-15 minutes after removing it from the oven, during which the temperature will rise an additional 5°F, bringing it to the final medium-rare temperature of 135°F. This resting period also ensures that the juices remain locked inside.
3. Medium: A Slightly Pink Center with Firmer Texture
Medium roast beef is cooked to a slightly firmer texture than medium-rare but still retains a hint of pink in the center. The juices are starting to cook out more, but the roast remains relatively moist and flavorful. This doneness level is ideal for those who prefer a firmer bite but still want the beef to remain juicy.
- Target Internal Temperature:
The target internal temperature for medium roast beef is 140°F to 145°F (60°C to 63°C). The roast will have a light pink center and will be firmer than medium-rare but not dry. - How to Achieve Medium Roast Beef:
- Cooking Time: At 325°F (163°C), roast for 20 minutes per pound. A 3-pound roast will take around 1 hour to 1 hour 15 minutes.
- Resting: After removing the roast from the oven, let it rest for 10-15 minutes. The residual heat will continue cooking the roast, raising its temperature to about 145°F, which is the ideal final temperature for medium roast beef.
4. Medium-Well: A Slightly Pink Center with a Firm Texture
For those who prefer their beef cooked further but still don’t want it completely dry, medium-well roast beef is the perfect choice. It has just a touch of pink in the center and is firmer in texture, with slightly less moisture compared to medium or medium-rare beef.
- Target Internal Temperature:
The ideal internal temperature for medium-well roast beef is 150°F to 155°F (66°C to 68°C). The center will have only a faint trace of pink, and the roast will have a firmer, denser texture. - How to Achieve Medium-Well Roast Beef:
- Cooking Time: Roast at 325°F (163°C) and cook for 25 minutes per pound. For a 3-pound roast, expect it to take around 1 hour 15 minutes to 1 hour 30 minutes.
- Resting: Let the roast rest for 10-15 minutes after removing it from the oven, which will allow the internal temperature to rise to around 155°F. This resting period will help keep the beef moist and tender.
5. Well-Done: Fully Cooked with No Pink Remaining
Well-done roast beef is cooked all the way through with no pink in the center. The roast will have a firmer texture, and most of the juices will be cooked out. This level of doneness is ideal for those who prefer beef that is fully cooked, though it tends to be drier and less tender than other doneness levels.
- Target Internal Temperature:
For well-done roast beef, the ideal internal temperature is 160°F (71°C) and higher. At this point, the roast will be fully cooked through with no pink or red in the center, and it will have a firm, dense texture. - How to Achieve Well-Done Roast Beef:
- Cooking Time: Roast at 325°F (163°C) and cook for 30 minutes per pound. A 3-pound roast will take around 1 hour 30 minutes to 1 hour 45 minutes.
- Resting: After roasting, allow the roast to rest for 10-15 minutes before slicing. This will help keep the beef from becoming too dry.
How to Use a Meat Thermometer:
Using a meat thermometer is the most reliable way to ensure your roast beef is cooked to the perfect level of doneness. To accurately measure the internal temperature:
- Insert the Thermometer: Insert the thermometer into the thickest part of the roast, avoiding any bones or fat, which can give an inaccurate reading.
- Check Early and Often: Begin checking the internal temperature 15-20 minutes before the estimated cooking time. This allows you to monitor the roast and avoid overcooking.
- Pro Tip: If you prefer a roast with a crispy crust, you can increase the oven temperature to 425°F (220°C) for the last 10-15 minutes of cooking. This will help develop a golden-brown, flavorful crust while maintaining the desired internal temperature inside.
Conclusion: Achieving the Perfect Roast Beef Temperature
Mastering the right internal temperature for roast beef is essential for achieving the desired level of doneness. By understanding the target temperatures for rare, medium-rare, medium, medium-well, and well-done beef, you can consistently create a roast that is perfectly cooked to your preferences. With the use of a meat thermometer and proper resting techniques, you’ll be able to confidently cook your roast beef to perfection every time.
Resting the Roast: Why It’s Crucial and How to Do It Properly
Resting your roast beef after it comes out of the oven is one of the most important steps in ensuring a perfectly cooked piece of meat. Although it may seem tempting to dive right in and carve the roast immediately, taking the time to rest the beef is essential for achieving the best flavor, tenderness, and juiciness. In this section, we’ll explore why resting the roast is crucial and the best way to do it properly.
1. Why Resting Is Crucial for Roast Beef
When you cook roast beef, the internal temperature rises as the heat transfers from the outside of the meat to the inside. During this cooking process, the muscle fibers contract, and juices are pushed toward the center of the roast. If you slice into the meat immediately after it’s removed from the oven, the juices will escape, and your roast will be dry and less flavorful.
Resting the roast allows time for the muscle fibers to relax and for the juices to redistribute evenly throughout the meat. As the roast rests, the internal temperature continues to rise slightly, and the juices move back from the center to the outer layers, making the roast more tender and moist. Without this critical step, your roast beef will lack the tenderness and juiciness that come from a well-rested roast.
- Prevents Dryness:
Resting helps to seal in the moisture, preventing it from being lost when the meat is sliced. Slicing too early would cause those flavorful juices to run out, leaving your roast beef dry and tough. - Improves Flavor:
The longer the meat rests, the more time it has to redistribute its juices, allowing the flavors to settle and intensify. When the roast is rested properly, each bite will be full of richness and natural beef flavor. - Maintains Tenderness:
The resting period ensures that the meat remains tender and juicy, as the collagen in the muscles breaks down over time and retains moisture. Without this resting phase, the meat will be tough and chewy.
2. How to Rest Your Roast Properly
Knowing how to rest your roast beef properly is just as important as understanding why it’s necessary. Proper resting will ensure you get the full benefit of this process, resulting in a roast that’s as tender, juicy, and flavorful as possible.
- Time Frame:
Generally, you should let your roast beef rest for about 10-20 minutes depending on the size of the roast. A small roast (around 2-3 pounds) should rest for about 10 minutes, while larger roasts (5 pounds or more) may benefit from 15-20 minutes of resting time.- Pro Tip: Bigger roasts can require more time to rest, allowing the juices to settle more evenly throughout the meat. Be sure to factor in this resting time to your total meal prep.
- Cover It Loosely:
After removing the roast from the oven, cover it loosely with aluminum foil to help keep the heat in while it rests. The foil helps maintain warmth but ensures that the roast isn’t “steaming” in its own juices, which could make the outer crust soggy.- Pro Tip: Don’t cover the roast too tightly with foil, as this can trap moisture and cause the crust to lose its crispness. A light covering will allow some air circulation while still retaining warmth.
- Resting on a Rack or Cutting Board:
Rest your roast on a wire rack or a cutting board. If using a rack, the juices will pool underneath, allowing the beef to stay elevated, so it doesn’t sit in the juices and become soggy. If you rest it on a cutting board, tilt it slightly so the juices run off, allowing the roast to maintain its crispy exterior. - Resting for Larger Cuts:
For very large roasts (5 pounds or more), consider resting it for a little longer (15-20 minutes), as the larger mass will retain more heat. This longer resting time will give the juices more time to redistribute without the meat cooling too much. - Use a Thermometer:
Remember that the internal temperature of the roast will continue to rise during the resting period. This is called carryover cooking. So, if you’re aiming for medium-rare roast beef at 130°F (54°C), you can remove it from the oven when the internal temperature is about 5°F (2-3°C) lower than your target. The rest time will allow the roast to reach the final desired temperature.
3. Impact on Carving: Slicing After Resting
Once the roast has had enough time to rest, it’s time to carve. Resting the beef has a major impact on how you carve and how well the slices hold together. If you cut into the roast too soon, you’ll notice that the slices might fall apart or become stringy, as the juices haven’t had time to settle into the meat.
- Slicing Against the Grain:
When carving your roast beef, it’s important to slice against the grain (the direction of the muscle fibers) to ensure the meat is tender and easy to chew. This is especially true for tougher cuts like chuck roast. Slicing against the grain makes the fibers shorter, which results in a more tender bite. - Juicy Slices:
When you rest the roast, the juices have time to redistribute across the entire roast, ensuring that each slice is flavorful and moist. Without this process, the outer slices will dry out, leaving them less juicy and flavorful than the center cuts. - Pro Tip: Once your roast is rested and sliced, you can drizzle the resting juices over the slices for an added burst of flavor and moisture. These juices are packed with concentrated beef flavor and will enhance each bite.
4. Resting and Larger Cuts of Meat:
If you’re preparing a prime rib roast, brisket, or any other large, bone-in cut, the resting period becomes even more crucial. Larger cuts have a higher density and take longer to cook through, so they require more time to relax and redistribute their juices. Resting these larger cuts for 20-30 minutes helps ensure that the roast is tender, juicy, and easy to slice.
- Prime Rib and Brisket:
A prime rib roast or brisket can sometimes benefit from a longer resting time, especially after slow roasting or if it was cooked low and slow for several hours. You’ll want to make sure you give it enough time to cool down slightly so that the fibers can fully relax, making every slice easier to carve and more flavorful.
Conclusion: The Key to a Juicy, Tender Roast Beef
Resting your roast beef is not just a step—it’s an essential part of the cooking process that ensures the final product is as juicy, tender, and flavorful as possible. By allowing the meat to rest, you give it the time it needs to redistribute its juices and settle into the perfect texture. So, next time you’re cooking roast beef, don’t skip this crucial step—your patience will be rewarded with a roast that’s nothing short of perfection.
Serving Roast Beef Like a Pro
Classic Side Dishes: Mashed Potatoes, Roasted Vegetables, and Yorkshire Pudding
When serving a roast beef meal, the sides are just as important as the main event. A well-rounded plate enhances the flavor of the beef and provides a satisfying balance of textures and tastes. Classic side dishes like mashed potatoes, roasted vegetables, and Yorkshire pudding are timeless companions for roast beef. These dishes not only complement the rich flavors of the beef but also provide variety and depth to the overall meal. In this section, we’ll explore why these classic sides work so perfectly with roast beef and how to prepare them.
1. Mashed Potatoes: Creamy Comfort with a Savory Twist
Mashed potatoes are perhaps the most beloved side dish to pair with roast beef, offering a creamy and smooth texture that contrasts wonderfully with the tender, flavorful meat. The starchiness of potatoes acts as a perfect base, absorbing the savory juices and gravies from the roast, which elevates the flavor profile of the dish.
- Why It Works with Roast Beef:
Mashed potatoes offer a mild and creamy backdrop that doesn’t overpower the beef. The buttery richness of the potatoes pairs beautifully with the savory umami of the roast. As a side, mashed potatoes provide both a smooth texture and the ability to soak up the rich flavors of any drippings or gravy. - Preparation Tips:
- Choose the Right Potatoes: Opt for Yukon Gold or Russet potatoes for the best texture. Yukon Golds are naturally creamy, while Russets offer a fluffier, more starchy texture, perfect for mashing.
- Flavoring Options: While classic mashed potatoes are made with butter, milk, and salt, feel free to add a twist by incorporating roasted garlic, chives, or parmesan cheese to give extra layers of flavor.
- Make-Ahead Tip: Mashed potatoes can be made ahead of time and kept warm in a slow cooker or oven with a little extra milk and butter stirred in before serving. This ensures that they stay fluffy and creamy.
2. Roasted Vegetables: A Colorful, Flavorful Addition
Roasted vegetables are a fantastic way to add texture, color, and nutritional balance to your roast beef meal. The natural sweetness of the vegetables is enhanced through roasting, which caramelizes their natural sugars, giving them a deeper, richer flavor that complements the savory roast beef.
- Why It Works with Roast Beef:
Roasted vegetables provide a crunchy, slightly charred contrast to the tender beef. The caramelization from roasting adds sweetness and earthiness that pairs perfectly with the savory umami of roast beef. Vegetables like carrots, parsnips, and Brussels sprouts add a satisfying bite and a vibrant contrast on the plate. - Popular Vegetables to Roast:
- Carrots and Parsnips: These root vegetables become naturally sweet when roasted, offering a great balance to the rich beef. Toss them with olive oil, salt, pepper, and a sprinkle of thyme or rosemary for extra flavor.
- Brussels Sprouts: These tiny cabbages, when roasted, develop a crispy outer layer and a tender center. Toss them with olive oil and balsamic vinegar for a hint of tang.
- Potatoes and Sweet Potatoes: These versatile root vegetables can be roasted alongside carrots and parsnips to create a hearty and filling side dish.
- Preparation Tips:
- Cut Vegetables Evenly: To ensure they cook uniformly, cut all vegetables into similar-sized pieces.
- Toss with Olive Oil and Seasoning: Use high-quality olive oil, salt, and pepper for a simple and flavorful roast. You can also add garlic, herbs, or a touch of honey to enhance the flavors.
- Roast at High Heat: Roast the vegetables at 400°F (204°C) for around 30-45 minutes, depending on the size of the pieces, until they are golden brown and tender.
3. Yorkshire Pudding: A British Classic That Complements Roast Beef
No traditional roast beef dinner is complete without Yorkshire pudding, a fluffy, savory pastry that’s a beloved side in British cuisine. Despite being called a “pudding,” it’s actually more like a popover or savory pancake, made from a simple batter of flour, eggs, and milk. It’s baked in a hot pan with drippings from the roast, resulting in a crispy, golden exterior with a soft, airy interior.
- Why It Works with Roast Beef:
Yorkshire pudding serves as the perfect vessel for soaking up the flavorful roast beef drippings and gravy. The crispy outer layer provides a satisfying contrast to the tender, juicy beef, while the inside remains light and airy. The addition of the rich drippings from the roast adds an extra layer of flavor, making each bite of pudding a delicious accompaniment to the beef. - History and Tradition:
Yorkshire pudding originates from the Yorkshire region of England, where it was traditionally served as a cheap and filling dish before the main meat course. It was originally made to soak up the juices from the roast meat, making it a practical and delicious addition to any roast dinner. - Preparation Tips:
- Use the Right Pan: Yorkshire pudding is best made in a muffin tin or a roast pan with enough room for the batter to rise and expand. You’ll want a pan that is hot before adding the batter to ensure it rises properly.
- Preheat the Pan with Drippings: After roasting your beef, pour some of the drippings into the hot pan and place it in the oven for a few minutes to heat up. Then, pour in the batter and bake at 425°F (220°C) for about 20-25 minutes or until golden brown and puffed up.
- Serve Immediately: Yorkshire pudding is best served fresh and hot, straight from the oven, so it retains its airy texture and crispy edges.
How to Serve These Sides with Roast Beef
Now that you have the perfect mashed potatoes, roasted vegetables, and Yorkshire pudding, it’s time to plate your meal. A well-plated dish doesn’t just look good—it also enhances the dining experience.
- Serve the Beef on a Warm Plate: Always place the sliced roast beef on a warm plate to keep it at the optimal serving temperature.
- Drizzle with Gravy: If you’ve made gravy from the roast drippings, drizzle it over the beef or serve it on the side for dipping. This will enhance the overall flavor and tie the entire plate together.
- Arrange Sides Around the Roast: Place a generous helping of mashed potatoes on one side, and arrange the roasted vegetables and Yorkshire pudding on the other. This creates a balanced plate with complementary flavors and textures.
Conclusion: Perfect Pairings for a Classic Roast Beef Meal
The combination of mashed potatoes, roasted vegetables, and Yorkshire pudding provides a harmonious and flavorful accompaniment to any roast beef dish. These classic sides not only elevate the flavor of the beef but also add variety and depth to the overall meal. Whether you’re preparing a Sunday roast for family or hosting a special dinner, these timeless dishes are sure to please your guests and make your roast beef dinner unforgettable.
Making the Perfect Gravy: Using Pan Drippings for a Rich Sauce
Gravy is the crowning touch that can elevate a roast beef dinner to new heights. The secret to a truly delicious gravy lies in using the pan drippings from the roast beef itself. These drippings are full of flavor and contain all the rich, savory goodness of the beef, making them the perfect base for a flavorful sauce. In this section, we’ll explore how to make the perfect gravy using pan drippings, with tips and tricks to ensure it’s rich, smooth, and perfectly seasoned.
1. Why Use Pan Drippings for Gravy?
Pan drippings are the liquid and fats that accumulate in the roasting pan while cooking the beef. They’re essentially the concentrated flavors of the roast, including juices, fats, and any seasonings used to flavor the meat. When properly incorporated into a gravy, these drippings create a rich, flavorful sauce that perfectly complements the roast.
- Flavor Profile: The drippings are infused with the natural flavors of the roast, including beefy umami, herb notes from seasonings like rosemary, thyme, or garlic, and the caramelized sweetness of any vegetables cooked alongside the roast. These flavors form the base of a gravy that’s full of depth and complexity.
- Richness: The fat in the drippings contributes to a velvety, luscious texture. The fat helps create a smooth mouthfeel and carries the flavors throughout the sauce, making each bite of gravy indulgent and satisfying.
- No Waste: Using the drippings ensures that no part of the roast is wasted. By utilizing the leftover juices, you’re enhancing the flavors of the meal and maximizing the potential of your ingredients.
2. Straining and Preparing the Drippings
Before you can turn the pan drippings into gravy, you need to prepare them properly. This step ensures that your gravy is smooth and free from any undesirable bits like burnt bits or herb stems that might have been left behind during roasting.
- Remove the Roast from the Pan: After your roast beef has finished cooking and has rested, carefully remove it from the pan. Set it aside and keep it covered to retain its warmth.
- Drain the Drippings: Pour the drippings from the roasting pan into a separate container, leaving behind any solid bits that may have stuck to the pan. You can use a fine mesh strainer or cheesecloth to filter out any herb stems, onions, or roast remnants that may not be desirable in the gravy.
- Deglaze the Pan (Optional): If there are flavorful bits stuck to the bottom of the pan (called fond), use a small amount of liquid like beef broth, wine, or water to deglaze the pan. Simply pour the liquid into the hot pan and scrape the fond with a wooden spoon to release the flavor. This step will give the gravy an extra layer of depth and complexity.
3. Thickening the Gravy: Roux vs. Cornstarch
Now that you have your drippings and deglazed bits, the next step is to thicken the gravy to your desired consistency. There are two main methods for thickening gravy: using a roux or cornstarch slurry. Both methods are effective, but they result in slightly different textures.
- Roux (Butter and Flour):
A roux is made by cooking equal parts of butter and flour together until the mixture becomes smooth and bubbly. The roux helps to thicken the gravy and gives it a rich, velvety texture. It also contributes to a deeper flavor, as cooking the flour with the butter until golden creates a slight nutty flavor that complements the beef.- How to Make a Roux for Gravy:
- Melt 2-3 tablespoons of butter in a saucepan over medium heat.
- Stir in 2 tablespoons of flour, whisking continuously to combine.
- Cook the mixture for 1-2 minutes until it turns golden and slightly fragrant, ensuring that the flour doesn’t taste raw.
- Slowly pour in the deglazed drippings or broth, whisking constantly to avoid lumps. Continue to cook until the gravy thickens to your desired consistency.
- How to Make a Roux for Gravy:
- Cornstarch Slurry (Quick Option):
If you prefer a faster method or need a gluten-free option, a cornstarch slurry is a great alternative. Simply mix cornstarch with a little cold water to create a slurry, and then stir it into the hot drippings or broth. This method results in a smooth, glossy gravy with a lighter texture, though it won’t have the depth of flavor that a roux provides.- How to Make a Cornstarch Slurry for Gravy:
- Mix 1 tablespoon of cornstarch with 2 tablespoons of cold water until smooth.
- Slowly add the cornstarch slurry to the hot pan drippings or broth while whisking constantly.
- Allow the mixture to simmer for 1-2 minutes until it thickens.
- How to Make a Cornstarch Slurry for Gravy:
4. Seasoning the Gravy: Balancing Salt, Pepper, and Other Flavors
Once the gravy has thickened to your liking, it’s time to season it. While the pan drippings will already provide a rich, savory base, you may need to adjust the flavors to your preference.
- Salt and Pepper:
The first step in seasoning the gravy is to add salt and black pepper to taste. Since the pan drippings may already contain salt, be sure to taste the gravy before adding too much. Start with a pinch of salt and a few cracks of black pepper, then taste and adjust as needed. - Beef Broth:
If the gravy is too thick or the flavor is too intense, you can thin it out with beef broth or water. Adding a splash of beef broth also enhances the beefy richness of the gravy, making it even more flavorful. - Herbs and Flavor Enhancers:
- A small amount of fresh thyme, rosemary, or bay leaves can be added to the gravy to bring out the savory, herbal notes in the roast beef. If you didn’t already cook the roast with these herbs, you can add them now, letting the gravy simmer for a few minutes to infuse the flavors.
- If you want a slight tang or additional depth, consider adding a splash of red wine, balsamic vinegar, or Worcestershire sauce. A small amount of mustard or garlic powder can also be used to boost the savory flavor profile.
- Taste and Adjust:
Always taste your gravy before serving, and adjust the seasoning as necessary. You may find that a little more salt, pepper, or broth is required to get it just right. If the gravy is too salty, you can add a bit more liquid to balance it out.
5. Serving the Gravy
Once your gravy is perfectly seasoned and the right consistency, it’s time to serve. Pour the gravy into a gravy boat or a serving dish and serve alongside your roast beef, mashed potatoes, and other sides. The gravy should be hot and ready to pour over the roast beef or mashed potatoes, or served on the side for dipping.
- Drizzling the Gravy:
A light drizzle of gravy over your roast beef adds moisture and flavor, making each bite more enjoyable. For mashed potatoes, the gravy will add a luscious richness, while roasted vegetables can also be enhanced with a splash of this savory sauce.
Conclusion: The Perfect Gravy Completes the Meal
Making the perfect gravy from pan drippings is a key step in ensuring that your roast beef dinner is nothing short of exceptional. By utilizing the flavors of the drippings, carefully thickening the sauce, and seasoning it to perfection, you can create a rich and flavorful gravy that will elevate your roast beef and sides. With these tips, you’ll be able to make a gravy that’s smooth, savory, and the perfect accompaniment to your delicious roast beef.
Plating Tips: Presenting Roast Beef in an Elegant, French-Inspired Way
The presentation of your roast beef is as important as the flavor, especially when aiming for an elegant, French-inspired dining experience. The French have mastered the art of beautifully plated dishes that not only taste divine but look visually stunning as well. By using simple yet sophisticated techniques, you can elevate your roast beef presentation and impress your guests. In this section, we’ll explore various plating tips to help you present your roast beef in an elegant way, inspired by classic French culinary aesthetics.
1. Use a Beautiful, Wide Plate or Platter
In French cuisine, plating typically involves using a wide, clean plate or a large platter to give the dish room to “breathe” and showcase the ingredients. The goal is to create a composition that looks as if each element has been thoughtfully arranged, rather than crowded together.
- Platter vs. Plate:
For larger roast beef cuts, consider serving the roast on a large, elegant platter instead of individual plates. This allows the roast beef to take center stage, with plenty of space around it for garnishes, side dishes, and sauces. It also provides the opportunity for guests to carve their own portions, which adds an interactive element to the meal. - Symmetry vs. Asymmetry:
French plating often plays with both symmetry and asymmetry, depending on the mood you want to evoke. For a more formal setting, go for symmetry, placing the roast beef in the center of the plate. For a more rustic yet sophisticated touch, asymmetrical arrangements work well, where the beef is placed off-center with sides scattered artistically around it.
2. Use Garnishes and Accents for Color and Texture
French-inspired plating emphasizes the use of color and texture to make the dish visually appealing. Garnishes should complement the flavor profile of the roast beef while adding a pop of color and texture to the plate.
- Fresh Herbs:
Fresh herbs like thyme, rosemary, parsley, or chives are classic French garnishes that add color, fragrance, and a touch of elegance. Scatter finely chopped herbs across the plate or place a sprig of rosemary or thyme on top of the roast beef for a fragrant, green accent. - Vegetables for Color:
Adding vibrant vegetables such as roasted carrots, glazed shallots, green beans, or grilled asparagus not only complements the richness of the roast beef but also adds visual contrast. Arrange them neatly beside or around the roast beef, allowing their colors to brighten the plate. - Edible Flowers:
For a truly elevated touch, consider using edible flowers like nasturtiums or violets. They add a delicate, colorful element that screams elegance. Be sure to use them sparingly to maintain balance on the plate.
3. Saucing Techniques: A French Classic
The sauce is a crucial part of French plating, and how you present it can enhance the overall look and taste of your dish. In French cuisine, sauces are often presented in a delicate yet artful manner, whether drizzled, pooled, or served on the side.
- Drizzle the Sauce:
For a clean and modern French presentation, drizzle a bit of your rich gravy or au jus sauce lightly over the roast beef. Use a squeeze bottle or a spoon to control the amount and direction of the sauce, creating elegant lines or a soft, fluid pattern on the plate. - Pooled Sauce:
Another classic French technique is to pool the sauce underneath or around the meat. This method is especially useful for thicker gravies or sauces like béarnaise or red wine reduction. Pour the sauce into a small circle on the plate and place the roast beef gently on top, allowing the sauce to create a “frame” for the meat. - On the Side:
If you prefer to keep the roast beef unadorned with sauce, you can serve the sauce in a small gravy boat on the side. This allows guests to add as much or as little sauce as they desire and maintains a clean presentation.
4. Portion Control: Slice the Roast Neatly
One of the defining characteristics of a French-inspired roast beef plate is neat, precise slices of the roast. French chefs often use thin slices to allow the texture and tenderness of the beef to shine, giving it a refined appearance.
- Carve with Care:
Use a sharp carving knife to slice the roast beef against the grain into uniform, thin slices. This not only makes the meat easier to eat but also enhances the visual appeal of the dish. Ensure the slices are neatly arranged, fanned out or stacked slightly for a sophisticated look. - Layering or Fan Slicing:
To add depth to the presentation, you can layer or fan out the sliced roast beef. Fanned slices where each slice is slightly overlapping in a circular or semi-circular shape can make the meat look more elegant and well-thought-out. Alternatively, stacking the slices in a slight pyramid shape can also create a modern, clean look.
5. Plate with Complementary Sides
French-inspired roast beef presentations often include a small but elegant arrangement of sides. The sides should not overshadow the roast beef but rather complement its flavors, textures, and colors. Aim for simple yet refined sides that enhance the meal without making the plate feel too crowded.
- Delicate Portions:
French plating often uses smaller portions of side dishes, arranged carefully on the plate next to the roast. For example, place a small mound of mashed potatoes with a sprig of thyme or a few roasted vegetables in an artful, scattered manner around the beef. - Elegant Side Dishes:
French-inspired side dishes like roasted fingerling potatoes, caramelized onions, green beans amandine, or a light ratatouille are perfect for accompanying roast beef. These should be arranged in clean lines, small groups, or slightly overlapping, ensuring the focus remains on the meat.
6. Final Touches for the Perfect French Plating
French-inspired plating focuses on elegance, precision, and balance. To complete the presentation, add a few final touches that elevate the dish:
- A Sprinkle of Sea Salt:
Just before serving, finish the plate with a sprinkle of flaky sea salt or freshly cracked black pepper. This small addition will not only enhance the flavor but also add a subtle texture that pops against the smoothness of the gravy and sides. - Elegant Serveware:
Consider using elegant, vintage china or polished silver serving utensils to create an upscale dining atmosphere. The presentation of the serveware itself can elevate the entire meal experience, creating a luxurious feel even before the first bite. - Final Garnish:
For a touch of freshness and color, add a few sprigs of fresh herbs or a light zest of lemon over the top of the beef or sides. This adds a burst of brightness and makes the dish appear even more refined.
Conclusion: French Elegance on the Plate
Plating your roast beef in a French-inspired manner transforms an everyday meal into a gourmet dining experience. By carefully selecting the right plate, using complementary garnishes, and applying French-style saucing techniques, you’ll create an elegant and visually striking dish that’s sure to impress. The key to success is balance—ensuring that each element enhances the flavor of the beef while contributing to a beautiful, cohesive presentation. By incorporating these techniques into your roast beef plating, you’ll be able to present your dish in a sophisticated, French-inspired way that reflects the culinary artistry of France.
Wine Pairings with Roast Beef: Recommendations for a Complete Meal Experience
Pairing wine with roast beef is an art that enhances the flavors of both the meat and the wine, creating a harmonious dining experience. When selecting the perfect wine to complement your roast beef, consider factors such as the cut of the meat, seasoning, and cooking method. Whether you’re serving a succulent ribeye, a tenderloin, or a flavorful sirloin, the right wine can elevate the meal to new heights. French cuisine has long been known for its expertise in food and wine pairings, and by following some general guidelines, you can achieve a perfect pairing for your roast beef.
1. Bold Red Wines: The Classic Choice
When it comes to pairing wine with roast beef, bold red wines are often the best choice due to their robust flavor profile, which balances well with the richness and savory taste of the meat. The tannins in red wines help cut through the fat in the beef, creating a smoother texture and more refined taste.
- Cabernet Sauvignon:
Cabernet Sauvignon is one of the most popular red wine choices for roast beef. Its full-bodied nature and high tannin content make it the perfect match for fatty cuts like ribeye or sirloin. This wine’s dark fruit flavors, along with hints of blackberry, currant, and plum, pair wonderfully with the charred exterior of the roast, enhancing its natural flavors. - Merlot:
If you prefer a softer, rounder red wine, Merlot is an excellent choice. With its smooth texture, lower tannin levels, and flavors of black cherry, chocolate, and plum, Merlot complements the richness of roast beef without overwhelming the palate. This wine works well with leaner cuts like tenderloin or even filet mignon. - Malbec:
Malbec, a bold red from Argentina, is known for its dark fruit and smoky notes, which pair beautifully with roast beef. This wine’s spicy finish also brings out the savory flavors in beef, making it a perfect match for cuts with a good amount of fat and seasoning, such as a ribeye roast or prime rib.
2. French Red Wines for an Authentic Experience
For those seeking a more French-inspired experience, there are numerous wines from France that pair superbly with roast beef. These wines often feature a combination of herbaceous and earthy notes that complement the depth of flavors in the meat.
- Bordeaux (Left Bank):
Wines from the Left Bank of Bordeaux, which are often blends of Cabernet Sauvignon and Merlot, are classic choices for roast beef. These wines are known for their structure, tannins, and complex flavors of dark fruit, tobacco, and leather. They are a fantastic choice for cuts like ribeye and prime rib, especially when roasted with herbs and spices. - Côtes du Rhône:
Côtes du Rhône wines are typically blends of Grenache, Syrah, and Mourvèdre, offering a rich and aromatic profile with flavors of blackberry, spices, and smoke. This wine is an excellent choice for roast beef that has been seasoned with herbs like thyme or rosemary. The slightly peppery finish pairs well with the caramelized crust of the roast. - Châteauneuf-du-Pape:
If you’re seeking a luxurious wine for a special occasion, Châteauneuf-du-Pape is a top-tier French option. This wine is a blend of several grape varieties, including Grenache, Syrah, and Mourvèdre, and offers a full-bodied structure with flavors of dark fruit, spices, and earthy undertones. It pairs well with hearty cuts like roast rib of beef or prime rib, making it a perfect choice for an extravagant dinner.
3. Lighter Reds for Leaner Cuts
If you’re serving a leaner cut of roast beef, such as tenderloin or filet mignon, a lighter red wine may be a better option. These wines won’t overpower the delicate flavors of the meat and will allow the subtle and refined taste of the beef to shine through.
- Pinot Noir:
Pinot Noir is a lighter-bodied red that works wonderfully with lean cuts of roast beef. Its bright acidity and flavors of red fruit (like cherry and raspberry) create a refreshing contrast to the rich beef, making it an excellent match for filet mignon or roast beef tenderloin. The subtlety of Pinot Noir also pairs well with herb-seasoned beef, adding a layer of freshness without overwhelming the dish. - Chianti Classico:
A well-balanced Chianti Classico, made primarily from Sangiovese, is another lighter red that pairs beautifully with roast beef, especially when it’s seasoned with garlic or rosemary. The wine’s acidity helps cut through the fattiness of the meat, and its notes of cherry, earth, and spice complement the savory flavors of the beef.
4. The Role of White Wines
While red wines are the go-to choice for most roast beef dishes, there are some exceptional white wines that can complement certain roast beef preparations, especially those with lighter seasonings or accompanied by a creamy sauce.
- Chardonnay (Oaked):
A rich, oaked Chardonnay can complement roast beef in a creamy sauce or with sides like creamy mashed potatoes. The wine’s buttery texture and flavors of citrus, vanilla, and oak balance well with the savory richness of the meat, especially when the beef is roasted with garlic or butter. - Gewürztraminer:
For a more adventurous pairing, Gewürztraminer offers a spicy and aromatic profile that pairs well with roast beef seasoned with spices or accompanied by a spicy sauce. The wine’s floral notes and slightly sweet finish complement the intensity of the beef without overshadowing the flavor.
5. Practical Pairing Tips
- Match the Intensity:
The intensity of the wine should match the flavor profile of the roast beef. Bold, fatty cuts of roast beef like ribeye or prime rib are best paired with fuller-bodied wines like Cabernet Sauvignon or Bordeaux, while leaner cuts like tenderloin can be complemented by lighter wines like Pinot Noir or Chianti. - Consider the Seasoning:
The herbs and seasonings used in your roast beef will also influence the wine pairing. For example, if your roast is seasoned with rosemary or garlic, consider pairing it with a Herbaceous wine like Cabernet Sauvignon or Syrah, which can bring out the herbal notes. - Serving Temperature:
Serve your red wines at a slightly cooler temperature than room temperature—around 60-65°F (15-18°C). This helps preserve the wine’s structure and acidity, allowing it to better complement the roast beef.
Conclusion: A Perfect Pairing for Every Palate
The right wine can enhance your roast beef meal by highlighting its rich flavors, complementing its seasoning, and creating a well-rounded dining experience. Whether you’re enjoying a bold red, a French classic, or even an unexpected white wine, each pairing brings out a unique aspect of the roast beef. With these wine recommendations in hand, you can confidently select the best wine for your roast beef, ensuring your meal is both flavorful and unforgettable.
Tips and Tricks for the Perfect Roast Every Time
Avoiding Common Mistakes: Overcooking, Under-Seasoning, and Improper Resting
When preparing roast beef, there are several common mistakes that can significantly impact the final result. These mistakes often arise from not paying attention to the finer details, such as the cooking process, seasoning, and resting time. By avoiding these common pitfalls, you can ensure that your roast beef is flavorful, juicy, and cooked to perfection every time.
1. Overcooking the Roast: The Key to Juiciness
Overcooking roast beef is one of the most common and disappointing mistakes. While it might seem tempting to cook your roast for longer to ensure it’s done, doing so can lead to a dry, tough, and flavorless roast. The key to avoiding this is to keep a close eye on the internal temperature of the meat.
- Use a Meat Thermometer:
The most reliable way to avoid overcooking is by using a meat thermometer. Different cuts of beef require different internal temperatures, and cooking beyond the recommended temperature can cause the beef to lose its moisture and tenderness. For example:- Rare: 120–125°F (49–52°C)
- Medium-Rare: 130–135°F (54–57°C)
- Medium: 140–145°F (60–63°C)
- Medium-Well: 150–155°F (66–68°C)
- Well-Done: 160°F (71°C) and above
- Rest the Meat Properly:
Resting the roast (more on this later) also plays a crucial role in ensuring the meat doesn’t overcook after it has been removed from the oven. Without resting, the juices in the meat will not redistribute evenly, leading to dryness and a less tender texture.
2. Under-Seasoning: Let the Flavor Shine
Another mistake many people make when cooking roast beef is under-seasoning. Beef, particularly larger cuts, has a naturally rich and robust flavor, but without the right seasoning, that flavor can be muted or bland.
- Generous Seasoning:
To enhance the natural taste of the beef, you need to season it well before cooking. Salt and freshly ground black pepper are the foundation of your seasoning, but herbs and spices should also be used to bring out additional layers of flavor. Classic combinations include:- Thyme, rosemary, and garlic for a traditional, savory seasoning.
- Mustard or paprika for a bit of tang or smoky flavor.
- Seasoning Ahead of Time:
Seasoning the beef at least 1 hour before roasting, or even overnight, allows the flavors to penetrate deeper into the meat. This process is known as dry brining, and it also helps the beef retain moisture during cooking, ensuring a juicy roast. - Don’t Forget the Crust:
Many people only season the interior of the meat, but the exterior should also be generously coated. The outer crust of the roast will caramelize as it cooks, and this crust is packed with flavor. Be sure to massage the seasoning into the entire surface of the beef.
3. Improper Resting: Why It’s Crucial to Let the Roast Sit
One of the most critical steps in cooking roast beef is letting the roast rest after it comes out of the oven. If you skip this step, you may end up with a roast that’s tough, dry, and not as flavorful as it could be.
- Why Resting Is Important:
As the beef cooks, the juices inside the meat move towards the center. If you cut into the roast immediately after it’s removed from the oven, the juices will spill out, leading to a dry roast. Resting allows the meat’s juices to redistribute evenly throughout the roast, ensuring each slice is moist and tender. - How Long Should You Rest the Roast?:
As a general rule of thumb, let your roast beef rest for 10-15 minutes. The larger the roast, the longer the resting time should be. For example, a large prime rib might need closer to 20 minutes. This resting time also helps the roast continue cooking slightly, reaching its ideal internal temperature. - Covering the Roast:
To maintain warmth while the beef rests, tent it loosely with aluminum foil. This will help keep the heat in without trapping too much steam, which can cause the crust to become soggy.
4. The Right Cooking Method: Avoiding Mistakes with Roasting and Searing
When roasting beef, a common mistake people make is not using the correct cooking method or pan. For example, some people make the error of using a shallow pan that doesn’t allow the roast to cook evenly, leading to an uneven texture.
- Roasting Pan:
A heavy-duty roasting pan is your best friend when cooking roast beef. It should be large enough to allow the beef to sit comfortably without crowding. This ensures even cooking. Additionally, consider using a rack to elevate the roast, which promotes even airflow and allows the fat to render off. - Searing the Meat:
Searing your roast before placing it in the oven helps develop a flavorful crust, but this must be done correctly. High heat is essential to achieve a good sear, and you should avoid overcrowding the pan. Make sure the oil is hot before adding the meat to the pan to ensure it doesn’t stick.
Conclusion: Perfecting Your Roast Beef Every Time
Avoiding these common mistakes—overcooking, under-seasoning, and improper resting—is essential for achieving a perfect roast beef every time. By monitoring the temperature carefully, seasoning the beef generously, and giving it time to rest, you’ll ensure that your roast beef is both juicy and full of flavor. By paying attention to the small details and refining your technique, you’ll be able to master the art of roasting beef and impress your guests with a flawless dish every time.
Adjusting for Different Cuts: Tailoring Your Technique to the Beef You Have
When it comes to roast beef, one of the most important aspects to consider is the cut of beef you’re working with. Different cuts vary in texture, fat content, and cooking time, and each requires specific preparation and cooking methods to ensure the best results. Tailoring your technique to the specific cut can elevate the flavor and tenderness of your roast, making it a standout dish every time.
1. Understanding the Key Cuts for Roasting
- Ribeye:
Ribeye is one of the most popular and flavorful cuts of beef, known for its marbling and tenderness. It comes from the rib section, making it rich in fat, which results in a juicy, flavorful roast. Because of its tenderness, ribeye can be roasted at a higher temperature to develop a crispy crust while keeping the interior juicy. You can sear the ribeye first to enhance flavor before transferring it to the oven. - Sirloin:
Sirloin is a leaner cut, but it is still relatively tender. This cut benefits from slower, more even roasting. Unlike ribeye, it doesn’t have the same marbling, so it’s essential to monitor the cooking temperature closely to avoid overcooking and drying it out. Sirloin is a great choice for those who prefer a more lean roast with a slightly firmer texture. Consider marinating sirloin for added moisture and flavor before roasting. - Tenderloin:
Tenderloin is the most tender cut of beef, and it’s a fantastic choice for those seeking a more refined, melt-in-your-mouth texture. It’s less fatty than ribeye but still retains a good amount of flavor when cooked properly. Tenderloin typically requires less cooking time due to its fine texture, so it’s essential to cook it at a lower temperature to prevent it from becoming dry. A quick sear on all sides will help form a nice crust, but the key to perfect tenderloin is careful monitoring of the internal temperature to avoid overcooking. - Chuck Roast:
Chuck roast comes from the shoulder area of the cow, and it’s a tougher cut that benefits from slow, low-and-slow roasting methods. Since chuck roast is rich in connective tissue, it requires a longer cook time to break down and become tender. This cut is often used in recipes that call for pot roasts, where the meat is cooked for several hours at low temperatures. The long cooking time allows the flavors to develop and results in a tender, juicy roast. - Brisket:
Brisket is another cut that needs low and slow cooking to achieve optimal tenderness. This cut comes from the breast or lower chest area of the cow and is known for its tough texture. For perfect brisket, you’ll want to use a slow-roasting technique and cook it at a low temperature for several hours. Many chefs recommend braising brisket, which involves cooking it in liquid to retain moisture and add flavor. The long cooking process will break down the tough fibers, creating a delicious, melt-in-your-mouth experience.
2. How to Adjust Cooking Techniques for Different Cuts
- For Lean Cuts (Sirloin, Tenderloin, Flank):
Lean cuts require more careful attention to avoid drying out during the roasting process. These cuts benefit from medium heat to ensure that the meat cooks evenly without losing too much moisture. Marinating these cuts beforehand can also help to retain moisture and enhance flavor. While lean cuts don’t need as much time in the oven as fattier cuts, they should be closely monitored with a meat thermometer to ensure they reach the desired doneness without overcooking. - For Fattier Cuts (Ribeye, Chuck, Brisket):
Fattier cuts, such as ribeye or chuck, benefit from higher heat to develop a crispy exterior and keep the interior juicy. These cuts are more forgiving and can be cooked at higher temperatures for shorter periods, as the fat will keep the roast moist. Additionally, consider searing the fat cap first to allow it to render and create a flavorful, golden crust. Roasting at a high temperature also helps caramelize the natural sugars in the fat, adding complexity to the roast’s flavor profile. - For Tougher Cuts (Chuck, Brisket, Round):
Tougher cuts require a slow-roasting technique, often combined with moist heat, to break down the collagen and fibers in the meat. Low and slow cooking is essential for cuts like chuck roast and brisket. The key is to cook them at a low temperature (typically around 250-275°F or 120-135°C) for several hours. Braising these cuts, where you add some liquid (like beef broth or wine) to the pan and cook it in a covered environment, can significantly improve tenderness and flavor. - For Smaller Cuts (Tenderloin, Ribeye Steak, Filet Mignon):
Smaller cuts like tenderloin or ribeye steak don’t require as much cooking time and are best roasted at high heat. These cuts are usually cooked to medium-rare or medium to preserve their tenderness. It’s important to preheat the oven before roasting these cuts to ensure even cooking and a perfect sear.
3. Adapting Your Cooking Time Based on Size
The size of the roast will also affect the cooking method. Larger cuts of beef require more time in the oven to cook evenly, while smaller cuts, like tenderloin or ribeye steaks, cook quickly. It’s essential to adjust your cooking time based on the size of the roast.
- Smaller Roasts:
For smaller cuts like filet mignon or ribeye steaks, roasting times are usually shorter—typically 25-30 minutes for a medium-rare roast. Always keep an eye on the internal temperature to ensure you achieve your desired doneness. - Larger Roasts:
For larger cuts, such as a prime rib or brisket, you’ll need more time to roast. Typically, these larger cuts can take anywhere from 1 to 3 hours to cook, depending on size. For best results, use low heat to ensure even cooking without drying out the meat.
4. Adjusting for Marbling and Fat Cap
When cooking different cuts of beef, it’s important to consider the marbling (fat within the meat) and the fat cap (the layer of fat on the outside of the roast).
- Marbling:
Cuts like ribeye and sirloin have more intramuscular fat (marbling), which will render during roasting, keeping the meat juicy and adding flavor. These cuts can handle high heat and shorter cooking times, as the marbled fat will prevent the meat from drying out. - Fat Cap:
Cuts like prime rib or brisket may have a thick fat cap, which should be left intact during cooking. The fat cap helps keep the meat moist during roasting and can be scored (lightly cut) to allow the fat to render and crisp up. For these cuts, you may choose to cook the beef fat-side up to allow the fat to melt and baste the meat during the roasting process.
Conclusion: Mastering Roast Beef with Tailored Techniques
Tailoring your technique to the cut of beef you have is key to achieving a perfect roast. Understanding the specific characteristics of different cuts—whether they’re lean, fatty, tough, or tender—will help you adjust your cooking methods for optimal results. By choosing the right technique and paying attention to factors like marbling, fat content, and size, you can ensure that every cut of beef is cooked to perfection, delivering a juicy, flavorful roast every time.
Storing and Reheating Leftovers: How to Maintain Flavor and Moisture
Leftover roast beef can be just as delicious the next day as it was when freshly cooked—if stored and reheated properly. One of the biggest challenges with roast beef leftovers is ensuring that they don’t become dry or tough. The key to preserving the flavor, moisture, and tenderness of your roast beef is all about the right storage techniques and reheating methods.
1. Properly Storing Leftover Roast Beef
Storing your leftover roast beef correctly is the first step in maintaining its quality. The goal is to lock in moisture and prevent any bacterial growth, which can happen if the beef isn’t stored properly.
- Cool Down Quickly:
Before storing your roast beef, allow it to cool at room temperature for no more than 2 hours (or 1 hour if the room temperature is above 90°F/32°C). This step helps prevent the growth of harmful bacteria. After cooling, store the leftovers in an airtight container or resealable plastic bag to minimize exposure to air, which can cause the meat to dry out. - Refrigeration:
Place the cooled roast beef in the refrigerator as soon as possible. Ideally, you should store it in the coldest part of the fridge to keep it at a safe temperature of 40°F (4°C) or lower. Leftover roast beef can typically be stored in the fridge for 3-4 days. - Freezing Leftovers:
If you have a lot of leftovers and don’t think you’ll eat them within a few days, consider freezing them. To freeze roast beef, slice the meat into smaller portions, and wrap each portion tightly in plastic wrap or aluminum foil before placing it in a freezer bag or airtight container. This helps prevent freezer burn and retains moisture. Leftover roast beef can be frozen for 2-3 months.
2. Tips for Reheating Roast Beef Without Drying It Out
When reheating roast beef, the goal is to gently warm it without further cooking it or losing too much moisture. There are several methods you can use depending on how much time you have and how much beef you need to reheat.
- Reheating in the Oven:
Reheating roast beef in the oven is one of the best methods for retaining moisture and flavor. Here’s how to do it:- Preheat your oven to 250°F (120°C).
- Place your leftover roast beef on a baking sheet and cover it loosely with aluminum foil. The foil helps trap moisture, ensuring the beef doesn’t dry out.
- Heat the roast for 10-15 minutes, or until it reaches the desired temperature. For thicker cuts, you may need up to 25 minutes. Check the internal temperature with a meat thermometer to avoid overcooking.
- Reheating in the Microwave:
While the microwave is the quickest option, it can easily result in dry roast beef if not done properly. To avoid this:- Place your slices of roast beef in a microwave-safe dish.
- Cover the beef with a damp paper towel or microwave-safe lid. This will help create steam and keep the beef moist.
- Heat in short intervals of 30 seconds, checking the temperature each time. Stir the beef or flip the slices to ensure even heating.
- Reheating on the Stovetop:
Reheating roast beef on the stovetop is another great method, especially for sliced beef. Here’s how:- Heat a skillet over low-medium heat and add a small amount of butter or olive oil.
- Place the leftover roast beef slices in the skillet, adding a few tablespoons of beef broth or gravy to the pan. The liquid will create steam and help keep the meat from drying out.
- Cover the skillet with a lid and heat the beef for 5-8 minutes, turning the slices occasionally to ensure even heating.
- Sous Vide Method (Best for Whole Roasts):
If you want to maintain the juiciness and tenderness of a large roast, the sous vide method is a great option. With sous vide, the beef is sealed in a vacuum bag and slowly heated in water at a controlled temperature. This method can be used to reheat roast beef without overcooking or drying it out.- Place the beef in a vacuum-sealed bag or resealable plastic bag with the air squeezed out.
- Submerge the bag in warm water (about 120°F-130°F or 50°C-55°C) and heat for 30 minutes to 1 hour, depending on the thickness of the roast.
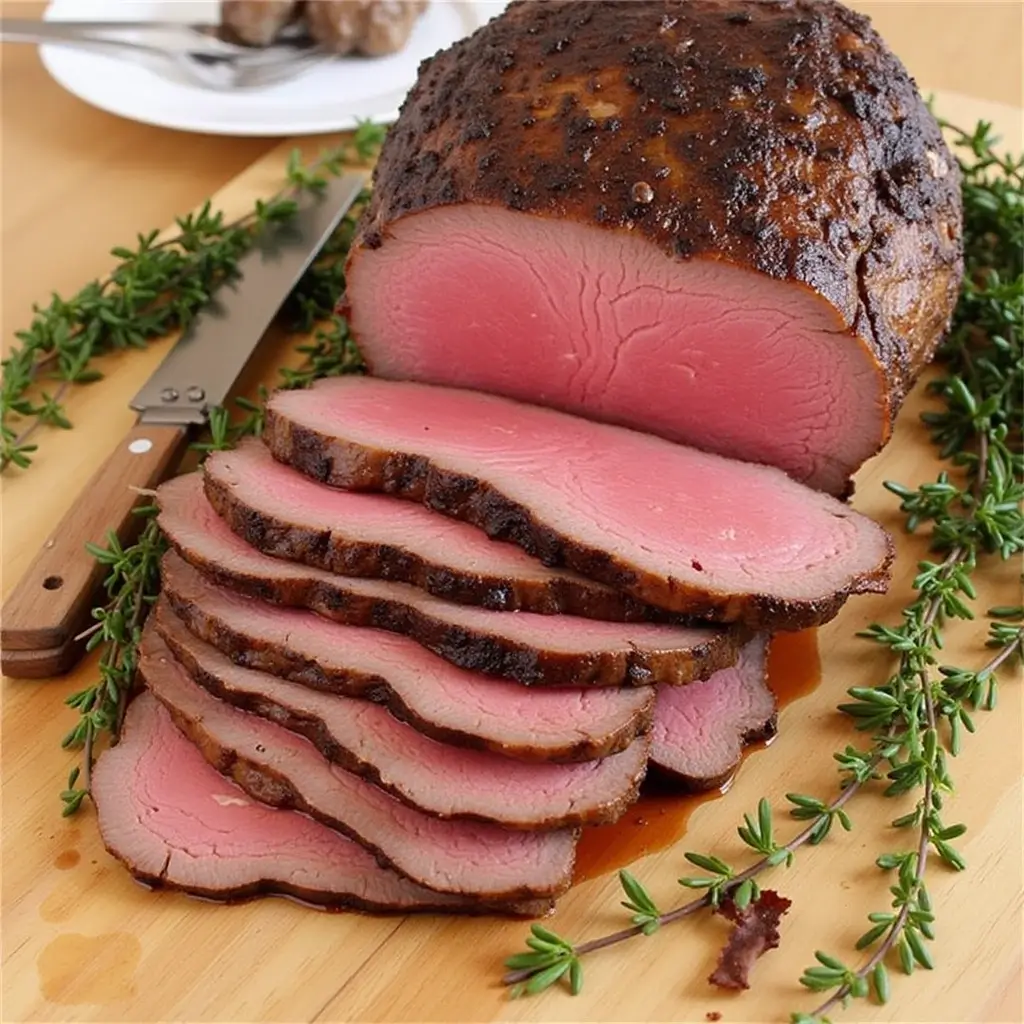
3. Making Leftovers Even Better: Transforming Roast Beef into New Dishes
Reheated roast beef can also be repurposed into a wide variety of dishes, giving it a second life while keeping it flavorful and tender.
- Beef Sandwiches or Wraps:
Slice the roast beef thinly and serve it on a sandwich or wrap. Add some horseradish, mustard, or your favorite condiments, and you have a delicious meal without much effort. - Beef Stew or Soup:
Use leftover roast beef in a hearty beef stew or soup. Chop the meat into cubes and simmer it with vegetables, broth, and seasonings for a comforting dish. The beef will continue to absorb flavors and stay tender, especially if simmered at low heat. - Beef Stir-Fry:
Leftover roast beef can also be stir-fried with vegetables and a savory sauce. Thinly slice the beef and quickly toss it in a hot skillet with your favorite stir-fry ingredients. This is a great way to use leftovers while adding new flavors.
4. Avoiding Over-Reheating: Why It’s Important
One of the most common mistakes when reheating roast beef is over-heating. Doing so can lead to tough, dry, and stringy meat, which is unpleasant to eat. The best way to avoid this is to heat the beef just enough to bring it up to the desired temperature and stop cooking it any further.
- Use a Meat Thermometer:
Just like with fresh roast beef, using a meat thermometer is crucial when reheating leftovers. This will ensure that the beef is heated through but not overcooked. The target temperature for reheating roast beef is usually around 140°F (60°C) for optimal flavor and texture.
Conclusion: Enjoying Leftover Roast Beef Without Sacrificing Quality
Storing and reheating leftover roast beef doesn’t have to result in dry or flavorless meat. By following the proper storage methods and reheating techniques, you can preserve the moisture, tenderness, and rich flavor of your roast beef. Whether you use the oven, stovetop, or microwave, always aim for gentle reheating and use a little extra liquid to maintain juiciness. And don’t forget, leftover roast beef can be transformed into a variety of new, delicious dishes that extend the enjoyment of your original roast.