When it comes to grilling, few things compare to the mouthwatering taste of BBQ chicken. But the key to making your chicken truly unforgettable lies in one essential ingredient: the marinade. A good BBQ chicken marinade not only adds incredible flavor but also ensures your chicken turns out juicy, tender, and perfectly seasoned. Whether you’re grilling chicken breasts, thighs, or drumsticks, the right marinade can take your BBQ to the next level.
In this guide, we’ll show you how to make the best BBQ chicken marinade that’ll have your taste buds singing. From balancing sweet and tangy flavors with the right spices to mastering marinating techniques, you’ll learn everything you need for chicken that’s bursting with flavor and grilled to perfection. So, fire up the grill, and let’s dive into the secrets of making the ultimate BBQ chicken marinade!
Why the Right BBQ Chicken Marinade Matters
How Marinade Enhances Flavor and Tenderness
Marinating chicken is more than just about adding a burst of flavor—it’s a science that helps break down the meat’s fibers and improve both its texture and taste. When chicken is soaked in a marinade, the ingredients work together in several key ways to elevate the final dish.
1. Flavor Infusion: The primary benefit of a marinade is its ability to infuse flavor deep into the chicken. While the surface of the meat absorbs the initial flavors of the marinade, the acids in the marinade—such as vinegar or lemon juice—help the flavor penetrate further into the meat. This creates a more evenly seasoned dish, ensuring every bite is full of taste. Spices, herbs, and seasonings are also absorbed, enhancing the chicken’s overall flavor profile with layers of savory, tangy, and sweet notes.
2. Tenderizing Effect: Marinades often include acidic ingredients like vinegar, citrus juice, or yogurt, which help break down the proteins in the meat. This tenderizing effect is essential for tougher cuts like chicken breasts or thighs, as it softens the muscle fibers, making the chicken easier to chew and more succulent. Additionally, enzymes found in ingredients like pineapple or papaya (if included) further assist in breaking down the meat’s connective tissues, ensuring a tender, juicy result.
3. Moisture Retention: Another benefit of marinating is that it helps the chicken retain moisture while cooking. The oil in the marinade forms a protective barrier around the meat, preventing it from drying out over high heat. This is especially important when grilling, as the high temperatures can quickly cause chicken to become dry and tough. The marinade acts as a sealant, locking in moisture, which results in a juicy and flavorful chicken that remains tender throughout the grilling process.
4. The Right Balance: The key to a successful marinade lies in finding the right balance between acidic, salty, sweet, and savory components. Too much acid can make the chicken mushy, while not enough will fail to tenderize the meat adequately. The perfect marinade strikes a balance, providing enough time for the chicken to soak up these ingredients without overwhelming the natural flavors of the meat. A well-balanced marinade enhances the chicken’s taste while maintaining a pleasant texture.
In short, marinating your chicken is a vital step in transforming ordinary grilled chicken into a flavorful, juicy, and tender masterpiece. By understanding how the marinade works, you can experiment with different flavors and ingredients to create the perfect BBQ chicken every time.
The Science Behind Marinating Chicken (Breaking Down Proteins)
Marinating chicken is not just a simple act of soaking meat in liquid; it’s a chemical process that influences the texture and flavor of the chicken on a molecular level. Understanding the science behind marinating chicken, particularly how it breaks down proteins, helps explain why marination is such a critical step in preparing the perfect BBQ chicken.
1. The Role of Acids in Protein Breakdown: One of the primary components in many marinades is an acid, such as vinegar, lemon juice, or wine. These acids play a pivotal role in the process of breaking down proteins in the chicken. Proteins are long chains of amino acids that are tightly packed in muscle fibers. The acid in the marinade begins to “denature” these proteins, meaning it alters their structure by loosening and unwinding the protein chains. This process breaks the proteins apart, making the meat more tender.
This is particularly beneficial for tougher cuts of chicken, such as chicken breasts or drumsticks, as it helps soften the muscle fibers and reduces any chewiness. The acid also has the added benefit of helping the chicken absorb the marinade’s flavors more deeply, enhancing its taste.
2. Enzymes that Aid in Tenderizing: Some marinades contain natural enzymes that are even more powerful at breaking down proteins. Ingredients like pineapple, papaya, or kiwi contain proteolytic enzymes—specifically bromelain (in pineapple), papain (in papaya), and actinidin (in kiwi)—which actively break down the proteins in meat, making it more tender. These enzymes work by cleaving the bonds between amino acids in the protein chains, further breaking down the structure of the chicken’s muscle fibers.
However, it’s important to note that if chicken is marinated for too long with these enzymatic ingredients, it can become overly soft or mushy, as the enzymes continue to break down the proteins beyond the point of tenderness.
3. Salt and Osmosis: In addition to acids and enzymes, salt is another crucial ingredient in most marinades. Salt plays a significant role in marinating through a process known as osmosis. When salt is added to the marinade, it draws moisture out of the chicken and into the marinade. This may sound counterintuitive, but it helps the meat absorb the flavors from the marinade more effectively.
As the salt pulls moisture out of the chicken, the cell structure of the meat weakens, which allows the marinade’s flavor to penetrate deeper. After a period of time, the moisture drawn out by the salt is then replaced by the marinade, which leads to a more flavorful and juicy chicken. This effect is especially noticeable in tougher cuts of meat.
4. The Importance of Time: The longer you marinate chicken, the more time the acids, enzymes, and salt have to break down the proteins and infuse the flavors. However, there’s a delicate balance. If you marinate chicken for too long, the acids can begin to break down the proteins too much, resulting in a mushy or overly soft texture. Generally, marinating chicken for 1-4 hours is ideal, although tougher cuts can benefit from a longer marinating period (up to 12 hours).
The key to successful marination is giving enough time for the proteins to break down and for the chicken to absorb the flavors, without going beyond the point where the texture becomes compromised.
5. Impact of Marinating on Chicken’s Flavor Profile: As the proteins break down, not only does the texture improve, but the chicken also becomes more receptive to absorbing the flavors of the marinade. The acids and seasonings have more access to the chicken’s inner tissues, which enhances the overall flavor. Herbs, spices, garlic, and other seasonings all have more time to penetrate the meat, creating a more flavorful chicken.
By understanding the science behind marinating and protein breakdown, you can fine-tune your BBQ chicken marinade to achieve the perfect combination of tenderness and taste, ensuring a juicy, flavorful grilling experience every time.
The Impact of Marinating Time on Flavor Absorption
When it comes to marinating chicken, timing plays a critical role in how well the flavors from the marinade permeate the meat. The longer the chicken sits in the marinade, the more time the flavors have to infuse. However, this process is not as simple as just letting the chicken sit for hours; the relationship between marinating time and flavor absorption is nuanced and dependent on several factors.
1. The Science of Flavor Penetration: The marinade needs time to soak into the chicken’s fibers and muscle tissues. Initially, the outer layer of the chicken absorbs the marinade, while the inner layers take longer to soak up the flavors. This is why a longer marination period generally results in a more flavorful piece of chicken. The acid in the marinade helps break down the outer proteins, allowing the flavors—whether it’s the tanginess of vinegar, the smokiness of BBQ sauce, or the spice from garlic and pepper—to penetrate deeper into the meat.
However, the process is gradual. In the first few hours, the flavors are concentrated around the outer surface, and as the marinating time increases, the flavor continues to seep deeper into the muscle fibers. For this reason, marinating chicken for at least 1-2 hours ensures that the flavors are absorbed effectively.
2. Marinating Time for Different Cuts of Chicken: The impact of marinating time can vary based on the cut of chicken you’re working with. More delicate cuts, like boneless chicken breasts, absorb flavors faster than thicker cuts, such as bone-in thighs or drumsticks. While chicken breasts only need around 1-2 hours to absorb the marinade fully, bone-in cuts may require up to 4 hours or even longer to ensure they are fully flavored.
For cuts with thicker muscle fibers, the marinade has to penetrate deeper, so the flavor absorption process takes more time. If you’re marinating whole chicken pieces or thicker cuts, giving them 3-6 hours to marinate will allow the flavors to reach all parts of the meat.
3. The Risk of Over-Marinating: While marinating for a long time generally leads to better flavor absorption, it’s important to know that there is such a thing as over-marinating. Prolonged exposure to acidic marinades can eventually break down the proteins too much, resulting in a mushy texture. This is especially true if you’re using an acid-heavy marinade, like one with a lot of vinegar or citrus juice.
For this reason, it’s important to balance marinating time with the ingredients in your marinade. For most cuts of chicken, marinating for 2-4 hours is usually enough to achieve a flavorful and tender result. For tougher cuts, like chicken thighs, you can go a little longer, but it’s still important not to overdo it.
4. The Role of Salt in Flavor Absorption: Salt plays a crucial role in flavor absorption by drawing moisture out of the chicken and allowing the marinade to penetrate the meat more easily. The longer the chicken is marinated, the more time salt has to extract juices from the meat, making it easier for the chicken to absorb the flavors. This is why you’ll often find that a balance of salt in the marinade is necessary—not only to season the meat but to ensure effective flavor penetration.
However, too much salt or too long a marination time can lead to overly salty chicken. It’s important to get the timing and balance just right, so the chicken soaks up the flavors without becoming too salty.
5. The Effect of Resting Time After Marinating: After you remove the chicken from the marinade, letting it rest for a few minutes before cooking can further enhance the flavor absorption. During this resting period, the juices that were drawn out of the chicken during the marinating process begin to redistribute evenly throughout the meat. This process helps maintain moisture and ensures that every bite is as flavorful as possible.
It’s also worth noting that while marinating overnight (up to 12 hours) can help flavors penetrate more deeply, it’s not always necessary. For most people, marinating for 2-4 hours is sufficient to achieve the right level of flavor absorption.
6. The Impact of Marinade Temperature: The temperature of your marinade also plays a role in flavor absorption. Marinades that are at room temperature tend to penetrate the meat faster than cold marinades, as heat speeds up the absorption process. However, you should never marinate chicken at room temperature for extended periods due to food safety concerns. Always marinate in the refrigerator to avoid bacterial growth.
If you want to speed up the marination process slightly, you can warm the marinade to just below room temperature before adding the chicken. This can help the flavors infuse a bit quicker without compromising food safety.
In summary, marinating time is crucial for flavor absorption, but the process requires a balance. By understanding how long different cuts need to marinate and how factors like salt, acid, and temperature affect the process, you can achieve perfectly seasoned chicken every time. Patience is key—just remember not to over-marinate, as this can negatively impact both flavor and texture.
Ingredients for the Best BBQ Chicken Marinade
Key Ingredients: BBQ Sauce, Olive Oil, Apple Cider Vinegar, Lemon Juice
The right combination of ingredients is essential to making the best BBQ chicken marinade. Each ingredient plays a specific role in balancing flavors and ensuring the chicken turns out juicy, tender, and full of savory goodness. Let’s break down the key ingredients: BBQ sauce, olive oil, apple cider vinegar, and lemon juice.
1. BBQ Sauce: The Flavor Base BBQ sauce is the heart and soul of any BBQ chicken marinade. It provides the deep, smoky, tangy, and slightly sweet flavors that make BBQ chicken irresistible. BBQ sauce typically contains ingredients like tomato paste, vinegar, sugar, and a variety of spices, which come together to create a rich and complex flavor profile.
The role of BBQ sauce in the marinade is twofold. First, it acts as the primary seasoning base, infusing the chicken with its bold flavors. Second, BBQ sauce has a thick consistency, which helps coat the chicken evenly, ensuring that each bite is packed with flavor. Additionally, its sugar content caramelizes on the grill, forming a beautiful glaze on the chicken’s surface, adding both flavor and visual appeal.
2. Olive Oil: The Moisture and Tenderizer Olive oil is another essential ingredient in a BBQ chicken marinade. While BBQ sauce provides the flavor, olive oil ensures that the chicken stays moist during cooking. Olive oil creates a thin, protective coating around the meat, preventing it from drying out as it grills over high heat.
The oil also helps the marinade stick to the chicken, ensuring that the flavors are evenly distributed across the surface. Moreover, the fat in olive oil assists in breaking down some of the proteins in the chicken, which can contribute to a more tender texture, especially for lean cuts like chicken breasts.
In addition to its functional benefits, olive oil adds its own mild, fruity flavor, which complements the richness of the BBQ sauce and the acidity of the vinegar and lemon juice.
3. Apple Cider Vinegar: The Tenderizing Acid Apple cider vinegar (ACV) is a key ingredient for adding acidity to your BBQ chicken marinade. Acidity helps tenderize the chicken by breaking down the proteins, making the meat more juicy and tender. ACV is a popular choice in marinades because it’s milder and slightly sweet compared to other vinegars, which helps balance the flavors without overwhelming the chicken.
Apple cider vinegar also acts as a flavor enhancer. Its subtle tanginess works in harmony with the sweet and smoky notes of BBQ sauce, creating a well-rounded flavor profile. It helps balance the richness of the oil and the sweetness of the BBQ sauce, preventing the marinade from becoming too heavy or greasy.
4. Lemon Juice: A Zesty Boost Lemon juice adds a bright, fresh acidity to the BBQ chicken marinade that complements the tangy notes of apple cider vinegar. While both are acidic, lemon juice brings a slightly different citrusy sharpness that cuts through the richness of the other ingredients and adds a zesty kick to the chicken.
In addition to flavor, lemon juice contributes to the tenderizing process. The citric acid helps break down the proteins in the chicken, making it more tender and juicy. Lemon juice also has a refreshing, clean flavor that adds complexity and balance to the marinade, keeping the flavors from feeling too heavy.
Lemon juice works particularly well in combination with BBQ sauce and apple cider vinegar, creating a marinade that has a perfect balance of sweet, tangy, savory, and fresh notes.
The Balance of Flavors
When combined, BBQ sauce, olive oil, apple cider vinegar, and lemon juice create a marinade that’s not only flavorful but also effective at tenderizing and moistening the chicken. The BBQ sauce provides the base of the marinade, bringing richness and sweetness; the olive oil seals in moisture and promotes tenderness; the apple cider vinegar breaks down proteins, tenderizing the meat while adding acidity; and the lemon juice adds a refreshing citrusy kick that rounds out the flavors.
The key to a successful BBQ chicken marinade is balancing these ingredients so that none of the flavors overwhelm the others. The acid from the vinegar and lemon juice should never dominate, and the sweetness from the BBQ sauce should be subtle enough to allow the tangy notes to shine through. With the right balance, these ingredients will come together to create a marinade that will infuse your chicken with deep, complex flavors and ensure a tender, juicy result when grilled.
Essential Spices and Seasonings: Garlic, Paprika, Brown Sugar
While the base ingredients of a BBQ chicken marinade provide the foundation of flavor, it’s the spices and seasonings that truly elevate the marinade and bring it to life. Garlic, paprika, and brown sugar are three essential components that contribute depth, complexity, and balance to the final dish. Let’s explore how each of these ingredients plays a critical role in your BBQ chicken marinade.
1. Garlic: The Savory Kick Garlic is one of the most beloved and versatile spices used in marinades because of its robust, savory flavor. Whether used in fresh, minced form or powdered, garlic infuses the chicken with an irresistible aroma and deep, savory taste. The natural oils in garlic contain compounds like allicin, which impart a rich, aromatic quality to the meat, making it more flavorful and aromatic.
In BBQ chicken marinades, garlic complements the smoky, tangy flavors from the BBQ sauce, vinegar, and lemon juice, adding a savory punch that balances out the sweetness and acidity. It also enhances the overall flavor profile by adding layers of richness, creating a fuller, more complex taste. When garlic is combined with olive oil, it can mellow out its sharpness, making it more fragrant and harmonious with the other ingredients.
2. Paprika: The Smoky Depth Paprika is another essential spice that provides both color and flavor to your BBQ chicken marinade. It’s made from ground dried peppers, and its flavor can range from sweet to smoky, depending on the variety. For BBQ chicken, smoky paprika is a popular choice because it imparts a subtle smokiness that mimics the outdoor grilling process, adding an authentic BBQ flavor.
Paprika’s smoky notes deepen the marinade’s overall taste and create a more aromatic profile, complementing the sweetness of the BBQ sauce and brown sugar. It also helps with color, giving the chicken a golden-brown, appetizing appearance once it’s grilled. The mild heat of paprika, while not overwhelming, adds a subtle warmth that balances the marinade and makes the chicken feel more flavorful without being spicy.
In addition to smoky paprika, you can also experiment with sweet paprika for a milder taste or hot paprika for a spicy kick, depending on the flavor profile you prefer. Regardless of the type, paprika is an essential spice that enhances the overall complexity of your BBQ chicken marinade.
3. Brown Sugar: The Sweet Contrast Brown sugar is a key ingredient for adding sweetness and helping to create a caramelized crust on the chicken as it grills. Unlike white sugar, brown sugar has molasses in it, which gives it a deeper, richer sweetness with notes of toffee and caramel. This complex sweetness is essential for balancing the tanginess of the vinegar, the acidity of the lemon juice, and the savoriness of the garlic and paprika.
The sweetness from brown sugar also works in harmony with the BBQ sauce to create a beautifully glazed chicken that’s both tender and flavorful. When the chicken is grilled, the sugar caramelizes, creating a slight crispiness on the surface while keeping the inside moist and juicy. This sugar-driven caramelization is one of the hallmarks of great BBQ chicken, giving it that golden, slightly crispy exterior that contrasts beautifully with the tender, juicy interior.
Moreover, the brown sugar helps to balance the sharpness of the acidic ingredients like vinegar and lemon juice, ensuring that the flavors are well-rounded and not overly tart. This perfect balance of sweet and savory makes the chicken taste indulgent and irresistible.
4. The Power of Combining Garlic, Paprika, and Brown Sugar When combined, garlic, paprika, and brown sugar work together to create a marinade that is rich in both savory and sweet notes. Garlic provides the depth and savory kick, paprika offers smoky warmth and color, and brown sugar brings sweetness and a caramelized finish. These ingredients complement one another perfectly, resulting in a balanced marinade that ensures the chicken is flavorful on the inside and out.
Additionally, the sweetness of the brown sugar helps to counterbalance the heat from the paprika (if you use hot paprika) or the tang from the vinegar and lemon juice, preventing the marinade from becoming too one-dimensional. This balance of flavor profiles is key to a well-rounded BBQ chicken marinade that appeals to a wide range of tastes.
Experimenting with Other Spices
While garlic, paprika, and brown sugar are essential, don’t hesitate to experiment with additional spices to suit your personal taste. For example, cumin can add a warm, earthy note, while cayenne pepper can increase the heat if you prefer a spicier marinade. Onion powder, thyme, and oregano can also enhance the depth of flavor and introduce an herbaceous component to the marinade.
Ultimately, the combination of garlic, paprika, and brown sugar creates a solid foundation for a BBQ chicken marinade, and by experimenting with different spices, you can customize the flavor to match your preferences perfectly.
The Role of Each Ingredient in Balancing Flavor (Sweet, Tangy, Savory)
Creating the best BBQ chicken marinade isn’t just about combining ingredients—it’s about striking the perfect balance of flavors. A successful marinade has to work in harmony, with each component contributing to a complex, well-rounded taste that enhances the natural flavors of the chicken. The key flavors in a BBQ chicken marinade are sweet, tangy, and savory, and each ingredient plays a distinct role in achieving this balance. Let’s take a deeper look at how each ingredient contributes to balancing these three essential flavor profiles.
1. Sweetness: Brown Sugar & BBQ Sauce Sweetness is an essential part of any BBQ marinade because it adds richness and complexity to the overall flavor profile. Sweetness can help counterbalance the sharpness of acidic ingredients like vinegar or lemon juice, ensuring the marinade isn’t too tangy or sour.
- Brown Sugar: Brown sugar is a critical ingredient in the marinade, contributing a deep, molasses-like sweetness. This sweetness not only helps to soften the acidity of the vinegar and lemon juice, but it also aids in the caramelization process when the chicken is grilled. The result is a beautifully golden, slightly crispy crust on the chicken, adding both flavor and texture. Brown sugar’s natural richness also complements the smokiness of the BBQ sauce, creating a rounded, indulgent flavor that enhances the chicken’s overall taste.
- BBQ Sauce: BBQ sauce is often the primary source of sweetness in a marinade. While it also contains tangy and savory notes, its sugar content gives it a natural sweetness that makes the marinade feel rich and balanced. The combination of sweet BBQ sauce and brown sugar ensures that the marinade isn’t overpowering in any one direction, maintaining a well-balanced flavor profile. The sugar in the BBQ sauce also works with the heat from grilling, giving the chicken that perfectly caramelized, sticky coating that we love in BBQ dishes.
2. Tanginess: Apple Cider Vinegar & Lemon Juice Tanginess is another key element in a BBQ marinade. It provides brightness and freshness, cutting through the richness of the oils and sugars while enhancing the overall flavor. Without a tangy element, the marinade could feel too heavy or one-dimensional.
- Apple Cider Vinegar (ACV): ACV is a powerful source of acidity, helping to tenderize the chicken while imparting a sharp, tangy flavor. This tanginess acts as a counterpoint to the sweetness of the brown sugar and BBQ sauce, preventing the marinade from becoming cloying. The acidity of ACV also helps to balance the richness of the olive oil, keeping the flavor profile fresh and vibrant. Additionally, the vinegar’s tang complements the smoky and spicy notes in the BBQ sauce, creating a dynamic, layered flavor that penetrates the chicken.
- Lemon Juice: Similar to apple cider vinegar, lemon juice adds an additional layer of acidity, but with a citrusy brightness that complements the other tangy elements. Lemon juice’s fresh, zesty flavor lifts the overall marinade and adds a sharp contrast to the deep sweetness of brown sugar and BBQ sauce. The acidity in lemon juice also plays a role in tenderizing the chicken, breaking down proteins and allowing the flavors to better penetrate the meat.
3. Savory: Garlic, Paprika & Olive Oil Savory flavors are essential for adding depth and complexity to the marinade. They create a rich, umami-filled base that ties everything together and brings out the natural flavors of the chicken.
- Garlic: Garlic is one of the most savory ingredients you can use in a BBQ marinade. Its pungent, aromatic flavor provides an earthy, umami-rich base that enhances the other flavors without overpowering them. Garlic complements the sweetness of brown sugar and the tanginess of vinegar and lemon juice by adding a layer of savory complexity. As garlic marinates with the chicken, it infuses the meat with its rich flavor, ensuring the chicken tastes deep and flavorful, especially when grilled.
- Paprika: Paprika contributes a mild, smoky flavor that enriches the overall savory profile of the marinade. Its smokiness, especially if you use smoked paprika, mimics the outdoor grilling process and enhances the BBQ flavor. Paprika also provides a subtle warmth, complementing the savory notes from garlic and the richness from the olive oil. It adds both depth and color to the marinade, giving the chicken an appetizing appearance once grilled.
- Olive Oil: Olive oil acts as the carrier for the other flavors, ensuring they spread evenly across the chicken. While olive oil itself is mild, it has a slightly fruity taste that adds a subtle richness to the savory profile. It also helps create a smooth, glossy coating on the chicken, ensuring that the garlic, paprika, and BBQ sauce adhere well. The oil also contributes to the tenderness of the chicken, making it moist and juicy while allowing the savory elements to penetrate the meat.
4. The Harmony of Sweet, Tangy, and Savory The secret to a great BBQ chicken marinade is balance. Sweetness from brown sugar and BBQ sauce adds richness and a subtle caramelization when grilled. Tanginess from apple cider vinegar and lemon juice cuts through that richness, adding brightness and preventing the marinade from feeling too heavy. Savory notes from garlic, paprika, and olive oil provide depth and umami, rounding out the flavor profile and ensuring the chicken tastes full-bodied and complex.
The key to creating the perfect BBQ chicken marinade is understanding how these elements interact. For example, if the marinade is too sweet, it can become overwhelming and sticky, while too much acidity can make the chicken taste sharp and sour. Similarly, if the savory elements aren’t strong enough, the chicken may lack the depth and complexity needed to elevate the flavors.
When balanced correctly, the interplay between sweet, tangy, and savory ingredients creates a marinade that not only enhances the natural flavors of the chicken but also produces a juicy, tender result with a perfectly grilled finish. Each flavor profile plays off the others, creating a marinade that is both flavorful and nuanced, ensuring every bite of BBQ chicken is mouthwateringly delicious
Step-by-Step Guide to Making BBQ Chicken Marinade
Mixing the Marinade: Combining BBQ Sauce, Olive Oil, and Vinegar
The process of mixing your BBQ chicken marinade is crucial to ensure that all the flavors are properly distributed and that the chicken absorbs every bit of flavor. While it might seem straightforward, how you combine ingredients can impact the final result. The balance between BBQ sauce, olive oil, and vinegar is essential to creating a marinade that infuses the chicken with rich flavors while also ensuring it stays tender and juicy. Let’s take a deeper dive into how to combine these ingredients effectively.
1. The Base: BBQ Sauce BBQ sauce often serves as the foundation of the marinade. It provides the primary flavor profile, combining a blend of sweetness, tanginess, and smokiness that is characteristic of great BBQ chicken. The BBQ sauce typically has a thick consistency, which helps coat the chicken evenly, ensuring every bite is full of flavor.
When mixing the marinade, start with BBQ sauce as the first layer. The sauce’s sugar content also plays a critical role in the marinade’s ability to create a caramelized coating on the chicken, which adds both flavor and texture when it’s grilled. It’s important to use a BBQ sauce that aligns with your desired flavor profile—whether you want it sweet, tangy, smoky, or spicy.
2. Olive Oil: The Moisture Carrier Olive oil serves as the binding ingredient, ensuring that all other flavors mix together seamlessly. Its primary role is to provide moisture, helping the marinade penetrate the chicken while also preventing it from drying out during cooking. Olive oil helps the BBQ sauce adhere to the surface of the chicken, ensuring even coverage and a smooth coating.
In addition to moisture, olive oil also helps the chicken retain its tenderness. The fat in the oil breaks down proteins in the meat, ensuring that the chicken remains juicy and flavorful. This is especially important for lean cuts like chicken breasts, which can easily dry out without the added fat of the olive oil. Olive oil also has a subtle, mild flavor that complements the richness of the BBQ sauce without overpowering the other ingredients.
When mixing the marinade, add the olive oil slowly to allow it to emulsify with the BBQ sauce, creating a smooth, cohesive mixture. This will ensure the marinade is evenly distributed when applied to the chicken.
3. Vinegar: The Acidity Balancer Vinegar, often in the form of apple cider vinegar (ACV), is one of the key ingredients that adds a sharp, tangy flavor to the marinade. Its acidity not only helps balance the sweetness of the BBQ sauce and the richness of the olive oil but also plays an important role in tenderizing the chicken. Vinegar works by breaking down some of the proteins in the meat, which leads to a more tender, juicy texture once cooked.
When adding vinegar to the marinade, you want to be mindful of the balance. Too much vinegar can result in a sharp, overly tangy flavor that could overpower the other ingredients. Start with a smaller amount and adjust to taste. The vinegar should enhance the BBQ sauce without being the dominant flavor.
The acid in vinegar also helps the marinade penetrate deeper into the chicken, ensuring that each bite is flavorful and juicy. The interaction between vinegar and olive oil is important for creating a well-balanced marinade, as the oil smooths out the sharpness of the vinegar while still allowing the acidity to shine through.
4. The Mixing Process: Ensuring Even Distribution Now that you’ve gathered your core ingredients (BBQ sauce, olive oil, and vinegar), it’s important to combine them in a way that ensures an even mixture. The best way to do this is to use a whisk or a fork to vigorously mix the ingredients together. Whisking helps emulsify the oil with the vinegar and BBQ sauce, creating a smooth, uniform texture.
When combining the ingredients, make sure that the BBQ sauce is well-integrated into the oil and vinegar mixture. The goal is to create a cohesive marinade that will coat the chicken evenly, ensuring consistent flavor throughout the meat. You may need to whisk for a minute or two to get the right texture, especially if you’re using a BBQ sauce that is on the thicker side.
Once the marinade is mixed, taste it. This is where you can adjust the balance of sweet, tangy, and savory. If you find the marinade too sweet, add a little more vinegar to brighten the flavor. If it’s too tangy, a touch more BBQ sauce or brown sugar can help mellow it out. Make small adjustments and taste as you go until you reach the perfect balance.
5. Marinating the Chicken Once your marinade is properly mixed, it’s time to apply it to the chicken. Ideally, you’ll want to marinate the chicken for at least 30 minutes, though longer marinating times (up to several hours) will allow the chicken to absorb even more flavor. To ensure the marinade is distributed evenly, use a resealable plastic bag or a shallow dish, and toss the chicken in the marinade until it’s well coated.
Make sure that all parts of the chicken are covered, especially if you’re marinating bone-in pieces, as the marinade needs to penetrate the meat to tenderize and infuse it with flavor. If you’re marinating for several hours, you can occasionally turn the chicken or stir it to ensure the marinade is evenly absorbed.
6. The Right Proportions The proportions of BBQ sauce, olive oil, and vinegar in your marinade can vary depending on personal preference and the size of the chicken you’re marinating. A good starting point is:
- BBQ Sauce: 1/2 cup
- Olive Oil: 1/4 cup
- Vinegar (ACV or other type): 2 tablespoons
These proportions can be adjusted based on how tangy, sweet, or rich you prefer the marinade. If you want a stronger BBQ flavor, you can increase the amount of BBQ sauce, while reducing the oil for a lighter, less greasy finish. More vinegar will bring extra tang, but balance it carefully to avoid overpowering the marinade’s flavors.
Final Thoughts
The process of mixing BBQ sauce, olive oil, and vinegar may seem simple, but it’s a critical step in creating a marinade that will truly elevate your BBQ chicken. Each ingredient serves a unique purpose—BBQ sauce for flavor, olive oil for moisture and tenderness, and vinegar for acidity and balance. By combining them in the right proportions and ensuring they are well-mixed, you create a marinade that enhances the chicken’s natural flavor, ensures juiciness, and produces that irresistible smoky, savory BBQ taste we all crave.
Perfect Marinating Technique and How to Ensure the Best Results
Marinating is an art as much as it is a science, and knowing the right techniques can make all the difference in achieving perfectly tender and flavorful BBQ chicken. While the ingredients of the marinade are crucial, how you apply and marinate the chicken can either elevate or diminish the overall result. Let’s explore the best marinating practices, tips, and techniques to ensure your BBQ chicken turns out juicy, tender, and packed with flavor.
1. Proper Marinating Time: How Long is Too Long? The duration of marination plays a pivotal role in how well the chicken absorbs the flavors of the marinade. However, too little or too much time can lead to unsatisfactory results.
- Marinating Time for Tenderness and Flavor: For optimal flavor and tenderness, marinate your chicken for at least 30 minutes to 2 hours. This timeframe allows the chicken to absorb the flavors from the marinade while also giving the acid (from vinegar or lemon juice) enough time to work on breaking down the proteins, which helps tenderize the meat.
- Over-Marination Risks: If you marinate the chicken for too long—particularly with acidic ingredients like vinegar or lemon juice—the meat can become mushy and overly soft. The acid will break down the protein too much, resulting in a texture that may feel too wet or spongy rather than firm and juicy. For most chicken cuts, marinating overnight (up to 24 hours) should be avoided, as the texture can start to deteriorate.
- Quick Marinades for Busy Days: If you’re short on time, even 15 to 30 minutes in the marinade will yield some flavor, especially if you are using thin cuts of chicken like breasts or tenders. While the flavor won’t be as deep as with longer marination, the result will still be tasty and tender. For quick marinating, consider using more intense flavorings, like garlic or spices, to help the chicken absorb flavor more quickly.
2. Choose the Right Container: Bags vs. Dishes The container you use for marinating can influence how well the flavors are distributed and how the chicken absorbs them.
- Resealable Plastic Bags: Using a resealable plastic bag is one of the best methods for marinating chicken. It ensures that the marinade surrounds the chicken evenly and allows for easy tossing to coat all the pieces. The bag’s vacuum-sealing properties help press the marinade into the meat, ensuring that every bite gets a flavorful infusion. Plus, the bag takes up less space in the fridge and minimizes mess.
- Shallow Dish or Baking Tray: If you prefer using a dish, choose a shallow one to ensure that the chicken is fully immersed in the marinade. Use a lid or cover the dish with plastic wrap to avoid contamination and retain the marinade’s flavor. A deeper dish might not allow the marinade to cover the chicken as effectively, especially if it’s a smaller batch.
3. Refrigerate, Never Marinate at Room Temperature Always marinate chicken in the refrigerator, not at room temperature. This is crucial for food safety, as leaving chicken at room temperature can promote bacterial growth, which can lead to foodborne illness.
Refrigerating the chicken ensures that it stays at a safe temperature (below 40°F or 4°C) while the marinade works its magic. If you plan to marinate for an extended period, like overnight, it’s even more important to keep the chicken in the fridge to prevent the growth of harmful bacteria.
4. Turn the Chicken for Even Flavor Absorption To ensure that the marinade penetrates the chicken evenly, turn or flip the chicken pieces halfway through the marinating process. This ensures all sides of the chicken are exposed to the marinade, and that the flavors infuse the meat more evenly. If you’re using a resealable plastic bag, you can gently shake the bag to redistribute the marinade.
If you’re marinating bone-in pieces of chicken (like thighs or drumsticks), this step is especially important. Bone-in cuts take longer to absorb the marinade due to the bones blocking some of the flavor absorption, so flipping them ensures both sides are equally marinated.
5. Don’t Overcrowd the Chicken While marinating chicken, ensure that there’s enough space for the marinade to reach all parts of the meat. Overcrowding the chicken in the bag or dish can cause uneven marination, as some pieces might be submerged in the marinade while others are not. This can result in inconsistent flavor and texture. If necessary, split the chicken into smaller batches or use a larger dish to ensure all pieces are evenly coated.
6. Using the Right Amount of Marinade Make sure you have enough marinade to fully coat the chicken, but not so much that it dilutes the flavors. The general guideline is about 1/4 to 1/2 cup of marinade per pound of chicken. If you’re making a large batch of chicken, you can scale up the marinade recipe accordingly. For maximum flavor absorption, ensure the chicken is not overcrowded and has enough space to absorb the flavors evenly.
7. Don’t Reuse Marinade or Cross-Contaminate It’s essential to never reuse marinade that has come into contact with raw chicken, as it could be contaminated with bacteria. If you’d like to use the marinade as a sauce later, make sure to set aside some of it before adding the chicken, or boil the marinade after use to kill any bacteria. Similarly, if you’re grilling the chicken, avoid using the same utensils for raw and cooked chicken to prevent cross-contamination.
8. Grilling or Cooking After Marinating After marinating, the chicken is ready for cooking. If you’re grilling, remove the chicken from the marinade and let excess marinade drip off. Grilling the chicken on medium-high heat ensures a crispy exterior while keeping the interior juicy and tender. Cooking times will vary based on the cut of chicken and the method used, so always check for doneness with a meat thermometer.
- For Boneless, Skinless Breasts: Grill for about 6-8 minutes per side, or until the internal temperature reaches 165°F (74°C).
- For Bone-In Cuts: Grill for about 10-12 minutes per side, or until the internal temperature reaches 165°F (74°C) at the thickest part of the meat.
9. Basting for Extra Flavor If you want to add even more flavor, consider basting the chicken with fresh marinade during the cooking process. Be sure to use a separate batch of marinade for basting, or bring the marinade to a boil before applying it to the chicken to ensure food safety.
10. Let the Chicken Rest Before Serving After cooking, let the chicken rest for a few minutes before cutting into it. This allows the juices to redistribute, keeping the chicken tender and moist. Cutting too soon can result in juices running out, leaving the meat dry. A short resting period of about 5 minutes is all it takes to lock in that moisture.
Final Thoughts on Marinating Technique
Mastering the perfect marinating technique is essential to achieving the best BBQ chicken. Whether you’re marinating for a quick burst of flavor or overnight, the right approach to timing, container choice, and refrigeration will yield the juiciest, most flavorful chicken possible. By following these steps and tips, you’ll ensure that your BBQ chicken is consistently tender, flavorful, and cooked to perfection every time.
Perfect Marinating Technique and How to Ensure the Best Results
Achieving the best BBQ chicken is all about how well the chicken absorbs the marinade. While the ingredients play a major role, the technique you use to marinate can significantly affect the tenderness, flavor, and texture of the final dish. Let’s dive deeper into how you can perfect your marinating technique to ensure that your BBQ chicken is as juicy, tender, and flavorful as possible.
1. Understanding Marination: Why Technique Matters
Marination is not just about tossing meat in a mixture of liquid and spices and hoping for the best. The way you marinate affects how flavors penetrate the meat and how tender the final product will be. The technique involves several factors—such as marinating time, type of marinade, and how the chicken is stored during marination—all of which impact the absorption of the marinade’s flavors.
The key is to balance time, temperature, and the interaction between the marinade ingredients and the meat. Using the right technique maximizes the marinade’s ability to break down the meat’s fibers while infusing it with complementary flavors.
2. Marinating Time: The Balance Between Too Little and Too Much
The duration of marination is one of the most critical aspects of ensuring the best results. Both under-marinating and over-marinating can cause the chicken to underperform in terms of flavor and texture.
- Short Marination (15 to 30 minutes): For chicken breasts, tenders, or boneless cuts, shorter marinating times work well. In this case, the marinade serves more as a surface coating, adding flavor quickly. For quick marinating, you’ll want a more potent marinade (with concentrated flavors like garlic, paprika, or mustard) to infuse the chicken in the brief time. For flavor infusion in a short period, ensure the chicken is cut into smaller pieces or pierced with a fork to help the marinade seep in.
- Medium Marination (1 to 2 hours): This is the sweet spot for most chicken cuts. Marinating chicken thighs, wings, or breasts for 1 to 2 hours allows the meat to absorb the flavors thoroughly while the acid in the marinade begins to break down the proteins, resulting in a tender and flavorful outcome. This timeframe allows the chicken to reach the optimal balance of flavor without compromising texture.
- Long Marination (Overnight, 6+ hours): While some recipes recommend marinating overnight (especially for larger cuts like bone-in thighs or whole chickens), this can lead to over-marinating, where the chicken can become too soft and mushy. If you’re marinating for longer periods, make sure the marinade isn’t too acidic, as the prolonged exposure to acid can cause the meat to become overly tenderized. For marinades with higher acidity (like vinegar or citrus), aim for no more than 4 to 6 hours.
3. Choosing the Right Container: Ensuring Even Coverage
The container you choose for marinating is just as important as the marinade itself. Proper coverage ensures that every part of the chicken receives the full flavor experience.
- Plastic Bags (Resealable): Plastic bags are ideal for marinating. They are cost-effective, space-efficient, and provide the best coverage by allowing the marinade to fully coat the chicken. By sealing the bag and gently massaging it, you can ensure that every piece of chicken is evenly coated and that the flavors penetrate thoroughly. Plus, plastic bags are easy to store in the refrigerator.
- Glass or Plastic Dishes: Shallow dishes or bowls are also effective for marinating. The key is to ensure the chicken is fully submerged in the marinade. You can also cover the dish with plastic wrap to lock in the moisture and avoid any cross-contamination. When using a dish, ensure there’s enough marinade to coat the chicken pieces, particularly if they’re large or bone-in.
- Avoid Metal Containers: Do not use metal containers, as certain acidic marinades (like those with vinegar or lemon juice) can react with the metal and alter the flavor of the marinade. Stick to plastic, glass, or ceramic containers for the best results.
4. Refrigeration: The Crucial Step
Always marinate chicken in the refrigerator, not on the countertop. Not only does refrigeration ensure food safety, but it also allows the marinade to work its magic at a constant temperature, which is essential for tenderizing the chicken properly. Marinating at room temperature is unsafe and can lead to bacterial growth, which poses a serious health risk.
The cold environment of the fridge helps the marinade slowly permeate the meat and break down the proteins without compromising its texture. Marinate the chicken for the required time in the fridge, and never leave it out for extended periods.
5. The Importance of Turning and Mixing the Chicken
Turning the chicken or mixing it during the marinating process ensures that every piece is evenly coated. This is especially important if you’re marinating bone-in cuts like chicken thighs or drumsticks, as the bones can block some of the marinade from reaching the meat.
- Resealable Bags: If you’re using a resealable plastic bag, simply flip the bag halfway through the marinating time. This ensures that the marinade is distributed evenly across all pieces of chicken.
- Shallow Dishes: If you’re using a dish, use tongs or a spoon to flip the chicken pieces or stir them gently to ensure that all sides are covered in the marinade. This will prevent uneven flavor distribution and guarantee that the chicken absorbs as much of the marinade as possible.
6. The Right Amount of Marinade: Don’t Underwhelm or Overwhelm
The quantity of marinade you use is also important. You want to have enough to fully coat the chicken and allow the flavors to soak in, but not too much that it dilutes the flavor. A general guideline is 1/4 to 1/2 cup of marinade per pound of chicken.
If you’re marinating a whole chicken or a large batch, make sure the marinade is enough to coat the pieces evenly. If you’re marinating just a few chicken breasts or thighs, you can adjust the proportions accordingly. Overcrowding the chicken can result in uneven coverage, so if necessary, use more than one container or work in batches.
7. Avoid Over-Marinating: Protecting Chicken’s Texture
While marinating for long periods can deepen the flavor, marinating for too long—especially with highly acidic ingredients like vinegar or lemon juice—can alter the texture of the chicken. The acid breaks down the proteins, making the meat softer, but if left too long, the chicken can become mushy or “cooked” by the acid.
To avoid this, limit marinating time to the ideal range (1 to 2 hours) and avoid exceeding 4 to 6 hours for acidic marinades. For milder marinades, you can push this to 8 hours or even overnight, but it’s best to keep an eye on the texture.
8. Grilling or Cooking After Marinating
After marinating, it’s time to cook the chicken. Before you begin cooking, remove excess marinade from the chicken, especially if you’re grilling, to avoid flare-ups.
- Grilling: Grilling provides a perfect balance of smoky flavor and caramelization, making it the ideal method for cooking marinated chicken. Preheat your grill to medium-high heat, and cook the chicken evenly on both sides, ensuring it reaches the recommended internal temperature of 165°F (74°C) for chicken breasts and 170-175°F (77-80°C) for bone-in cuts.
- Baking or Pan-Frying: If grilling isn’t an option, baking or pan-frying also works well for marinated chicken. You can bake marinated chicken at 375°F (190°C) for 25-30 minutes, depending on the cut, or pan-fry on medium heat until fully cooked.
9. Basting for Extra Flavor
To enhance the flavor and moisture during grilling or baking, consider basting the chicken with fresh marinade. However, ensure the marinade is free from any raw meat juices. For extra security, you can boil the marinade to kill any bacteria before using it as a baste.
10. Rest the Chicken Before Serving
Once the chicken is cooked, let it rest for about 5 minutes. This allows the juices to redistribute throughout the meat, ensuring that the chicken stays moist and tender. Cutting into it too soon can cause the juices to run out, leading to a dry, less flavorful dish.
Conclusion
Mastering the art of marinating is essential to creating the best BBQ chicken. By following these tips and techniques, from choosing the right container to marinating for the perfect amount of time and ensuring proper refrigeration, you’re setting yourself up for success. When done correctly, marination not only enhances the flavor but also ensures a tender, juicy texture that makes every bite of BBQ chicken unforgettable.
Tips for Marinating Chicken to Ensure Juicy, Tender Results
Ideal Marinating Time (How Long to Marinate Chicken for the Best Results)
Marinating is a crucial step in achieving flavorful, juicy chicken, but knowing the ideal marinating time is key to making the most of the marinade. Too little time, and the chicken won’t absorb enough flavor; too much time, and the texture can become undesirable. The goal is to find that perfect balance between marinating long enough to impart rich flavors and short enough to preserve the chicken’s tender texture.
Let’s break down the ideal marinating times based on different types of chicken and marinade compositions.
1. Short Marinating Time (15 to 30 Minutes)
While longer marination periods are often recommended, there are occasions when you may need to marinate your chicken in a hurry, such as on busy weeknights or last-minute meal prep. In these cases, a quick marinade is still effective, especially for chicken breasts, tenders, or boneless cuts.
- Why it Works: A shorter marinating time can still provide a noticeable flavor boost, especially if the marinade is highly flavorful or uses ingredients like garlic, soy sauce, and spices that infuse the meat more quickly. The goal here is more about surface-level flavor rather than deep absorption.
- Best for: Chicken breasts, tenders, or smaller cuts. These thin, boneless pieces absorb flavor quickly, so they don’t need extended marination. If you are short on time, marinating for just 15-30 minutes can still give you a tasty result.
- How to maximize the flavor: You can increase the intensity of the marinade by using ingredients that penetrate quickly, such as salt, sugar, mustard, or spicy elements like chili flakes. Also, cutting the chicken into smaller pieces or scoring the surface can help the marinade seep in faster.
2. Medium Marinating Time (1 to 2 Hours)
For a perfect balance of flavor and tenderness, 1 to 2 hours is usually the sweet spot for most cuts of chicken. This duration allows the chicken to absorb the flavors well, and if you’re using a marinade with moderate acidity (such as vinegar, lemon juice, or yogurt), the chicken will become nicely tender without losing its texture.
- Why it Works: During this time, the chicken absorbs enough of the marinade to flavor the interior, while the acids and enzymes start to tenderize the meat. This time frame strikes a balance, allowing the flavors to permeate the meat while preventing the chicken from becoming overly tenderized or mushy.
- Best for: Chicken thighs, wings, and breasts. These cuts are thicker and require more time for full flavor absorption. For bone-in pieces, this time frame is ideal because it allows the marinade to penetrate the meat without over-softening it.
- How to maximize the flavor: To get the most out of your marinade, ensure that all pieces are well-coated and turned or stirred halfway through the marination process. This ensures that the chicken is equally flavored on both sides, especially if you’re using a container where the chicken may not be fully submerged.
3. Longer Marinating Time (Overnight or 4 to 6 Hours)
For those with more time and a deeper desire for flavor, marinating for 4 to 6 hours or even overnight can enhance the flavors significantly, especially if you’re marinating bone-in cuts or whole chicken. However, this extended period requires careful consideration of the marinade’s acidity and how it may affect the texture.
- Why it Works: The longer the marination time, the more deeply the flavors penetrate the meat. Additionally, the acids (vinegar, lemon juice, or yogurt) have more time to break down the chicken’s proteins, leading to a more tender, juicy result. With bone-in cuts like thighs, wings, or even a whole chicken, marinating for an extended period allows the flavors to reach deep into the meat, especially around the bones.
- Best for: Bone-in chicken pieces such as thighs, drumsticks, and wings, as well as whole chickens. These cuts take longer to absorb the marinade because the bones block some of the marinade from reaching the meat.
- How to maximize the flavor: If you’re marinating overnight, ensure that the chicken is stored in an airtight container or resealable bag to keep the marinade fresh and prevent contamination. Avoid over-marinating, especially if the marinade is highly acidic. In this case, consider using a milder marinade or reducing the amount of acid to prevent the chicken from becoming too soft.
4. Over-Marination: Risks of Too Much Time
While marinating for a long period (overnight or more) can result in deliciously tender chicken, leaving the chicken in the marinade for too long can actually have a negative impact on the texture. Over-marination, particularly with highly acidic ingredients, can cause the chicken to become mushy and lose its desired texture.
- Why it Happens: The acid or enzymes in the marinade work by breaking down the proteins in the chicken, which makes it tender. However, if left for too long, the acid begins to break down the proteins excessively, resulting in a texture that’s more akin to “pulled” chicken or mushy meat. This is most noticeable with highly acidic marinades containing vinegar, citrus juice, or yogurt.
- Best to Avoid: For most marinades, you don’t want to marinate your chicken longer than 24 hours, especially if your marinade contains a lot of acid. If you must, reduce the acid content to prevent the chicken from becoming mushy.
- How to avoid: To prevent over-marination, keep track of your timing and don’t leave the chicken in the marinade for longer than necessary. For those using acidic marinades, keep marination time to 6 hours or less to maintain the right balance between tenderness and texture.
5. Marinating Bone-In vs. Boneless Chicken
The type of chicken you’re marinating (bone-in vs. boneless) plays a significant role in determining the ideal marinating time.
- Boneless Chicken: Boneless cuts like chicken breasts or tenders are thinner and absorb flavors much faster than bone-in pieces. For these, 30 minutes to 2 hours is usually plenty to give them a rich, flavorful infusion.
- Bone-In Chicken: Bone-in pieces like thighs or drumsticks need more time for the marinade to fully penetrate the meat. For these cuts, 1 to 6 hours (or even overnight) can be beneficial, but be mindful not to over-marinate, as the bone slows down the absorption process, and too much acid can break down the meat’s structure.
6. Special Considerations for Different Marinade Types
Different marinade types require different marinating times to achieve the best results:
- Acid-Based Marinades (Vinegar, Citrus): These types of marinades should generally not be used for more than 2 to 4 hours, as they can quickly break down the proteins in the chicken and lead to overly tender or mushy meat.
- Oil-Based Marinades: Oil-based marinades can be left on the chicken for longer periods, typically between 1 to 6 hours. These types of marinades coat the chicken with fat, helping to lock in moisture and enhance flavor.
- Yogurt or Buttermilk Marinades: Yogurt and buttermilk-based marinades tend to be more forgiving, and the lactic acid helps tenderize the chicken more gently. These can be used for marinating overnight (up to 12 hours) without negatively affecting texture.
7. A Few Tips to Optimize Marination
To get the most out of your marinating time, follow these additional tips:
- Avoid marinating at room temperature—always marinate in the fridge to prevent bacterial growth.
- Use a fork or a tenderizer tool to poke small holes in the chicken. This allows the marinade to penetrate deeper, enhancing flavor absorption.
- Stir or flip the chicken halfway through marinating to ensure even distribution of the marinade.
Conclusion
The ideal marinating time for chicken depends on various factors, including the type of chicken, the ingredients in the marinade, and your desired flavor profile. While quick marinating is perfect for busy nights, longer marinating times are essential for infusing deeper flavors into thicker, bone-in cuts. By adjusting your marinating time based on these factors, you’ll be able to achieve the perfect balance of flavor and tenderness for every BBQ chicken dish.
Tips for Marinating Chicken Breasts vs. Thighs
When marinating chicken, one size doesn’t fit all, especially when it comes to chicken breasts and chicken thighs. These two cuts have different textures, flavors, and moisture levels, which means they require slightly different approaches to marinating. Understanding the unique characteristics of each cut will help you achieve the best results for both flavor and tenderness.
1. Chicken Breasts: Lean and Quick to Marinate
Chicken breasts are lean and low in fat, making them prone to drying out if overcooked or under-marinated. Because of their delicate texture, chicken breasts require a bit more care when marinating to ensure they don’t become dry or tough.
Marinating Tips for Chicken Breasts:
- Marinating Time: Chicken breasts benefit from a shorter marination period than thighs. A 30-minute to 2-hour marinating window is typically sufficient to infuse them with flavor. Over-marinating chicken breasts can cause them to become too tender or mushy, especially if you’re using an acidic marinade (such as vinegar or citrus juice).
- Use of Acidic Ingredients: Since chicken breasts are leaner, they’re more susceptible to the effects of acid-based marinades. When using acidic ingredients like lemon juice, vinegar, or wine, be careful not to marinate for too long (more than 2 hours) as the acid can break down the proteins too much, resulting in an overly soft or mushy texture.
- Moisture Retention: To prevent the chicken breasts from drying out, opt for marinades with higher oil content. Olive oil or other fats help to lock in moisture during the cooking process. The oil also helps the marinade adhere to the surface of the chicken, giving it a crisp, flavorful exterior when grilled or baked.
- Best Marinade Composition: A good marinade for chicken breasts typically combines oil (for moisture), herbs/spices (for flavor), and a small amount of acid (for tenderness). For example, a mixture of BBQ sauce, olive oil, and a touch of apple cider vinegar can work wonderfully to keep chicken breasts juicy and flavorful.
- How to Marinate: Since chicken breasts are usually boneless and skinless, they will absorb the marinade quickly. You can also score the surface of the chicken to create small pockets for the marinade to penetrate deeper into the meat, maximizing the flavor absorption.
Quick Tip:
If you’re marinating chicken breasts in advance and need to store them overnight, avoid using highly acidic marinades or reduce the acidic ingredients. Instead, focus on using ingredients like garlic, herbs, and spices to ensure the chicken remains tender but not overly soft.
2. Chicken Thighs: Juicy, Flavorful, and Forgiving
Chicken thighs are a darker, more flavorful cut of chicken, rich in fat, which helps them stay juicy even when cooked longer. This makes thighs much more forgiving when it comes to marinating, and they can handle longer marinating times without drying out. Because of their higher fat content, thighs also absorb marinades more slowly than breasts but in a way that maximizes flavor depth.
Marinating Tips for Chicken Thighs:
- Marinating Time: Chicken thighs benefit from a longer marination period than breasts, especially if you’re using bone-in thighs. You can marinate them for 2 to 6 hours, or even overnight, without fear of over-marinating. Thighs take more time to fully absorb flavors, so a longer period allows the marinade to penetrate deep into the meat, especially around the bone.
- Use of Acidic Ingredients: While chicken thighs can handle more acidic ingredients than breasts, it’s still important to avoid going overboard with vinegar or citrus juices. You can incorporate moderate amounts of acid to tenderize the chicken without compromising texture, but the fat content in thighs helps balance this out. For example, a BBQ-based marinade with vinegar, oil, and spices will work beautifully for thighs, giving them both flavor and juiciness.
- Moisture Retention: Because of their fat content, chicken thighs are naturally more moist and tender than breasts, so you don’t have to worry as much about moisture loss during cooking. Thighs are also great at absorbing a variety of seasonings, from smoky paprika to aromatic herbs, and they hold onto these flavors well throughout the marination process.
- Best Marinade Composition: Chicken thighs pair well with more complex marinades. A good mix for thighs might include BBQ sauce, soy sauce, honey, garlic, and herbs such as rosemary or thyme. The sweet elements (honey or brown sugar) in the marinade help to create a beautifully caramelized, crispy exterior when grilled or roasted.
- How to Marinate: If you’re using bone-in thighs, it’s a good idea to make small cuts in the skin or flesh to allow the marinade to reach the meat. The fat on chicken thighs also helps the marinade to adhere better, so you don’t need to worry too much about adding extra oil, although a small amount of fat will help with flavor.
Quick Tip:
For even more intense flavor, try searing your chicken thighs in a hot pan before finishing them on the grill. This method locks in the juices and enhances the marinade’s flavor, providing a beautifully crispy, caramelized exterior.
3. Summary of Differences: Chicken Breasts vs. Thighs
| Feature | Chicken Breasts | Chicken Thighs |
|---|---|---|
| Texture | Lean, tender but can dry out quickly | Juicy, tender, and flavorful due to fat |
| Best Marinating Time | 30 minutes to 2 hours | 2 to 6 hours, or overnight |
| Acidity Sensitivity | High sensitivity to acids (vinegar, lemon) | More forgiving with acidic ingredients |
| Ideal Marinade Composition | Oil-based with light acid | Oil and flavorful seasonings, including honey and soy sauce |
| Moisture Retention | Needs more moisture retention (oil) | Naturally moist, but marinades enhance flavor |
| Marinating Technique | Quick marination, possibly scored | Longer marination, often bone-in |
Conclusion
Understanding the differences in marinating techniques for chicken breasts and chicken thighs will ensure your BBQ chicken turns out perfectly every time. Chicken breasts benefit from short, flavorful marinations that focus on moisture retention, while chicken thighs thrive with longer marinating times, allowing the rich flavors to sink deep into the meat. Whether you’re preparing a quick dinner or a weekend BBQ, knowing the nuances of each cut will help you create juicy, tender chicken with maximum flavor.
How to Avoid Over-Marinating and Creating Too Much Acidity
When marinating chicken, there’s a delicate balance between infusing flavor and avoiding the negative effects of over-marinating or excessive acidity. While marinating enhances the taste, tenderness, and juiciness of the chicken, too much time in the marinade or an overly acidic mixture can result in undesirable textures and flavors. Understanding how to avoid over-marinating and how to control the acidity of your marinade is crucial for achieving the best results. Here’s how you can avoid these common pitfalls:
1. Recognizing the Signs of Over-Marinating
Over-marinating occurs when chicken is left in the marinade for too long, particularly if it contains acidic ingredients like lemon juice, vinegar, or wine. Here’s how to tell if your chicken has been over-marinated:
- Texture Changes: Over-marinated chicken will become mushy or overly soft. This happens because the acids break down the proteins in the chicken too much, resulting in a texture that’s similar to shredded meat or a paste-like consistency.
- Dryness on the Surface: While the inside might be too tender, the surface of the chicken may appear dry or lose its natural juiciness. The exterior may look “cooked” even before being placed on the grill, which can lead to dry spots when cooking.
- Off-putting Flavor: Excessive acidity can overpower the flavor of the chicken. Instead of the marinade enhancing the flavor, the chicken can take on a sharp, sour taste that masks the other seasonings.
How to avoid over-marinating:
- Set a Timer: If you’re marinating chicken for a specific amount of time, make sure to set a timer to prevent leaving it in the marinade for too long. As a rule of thumb:
- Boneless, skinless chicken breasts should marinate for no longer than 2 hours.
- Bone-in chicken thighs can handle marination for up to 6 hours or even overnight.
- Use Less Acid: Limit the amount of acidic ingredients like lemon juice, vinegar, or wine in your marinade. Instead, focus on using herbs, spices, and oils to flavor the chicken, and keep the acid to a minimum. Typically, the acid should make up no more than 25% of your marinade.
2. Controlling the Acidity in Your Marinade
Acid plays a crucial role in breaking down proteins and tenderizing meat, but too much can lead to undesirable effects on both flavor and texture. Here’s how to manage the acidity in your marinade:
- Balance Acid with Oil and Sweeteners: In a well-balanced marinade, the oil and sweeteners (like honey or brown sugar) help to counteract the sharpness of the acid, creating a more harmonious flavor profile. The oil also helps to seal in moisture, preventing the chicken from becoming dry and stringy during cooking. Sweet ingredients, in particular, can help round out the acidity and create a caramelized glaze when cooking.
- For example, if you’re using vinegar or citrus, try pairing it with a tablespoon of brown sugar or honey to balance the tanginess and help with browning during grilling.
- Choose Milder Acids: Instead of using highly acidic vinegar or citrus juice, opt for milder acids like apple cider vinegar, balsamic vinegar, or yogurt. These alternatives provide tenderness without overpowering the flavor of the chicken. Yogurt-based marinades, for instance, tend to be gentler on the chicken and less likely to cause over-tenderization.
- Acid-Free Marinades: If you’re particularly concerned about over-acidifying the chicken, try a marinade that’s free of acid. You can rely on herbs, garlic, soy sauce, and other seasonings to provide flavor without the need for citrus or vinegar. These types of marinades are less likely to change the texture of the chicken and more focused on infusing rich, savory flavors.
3. When to Marinate: Timing is Everything
The marinating time can vary depending on the type of chicken you’re preparing and the marinade’s composition. Here are general guidelines to follow to avoid over-marinating:
- Boneless Chicken Breasts: Since boneless breasts cook quickly and are more prone to drying out, they only need 30 minutes to 2 hours in the marinade. Anything longer may result in too much acidity affecting the texture.
- Bone-in Chicken Thighs: These cuts are more forgiving and can handle 2 to 6 hours or even overnight marination without losing their texture or flavor. Bone-in pieces take longer to absorb the marinade, so they require more time to fully infuse the flavor.
- Whole Chicken: If you’re marinating an entire chicken, you can go longer—overnight is typically recommended. Just make sure the marinade has a balanced acid-to-oil ratio to ensure you’re not over-acidifying the meat.
4. How to Use Marinade Properly: Avoiding Excess Liquid
When marinating, it’s important not to drown the chicken in too much marinade, as the meat may become overly saturated and begin breaking down the proteins too much. Here are some tips to avoid this:
- Use Enough to Coat: You don’t need to completely submerge the chicken in the marinade. Simply ensure the chicken is well-coated with the marinade, and it will absorb the flavors sufficiently. For best results, flip or stir the chicken halfway through to make sure all sides are evenly marinated.
- Refrigeration: Always marinate in the fridge rather than at room temperature. Marinating at room temperature increases the risk of bacterial growth, and a warmer environment accelerates the breakdown of proteins, potentially resulting in mushy chicken.
5. Reusing Marinade: Caution with Acidity
If you’re thinking about reusing marinade (for example, to brush on the chicken while it’s grilling), be cautious. Marinade that has been in contact with raw chicken should never be reused unless it’s been boiled for several minutes to kill any bacteria. If you plan to use the marinade for basting, set aside a portion of it before marinating the chicken to avoid cross-contamination.
- Basting Tip: When basting grilled or roasted chicken with the marinade, use a brush to apply a light coating. If the marinade has a lot of acid, be careful not to over-baste, as it can create an overly sharp flavor and may dry out the surface of the chicken.
6. Tasting Your Marinade: A Simple Way to Avoid Over-Acidity
Before you marinate your chicken, taste the marinade. It should have a balanced flavor where no single ingredient (like acid, salt, or sweetness) overpowers the others. If the marinade tastes too sour or harsh, dilute it with a little more oil or sweetener to balance it out. You can also add a pinch of salt or seasoning to enhance the overall profile.
Conclusion
The key to a successful marinade lies in striking the right balance between flavor, tenderness, and acidity. To avoid over-marinating or creating an overly acidic mixture, be mindful of the marinating time, the acid content, and how the chicken reacts to prolonged exposure to acidic ingredients. By adjusting these factors, you can avoid common pitfalls and ensure your BBQ chicken is tender, juicy, and full of rich, balanced flavors.
Grilling Tips for Perfect BBQ Chicken Every Time
Preheat Your Grill for Optimal Grilling
Grilling BBQ chicken to perfection doesn’t just depend on the marinade or the chicken itself—it’s also about setting up your grill properly before cooking. Preheating your grill is an essential step for ensuring your chicken cooks evenly, develops a delicious sear, and retains its juiciness. Whether you’re using a charcoal grill, gas grill, or electric grill, getting your grill to the right temperature is key to achieving that perfect crisp, caramelized exterior and tender, juicy interior.
1. Why Preheating is Crucial for BBQ Chicken
When it comes to grilling chicken, the temperature of the grill at the time you place the meat on it plays a major role in the outcome. A preheated grill ensures that the chicken cooks evenly, and it helps the maillard reaction (the chemical process responsible for browning and flavor development) to occur quickly.
Preheating Benefits:
- Even Cooking: Preheating helps to eliminate the risk of hot spots on the grill that can lead to uneven cooking. If the grill is not hot enough when you place the chicken on it, the meat will end up cooking too slowly, resulting in a dry texture, especially for lean cuts like chicken breasts.
- Crispy Exterior: A hot grill creates a crispy, caramelized crust on the outside of the chicken while locking in juices, keeping the interior moist and flavorful. This crispy texture is especially important when cooking marinated chicken, as the sugars in the marinade caramelize on the grill grates, giving your chicken that signature grill flavor.
- Prevent Sticking: If the grill isn’t preheated, the chicken is more likely to stick to the grill grates, making it difficult to flip without tearing the skin or meat. Preheating the grill ensures that the grates are hot enough to seal the chicken as soon as it makes contact, creating those beautiful grill marks and preventing sticking.
2. How to Preheat a Charcoal Grill
If you’re using a charcoal grill, preheating is a bit more involved, but it’s well worth the effort. Here’s how to achieve the ideal grilling temperature for BBQ chicken:
- Light the Charcoal: Start by lighting your charcoal in a chimney starter or directly in the grill. Once the charcoal is fully ignited and covered with a layer of white ash, it’s ready for cooking. This usually takes about 20-30 minutes.
- Create Two-Zone Cooking: For optimal cooking, set up a two-zone fire by piling the hot coals on one side of the grill to create a direct heat zone (for searing) and leaving the other side without coals for indirect heat (for cooking the chicken through). This allows you to first sear the chicken over high heat and then move it to the cooler side of the grill to finish cooking through without burning the exterior.
- Temperature Check: The optimal temperature for grilling chicken over charcoal is around 375-400°F (190-200°C). Use a grill thermometer or the hand-test method (holding your hand above the grill for a few seconds) to estimate the heat.
3. How to Preheat a Gas Grill
Preheating a gas grill is much quicker and more straightforward. Here’s the process to follow:
- Turn on the Gas: Open the lid and ignite the burners, turning the knobs to high heat. Allow the grill to heat up for 10-15 minutes. You’ll know it’s ready when the thermometer inside the lid reads 375-400°F (190-200°C).
- Create Two-Zone Cooking (Optional): If you want to replicate a two-zone cooking system on a gas grill, turn off one or two burners after preheating and leave the others on for indirect heat. This gives you a hot side for searing and a cooler side for slower cooking.
- Clean and Oil the Grates: Before placing the chicken on the grill, use a grill brush to clean the grates of any debris from previous grilling sessions. Then, lightly oil the grates using a paper towel dipped in oil to help prevent sticking. This step is essential, especially when grilling marinated chicken, which can be sticky due to the sugar content in the marinade.
4. How to Preheat an Electric Grill
If you’re using an electric grill, preheating is a bit different but still essential:
- Turn on the Grill: Plug in the grill and turn it on to its highest setting. Allow it to preheat for about 5-10 minutes, or until the grill reaches an optimal temperature of 375-400°F (190-200°C).
- Check for Even Heat: Electric grills often have a more uniform heat distribution than gas or charcoal, but it’s still good to check the temperature using a thermometer. If your electric grill has a temperature dial, adjust it to medium-high heat.
- Oiling the Grates: Like other grills, electric grills benefit from having lightly oiled grates to prevent sticking. A quick wipe with an oiled paper towel or grill-safe brush will suffice.
5. Common Mistakes to Avoid When Preheating Your Grill
- Not Allowing Enough Time: One of the most common mistakes is not giving the grill enough time to heat up. If you’re cooking chicken on a grill that’s not hot enough, it can result in uneven cooking and rubbery or dry chicken. Always give your grill enough time to heat before you start cooking.
- Grilling with the Lid Closed Too Soon: When you first place your chicken on the grill, keep the lid open for the first couple of minutes to ensure the heat doesn’t build up too quickly. Once you’ve placed the chicken on the grill and it has started searing, you can close the lid to keep the temperature consistent.
- Ignoring Grill Maintenance: A dirty grill or a buildup of old grease and food particles can result in flare-ups that burn your chicken. Always ensure your grill grates are clean before preheating.
6. Temperature Control: Adjusting During Grilling
Even after preheating, you might need to adjust your grill’s heat during cooking:
- Searing: Start by searing the chicken over high heat (direct heat) to create a crispy, golden-brown crust. This usually takes about 2-3 minutes per side.
- Finishing with Indirect Heat: Once you’ve seared both sides, move the chicken to the cooler side of the grill (indirect heat) to continue cooking. This method ensures the chicken cooks through without burning the exterior. Continue grilling for 10-20 minutes, depending on the size of the chicken pieces, and check the internal temperature with a meat thermometer.
Conclusion
Preheating your grill is one of the simplest yet most important steps in grilling BBQ chicken to perfection. Whether using a charcoal, gas, or electric grill, ensure your grill reaches the correct temperature before placing the chicken on it. This not only ensures even cooking but also contributes to a deliciously crispy exterior while locking in the moisture of the chicken. By mastering the preheating process, you’ll be one step closer to grilling up juicy, tender BBQ chicken every time.
Grilling Times for Different Cuts of Chicken (Breasts, Thighs, Drumsticks)
When grilling chicken, the cut of meat you’re working with plays a crucial role in determining the grilling time. Different chicken cuts have different cooking characteristics, so understanding how long to grill each cut ensures that you get the best results—juicy, flavorful chicken with the perfect level of doneness. Whether you’re grilling chicken breasts, thighs, or drumsticks, each part has specific grilling times that depend on the thickness, bone structure, and fat content.
1. Grilling Boneless, Skinless Chicken Breasts
Boneless, skinless chicken breasts are the leanest cut of chicken and can easily dry out if overcooked. Because of their lack of fat and bone, they cook relatively quickly but require a more careful eye to ensure they don’t become tough or dry.
Grilling Time:
- Direct heat (High heat): Grill boneless chicken breasts for about 5-7 minutes per side over medium-high heat (375-400°F or 190-200°C), depending on the thickness of the breast.
- Internal Temperature: The chicken is done when it reaches an internal temperature of 165°F (74°C). Use a meat thermometer to check the temperature at the thickest part of the breast to avoid overcooking.
Tips for Grilling Boneless Breasts:
- Flatten the Chicken: If the breasts are uneven in thickness, you can pound them to an even thickness using a meat mallet. This ensures more consistent cooking.
- Use Indirect Heat: If the chicken is browning too quickly on the outside before reaching the right internal temperature, move it to a cooler part of the grill to finish cooking through with indirect heat.
2. Grilling Bone-In Chicken Thighs
Bone-in chicken thighs are juicier and have more fat than boneless breasts, making them more forgiving when grilled. The bone helps retain moisture during grilling and can add more flavor to the meat.
Grilling Time:
- Direct heat (Searing): Grill bone-in chicken thighs over medium-high heat for about 5-7 minutes per side to get a nice sear.
- Indirect heat (Slow cooking): After searing, move the thighs to the cooler side of the grill (indirect heat) and cook for an additional 20-30 minutes, depending on their size and thickness.
- Internal Temperature: The thighs should reach an internal temperature of 165°F (74°C) at the thickest part near the bone.
Tips for Grilling Bone-In Thighs:
- Baste During Grilling: The extra fat in the thighs can create flare-ups on the grill, so keep an eye out. You can baste the chicken with your marinade or a BBQ sauce toward the end of grilling to add flavor and moisture.
- Rest the Meat: Once the thighs are done, let them rest for a few minutes before cutting into them. This allows the juices to redistribute throughout the meat, keeping it moist.
3. Grilling Chicken Drumsticks
Drumsticks are another bone-in cut with a good amount of fat and skin, making them perfect for grilling. The skin crisps up nicely on the grill, and the meat stays juicy and flavorful. Since the bone takes longer to cook through, drumsticks require a bit more time than boneless chicken breasts.
Grilling Time:
- Direct heat (Searing): Grill the drumsticks over medium-high heat for about 5-7 minutes per side to get a nice sear and crispy skin.
- Indirect heat (Slow cooking): Move the drumsticks to the cooler side of the grill (indirect heat) and cook for 25-35 minutes, turning occasionally to ensure even cooking.
- Internal Temperature: The drumsticks are done when they reach an internal temperature of 165°F (74°C). The meat should be tender and fully cooked through, with no pink remaining near the bone.
Tips for Grilling Drumsticks:
- Turn Frequently: Drumsticks benefit from being turned frequently to ensure even cooking and to avoid burning the skin.
- Use a Thermometer: Because the bone can affect the cooking time, it’s best to check the internal temperature with a thermometer to make sure they are fully cooked. The skin should also be golden brown and crispy when done.
4. Grilling Bone-In vs. Boneless Chicken
One important factor to keep in mind when grilling is the difference in cooking times for bone-in versus boneless chicken. Bone-in chicken cuts tend to cook more slowly because the bone conducts heat more gradually than the surrounding meat, leading to longer cooking times.
- Boneless chicken tends to cook faster and is more suited for direct heat grilling.
- Bone-in chicken (like thighs or drumsticks) benefits from the two-zone method, where you can start with high heat for searing and then move to indirect heat to cook the meat thoroughly without burning the skin.
5. How to Avoid Overcooking Chicken
Grilling chicken can be tricky because of the varying cooking times and risks of overcooking. Here are some tips to ensure the chicken is grilled perfectly every time:
- Check the Internal Temperature: Use a meat thermometer to check the internal temperature of your chicken. For boneless breasts, look for 165°F (74°C). For bone-in cuts like thighs and drumsticks, check the thickest part near the bone for the same temperature.
- Monitor Grill Temperature: Keep the grill temperature at a steady 375-400°F (190-200°C) for optimal grilling results. Too high a temperature can burn the outside before the inside cooks properly, while too low a temperature can result in dry, overcooked chicken.
- Rest Your Chicken: Allow your chicken to rest for 5-10 minutes after removing it from the grill. This helps the juices redistribute and keeps the meat moist and flavorful.
6. General Grilling Guidelines for Different Chicken Cuts
| Chicken Cut | Grill Time (Searing) | Grill Time (Indirect Heat) | Internal Temp (°F/°C) |
|---|---|---|---|
| Boneless Chicken Breasts | 5-7 minutes per side | None (cook directly) | 165°F (74°C) |
| Bone-In Chicken Thighs | 5-7 minutes per side | 20-30 minutes | 165°F (74°C) |
| Chicken Drumsticks | 5-7 minutes per side | 25-35 minutes | 165°F (74°C) |
Conclusion
Grilling times for different cuts of chicken vary based on factors like bone structure, fat content, and thickness. Boneless breasts cook faster, while bone-in thighs and drumsticks take a bit longer to cook through. By understanding the grilling times for each cut, you can ensure that your chicken is perfectly cooked—crispy on the outside, juicy on the inside, and full of flavor. Use a meat thermometer to confirm the internal temperature and always let your chicken rest before serving for the best results.
How to Check if Your Chicken is Done (Internal Temperature, Visual Cues)
Grilling chicken to perfection involves more than just following a set time. The key to ensuring that your chicken is cooked safely and tastes great is knowing when it’s done. While timing is important, using both internal temperature and visual cues provides the most reliable way to check if your chicken is properly cooked. This is especially true for thicker cuts or bone-in pieces like chicken thighs or drumsticks.
1. Internal Temperature: The Most Reliable Way to Know
The internal temperature of the chicken is the most accurate way to determine if it’s cooked to perfection. When the chicken reaches the proper temperature, it’s not only safe to eat but also retains the perfect moisture and texture.
The Ideal Internal Temperature for Chicken:
- Boneless, Skinless Chicken Breasts: The internal temperature should reach 165°F (74°C). Chicken breasts are lean, and if cooked beyond this temperature, they can dry out and become tough.
- Bone-In Chicken Thighs, Drumsticks, and Other Dark Meat: The ideal temperature is also 165°F (74°C), but these cuts have more fat and tend to cook better with a slightly higher internal temperature. Some people prefer cooking dark meat to 170-175°F (77-80°C) for a more tender, juicy result.
- Whole Chicken: For a whole chicken, the thickest part of the breast and the inner thigh should reach 165°F (74°C), while the drumstick should be at 170-175°F (77-80°C) to ensure proper cooking throughout.
How to Check Internal Temperature:
- Use a meat thermometer (preferably instant-read) to take the temperature at the thickest part of the meat, avoiding bones, as they conduct heat and may give an inaccurate reading.
- Insert the thermometer horizontally into the chicken for the most accurate measurement.
- For thicker cuts, like bone-in thighs or whole chickens, it’s a good idea to check in a few different spots to ensure the entire piece is fully cooked.
2. Visual Cues: How the Chicken Should Look
While internal temperature is the most precise way to check doneness, visual cues can also help you determine if your chicken is properly cooked. These visual cues are particularly useful when you’re cooking chicken without a thermometer or when you just want to double-check your readings.
Chicken Color:
- Juices: One of the easiest ways to check if chicken is done is by looking at the juices. When you cut into a piece of cooked chicken, the juices should run clear, not pink or red. If the juices are still red or pink, the chicken needs more time on the grill.
- Meat Color: The meat of chicken breasts should be opaque and no longer pink or translucent. For thighs and drumsticks, the meat should be firm, and the color should change from pink to a deep, cooked color, usually white to light brown.
Chicken Skin (For Bone-In Cuts):
- For skin-on chicken (like drumsticks or thighs), the skin should be crispy and golden brown. The skin should also have a shrunken appearance, indicating that it has rendered out the fat and is cooked through.
- If the skin is still pale or looks rubbery, the chicken likely needs more time on the grill.
The “Firmness” Test:
- Another visual cue to check doneness is the firmness of the meat. When you press gently on the chicken with tongs or a spatula, it should feel firm but springy. If the meat feels soft or squishy, it likely needs more time to cook.
- For bone-in chicken, gently pull the drumstick or thigh and see if the bone is moving easily from the meat—this usually means the chicken is done.
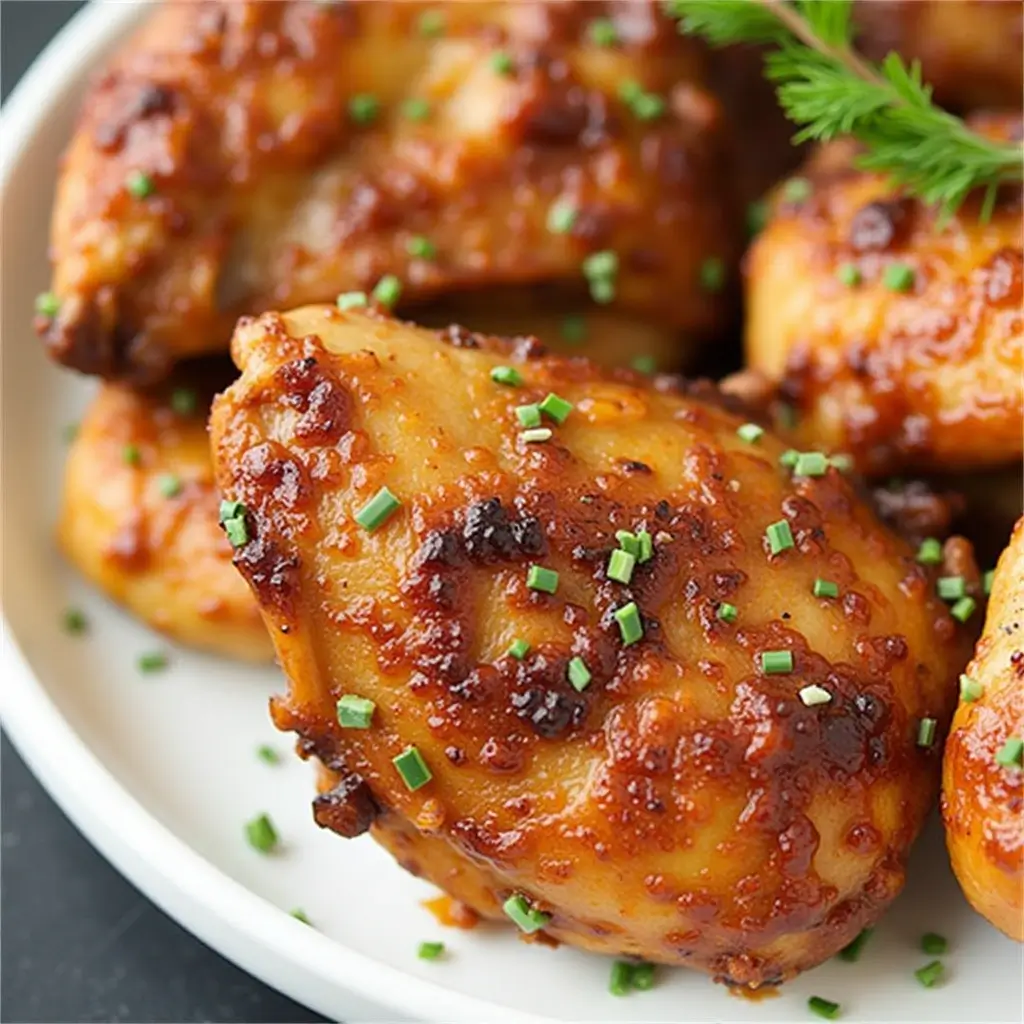
3. The Importance of Carryover Cooking
Chicken continues to cook for a few minutes after being removed from the grill due to the residual heat in the meat. This is called carryover cooking, and it’s important to keep in mind when checking your chicken’s doneness.
- Remove chicken from the grill when it is 1-2°F (0.5-1°C) below your target temperature. This will allow the meat to continue cooking without becoming overdone.
- Let the chicken rest for 5-10 minutes before serving. This resting period lets the juices redistribute throughout the meat, ensuring the chicken stays moist and flavorful.
4. Troubleshooting Doneness Without a Thermometer
If you don’t have a meat thermometer on hand, you can still check if your chicken is done by using a few other methods:
Pierce the Chicken:
- Pierce the thickest part of the chicken (like the breast or thigh) with a fork or skewer. If the juices run clear, the chicken is likely done. If they are still pink or reddish, the chicken needs more time.
Check the Bone (for Bone-In Cuts):
- For bone-in chicken, check if the meat around the bone is fully cooked. When done, the meat should pull away from the bone easily, and there should be no traces of pink. If the meat is sticking to the bone or looks undercooked, continue grilling.
Texture and Appearance:
- Boneless chicken breasts: The texture should feel firm when you press it, and it should no longer feel soft or spongy.
- Bone-in chicken pieces (like thighs and drumsticks): The chicken should feel tender when pressed, with a slight resistance due to the bone and muscle.
5. Doneness vs. Overcooking:
While it’s important to cook chicken thoroughly for safety and flavor, you also want to avoid overcooking it. Overcooked chicken can become dry, tough, and lose its flavor. The best way to avoid this is to use a meat thermometer to make sure you’re cooking your chicken to the correct temperature and checking it regularly as it grills.
Conclusion
To ensure that your BBQ chicken is cooked perfectly every time, rely on both internal temperature and visual cues to check doneness. The internal temperature should reach 165°F (74°C) for safe eating, but don’t forget to check for clear juices, golden skin, and firm texture. With practice, you’ll become an expert at recognizing when your chicken is done without the need to cut into it. Whether you’re grilling breasts, thighs, or drumsticks, knowing how to check doneness will help you avoid overcooking while still ensuring the chicken is juicy, tender, and full of flavor.